Here are my slides:
Or if you like PDF:
Imagine you have a programming task that involves parsing and analyzing text. Nothing complicated: maybe just breaking it into tokens. Now imagine the only programming language you had available:
Sounds impossible, right? But that’s the world described in Colin Day’s book from 1972, Fortran techniques with special reference to non-numerical applications.
The programming language used is USA Standard FORTRAN X3.9 1966, commonly known as Fortran IV after IBM’s naming convention. For all it looks crude today, Fortran was an efficient, sod-the-theory-just-get-the-job-done language that allowed numerical problems to be described as a text program and solved with previously impossible speed. Every computer shipped with some form of Fortran compiler at the time. Day wasn’t alone working within Fortran IV’s text limitations in the early 1970s: the first Unix tools at Bell Labs were written in Fortran IV — that was before they built themselves their own toolchain and invented the segmentation fault.
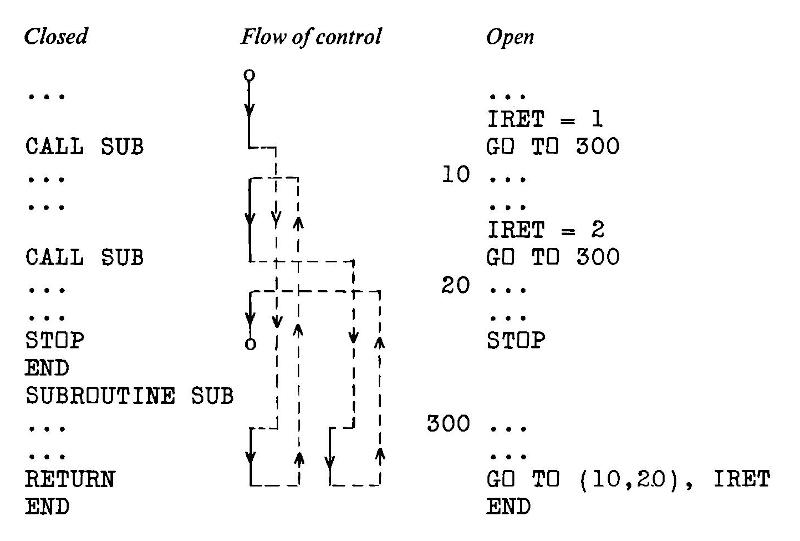
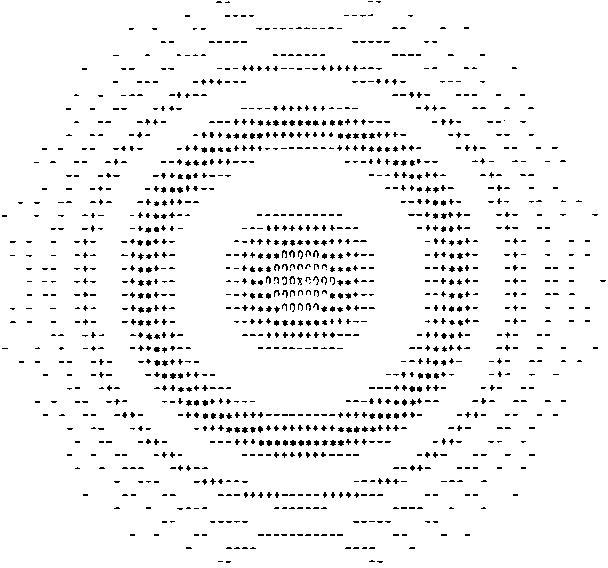
The book is a small (~ 90 page) delight, and is a window into system limitations we might almost find unimaginable. Wanna create a lookup table of a thousand entries? Today it’s a fraction of a thought and microseconds of program time. But nearly fifty years ago, Colin Day described methods of manually creating two small index and target arrays and rolling your own hash functions to store and retrieve stuff. Text? Hollerith constants, mate; that’s yer lot — 6HOH HAI might fit in one computer word if you were running on big iron. Sorting and searching (especially without recursion) are revealed to be the immensely complex subjects they are, all hidden behind today’s one-liner methods. Day shows methods to simulate recursion with arrays standing in for pointer stacks of GO TO targets (:coding_horror_face:). And if it’s graphics you want, that’s what the line printer’s for:
Why do I like this book enough to track down a used copy, import it, scan it, correct it and upload it to the Internet Archive? To me, it shows the layers we now take for granted, and the privilege we have with these hard problems of half a century ago being trivially soluble on a $10 computer the size of a stick of gum. When we run today’s massive AI models with little interest in the underlying assumptions but a sharp focus on getting the results we want, we do a disservice to the years of R&D that got us here.
The ‘charges for computing time’ comment above is from Colin’s website. Early central computing facilities had the SaaS billing down solid, partly because many mainframes were rented from the vendor and system usage was accounted for in minute detail. Apparently the system Colin used (when a new lecturer) was at another college, and it was the custom to send periodic invoices for CPU time and storage used back to the user’s department. Nowhere on these invoices did it say that these accounts were for information only and were not payable. Not the best way to greet your users.
(Incidentally, if you hate yourself and everyone else around you, you can get a feel of system billing on any Linux system by enabling user quotas. You’ll very likely stop doing this almost immediately as the restrictions and reporting burden seem utterly alien to us today.)
While the book is still very much in copyright, the copy I have sat unread at Lakehead University Library since June 1995; the due date slip’s still pasted in the back. It’s been out of print at Cambridge University Press since May 1987, even if they do have a plaintive/passive aggressive “hey we could totally make an ebook of this if you really want it†link on their site. I — and the lovely folks hosting it at the Internet Archive — have saved them from what’s evidently too much trouble. I won’t even raise an eyebrow if they pull a Nintendo and start selling this scan.
Colossal thanks to Internet Archive for making the book uploading process much easier than I thought it was. They’ve completely revamped the processing behind it, and the fully open-source engine gives great results. As ever, if you assumed you knew how to do it, think again and read the How to upload scanned images to make a book guide. Uploading a zip file of images is much easier than mucking about with weird command-line TIFF and PDF tools. The resulting PDF is about half the size of the optimized scans I uploaded, and it’s nicely tagged with metadata and contains (mostly) searchable text. It took more than an hour to process on the archive’s spectacularly powerful servers, though, so I hate to think what Colin Day’s bill would have been in 1972 for that many CPU cycles … or if even a computer of that time, given enough storage, could complete the project by now.
It is good that there are so many scanned manuals for old computer systems out there. Every old system did things its very own special way, and life’s too short to guess. I mean, there’s not much out there on the SYM-1 I’m trying to get working again:
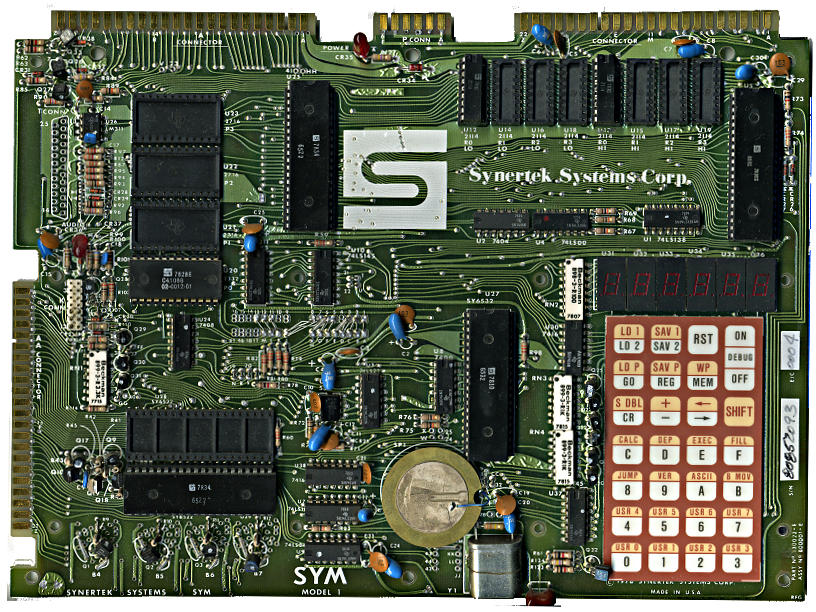
— not much except for 6502.org’s excellent Synertek SYM-1 Resources, that is.
Some manuals, though, while lovingly scanned, are just too large to download, browse or file. Take, for instance, AppleIIScans’ Apple II BASIC Programming With ProDOS. It’s a very faithful colour scan, but at 170 MB for 280 pages, it’s a bit unwieldy. I suspect it’s Adobe Acrobat Paper Capture’s fault: while it makes turning scans into readable files really easy, it doesn’t warn against using 600 dpi full colour for a book with only decorative use of colour.
Good old Ghostscript saves the day, though:
gs -sDEVICE=pdfwrite -sColorConversionStrategy=Gray -dProcessColorModel=/DeviceGray -dPDFSETTINGS=/ebook -dNOPAUSE -dBATCH -dSAFER -q -sOutputFile=1983-A2L2013-m-a2-bpwp-grey.pdf -- 1983-A2L2013-m-a2-bpwp.pdf
By downsampling the scanned images and converting everything to greyscale, the result’s only 16 MB. All text and indexing from Acrobat is left intact.
LibHandDis — Based on scans of “Library Hand – Disjointâ€, described in Dana’s A Library Primer, with some modifications.
Major changes from scan:
(idea for this came via MetaFilter, This question of library handwriting is an exceedingly practical one)
Local copy: LibHandDis.zip.
My lightning talk for GTALUG seemed to go down quite well. Here are the slides. It’s mostly based on experience gleaned from My bank broke PDF … and how I used PDFBeads to fix it. I really must write this up properly … oh wait, I just did.
I also prepared — but didn’t get to use — notes on using Mini Printers and Linux. Again, this is from Thermal Printer driver for CUPS, Linux, and Raspberry Pi: zj-58 and Notes on mini-printers and Linux.
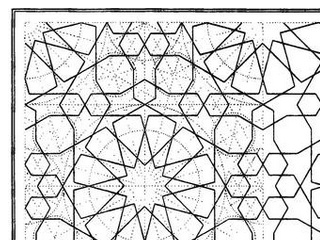
Product link: Arabic Geometrical Pattern and Design (Dover Pictorial Archive) eBook: J. Bourgoin: Amazon.ca: Kindle Store
Summary: Buy the paper edition; this book is illegible on Kindle.
The original book features very finely engraved line drawings, with construction lines showing how the patterns are built up. The Kindle edition has only low-resolution scans, so the lines break down into noise and are very hard to follow. You can’t zoom in, either. The figure numbering is entirely absent from the Kindle edition, so you can’t use this book for reference. Some of the page scans are squint and partially cut off, too.
Very disappointed in this purchase. You’re better off with the paper than trying to squint at these smudgy pixels.
(unedited text as simultaneously posted to Amazon)
Colour management is good. It means that what I see on the screen is what you meant it to look like, and anything I make with a colour-managed workflow you’ll see in the colours I meant it to have. (Mostly.) You can spend a lot of money to do this professionally, but you can also get most of the benefits for about $125, if you’re prepared to do some fiddly stuff.
The most important part is calibrating your display. Hughski’s ColorHug (which I’ve mentioned before) is as close to plug-and-play as you’ll get: plug it in, and the colour management software pops up with prompts on what to do next. Attach the ColorHug to the screen (with the newly supplied stretchy band), let it burble away for 10–20 minutes, and the next time you log in, colours will be just right.
Calibrating the scanner on my Epson WorkForce WF-7520 was much more work, and the process could use optimization. To calibrate any scanner, you need a physical colour target to scan and compare against reference data. The cheapest place to get these (unless there was one in the box with your scanner) is Wolf Faust’s Affordable IT 8.7 (ISO 12641) Scanner Colour Calibration Targets. If there are a bunch of likeminded folk in your area, it’s definitely worth clubbing together on a group buy to save on shipping. It’s also less work for Wolf, since he doesn’t have to send out so many little packages.
(I’ve known of Wolf Faust since my Amiga days. He produced the most glorious drivers for Canon printers, and Jeff Walker produced the camera-ready copy for JAM using Wolf’s code. While Macs had the high end DTP sewn up back then, you could do amazing things on a budget with an Amiga.)
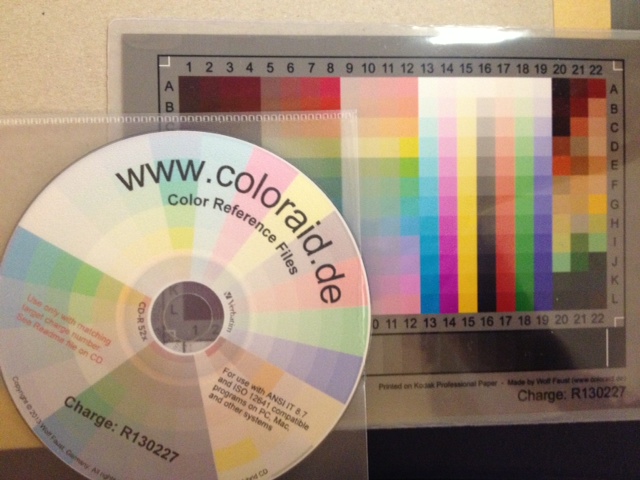 The target comes packed in a protective sleeve, and along with a CD-R containing the calibration data which matches the print run of the target. Wolf makes a lot of targets for OEMs, and cost savings from his volume clients allow him to sell to individuals cheaply.
Scanning the thing without introducing automatic image corrections was the hard part. I found that my scanner had two drivers (epson2 and epkowa), the latter of which claimed to support 48-bit scanning. Unfortunately, it only supports 24-bit, like the epson2 driver, so whichever I chose was moot. I used the scanimage command line tool to make the scan:
scanimage --mode Color -x 175 -y 125 --format=tiff --resolution 300 > Epson-Workforce_WF-7520-WFaust-R1.tiff
which looks, when reduced down to web resolution, a bit like this:
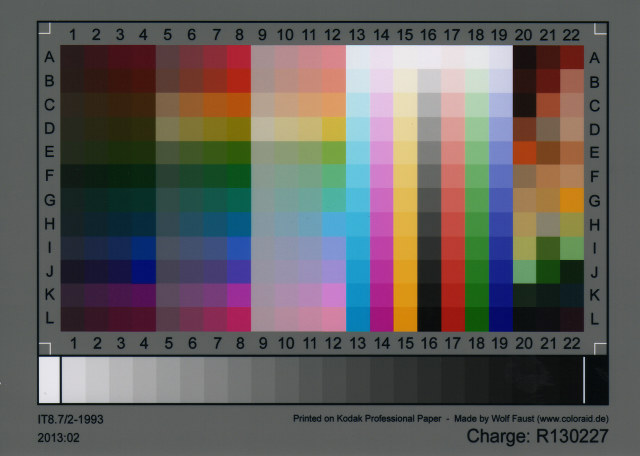 It looks a lot darker than the physical target, so it’s clear that the scanner needs calibrating. To do this, you need two tools from the Argyll Colour Management System. The first creates a text representation of the scanned target’s colour patches:
scanin -v Epson-Workforce_WF-7520-WFaust-R1.tiff /usr/share/color/argyll/ref/it8.cht IT87/r130227.txt diag.tiff
The result is a smallish text file Epson-Workforce_WF-7520-WFaust-R1.ti3 which needs one more step to make a standard ICC profile:
colprof -A Epson -M 'Workforce WF-7520' -D 'WFaust R1' -ax -qm Epson-Workforce_WF-7520-WFaust-R1
I didn’t quite need to add that much metadata, but I could, so I did. The resultant ICC file can be used to apply colour calibrations to scanned images. Here’s the target scan, corrected:

(I’ve made this a mouseover with the original image, so you can see the difference. Also, yes, there is a greasy thumb-print on my scanner glass near the bottom right, thank you so much for noticing.)
I used tifficc from the Little CMS package to apply the colour correction:
tifficc -v -i Epson-Workforce_WF-7520-WFaust-R1.icc Epson-Workforce_WF-7520-WFaust-R1.tiff Epson-Workforce_WF-7520-WFaust-R1-corrected.tiff
There are probably many easier, quicker ways of doing this, but this was the first thing I found that worked.
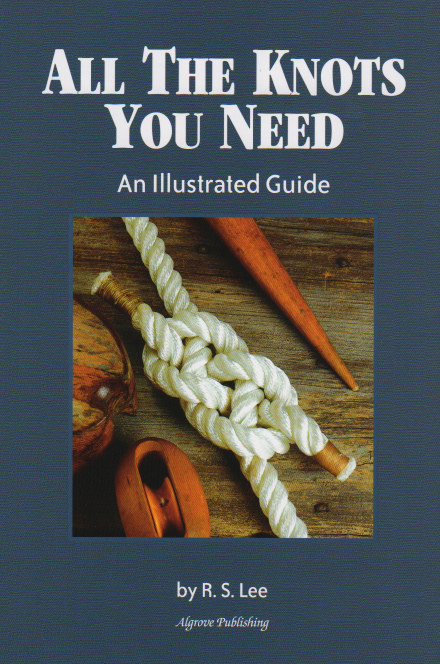
To show you a real example, here’s an un-retouched scan of the cover of Algrove Publishing‘s book “All the Knots You Needâ€, scanned at 75 dpi. Mouseover to see the corrected version:
(Incidentally, there are two old but well-linked programs that are out there that purport to do scanner calibration:Â Scarse and LPROF. Don’t use them! They’re really hard to build on modern systems, and the Argyll tools work well.)
The last part of my workflow that remains uncalibrated is my printer. I could make a target with Argyll, print it, scan it, colour correct it, then use that as the input to colprof as above. I’m suspecting the results would be mediocre, as my scanner’s bit depth isn’t great, and I’d have to do this process for every paper and print setting combination. I’d also have to work out what magic CUPS does and compensate. Maybe later, but not yet.
 This is how wind turbines were supposed to look, at least in the 1940s. It’s the experimental Smith-Putnam 1.25 MW unit than ran for a short while on a hill near Rutland, VT. The picture’s from a rather falling-apart copy of Large Horizontal-axis Wind Turbines (Thresher, R. W., & Solar Energy Research Institute. (1982). Large horizontal-axis wind turbines: Proceedings of a workshop held in Cleveland, Ohio, July 28-30, 1981. Golden, Colo: Solar Energy Research Institute) that I rescued from Jim‘s recycling years ago.
The first part of these proceedings has a historical review of the Smith-Putnam turbine, including an excerpt from the S. Morgan Smith Company’s house organ on the project. As the rest of the book is pretty much all about the MOD series of turbines, it’s of less interest. I’ve scanned the bits about the Smith-Putnam turbine, and put them here: NASA_DOE-1981-large_horizontal_axis_wind_turbines-excerpt. If anyone wants the book, let me know. It’s very ratty, but readable.
I’ve written about this turbine before, but in relation to a packet of crayons. More awesome turbine pictures from Paul Gipe: Smith-Putnam Industrial Photos.
Here are the complete 1988-vintage Sun manuals “Using NROFF and TROFF†and “Formatting Documents†scanned just for you. I’d scanned these in 2000, and they’d sat on a forgotten archive volume since then.
Update: there are better versions on the Internet Archive: Using NROFF and TROFF and Formatting Documents, all as part of the Sun Microsystems, Inc. manual collection.
(if you need to get your troff on, go to Ralph’s troff.org.)
I have, of late, been rather more attached to QR Codes than might be healthy. I’ve been trying all sorts of sizes and input data, printing them, and seeing what camera phones can scan them. I tried three different devices to scan the codes:
QR Code readability is defined by the module size; that is, the number of device pixels (screen or print) that represent a single QR Code pixel. Denso Wave recommends that each module is made up of 4 or more dots. I was amazed that the iPhone could read images with a module size of 1 from the screen, like this one:

On this laptop, one pixel is about 0.24 mm. The other cameras didn’t fare so well on reading from the screen:
So I guess for screen scanning, Denso Wave’s recommendation of 4 pixels/module will pretty much work everywhere.
I then generated and printed a bunch of codes on a laser printer, and scanned them. The results were surprisingly similar:
A test print on an inkjet resulted in far less impressive results. I reckon you need to make the module size around 25% bigger on an inkjet than a laser, perhaps because the inkjet is less crisp.
I have to admit I went a bit nuts with QR Codes. I made a Vcard: 
(and while I was at it, I created a new field for ham radio operators: X-CALLSIGN. Why not?). I even encoded some locations in QR Codes.
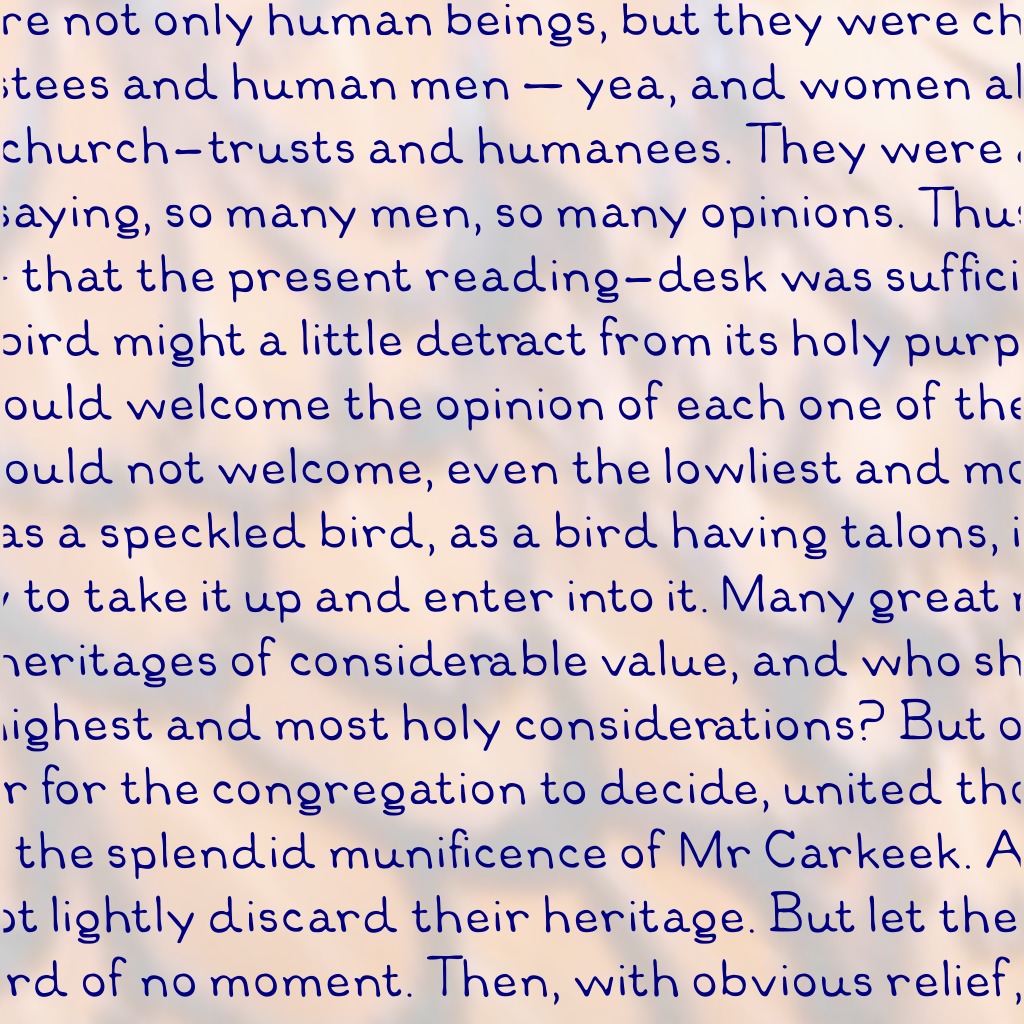
Just to show you what qrencode can do, here’s a favourite piece of little prose:

Update, 2026: If you must mess with optar, this fork looks like it will build better: colindean / optar
I’ve spent most of the day messing around with Twibright Optar, a way of creating printed archives of binary data that can be scanned back in and restored. It looks like it was written as a proof-of-concept, as the only way to change options is to modify the code and recompile. Eppur si muove.
To compile the code on OS X, I found I had to change this line in the Makefile from:
LDFLAGS=-lm
to
LDFLAGS=-lm `libpng-config --L_opts`
After trying to print some samples at the default resolution, I had no luck, so for reliability I halved the data density settings in the file optar.h:
#define XCROSSES 33 /* Number of crosses horizontally */
#define YCROSSES 43 /* Number of crosses vertically */
It’s quite important that your image prints and scans with a whole number of printer dots to image pixels. This used to be quite easy to do, before the advent of PDF’s “Scale to fit” misfeature, and also printer drivers that do a tonne of work in the background to “improve” the image. Add the mismatch between laser printer resolutions (300, 600, 1200 dpi …) and inkjets (360, 720, 1440 dpi …), and you’ve got lots of ways that this can go wrong.
Thankfully, there’s one common resolution that works across both types of printers. If you output the image at 120 dpi, that’s 5 laser printer dots at 600 dpi, or six inkjet dots at 720 dpi. And there was peace in the kingdom.
Here’s a demo, based on this:
So I took this track (which I used to have as a 7″, got at a jumble sale in the mid-70s) and converted it to a really low quality MPEG-2.5: MichelinJingle8kbit — that’s 175KB for just shy of three minutes of music (which, at this bitrate, sounds like it’s played through a layer of socks at the bottom of the Marianas Trench, but still).
Passing it through optar (which I wish wouldn’t produce PGM files; its output is mono) and bundling the pages into a PDF, I get this: optar_mj.pdf (760KB). Scanning that printout at 600dpi and running the pages through unoptar, I got this: optar1_mj.mp3. It’s the same as the input file, except padded with zeros at the end.
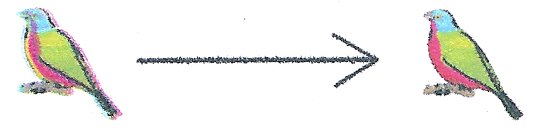
Sometimes, the scanning and conversion doesn’t do so well:
I’m on a major decluttering toot. When I realised that the filing cabinet I bought three years ago would no longer close with all the papers stuffed in it, I knew something had to change. I’ve been shredding like it’s Houston in 2001. I have the duplex scanner to suck in the stuff I need to keep. I’m moving to paperless wherever possible to stop it building up again.
My bank provides PDF statements. Of this I approve. PDF is almost perfect for this: it provides an electronic version of the page, but with searchable text and the potential for some level of security. Except, this is not the way that my bank does it. At first glance, the text looks pretty harmless:

Zoom in, and it gets a bit blocky:

Zoom right in:

Aargh! Blockarama! Did they really store text as bitmaps? Sure enough, pdftotext output from the files contains no text. Running pdfimages produces hundreds of tiny images; here’s just a few:
![]()
![]()
![]()
![]()
![]()
![]()
Dear oh dear. This format is the worst of electronic, combined with paper’s lack of computer indexability. The producer claims to be Xenos D2eVision. Smooth work there, Xenos.
So, how can I fix this? It’s a bit of a pain to set this workflow up, but what I’ve done is:
gs -SDEVICE=tiffg4 -r300x300 -sOutputFile=file%03d.tif -dNOPAUSE -dBATCH -- file.pdffor f in file*tif
do
tesseract $f `basename $f` hocr
donefor f in file*tif
do
cuneiform -f hocr -o `basename $f .tif`.html $f
donepdfbeads * > ../Output.pdfThe files are really small, and the text is recognized pretty well. It still looks pretty bad:
 but at least the text can be copied and indexed.
This thread “Convert Scanned Images to a Single PDF File†got me up and running with PDFBeads. You might also have success using the method described here: “How to extract text with OCR from a PDF on Linux?†— it uses hocr2pdf to create single-page OCR’d PDFs, then joins them.
Hey, this post is super old!
That means that installation and run instructions may not work as well, or even at all. Most of the *Ports Apple software repositories have given way to Homebrew: you may have some success on Mac (untested by me) if you brew install netpbm fontforge potrace. There’s also some font cleanup I’d recommend, like resolving overlaps, adding extrema, and rounding points to integer. One day I may update this post, but for now, I’m leaving it as is.
This looks more than a bit like my handwriting

because it is my handwriting! Sure, the spacing of the punctuation needs major work, and I could have fiddled with the baseline alignment, but it’s legible, which is more than can usually be said of my own chicken-scratch.
This process is a little fiddly, but all the parts are free, and it uses free software. This all runs from the command line. I wrote and tested this on a Mac (with some packages installed from DarwinPorts), but it should run on Linux. It might need Cygwin under Windows; I don’t know.
Software you will need:
You will need to download
Procedure:
 I find it helpful at this stage to clean off any specks/macules. I also scale and threshold the image so I get a very dark image at 300-600dpi.
fonttrace.pl infile.pbm | sh


There are a couple of limitations to the process:
Lastly, a couple of extra files:
Have fun! Write nicely!
I’ve recently taken up film photography again. But processing is expensive.
To have 24 exposures processed and scanned at 6MP at Downtown Camera costs $12 + tax. That’s a pretty good price for black and white.
I can process at home (yay stinky toxic chemicals!) for a bit less. I’d need to buy a scanner, and the cheapest film scanners come in at around $300.
What to do, what to do?

In case anyone wants them, the 600 dpi page images of What a Life! are stored in this PDF: what_a_life.pdf (16MB). If you merely wish to browse, all the images from the book are here.
I got a bit carried away with doing this. Instead of just smacking together all the 360 dpi TIFFs I scanned seven years ago, I had to scan a new set at a higher resolution, then crop them, then fix the page numbers, add chapter marks, and make the table of contents a set of live links.
I’ve got out of the way of thinking in PostScript, so I spent some time looking for tools that would do things graphically. Bah! These things’d cost a fortune, so armed only with netpbm, libtiff, ghostscript, the pdfmark reference, Aquamacs, awk to add content based on the DSC, and gimp to work out the link zones on the contents page, I made it all go. Even I’m impressed.
One thing that didn’t impress me, though:
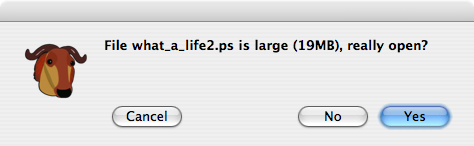
I used to edit multi-gigabyte files with emacs on Suns. They never used to complain like this. They just loaded (admittedly fairly slowly) and let me do my thing. Real emacs don’t give warning messages.
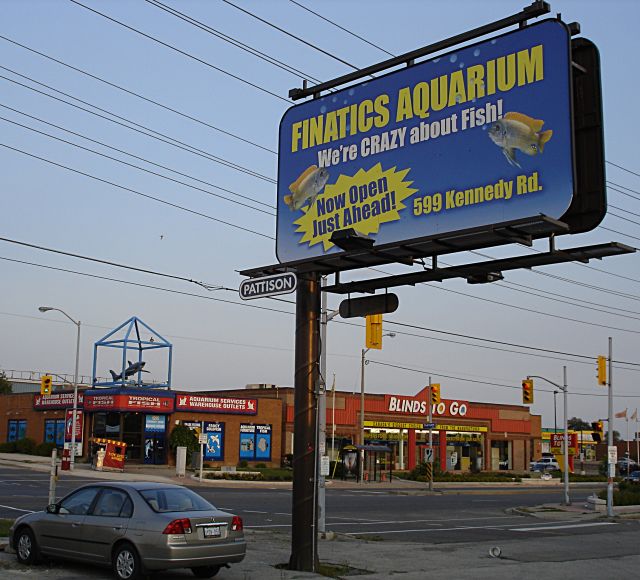
I’m no fan of billboards, but I have to congratulate Mike of Finatics for sheer gall when he put up this sign. See the plastic shark on the building behind? That’s Big Al’s, one of the biggest aquarium stores in Canada. Mike’s probably not going to get any favours from them any time soon.
Stewart’s Images :: Groovy Computers are some images scanned from a 1975 programming manual. I remember when computers looked like this …
I like Aalborg. I think we’re staying in exactly the same hotel (the Scandic) as I stayed in 10 years ago with RES. We’re going to see some really big wind turbines tomorrow.
Oh, and the Google Maps locations I picked off for this hotel are pretty darn accurate; the one I double-clicked on for this hotel is less than 50m from my room. I like.
The very excellent VueScan for Linux now seems to require libusb. It’s no problem to install, but I don’t think I needed it for v7.6.69, but I do for v7.6.79.