niche 68K Mac emulation needs

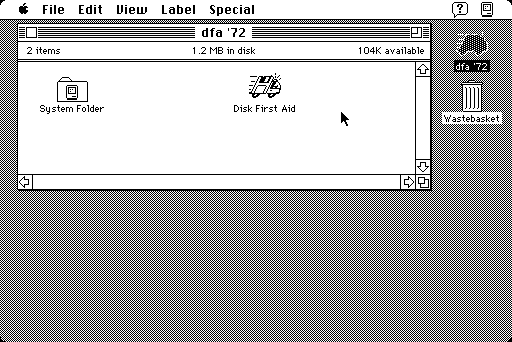
black and white screenshot of Macintosh System 7 desktop showing Disk First Aid icon
It amazes me how you manage to live in anything that small“: actual size Mac Classic II screenshot

So I’m refurbishing the Mac Classic II I got in 2016 now that I’ve found that BlueSCSI is a fairly cheap way of providing large replacement storage. The 40 MB (yes, 40 MB) drive from 1992 can finally be replaced.

Hit a snag, though: DiskCopy won’t copy a disk with errors, which this drive seemed to have. DiskCopy also won’t repair the boot disk, so you have to find a bootable floppy or some other way to work around this limitation. The only readily available bootable disk image I could find was the System 7.1 Disk Tools floppy — which reported no errors on my drive! Later versions of Disk First Aid would fix it, but weren’t provided on a bootable image.

Here’s the 7.1 Disk Tools floppy with all of the apps replaced by Disk First Aid 7.2. Both of these were found on the Internet Archive’s download.info.apple.com mirror and combined:

Disk duly repaired, DiskCopy was happy, backup complete. Eventually: the Classic II is not a fast machine at all.

I love the old Mac icons, how they packed so much into so few pixels:

enlarged icon: stylized ambulance with flashing light and driver, side is a floppy disk, there are motion lines at back and the whole icon is slanted to indicate speed/rush
Disk First Aid icon

It’s a stylized ambulance with flashing light and driver, the side is a floppy disk, it’s got motion lines and the whole icon is slanted to indicate speed/rush. Nice!


Vaguely related: most old Mac software is stored as Stuffit! archives. These don’t really work too well on other systems, as they use a compression scheme all their own and are specialized to handle the forked filesystem that old Macs use. Most emulators won’t know what to do with them unless you jump through hoops in the transfer stage.

Fortunately, the ancient Linux package hfsutils knows the ways of these hoops, if only you tell it when to jump. The script below takes a Stuffit! file as its sole argument, and creates a slightly larger HFS image containing the archive, with all the attributes set for Stuffit! Expander or what-have-you to unpack it.

#!/bin/bash
# sitdsk - make an HFS image containing a properly typed sit file
# requires hfsutils
# scruss, 2021-07

if
    [ $# -ne 1 ]
then
    echo Usage: $0 file.sit
    exit 1
fi

base="${1%.sit}"
# hformat won't touch anything smaller than 800 KB,
#  so min image size will be 800 * 1.25 = 1000 KB
size=$(du -k "$1" | awk '{print ($1 >= 800)?$1:800}')
dsk="${base}.dsk"
dd status=none of="$dsk" if=/dev/zero bs=1K count=$((size * 125 / 100))
hformat -l "$base" "$dsk"
# note that hformat does an implicit 'hmount'
hcopy "$1" ':'
# and hcopy silently changes underscores to spaces
hattrib -t 'SIT!' -c 'SITx' ":$(echo ${1} | tr '_' ' ')"
hls -l
humount

What this does:

  1. creates a blank image file roughly 25% larger than the archive (or 1000 KB, whichever is the larger) using dd;
  2. ‘formats’ the image file with an HFS filesystem using hformat;
  3. copies the archive to the image using hcopy;
  4. attempts to set the file type and creator using hattrib;
  5. lists the archive contents using hls;
  6. disconnects/unmounts the image from the hfsutils system using humount.

Notice I said it “attempts” to set the file type. hfsutils does some file renaming on the fly, and all I know about is that it changes underscores to spaces. So if there are other changes made by hfsutils, this step may fail. The package also gets really confused by images smaller than 800 KB, so small archives are rounded up in size to keep hformat happy.

An hour of Pink Noise

cover made by netpbm, of course
an hour of soothing 2-channel noise

Direct download: 01-pink_noise.mp3

There are a million variations on the simple “use sox to play masking pink noise“, such as:

play -n synth pinknoise gain -3

This will play synthesized pink noise until you hit Ctrl-C.

But it you want two independent noise channels rather than mono, that’s a little more complex. It’s probably easier to download/play the MP3 file above than show you the command line.

Note that MP3s really aren’t designed to encode such random data, and it’s likely that your player will cause the audio to clip in a couple of places. I’m not quite sure why it does this, but it does it repeatably.
If you want to create this for yourself (and create a bonus lossless FLAC, which was far too large to upload here), here’s what I did to make this:

#!/bin/bash

duration='60:00'
fade='1'
outfile='pinknoise.wav'

# make the track
sox --combine merge "|sox --norm=-3 -c 1 -b 16 -r 44100 -n -p synth $duration pinknoise" "|sox --norm=-3 -c 1 -b 16 -r 44100 -n -p synth $duration pinknoise" -c 2 -b 16 -r 44100 $outfile fade $fade fade 0 $duration $fade gain -n -3

# make the cover
# 1 - text - 500 x 500 px
pnmcat -white -tb <(pbmmake -white 500 114) <(pbmtextps -font HelveticaBold -fontsize 64 -resolution 180 "PINK" | pnmcrop) <(pbmmake -white 32 32) <(pbmtextps -font HelveticaBold -fontsize 64 -resolution 180 "NOISE" | pnmcrop) <(pbmmake -white 500 114) > cover-text.pbm
# 2 - make the noise bg
pgmnoise 500 500 > cover-noise.pgm
# 3 - make the magenta text
ppmchange black magenta cover-text.pbm > cover-text-magenta.ppm
# 4 - overlay with transparency
pnmcomp -alpha=<(pnminvert cover-text.pbm | pbmtopgm 35 35 ) cover-text-magenta.ppm cover-noise.pgm | cjpeg -qual 50 -opt -baseline -dct float > cover.jpg
# delete the temporary image files, leaving cover.jpg
rm -f cover-text.pbm cover-noise.pgm cover-text-magenta.ppm

# make the mp3
lame -V 2 --noreplaygain -m s --tt 'Pink Noise' --ta 'Pink Noise' --tl 'Pink Noise' --ty $(date +%Y) --tc "scruss, 2021-05" --tn 1/1 --tg Ambient --ti cover.jpg "$outfile" 01-pink_noise.mp3

# make the flac (and delete wav file)
flac --best --output-name=01-pink_noise.flac --delete-input-file --picture=cover.jpg --tag="TITLE=Pink Noise" --tag="ARTIST=Pink Noise" --tag="ALBUM=Pink Noise" --tag="DATE=$(date +%Y)" --tag="COMMENT=scruss, 2021-05" --tag="GENRE=Ambient" --tag="TRACKNUMBER=1" --tag="TRACKTOTAL=1" "$outfile"

You’ll likely need these packages installed:

sudo apt install sox libsox-fmt-all ghostscript gsfonts-x11 netpbm lame flac libjpeg-progs

cp2up.sh — fits the important part of Canada Post print labels two per sheet

blurred (for privacy) 2-up landscape page of Canada Post Tracked Package (to USA) shipping labels made by this script
no you will not read my 2-up shipping labels

If you need to ship things, you’re probably not too keen on queuing at the post office right now. Canada Post’s Ship Online service is pretty handy if you have a printer. The PDFs it produces are okay to print on plain paper, but if you’re using full-sheet labels like Avery 5165 you’re going to waste half a sheet of expensive labels.

If you’ve got two parcels to mail, this shell script will extract the right side of each page and create a single 2-up PDF with both your labels on the same page. You will need:

On my Ubuntu system, you can get good-enough¹ versions by doing this:

sudo apt install poppler-utils netpbm img2pdf

The code:

#!/bin/bash
# cp2up.sh - fits the important part of Canada Post print labels 2 per sheet
# scruss, 2021-05 - CC-BY-SA
# hard-coded input name (document.pdf)
# hard-coded output name (labels-2up.pdf)
# accepts exactly two labels (sorry)

dpi=600
width_in=11
height_in=8.5
# png intermediate format uses pixels per metre
dpm=$(echo "scale=3; $dpi * 1000 / 25.4" | bc)
# calculated pixel sizes, truncated to integer
half_width_px=$(echo "$width_in * $dpi / 2" | bc | sed 's/\..*$//')
height_px=$(echo "$height_in * $dpi" | bc | sed 's/\..*$//')

pdftoppm -mono -r "$dpi" -x "$half_width_px" -y 0 \
	 -W  "$half_width_px" -H "$height_px" document.pdf labels
pnmcat -lr labels-1.pbm labels-2.pbm |\
    pnmtopng -compression 9 -phys "$dpm" "$dpm" 1 > labels.png \
    && rm labels-1.pbm labels-2.pbm
# fix PDF time stamps
now=$(date --utc --iso-8601=seconds)
img2pdf -o labels-2up.pdf --creationdate "$now" --moddate "$now" \
	--pagesize "Letter^T" labels.png \
    && rm labels.png 

# saved from:
# history | tail | awk '{$1=""; print}' |\ 
#           perl -pwle 'chomp;s/^\s+//;' > cp2up.sh

It’s got a few hard-coded assumptions:

  • input name (document.pdf);
  • output name (labels-2up.pdf);
  • accepts exactly two labels (sorry).

Clever people could write code to work around these. Really clever people could modify this to feed a dedicated label printer.

Yes, I could probably have done all this with one ImageMagick command. When ImageMagick’s command line syntax begins to make sense, however, it’s probably time to retire to that remote mountain cabin and write that million-word thesis on a manual typewriter. Also, ImageMagick’s PDF generation is best described as pish.

One of the issues that this script avoids is aliasing in the bar-codes. For reasons known only to the anonymous PDF rendering library used by Canada Post, their shipping bar-codes are stored as smallish (780 × 54 px) bitmaps that are scaled up to a 59 × 19 mm print size. Most PDF viewers (and Adobe Viewer is one of these) will anti-alias scaled images, making them slightly soft. If you’re really unlucky, your printer driver will output these as fuzzy lines that no bar-code scanner could ever read. Rendering them to high resolution mono images may still render the edges a little roughly, but they’ll be crisply rough, and scanners don’t seem to mind that.

split image of simulated printed barcode: top image is five indistinct black-grey bars merging into a white background, bottom image is the same vertical lines, rendered crisply but showing some slightly rough edges
fuzzy vs crisply rough: scaled image (top) vs direct-rendered (bottom), at simulated 600 dpi laser print resolution

¹: Debian/Ubuntu’s netpbm package is roughly 20 years out of date for reasons that only a very few nerds care about, and the much better package is blocked by Debian’s baroque and gatekeepery packaging protocol. I usually build it from source for those times I need the new features.

Possibly Painless Network Printing from your Raspberry Pi

Printing from computers goes through waves of being difficult to being easy, then back to difficult again. This is likely due to the cycles of technology, complexity and user demand flow in and out of sync. I think we’re at peak annoyance right now.

It’s even harder with Raspberry Pis, as when printer drivers support Linux, 90% of them are for x86 or x86_64 computers only (Canon: ಠ_ಠ). ARM doesn’t get a look in. But one technology does actually seem to help: network printers that support IPP — Internet Printing Protocol.

We had an old Brother laser printer that just got slower and crankier and less useful as a printer, so yesterday I got a new Brother DCP-L2550DW to replace it. It says it supports Linux in the spec, but I knew not to be too optimistic with my Raspberry Pis. And indeed, it was seen on the network but no driver was found. I had a sad.

What turned my frown upside down was finding out about Raspbian’s cups-ipp-utils package. For desktop use, install it this way:

sudo apt install cups cups-ipp-utils system-config-printer

(leave off system-config-printer if you’re running from the terminal.)

Update: while you’re here, you might also want to install the print-to-PDF driver too. This allows you to print without wasting paper. Install it (and the IPP driver) with:

sudo apt install cups cups-ipp-utils system-config-printer printer-driver-cups-pdf

In many cases, this might be all you need to do: the network printers should be automatically found and added as devices.

Adding the new printer

On the desktop, open up Preferences → Print Settings and add a new printer. Yes, it prompts for your user password which you may have forgotten. I’ll wait while you try to remember it …

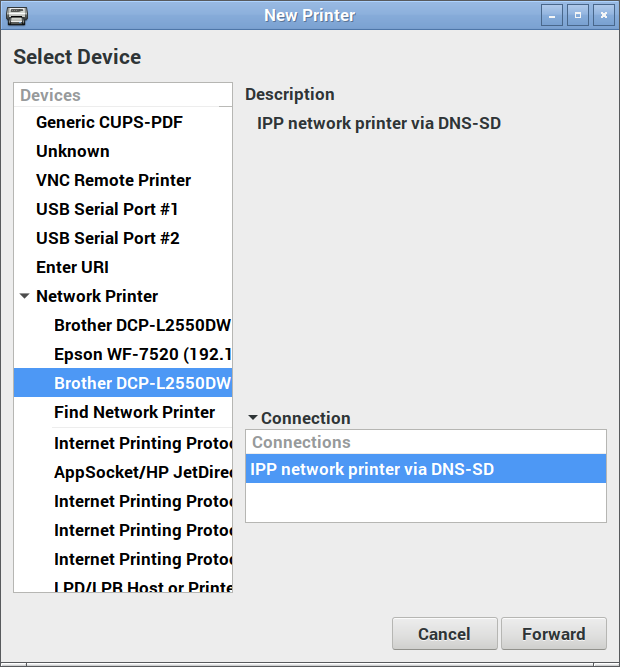
Now under Network Printers, you should see a device you recognize. Pick the one that says IPP network printer somewhere:

IPP network printer

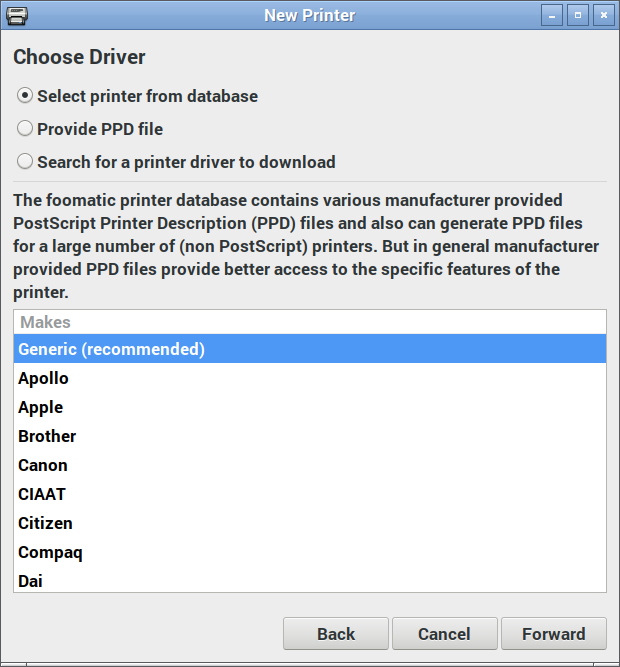
Here’s where the magic happens: you actually want to pick the generic driver for once:

Select Generic (recommended) manufacturer

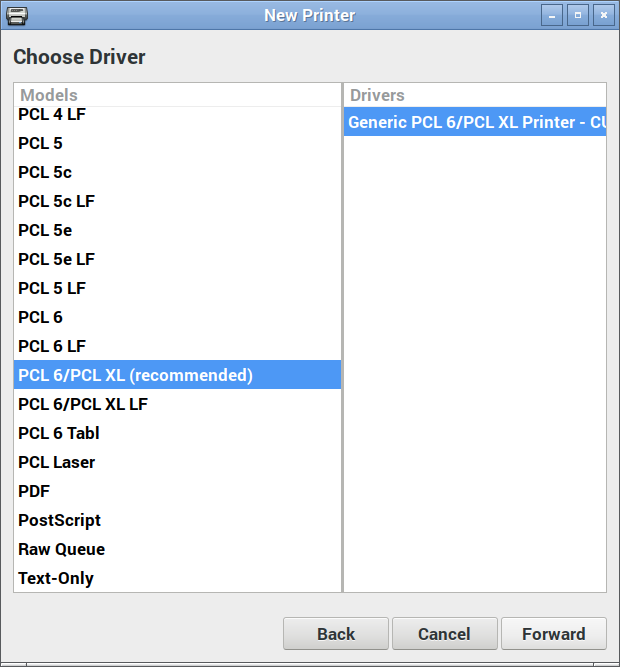
And again, the IPP utilities package will have picked the right driver for you:

Just go with what the driver suggests

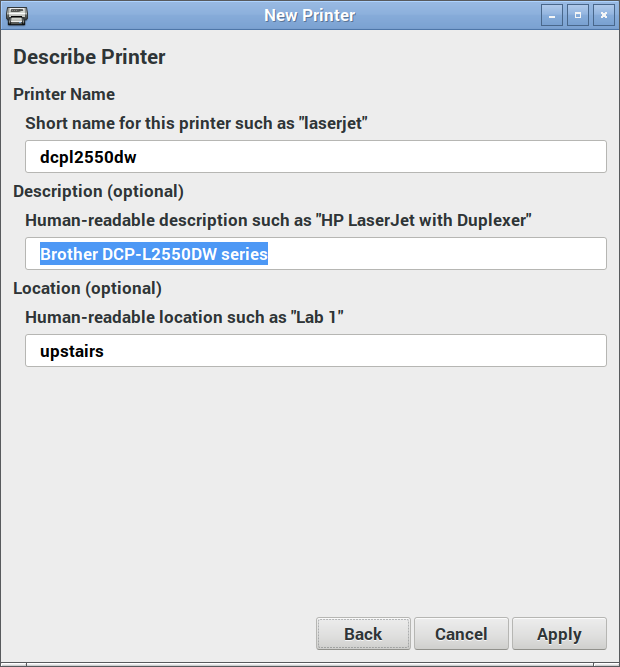
Changing the name and location is optional:

Your new printer’s almost ready to go!

Hit Apply, and you should be printing!

(Hey, printer manufacturers have been known to be evil and make good, working stuff suddenly not work. IPP is supposed to make everything sparkly again, but I can’t guarantee that something wicked won’t come this way.)

Update: After a few months of using the Brother DCP-L2550DW, I don’t recommend you buy it. It’s a perfectly capable printer, but it takes ‘chipped’ toner cartridges that:

  1. stop dead when you hit their page count limit, wasting toner and preventing you from finishing the print job;
  2. can’t easily be refilled by local technicians, so are wasteful of resources.

To get around (1), select Continue instead of Stop in the Toner Out configuration menu.

Update, January 2020: with sales and all needing a printer for work, the DCP-L2550DW will go with me to the office. I now have a MFC-L2750DW at home that scans to network, amongst other things. IPP proved it was magic yet again by the new printer being found and just worked with all my machines as soon as I added it to the network.

Synthesizing simple chords with sox

SoX can do almost anything with audio files — including synthesize audio from scratch. Unfortunately, SoX’s syntax is more than a bit hard to follow, and the manual page isn’t the most clear. But there is one example in the manual that gives a glimpse of what SoX can do:

play -n synth pl G2 pl B2 pl D3 pl G3 pl D4 pl G4 \ 
     delay 0 .05 .1 .15 .2 .25 remix - fade 0 4 .1 norm -1

While it plays a nice chord, it’s not obvious how to make audio files from this process. I have a project coming up that needs a few simple guitar chords, and with much trial and error I got SoX to spit out audio files. Here’s what I keyed into the shell:

cat guitar.txt | while read chord foo first third fifth
do
  echo "$chord" :
  sox -n \ 
    -r 16000 -b 16 "chord-${chord}.wav" \
    synth pl "$first" pl "$third" pl "$fifth" \
    delay 0 .05 .1 \ 
    remix - \ 
    fade 0 1 .095 \ 
    norm -1
done

with these lines in the file “guitar.txt”

G   :  G2  B2  D3
C   :  C3  E3  G4
D   :  D3  F#4 A3
F   :  F3  A3  C4
A   :  A3  C#4 E4
E   :  E2  G#3 B3
Em  :  E2  G3  B3

How the SoX command line breaks down:

    • -n —use no input file: SoX is going to generate the audio itself
    • -r 16000 -b 16 “chord-${chord}.wav” — with a sample rate of 16 kHz and 16-bits per sample, write to the output file “chord-….wav”
    • synth pl “$first” pl “$third” pl “$fifth” —synthesize three plucked tones read from the file
    • delay 0 .05 .1 —delay the second tone 0.05 s after the first and likewise the third after the second. This simulates the striking of guitar strings very slightly apart.
    • remix – —mix the tones in an internal pipe to the output
    • fade 0 1 .095 —fade the audio smoothly down to nothing in 1 s
    • norm -1 —normalize the volume to -1 dB.

The chords don’t sound great: they’re played on only three strings, so they sound very sparse. As my application will be playing these through a tiny MEMS speaker, I don’t think anyone will notice.

Update: well, now I know how to do it, why not do all 36 autoharp strings and make the “magic ensues” sound of just about every TV show of my childhood?

Glissando up:

sox -n -r 48000 -b 16 autoharp-up.wav synth pl "F2" pl "G2" pl "C3" pl "D3" pl "E3" pl "F3" pl "F#3" pl "G3" pl "A3" pl "A#3" pl "B3" pl "C4" pl "C#4" pl "D4" pl "D#4" pl "E4" pl "F4" pl "F#4" pl "G4" pl "G#4" pl "A4" pl "A#4" pl "B4" pl "C5" pl "C#5" pl "D5" pl "D#5" pl "E5" pl "F5" pl "F#5" pl "G5" pl "G#5" pl "A5" pl "A#5" pl "B5" pl "C6" delay 0 0.05 0.1 0.15 0.2 0.25 0.3 0.35 0.4 0.45 0.5 0.55 0.6 0.65 0.7 0.75 0.8 0.85 0.9 0.95 1 1.05 1.1 1.15 1.2 1.25 1.3 1.35 1.4 1.45 1.5 1.55 1.6 1.65 1.7 1.75 remix - fade 0 6 .1 norm -1

Glissando down:

sox -n -r 48000 -b 16 autoharp-down.wav synth pl "C6" pl "B5" pl "A#5" pl "A5" pl "G#5" pl "G5" pl "F#5" pl "F5" pl "E5" pl "D#5" pl "D5" pl "C#5" pl "C5" pl "B4" pl "A#4" pl "A4" pl "G#4" pl "G4" pl "F#4" pl "F4" pl "E4" pl "D#4" pl "D4" pl "C#4" pl "C4" pl "B3" pl "A#3" pl "A3" pl "G3" pl "F#3" pl "F3" pl "E3" pl "D3" pl "C3" pl "G2" pl "F2" delay 0 0.05 0.1 0.15 0.2 0.25 0.3 0.35 0.4 0.45 0.5 0.55 0.6 0.65 0.7 0.75 0.8 0.85 0.9 0.95 1 1.05 1.1 1.15 1.2 1.25 1.3 1.35 1.4 1.45 1.5 1.55 1.6 1.65 1.7 1.75 remix - fade 0 6 .1 norm -1

Could maybe use some reverb in there for the ultimate nostalgic effect.


making an hourly chime with cron

I wanted to have a “Hey, be here now!” ping throughout the working day. Something loud enough to hear, but not irritating.

Doing this with cron was harder than you might expect. It seems that sound is typically part of the X11 display infrastructure, so you need to give the command permission to make a noise on this particular machine’s display. Here’s the crontab line I came up with:

# m h    dom mon dow   command
  0 9-17 *   *   1-5   export DISPLAY=:0 && /usr/bin/play -q /home/scruss/sounds/ting/ting.wav

That translates as: at 0 minutes past the hours of 09:00 to 17:00 on any weekday (day of week = 1-5, and we don’t care about day of month or which month it is), execute the command play (part of the sox package) with no text output (-q). cron needs environment variables like DISPLAY set, and prefers full command paths. It may trigger a second or so after the turn of the hour; this is good enough for me.

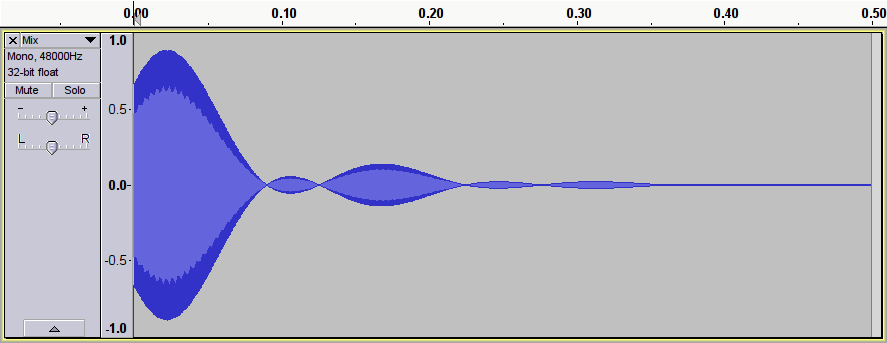
As for the alert, I wanted something distinctive — percussive, short, bright — but with a tiny bit of modulation to stop it sounding like a bland computer-generated sine wave. This is what I made; click on the image and the sound should play or download:

ting-audacityIt’s essentially a 2093 Hz (C7) sine wave, mixed with itself frequency-modulated at 7 Hz. Why 7 Hz? Apart from sounding about right, 2093 is exactly divisible by 7, 13 & 23, so I used a factor for neatness.

There was some later messing about in Audacity (mostly fades and length edits; I forget exactly what). The two components were generated using sox:

sox -n ting-plain.wav synth 1 sine C7 fade l 0 1 1
 sox -n ting-vibrato.wav synth 1 sin C7 synth 1 sine fmod 7 fade l 0 1 1

Yes, sox does have pretty horrible syntax, doesn’t it?

The frequency-modulated one seems to be pretty close to the final result. It would be less time spent trying to save time …

micro, a nice little text editor

screenshot-from-2016-09-18-15-24-13

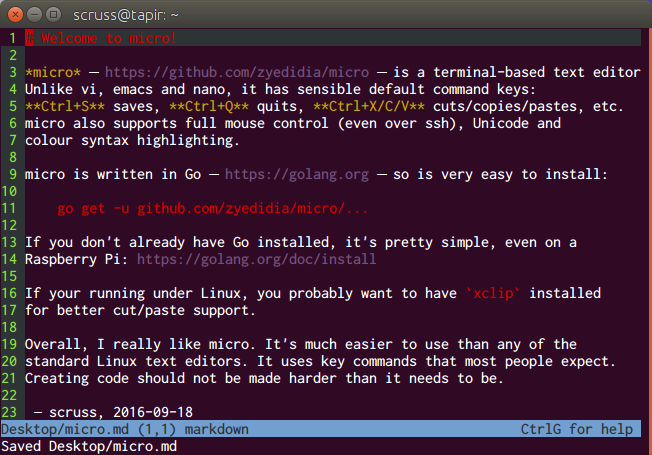
micro – https://github.com/zyedidia/micro – is a terminal-based text editor. Unlike vi, emacs and nano, it has sensible default command keys: Ctrl+S saves, Ctrl+Q quits, Ctrl+X/C/V cuts/copies/pastes, etc. micro also supports full mouse control (even over ssh), Unicode and colour syntax highlighting.

micro is written in Go – https://golang.org – so is very easy to install:

go get -u github.com/zyedidia/micro/...

If you don’t already have Go installed, it’s pretty simple, even on a Raspberry Pi: https://golang.org/doc/install

If your running under Linux, you probably want to have xclip installed for better cut/paste support.

Overall, I really like micro. It’s much easier to use than any of the standard Linux text editors. It uses key commands that most people expect. Creating code should not be made harder than it needs to be.

(I was about to suggest FTE, as it appears to be the closest thing to the old MS-DOS 6 editor that I’ve seen under Linux. While it’s a great plain text editor, its Unicode support isn’t where it needs to be in 2016.
micro suggestion came via MetaFilter’s Ctrl + Q to quit. Need I say more?
)

Working with case-sensitive CD-ROM images on Linux

I bought a CD-ROM, The World of Patterns. It’s supposed to work on ‘Any computer with an Internet browser and a CD-ROM drive’. Guess I don’t just have any computer, then …

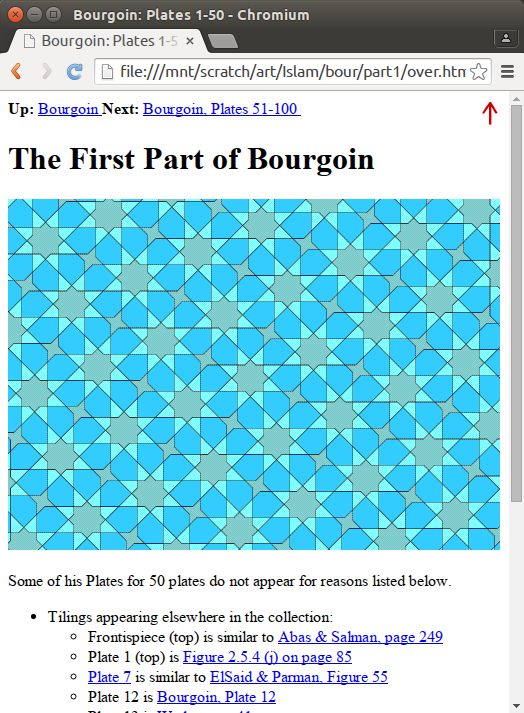
The disk — an interesting mathematical/artistic study of patterns — is arranged as a tree of HTML files, with internal links and images. This is how the folders appear on my computer:

├── art
│   ├── islam
│   ├── preislam
│   └── pstislam
│   ├── latt
│   ├── other
│   └── quilts
│   ├── modern
│   │   ├── large
│   │   ├── patch3
│   │   └── patch4
│   └── usa
├── info
├── maths

All neatly lower case, as one might expect. Unfortunately, the internal links are hard-coded to access links such as /art/Islam/over.htm, and Linux, being good and literal, can’t find the upper case ones.

Unfortunately, the majority of computers quietly ignore the case of letters on removable media. Linux’s insistence on being correct is at odds with what is generally considered useful. But there’s a way around this. You can give the mount command options to tell it to be more chill about case:

sudo mount -t iso9660 -o loop,check=relaxed,map=normal,norock,nojoliet disk.iso /mnt/scratch/

This works for me quite well:

Screenshot from 2015-09-08 10:57:54

The CD-ROM is interesting, if a little dated. The author has gone on to produce the website tilingsearch.org, a huge database of historical tile patterns.

Thermal Printer driver for CUPS, Linux, and Raspberry Pi: zj-58


Update:build instructions have changed, 2019. If any manufacturer wants to see if their printer works, send me one (I’m easy to find) for free and I’ll check it out and add it here.

This might be my last post on mini-printers, as I’ve found a driver that just works with CUPS on Raspberry Pi. It also works on Ubuntu on my laptop, and should work (though untried) on Mac OS. You’ll have to build it from source, but it’s not too hard.

The hard part is working out if your thermal printer will work or not. There are many out there, and they’re all slightly different. If they support the ESC/POS bitmap command GS v 0 on 58 mm wide paper, they should work. The ones I’ve tested are:

  1. Catex POS5890U — USB, cheap, fast.
  2. “701” control board panel printer — fairly generic, decent quality printer with serial input. A bit slow for daily use at 9600 baud.
  3. Xiamen Embedded Printer DP-EH600 — as above.

The following should also work, but haven’t been tried:

  • Adafruit Mini Thermal Receipt Printer — again, serial, so not super fast.
  • Sparkfun thermal printer — which now appears to be identical to the Adafruit unit, and is referred to as the “A1 (or A2) micro panel printer” in the documentation.

Known not to work:

  • BTHT-V6 printer — which uses a completely different command set. (Roughly that of an Epson FX-80 for image commands, if you care.)

If you have a manual for your printer, check it to see if it prints bitmaps by sending a three byte header of 29 118 48 (or 1D 76 30 in hexadecimal). If you’re not sure, try it with a small test image, and be ready by the power switch …

Getting and building the driver

The driver is meant for a ZiJiang ZJ-58 printer, and lives here on Github: klirichek/zj-58.

Now read and follow the Building & Installing section of the README, and do what it says. I’ll wait …

Setting up the printer

This bit is much more graphical. You’ll need the system-config-printer package:

sudo apt install -y system-config-printer cups

Open up the printer settings window (Preferences → Print Settings):

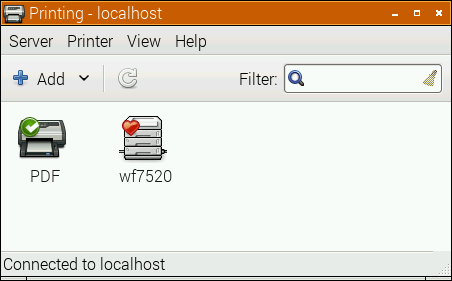
2015-07-11-220946_452x281_scrotSelect the Add icon, and the New Printer window opens:

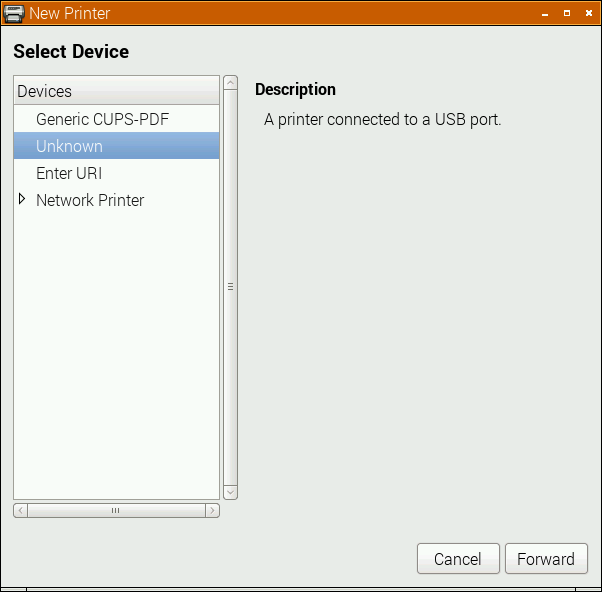
2015-07-11-221141_602x592_scrotThe POS5890U shows up as “Unknown” on my USB port, as Linux doesn’t know the name of this device from its USB ID.

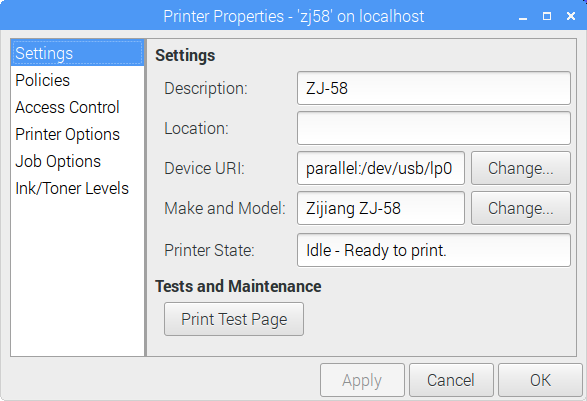
Update (for the slightly desperate): In the land of “Things have changed!”, my Catex printer isn’t/wasn’t showing up at all. I had to resort to this in the Enter URI option:

thermal printer usb lp uri
(hey, this image doesn’t quite match the flow. Look only at the the “Device URI” bit please)

parallel:/dev/usb/lp0 seems to work. Another option might be looking at the output of

sudo /usr/lib/cups/backend/usb

which suggests that usb://Unknown/Printer might work too. (All of this might need to have been preceded by

sudo usermod -a -G lp pi

and a logout or reboot; I did say this was for the slightly desperate …)

If the above doesn’t apply, your printer might have an known ID, or show up as a serial port. Select the right one, and click Forward:

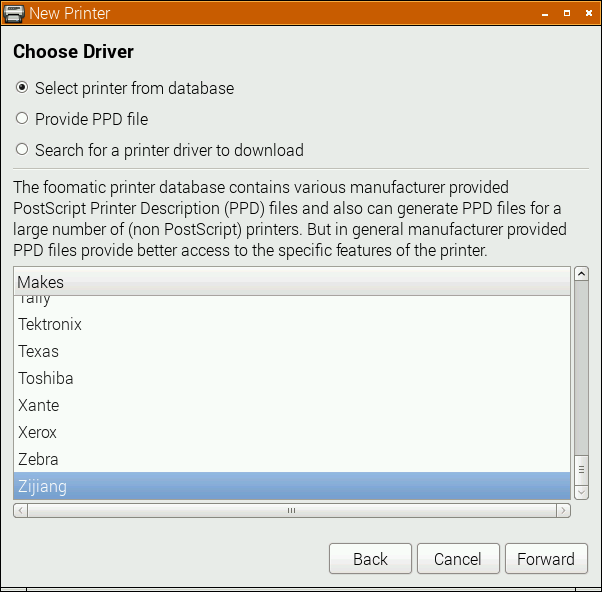
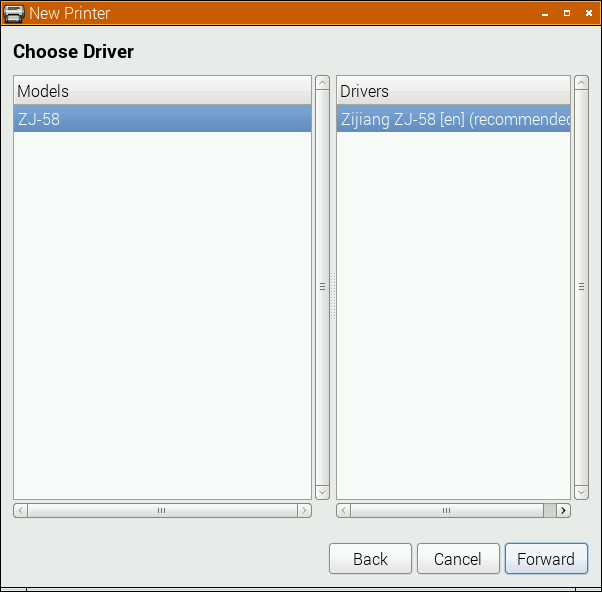
2015-07-11-221221_602x592_scrotHere, I’m really pleased that the driver is for a Zijiang unit, as it’s conveniently at the end of the list. Click Forward …

2015-07-11-221240_602x592_scrotNo options here, so again, Forward …

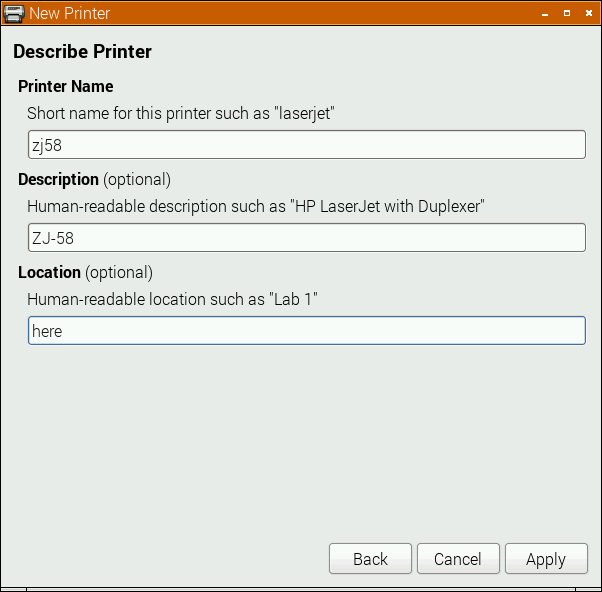
2015-07-11-221311_602x592_scrotI changed the name from the default ZJ-58 to the more unixly zj58. You don’t have to, but either way, Apply the changes.

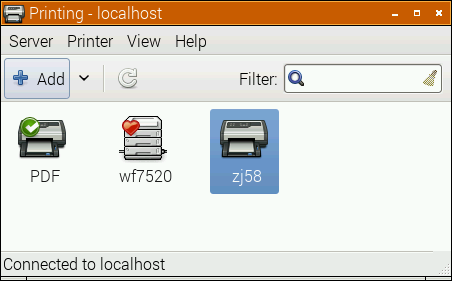
2015-07-11-222030_452x281_scrotAnd there it is, registered as a printer!

Printer Options

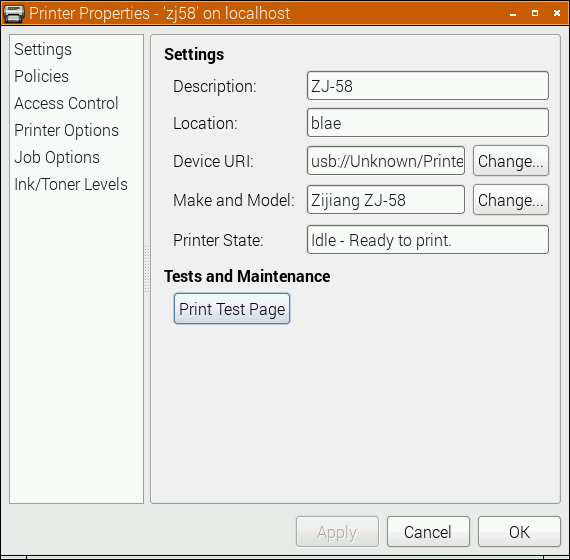
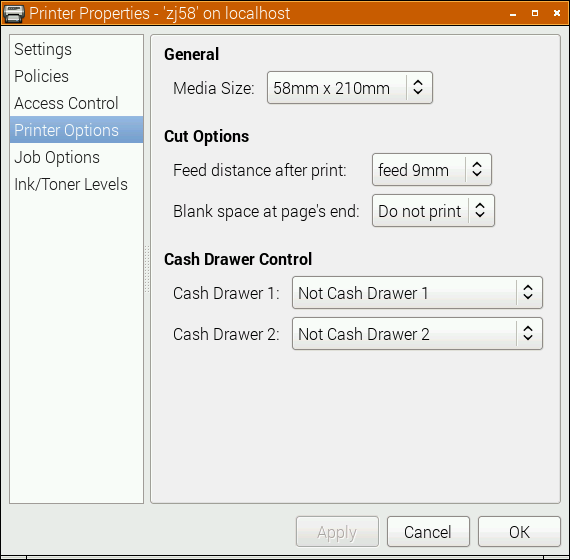
Most printers expect paper wider than 58 mm, but mini-printers can’t do that. To tell the system about paper sizes, right click on the printer’s icon, and change the printer settings:

2015-07-11-222225_570x560_scrotA test page might print properly now, but you should probably go into Printer Options first:

2015-07-11-222239_570x560_scrotYou do want to set the media size to at least 58 × 210 mm. This is just the longest strip it will print in one ‘page’; if your print is shorter, it won’t waste extra paper. You can choose longer prints, but not wider. The default assume your local standard paper size which —be it A4, Letter, or whatever — will not be what you want here. Hit OK.

Printing something

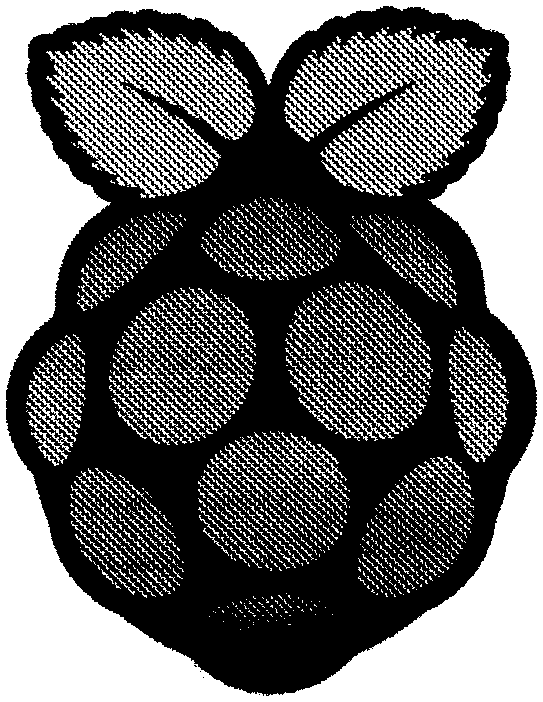
You could print the self test page, but it’s long and boring. If you’re fairly sure your printer will be supported, try this scaled PDF version of the Raspberry Pi Logo: raspberry-pi-logo.  Printed and scanned, it came out like this:

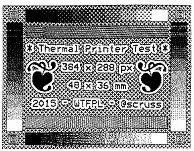
raspberry-pi-logo-miniprinterNot the best rendition, but not bad for a $30 receipt printer. My test image came out like this (iffy scan, sorry):

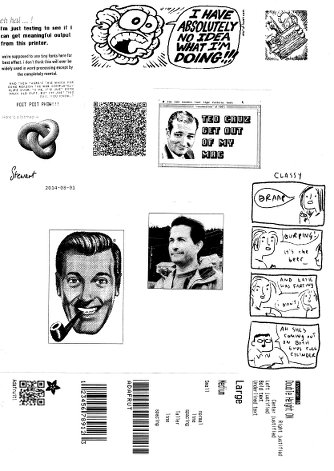
zj58-driver-testI haven’t covered the intricacies of setting up serial port connections here; maybe another time. Also, there’s a short delay (maybe 10–20 s) between selecting Print and the printer coming to life. CUPS is pretty complex, and is doing things in the background while you wait.

(Seeing as I use their logo prominently up there, I should totes acknowledge that “Raspberry Pi is a trademark of the Raspberry Pi Foundation”. Also, I couldn’t have done all this without the support of Reed Zhao. Though Reed has moved on to bigger things and doesn’t sell printers any more, his help — not to mention the generous gift of a couple of printers — was very welcome.)

→ you might also be interested in my notes on mini-printers and Linux – it has some manuals too.

fun with darktable

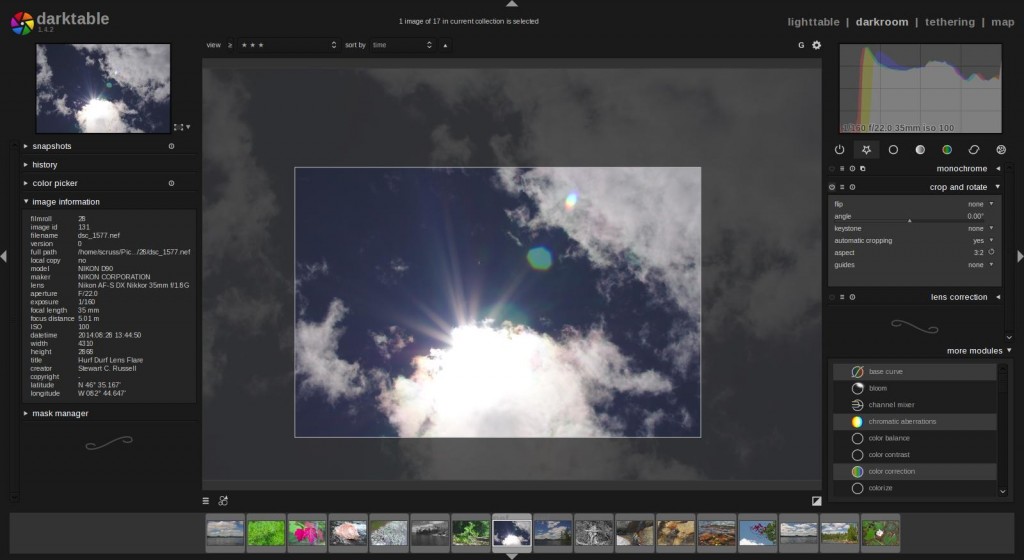
LiquidI’m really impressed with darktable, a raw photo workflow for Linux.  Unlike Gimp, it uses floating point for all image processes, so it doesn’t get caught up in quantization error. It’s a non-destructive editor, too: it assumes your source images are like negatives, and any changes you make are only applied to the exported images. Darktable also has a very intuitive black and white filtering mode (where you apply a virtual colour filter to the front of the lens, and see the results in real time) and some very powerful geotagging features. I’m sold.

darktable-uiIt’s not immediately obvious how some of the features work, and it took me a few hours (and some reading of the manual — eek!) to get files to export as I wanted them. It’s not quite perfect yet — the map feature can become unresponsive if you click too much on image icons — but it’s definitely solid enough for my purposes.

More of my initial darktable attempts on flickr: A Day by the Lake.

Notes on mini-printers and Linux

miniprinter galleryOver the last few weeks, I’ve been playing with a few small thermal printers. Meant as POS or information booth printers, they make a diverting project for the lo-fi printing enthusiast. While they all have common features — 58 mm/2¼” paper width, 8 pixel/mm resolution, 48 mm print width, serial connection — they all have their quirks. You may have seen these sold as the Adafruit Mini Thermal Receipt Printer or Sparkfun’s Thermal Printer, but there are many others. I’m going to write more on interfacing these directly to Raspberry Pi, Arduino, and (if I can navigate the documentation) a CUPS driver.

Update, July 2015: Here’s a CUPS driver: klirichek/zj-58, and my writeup on installing it on a Raspberry Pi — Thermal Printer driver for CUPS, Linux, and Raspberry Pi: zj-58

For now, I’m just leaving you a list of things I’ve found helpful for the DP-EH600 and 701 printers. Note that the similar-looking BTHT-v6 printer uses a completely different command set.

  • Replacement paper is sold as 2¼” × 30′. Staples have a box of 30 rolls for under $25 (item 279096, not on their website). Longer rolls don’t fit.
  • You’ll need a USB→TTL Serial adaptor, preferably one with DTR control. I use one from JY-MCU. In a pinch, you can use a simpler  Debug / Console Cable for Raspberry Pi, but you risk serial overruns and dodgy results. Remember that RX on the adaptor goes to TX on the printer, and vice versa.
  • A good solid power supply is needed; these printers draw ~8 W when printing. Some printers only support 5 V (for which a 3 amp adaptor would be ideal), others 5-9 V. The higher voltage makes text printing faster. You can’t drive these directly from your Raspberry Pi/Arduino power supply.
  • Linux serial ports are set to some defaults which may have been historically useful, but now corrupt 8-bit data. A trick I picked up here is to first issue the command
    stty -F /dev/ttyUSB1 0:0:0:0:0:0:0:0:0:0:0:0:0:0:0:0:0:0:0:0:0:0:0:0:0:0:0:0:0:0:0:0:0:0:0:0
    which clears all settings, then set the device up as you need it:
    stty -F /dev/ttyUSB1 speed 9600 raw cs8
    (Most of these printers default to 9600 baud. Your device may be called something different to ttyUSB1.)
  • I’ve written a couple of Python driver stubs which take an image and produce the relevant binary output:
    • scruss / esc-pos-image.py – prints an image as a single command. May not work on the SparkFun printer. Does not work on the BTHT-v6.
    • scruss / esc-pos-image-star.py – prints the image in 24 pixel deep bands. Can sometimes cause visible gaps in the printout, but will work on almost all printers, except the BTHT-v6.
  • These Python libraries also work, as long as you address the printer properly (right device, right speed):

Notes/Credits

  1. Reed Zhao (of Tangram Software) lent me a couple of different printers for testing after I bought a different one from him. He’s put a lot of work into sourcing these printers direct from the manufacturers. Thanks, Reed!
    NB: Reed doesn’t sell printers any more. Try eBay.
  2. Image credits for print samples:

Manuals/Docs

Posted more for historical reference:

elementary OS: could be worse

Imagine there’s a really nicely arranged screenshot of elementary OS here. You know, browser arranged just so, dock showing shiny icons, and a coy little dropdown showing that I’m playing music that’s faaaar hipper than you’ll ever be. Got that image? Good. ‘Cos I just spent a ½-hour setting it up, then deleted it in a second of unthought when I cleaned up the elementary OS VM from VirtualBox. Aargh!

elementary OS is a very pretty Ubuntu/Debian distro. It has a very strong visual identity, and is designed and managed by a very small group. This rigidity may annoy the seasoned Linux user,  but will likely work in a more logical way if you’re used other OSs. You won’t face jarringly mismatched user interface elements, as still happens with Ubunty/Unity. Linux UX allows too much choice, so you’re never sure which options do what at any given time.
(F’rinstance: Ctrl+Q used to quit programs. Now, Ubuntu wants us to use Ctrl+W, the old close-the-window command. Some programs no longer quit with Ctrl+Q, so you’re left with an awksmash of Ctrl+Q_no-I-meant_W. Don’t make me think!)

A couple of things put me off elementary OS:

  1. You can’t put files on the desktop. In an effort to be tidy, eOS forbids you putting the stuff you’re working on in the place you’ll see it. This is a major annoyance, but worse things are coming.
  2. It expects you to pay for it. No, really. They want $10 from you, right from the get-go. While you can get around this (click the “Download” button; it only looks like it’s linked to the payment button), they do something far, far worse:
    They use a PayPal popunder.
    Srsly. Gahh. Eww. Pop-unders are the web equivalent of taking a 💩 on an art gallery floor. If they’re low enough to pull that kind of stunt, who knows what leakage lurks under their pretty graphics?

The HP48: the best calculator ever

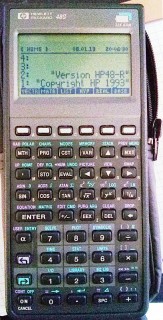
We had an unscheduled overnight stop in East Lansing last week, and I took the chance to visit the MSU Surplus Store.  For $15, they had HP48G calculators, seemingly unused:

hp48gThey still have a bunch of them: HP 48G Graphic Calculator.

They’re maybe not the quickest (the 4 MHz Saturn processor chugs sometimes, and wanders off to clean up memory when it feels like it), the display is downright chunky these days, but they have everything that a scientific calculator should have. The keys have a good action. It just works. Yes, your smartphone has hundreds of times the processing power, but it’s not specialized to the task. The HP48 is.

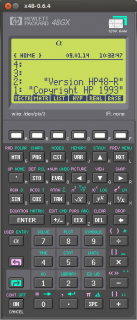
If you’re feeling really nerdy, you can run an HP48 (a GX, not the G which I have) under Linux using x48. Jeff has some useful tips on installing x48 on newer ubuntu versions (though you don’t have to do the font thing under Ubuntu 13.10).

x48Building it is a small matter of ./autogen.sh ; ./configure ; make ; sudo make install.  To run it, you’ll need to install the GX ROM image to ~/.hp48.  The first time you run it, I’d recommend running it from the terminal with:

x48 -connFont -misc-fixed-bold-r-normal--13-120-75-75-c-70-iso8859-16 -smallFont -misc-fixed-bold-r-normal--13-120-75-75-c-70-iso8859-16 -mediumFont -misc-fixed-bold-r-normal--14-130-75-75-c-70-iso8859-16 -largeFont -misc-fixed-bold-r-normal--15-140-75-75-c-90-iso8859-16 -reset -initialize -rom ~/.hp48/rom

as the ROM format has an outdated config file which causes it to complain weakly every time you start the emulator.

Scanned manuals are available from HP and archive.org here: HP 48g User Guide, HP 48g Quick Start Guide.

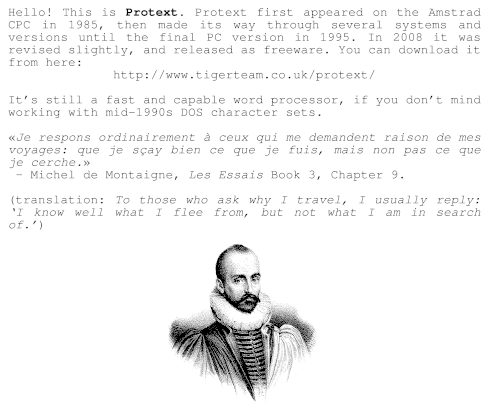
Protext lives!

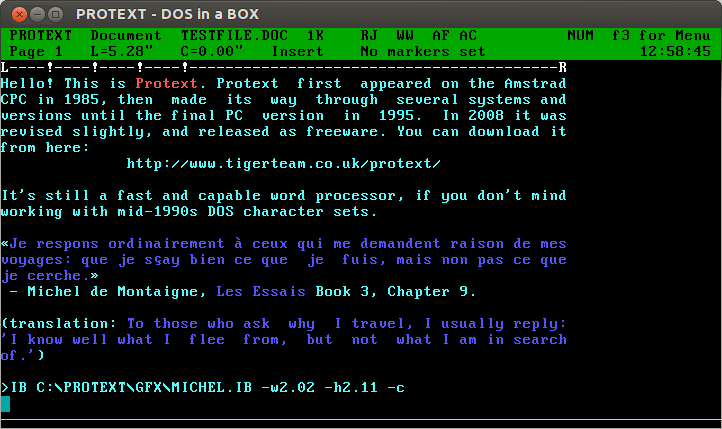
Protext screenshot (dosemu)

Oh man, Protext! For years, it was all I used: every magazine article, every essay at university (all two of them), my undergraduate dissertation (now mercifully lost to time: The Parametric Design of a Medium Specific Speed Pump Impeller, complete with spline-drawing code in HiSoft BASIC for the Amiga, is unlikely to be of value to anyone these days), letters — you name it, I used Protext for it.

I first had it on 16kB EPROM for the Amstrad CPC464; instant access with |P. I then ran it on the Amiga, snagging a cheap copy direct from the authors at a trade show. I think I had it for the PC, but I don’t really remember my DOS days too well.

The freeware version runs quite nicely under dosemu. You can even get it to print directly to PDF:

  1. In your Linux printer admin, set up a CUPS PDF printer. Anything sent to it will appear as a PDF file in the folder ~/PDF.
  2. Add the following lines to your ~/.dosemurc:
    $_lpt1 = “lpr -l -P PDF”
    $_printer_timeout = (20)
  3. In Protext, configure your printer to be a PostScript printer on LPT1:

The results come out not bad at all:

protext output as pdfProtext’s file import and export is a bit dated. You can use the CONVERT utility to create RTF, but it assumes Code page 437, so your accents won’t come out right. Adding \ansicpg437 to the end of the first line should make it read okay.

(engraving of Michel de Montaigne in mad puffy sleeves: public domain from Wikimedia Commons: File:Michel de Montaigne 1.jpg – Wikimedia Commons)

A (mostly) colour-managed workflow for Linux for not too many $$$

Colour management is good. It means that what I see on the screen is what you meant it to look like, and anything I make with a colour-managed workflow you’ll see in the colours I meant it to have. (Mostly.) You can spend a lot of money to do this professionally, but you can also get most of the benefits for about $125, if you’re prepared to do some fiddly stuff.

The most important part is calibrating your display. Hughski’s ColorHug (which I’ve mentioned before) is as close to plug-and-play as you’ll get: plug it in, and the colour management software pops up with prompts on what to do next. Attach the ColorHug to the screen (with the newly supplied stretchy band), let it burble away for 10–20 minutes, and the next time you log in, colours will be just right.

Calibrating the scanner on my Epson WorkForce WF-7520 was much more work, and the process could use optimization. To calibrate any scanner, you need a physical colour target to scan and compare against reference data. The cheapest place to get these (unless there was one in the box with your scanner) is Wolf Faust’s Affordable IT 8.7 (ISO 12641) Scanner Colour Calibration Targets. If there are a bunch of likeminded folk in your area, it’s definitely worth clubbing together on a group buy to save on shipping. It’s also less work for Wolf, since he doesn’t have to send out so many little packages.

(I’ve known of Wolf Faust since my Amiga days. He produced the most glorious drivers for Canon printers, and Jeff Walker produced the camera-ready copy for JAM using Wolf’s code. While Macs had the high end DTP sewn up back then, you could do amazing things on a budget with an Amiga.)

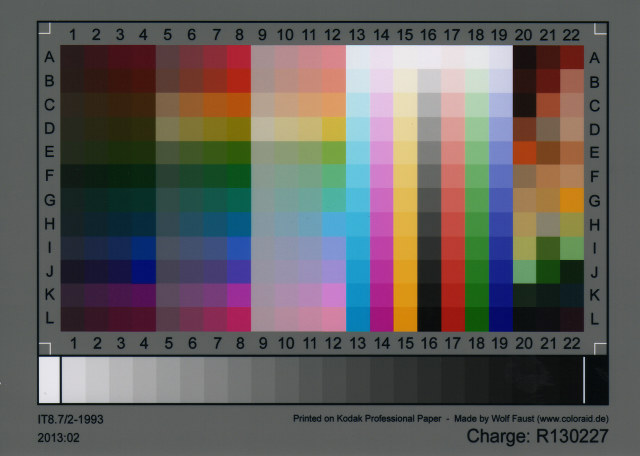
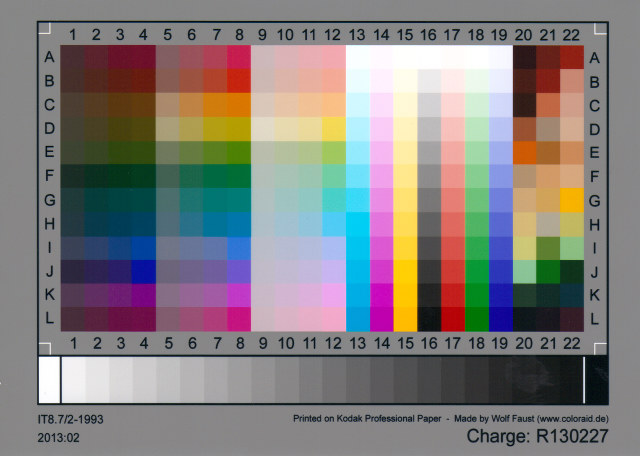
colour targetThe target comes packed in a protective sleeve, and along with a CD-R containing the calibration data which matches the print run of the target. Wolf makes a lot of targets for OEMs, and cost savings from his volume clients allow him to sell to individuals cheaply.

Scanning the thing without introducing automatic image corrections was the hard part. I found that my scanner had two drivers (epson2 and epkowa), the latter of which claimed to support 48-bit scanning. Unfortunately, it only supports 24-bit, like the epson2 driver, so whichever I chose was moot. I used the scanimage command line tool to make the scan:

scanimage --mode Color -x 175 -y 125 --format=tiff --resolution 300 > Epson-Workforce_WF-7520-WFaust-R1.tiff

which looks, when reduced down to web resolution, a bit like this:

Epson-Workforce_WF-7520-WFaust-R1It looks a lot darker than the physical target, so it’s clear that the scanner needs calibrating. To do this, you need two tools from the Argyll Colour Management System. The first creates a text representation of the scanned target’s colour patches:

scanin -v Epson-Workforce_WF-7520-WFaust-R1.tiff /usr/share/color/argyll/ref/it8.cht IT87/r130227.txt diag.tiff

The result is a smallish text file Epson-Workforce_WF-7520-WFaust-R1.ti3 which needs one more step to make a standard ICC profile:

colprof -A Epson -M 'Workforce WF-7520' -D 'WFaust R1' -ax -qm Epson-Workforce_WF-7520-WFaust-R1

I didn’t quite need to add that much metadata, but I could, so I did. The resultant ICC file can be used to apply colour calibrations to scanned images. Here’s the target scan, corrected:

Epson-Workforce_WF-7520-WFaust-R1-corrected

(I’ve made this a mouseover with the original image, so you can see the difference. Also, yes, there is a greasy thumb-print on my scanner glass near the bottom right, thank you so much for noticing.)

I used tifficc from the Little CMS package to apply the colour correction:

tifficc -v -i Epson-Workforce_WF-7520-WFaust-R1.icc Epson-Workforce_WF-7520-WFaust-R1.tiff Epson-Workforce_WF-7520-WFaust-R1-corrected.tiff

There are probably many easier, quicker ways of doing this, but this was the first thing I found that worked.

To show you a real example, here’s an un-retouched scan of the cover of Algrove Publishing‘s book “All the Knots You Need”, scanned at 75 dpi. Mouseover to see the corrected version:

all-the-knots-you-need_algrove

(Incidentally, there are two old but well-linked programs that are out there that purport to do scanner calibration: Scarse and LPROF. Don’t use them! They’re really hard to build on modern systems, and the Argyll tools work well.)

The last part of my workflow that remains uncalibrated is my printer. I could make a target with Argyll, print it, scan it, colour correct it, then use that as the input to colprof as above. I’m suspecting the results would be mediocre, as my scanner’s bit depth isn’t great, and I’d have to do this process for every paper and print setting combination. I’d also have to work out what magic CUPS does and compensate. Maybe later, but not yet.

Using large format paper with Linux and the Epson WorkForce WF-7520 printer

Update: Nope, I can’t get this to work any more.

I have an Epson WorkForce WF-7520, and I really like it: excellent built-in duplex large format scanner with ADF, CIFS network storage, giant paper bins, photo quality printing up to 330×482 mm, only slightly expensive print cartridges… Under Linux, though, it’s not so well behaved, especially if you want to print on large format paper. This is the workaround I developed:

  1. Put the B-size/11×17″ paper in Tray 1 (the upper one), and the Letter paper in Tray 2. This, unfortunately, matters — the driver that can print large format can only access the upper tray. On the setup menu on the printer console, tell the printer which tray holds what size of paper.
  2. Install the epson-inkjet-printer-escpr driver; it should be in the standard Ubuntu repos. Define a printer (wf7520-lf, for example) that uses this driver. Set the paper size to “US B 11 x 17 in”.
  3. Ensure that the lsb and lsb-printing packages are installed:
    sudo apt-get install lsb lsb-printing
  4. Download and install the non-free epson-201115w driver from the EPSON Download Center. Define a printer (I used wf-7520 for the name) using this driver, making sure that the correct PPD (epson-inkjet-printer 1.0.0-1lsb3.2 (Seiko Epson Corporation LSB 3.2)) is used. Set it up to use Letter paper, and (important!) set the source to Paper Cassette 2. You might want to make this printer the system default.

To print to large format, use the command:

lp -d wf7520-lf -o PageSize=USB file.pdf

To print regular size, just send the job to the wf-7520 device.

(modified from my Ask Ubuntu question/answer: Selecting Large Format Paper: what printing options work?)

Update for the (rightly) confused: Epson appear to have hoiked US B / 11×17″ support for this printer. Here are my PPDs:

Copying PPDs from one driver to another may not work, but you’ve likely nothing to lose.

fixing firefox’s fugly fonts on Ubuntu

Update 2015-09: Better yet, install Infinality. It makes font rendering pretty.


Switching back to Linux from Mac is still a process of ironing out minor wrinkles. Take, for example, this abomination (enlarged to show texture):—

Screenshot from 2013-05-19 11:42:18

… No, I’m not talking about Mr Paul’s antics (or the typo in the TP post, either), but the horrid non-matching ligatures (‘attack’, ‘flubbed’, ‘targeting’) in a sea of blocky text. Almost every programme I was running had this problem. Mouse over the image to see how it could look if you apply this easy fix.

Create (or edit) the file ~/.fonts.conf ~/.config/fontconfig/conf.d, and add the following lines:

<match target="font" >
  <edit name="embeddedbitmap" mode="assign">
    <bool>false</bool>
  </edit>
</match>

Log out, log back in again, and text is properly pretty. Yay!

clean up your GnuPG keyring

For reasons too annoying to explain, my GnuPG keyring was huge. It was taking a long time to find keys, and most of them weren’t ones I’d use. So I wrote this little script that strips out all of the keys that aren’t

  1. yours, or
  2. signatories to your key.

The script doesn’t actually delete any keys. It produces shell-compatible output that you can pipe or copy to a shell. Now my keyring file is less than 4% the size (or more precisely, 37‰) of the size it was before.

#!/bin/bash
# clean_keyring.sh - clean up all the excess keys

# my key should probably be the first secret key listed
mykey=$(gpg --list-secret-keys | grep '^sec' | cut -c 13-20 | head -1)
if
    [ -z $mykey ]
then
    # exit if no key string
    echo "Can't get user's key ID"
    exit 1
fi

# all of the people who have signed my key
mysigners=$(gpg --list-sigs $mykey | grep '^sig' | cut -c 14-21 | sort -u) 

# keep all of the signers, plus my key (if I haven't self-signed)
keepers=$(echo $mykey $mysigners | tr ' ' '\012' | sort -u)

# the keepers list in egrep syntax: ^(key|key|…)
keepers_egrep=$(echo $keepers | sed 's/^/^(/; s/$/)/; s/ /|/g;')

# show all the keepers as a comment so this script's output is shell-able
echo '# Keepers: ' $keepers

# everyone who isn't on the keepers list is deleted
deleters=$(gpg --list-keys | grep '^pub'|  cut -c 13-20 | egrep -v ${keepers_egrep})

# echo the command if there are any to delete
# command is interactive
if
    [ -z $deleters ]
then
    echo "# Nothing to delete!"
else
    echo 'gpg --delete-keys' $deleters
fi

Files:

Compose yourself, Raspberry Pi!

NB: If you’re gonna complain about the text encoding in this article, please know that the database went and broke itself: I (U+1F494, BROKEN HEART) UTF-8


Years ago, I worked in multilingual dictionary publishing. I was on the computing team, so we had to support the entry and storage of text in many different languages. Computers could display accented and special characters, but we were stuck with 8-bit character sets. This meant that we could only have a little over 200 distinct characters display in the same font at the same time. We’d be pretty much okay doing French & English together, but French & Norwegian started to get a little trying, and Italian & Greek couldn’t really be together at all.

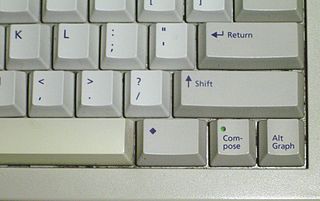
We were very fortunate to be using Sun workstations in the editorial office. These were quite powerful Unix machines, which means that they were a fraction of the speed and capabilities of a Raspberry Pi. Suns had one particularly neat feature:

Compose_key_on_Sun_Type_5c_keyboard(source: Compose key, Wikipedia.)

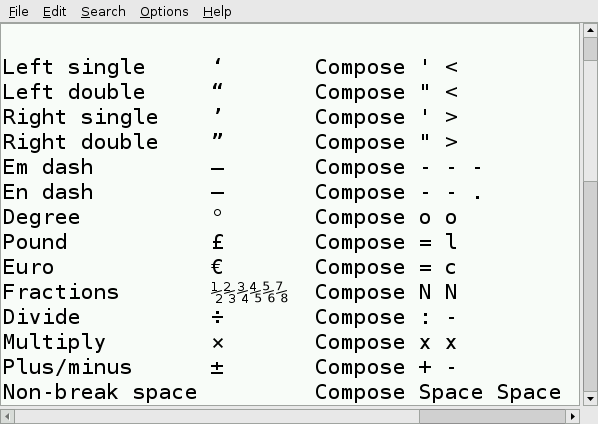
That little key marked “Compose”  (to the right of the space bar) acted as a semi-smart typewriter backspace key: if you hit Compose, then the right key combination, an accented character or symbol would appear. Some of the straightforward compose key sequences are:

  Compose +    
Accent First key Second key Result Example
Acute e é café
Grave ` a à déjà
Cedilla , c ç soupçon
Circumflex ^ o ô hôtel
Umlaut “ u ü küche
Ring o a å Håkon
Slash / L Ł Łukasiewicz
Tilde ~ n ñ mañana

Like every (non-embedded) Linux system I’ve used, the Raspberry Pi running Raspbian can use the compose key method for entering extra characters. I’m annoyed, though, that almost every setup tutorial either says to disable it, or doesn’t explain what it’s for. Let me fix that for you …

Setup

Run raspi-config

sudo raspi-config

and go to the configure_keyboard “4 Internationalisation Options” → “I3 Change Keyboard Layout” section. Your keyboard’s probably mostly set up the way you want it, so hit the Tab key and select <Ok> until you get to the Compose key section:

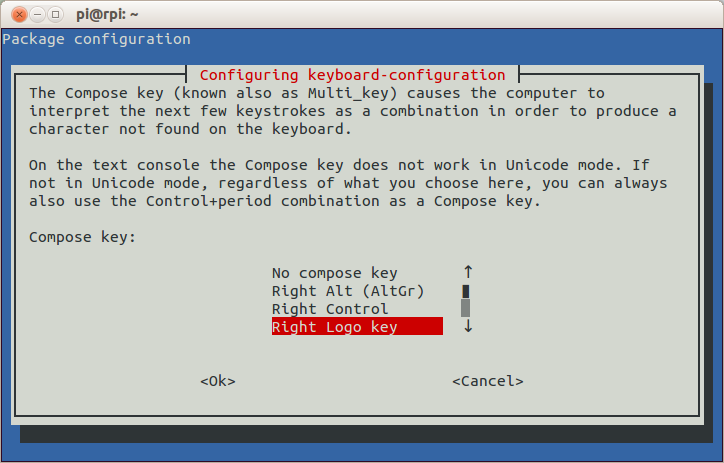
raspi-config: Compose key selectionChoose whatever is convenient. The combined keyboard and trackpad I use (a SolidTek KB-3910) with my Raspberry Pi has a couple of “Windows® Logo” keys, and the one on the right works for me. Keep the rest of the keyboard options the same, and exit raspi-config. After the message

Reloading keymap. This may take a short while
[ ok ] Setting preliminary keymap...done.

appears, you now have a working Compose key.

Using the Compose key

raspi-config hints (‘On the text console the Compose key does not work in Unicode mode …’) that Compose might not work everywhere with every piece of software. I’ve tested it across quite a few pieces of software — both on the text console and under LXDE — and support seems to be almost universal. The only differences I can find are:

  • Text Console — (a. k. a. the texty bit you see after booting) Despite raspi-config’s warning, accented alphabetical characters do seem to work (é è ñ ö ø Ã¥, etc). Most symbols, however, don’t (like ± × ÷ …). The currency symbol for your country is a special case. In Canada, I need to use Compose for € and £, but you’ve probably got a key for that.
  • LXDE — (a. k. a. the mousey bit you see after typing ‘startx’) All characters and symbols I’ve tried work everywhere, in LXTerminal, Leafpad, Midori, Dillo (browser), IDLE, and FocusWriter (a very minimal word processor).

Special characters in Python's IDLE
Special characters in Python’s IDLE

Some Compose key sequences — Leafpad

To find out which key sequences do what, the Compose key – Wikipedia page is a decent start. I prefer the slightly friendlier Ubuntu references GtkComposeTable and Compose Key, or the almost unreadable but frighteningly comprehensive UTF-8 (Unicode) compose sequence reference (which is essentially mirrored on your Raspberry Pi as the file /usr/share/X11/locale/en_US.UTF-8/Compose). Now go forth and work that Compose key like a boß.

(If you’re on a Mac and feeling a bit left out, you can do something similar with the Option key. Here’s how: Extended Keyboard Accent Codes for the Macintosh. On Windows®? Out of luck, I’m afraid WinCompose!)