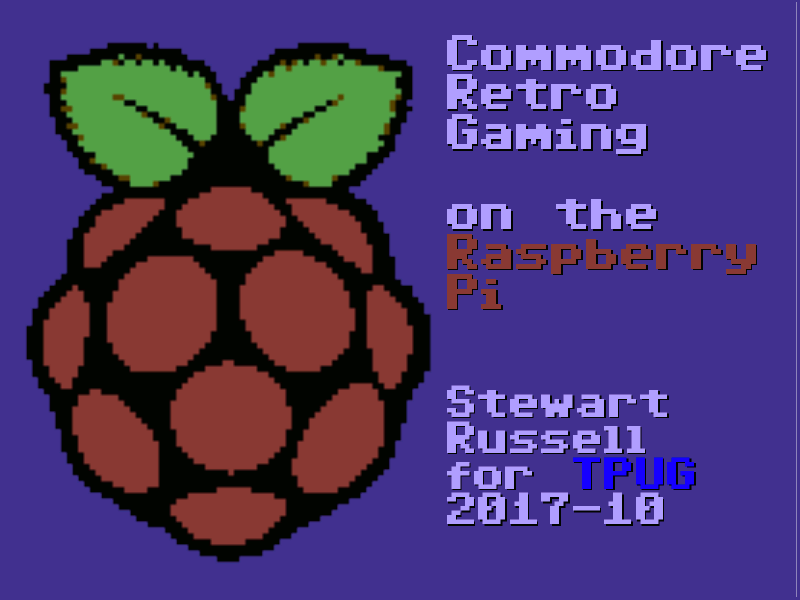
Tom’s A Short Course In Programming (1980) is a good introduction for new 1802 programmers. Print copies are rare, so someone on the cosmacelf group asked if it existed as a printable PDF. Well, when you put it like that …
conversion shell script, for those who like to tinker and/or want to use a sensible page size: short_course.sh (zipped). It uses curl to download the web pages and Calibre’s ebook-convert to do the HTML → PDF (and e-book) magic.
The linked PDF is quite similar to what you’d get if you went to Tom’s page and selected File → Print… in your browser, except:
the cover image is a Netronics ELF II, from Wikimedia Commons — with the appropriate attribution inserted into the document, as required by the image licence;
a known typo is corrected: references to $2E80 are changed to $2E82;
the document links to Tom’s site.
All of this is done automatically, so if any of the source URLs change, the script will break.
If you need to ship things, you’re probably not too keen on queuing at the post office right now. Canada Post’s Ship Online service is pretty handy if you have a printer. The PDFs it produces are okay to print on plain paper, but if you’re using full-sheet labels like Avery 5165 you’re going to waste half a sheet of expensive labels.
If you’ve got two parcels to mail, this shell script will extract the right side of each page and create a single 2-up PDF with both your labels on the same page. You will need:
On my Ubuntu system, you can get good-enough¹ versions by doing this:
sudo apt install poppler-utils netpbm img2pdf
The code:
#!/bin/bash
# cp2up.sh - fits the important part of Canada Post print labels 2 per sheet
# scruss, 2021-05 - CC-BY-SA
# hard-coded input name (document.pdf)
# hard-coded output name (labels-2up.pdf)
# accepts exactly two labels (sorry)

dpi=600
width_in=11
height_in=8.5
# png intermediate format uses pixels per metre
dpm=$(echo "scale=3; $dpi * 1000 / 25.4" | bc)
# calculated pixel sizes, truncated to integer
half_width_px=$(echo "$width_in * $dpi / 2" | bc | sed 's/\..*$//')
height_px=$(echo "$height_in * $dpi" | bc | sed 's/\..*$//')

pdftoppm -mono -r "$dpi" -x "$half_width_px" -y 0 \
	 -W  "$half_width_px" -H "$height_px" document.pdf labels
pnmcat -lr labels-1.pbm labels-2.pbm |\
    pnmtopng -compression 9 -phys "$dpm" "$dpm" 1 > labels.png \
    && rm labels-1.pbm labels-2.pbm
# fix PDF time stamps
now=$(date --utc --iso-8601=seconds)
img2pdf -o labels-2up.pdf --creationdate "$now" --moddate "$now" \
	--pagesize "Letter^T" labels.png \
    && rm labels.png

# saved from:
# history | tail | awk '{$1=""; print}' |\
#           perl -pwle 'chomp;s/^\s+//;' > cp2up.sh
It’s got a few hard-coded assumptions:
input name (document.pdf);
output name (labels-2up.pdf);
accepts exactly two labels (sorry).
Clever people could write code to work around these. Really clever people could modify this to feed a dedicated label printer.
Yes, I could probably have done all this with one ImageMagick command. When ImageMagick’s command line syntax begins to make sense, however, it’s probably time to retire to that remote mountain cabin and write that million-word thesis on a manual typewriter. Also, ImageMagick’s PDF generation is best described as pish.
One of the issues that this script avoids is aliasing in the bar-codes. For reasons known only to the anonymous PDF rendering library used by Canada Post, their shipping bar-codes are stored as smallish (780 × 54 px) bitmaps that are scaled up to a 59 × 19 mm print size. Most PDF viewers (and Adobe Viewer is one of these) will anti-alias scaled images, making them slightly soft. If you’re really unlucky, your printer driver will output these as fuzzy lines that no bar-code scanner could ever read. Rendering them to high resolution mono images may still render the edges a little roughly, but they’ll be crisply rough, and scanners don’t seem to mind that.
fuzzy vs crisply rough: scaled image (top) vs direct-rendered (bottom), at simulated 600 dpi laser print resolution
¹: Debian/Ubuntu’s netpbm package is roughly 20 years out of date for reasons that only a very few nerds care about, and the much better package is blocked by Debian’s baroque and gatekeepery packaging protocol. I usually build it from source for those times I need the new features.
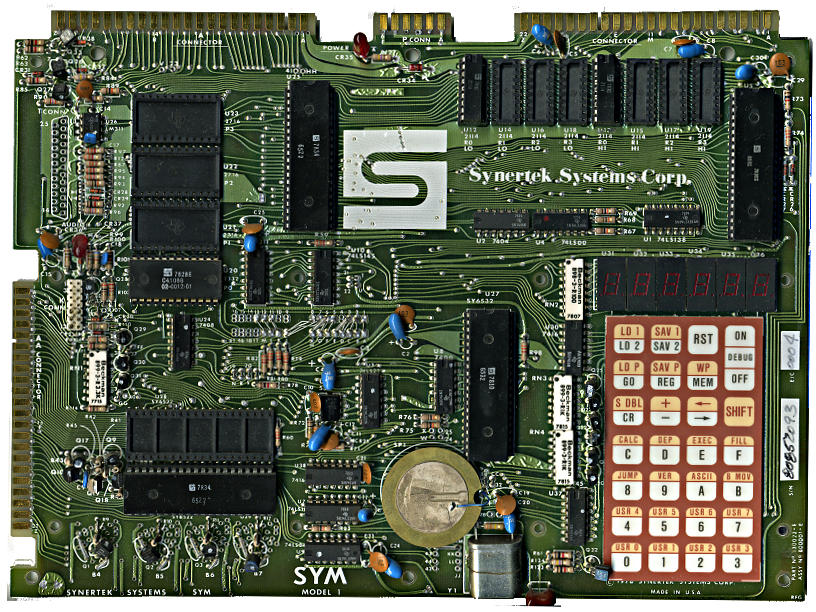
It is good that there are so many scanned manuals for old computer systems out there. Every old system did things its very own special way, and life’s too short to guess. I mean, there’s not much out there on the SYM-1 I’m trying to get working again:
Some manuals, though, while lovingly scanned, are just too large to download, browse or file. Take, for instance, AppleIIScans’ Apple II BASIC Programming With ProDOS. It’s a very faithful colour scan, but at 170 MB for 280 pages, it’s a bit unwieldy. I suspect it’s Adobe Acrobat Paper Capture’s fault: while it makes turning scans into readable files really easy, it doesn’t warn against using 600 dpi full colour for a book with only decorative use of colour.
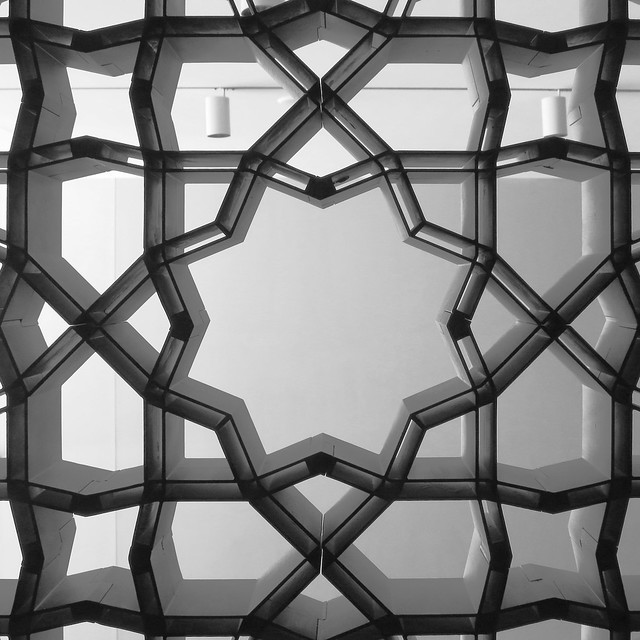
I’m rather pleased with this, as it’s the first pattern I’ve worked out from a real example, a screen in the Aga Khan Museum:
Here’s the pattern as a full page PDF from Inkscape: akm-screen-tiled-strapwork.pdf. The pattern’s not much more than an 8-pointed star with a smaller 8-pointed star inside it, rotated 22½°. But it’s still kinda neat.
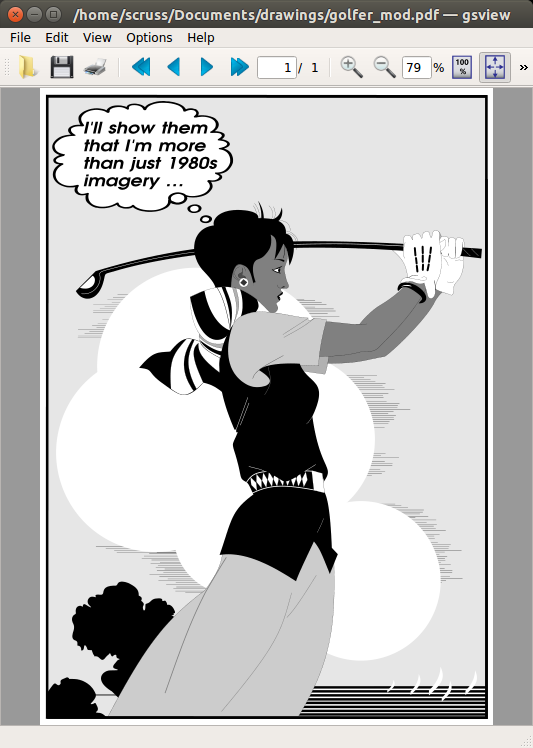
Artifex’s GSView is rather good. It describes itself as ‘a user friendly viewer for Postscript, PDF, XPS, EPUB, CBZ, JPEG, and PNG’, and it sure does those things. It’s currently bundled as Mac, Windows and Linux Intel-only binaries, but maybe we’ll see ARM distribution or source soon enough.
The name confused me a bit. Russell Lang of Ghostgum Software Pty Ltd has maintained a nice Windows-only Ghostscript front end called GSview for years. Note the huge difference in names: Artifex‘s release is GSView 6, while Ghostgum’s is GSview 5. Hmm.
Naming aside, GSView does make it very easy to convert its input files to PDF/A, the ISO standard archival PDF definition that is immune to Adobe’s format meddling. (Adobe have, with Acrobat Reader DC, maintained an unbroken tradition that their latest PDF reader software is more bloated and craptastic than the last.)
PDF/A defines several archival settings such as font embedding and colour management. It’s possible to do this on the Ghostscript command line, but it’s fiddly. GSView just needs you to point it at the colour standard files on your system. On Mac, these live in /System/Library/ColorSync/Profiles/, and in the image below, I’ve picked out the generic ones:
On Linux, these files will likely be somewhere predictable; for me, they are in /usr/share/ghostscript/9.15/iccprofiles/. I made copies in the GSView executable folder so they wouldn’t get lost if my system updates Ghostscript:
The PDF/A files you get can be considerably smaller than the originals. A 10 MB LibreOffice Impress slide deck from a presentation on OpenStreetMap that I gave last week shrunk down to 1.3 MB when saved by GSView, with only very minor JPEG gribblies visible in the slide background. The graphic above (modified from the Ghostscript example file ‘golfer.eps’; yay, Illustrator 1.0!) shrunk by ⅓. These are handy savings, plus you get a standalone archival format that will never change!
Aargh! Ubuntu 16.10 has decided that ImageMagick doesn’t need JPEG 2000 support, and will quietly (and very very wrongly) write JP2s as JPEG.
(NB: JPEG 2000 images still maybe crash Ubuntu’s file browser in 14.10. My old installation didn’t like them, but my reinstall seems quite happy. Go figure.)
JPEG 2000 is a great image file format: well-defined, and able to store high quality photographic data in a very small space. It truly is the JPEG of the 2000s — except for its dismal support under Ubuntu.
The problem is the patents. An open library has been a long time coming, and lots of Linux software is built without JP2 support. This helped keep it away from my desktop.
Under Ubuntu 14.04, here’s what does and doesn’t support JP2 files:
Gimp — not supported. It appears to have a non-functioning plugin that tries to read the file, then gives up. This is annoying, as Gimp is defined as the system default viewer for JPEG 2000.
Image Viewer — does support JP2, but occasionally mis-renders pages. To make this the default, right-click on a JP2 file, and select Open with → Other Application …, then choose Image Viewer. It should work from then onwards.
Document Viewer — a bit rough when looking at JPEG 2000-encoded PDFs. Very slow, too.
GraphicsMagick — seems to be the most painless way of converting graphics files to JPEG 2000. My preferred method of invoking it is: gm convert -define 'jp2:rate=0.008' in.png out.jp2
The rate option should be a small number; the smaller, the greater the compression, and the worse the image quality.
OpenJPEG — provides the image_to_j2k and j2k_to_image tools. Far more picky about input formats than it should be, and often fails on seemingly perfect input.
img2pdf — (built from source) is a tiny gem of a package. All it does is wrap various image formats into a PDF file. It doesn’t modify the image data in any way, so with a bit of ingenuity (and pdftk) you can use PDF as a true metafile archive. You can view the content on any platform, but get the source images out bit-for-bit perfect. We used to call files which could contain files metafiles, but that stopped being popular when TIFF started to be a baroque travesty of an image container back in the mid-1990s.
poppler — (for full features, build from source) has a tool, pdfimages, which can extract embedded image files from PDFs. Some of the metadata might get lost, but all of the image bits come through.
Since JPEG 2000 isn’t included in web browsers (grar), I’ve embedded a sample scanned JPEG into a PDF, and added a series of progressively more compressed JPEG 2000 versions: JPEG-2000Booklet [PDF]. The booklet has notes showing the byte size of each page. The image still looks pretty good at 8% of the original file size!
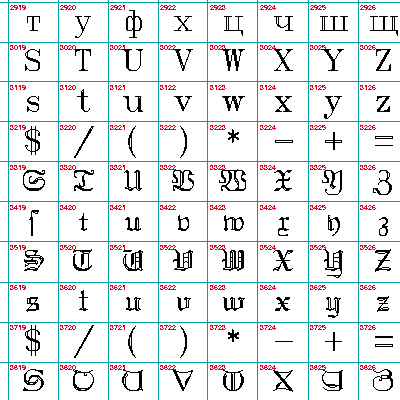
It’s impractically huge, but under the image link lives a table of all of the Hershey fonts (well, the Western ones, at least). It’s interesting to note Dr Hershey’s preferences in this pre-ASCII table: almost every variant has degree, minute and second symbols, but none of them have ‘\’. Many of them don’t have ‘@’, either, so no e-mail addresses in Hershey Fraktur for you …
ICQuestionBank2csv: A tool to extract both the Basic and Advanced Amateur Radio Examination guides from Industry Canada’s rather annoying two-column PDFs. Written for IC’s 2014-02 database updates.
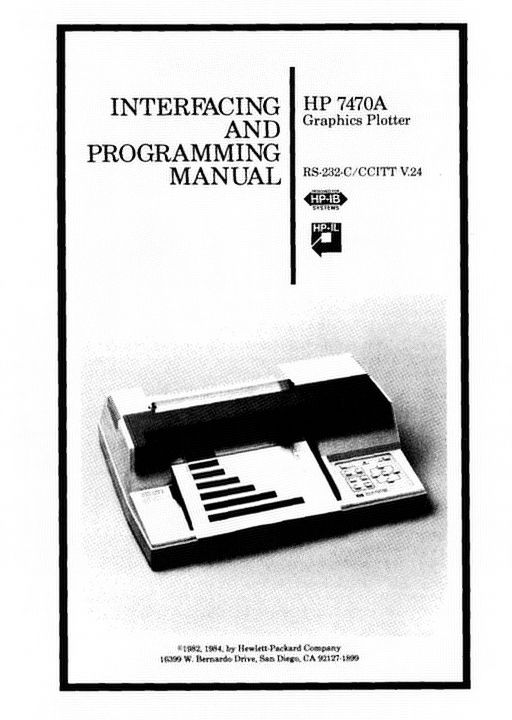
On the off chance you need to control a 30 year old graphics plotter, have I got something for you:
The image links to a scanned copy of the HP 7470A Graphics Plotter: Interfacing and Programming Manual which I found on the web, and cleaned up. The pages have been OCR’d, so it should be searchable.
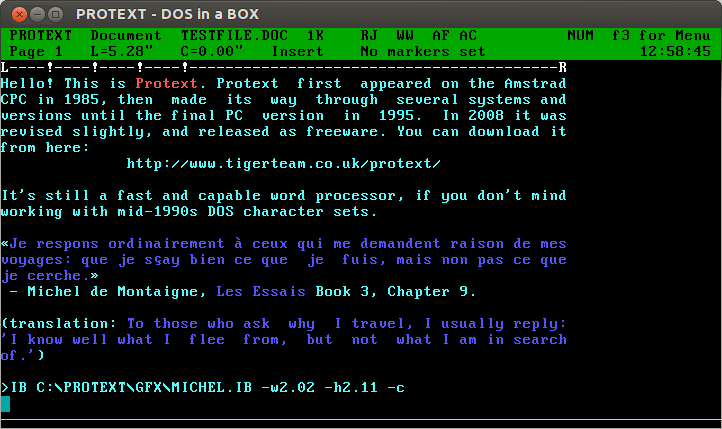
Oh man, Protext! For years, it was all I used: every magazine article, every essay at university (all two of them), my undergraduate dissertation (now mercifully lost to time: The Parametric Design of a Medium Specific Speed Pump Impeller, complete with spline-drawing code in HiSoft BASIC for the Amiga, is unlikely to be of value to anyone these days), letters —you name it, I used Protext for it.
I first had it on 16kB EPROM for the Amstrad CPC464; instant access with |P. I then ran it on the Amiga, snagging a cheap copy direct from the authors at a trade show. I think I had it for the PC, but I don’t really remember my DOS days too well.
The freeware version runs quite nicely under dosemu. You can even get it to print directly to PDF:
In your Linux printer admin, set up a CUPS PDF printer. Anything sent to it will appear as a PDF file in the folder ~/PDF.
Add the following lines to your ~/.dosemurc: $_lpt1 = “lpr -l -P PDF” $_printer_timeout = (20)
In Protext, configure your printer to be a PostScript printer on LPT1:
The results come out not bad at all:
Protext’s file import and export is a bit dated. You can use the CONVERT utility to create RTF, but it assumes Code page 437, so your accents won’t come out right. Adding \ansicpg437 to the end of the first line should make it read okay.
This is how wind turbines were supposed to look, at least in the 1940s. It’s the experimental Smith-Putnam 1.25 MW unit than ran for a short while on a hill near Rutland, VT. The picture’s from a rather falling-apart copy of Large Horizontal-axis Wind Turbines (Thresher, R. W., & Solar Energy Research Institute. (1982). Large horizontal-axis wind turbines: Proceedings of a workshop held in Cleveland, Ohio, July 28-30, 1981. Golden, Colo: Solar Energy Research Institute) that I rescued from Jim‘s recycling years ago.
The first part of these proceedings has a historical review of the Smith-Putnam turbine, including an excerpt from the S. Morgan Smith Company’s house organ on the project. As the rest of the book is pretty much all about the MOD series of turbines, it’s of less interest. I’ve scanned the bits about the Smith-Putnam turbine, and put them here: NASA_DOE-1981-large_horizontal_axis_wind_turbines-excerpt. If anyone wants the book, let me know. It’s very ratty, but readable.
I’ve written about this turbine before, but in relation to a packet of crayons. More awesome turbine pictures from Paul Gipe: Smith-Putnam Industrial Photos.
Here are the complete 1988-vintage Sun manuals “Using NROFF and TROFF†and “Formatting Documents†scanned just for you. I’d scanned these in 2000, and they’d sat on a forgotten archive volume since then.
I don’t often need it, but the code printing facility in the Arduino IDE is very weak. It has some colour highlighting, but no page numbering, no line numbering, and no headers at all.
a2ps will sort you right out here. Years back, it was a simple text to PostScript filter, but now it has many wonderful filters for pretty-printing code. The Wiring/Arduino language is basically C++, and a2ps knows how to deal with that. So, to create a PostScript file with a nice version of the the most basic Blink sketch:
If you’re somewhere that uses sensible paper sizes (in other words, not North America), you probably don’t want the -M letter option. a2ps is supposed to have a PDF print option (-P pdf), but it doesn’t work on my installation, so I just splat the output through ps2pdf. You can’t use the -P «printer» option combined with the -o «file» option, but cups-pdf is your friend if you need to print to a PDF. The results are linked below:
Not bad, eh?
(Update: think I must have written this post on a Mac with a case-insensitive filesystem. Using the --pretty-print='C++' option I had before failed on Linux.)


