awaiting surgery

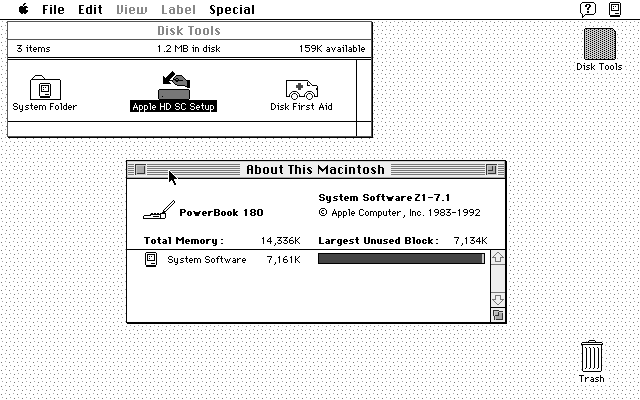
Seems I have two Macintosh PowerBook 180s: one has a dead colour screen but seems to boot fine, and the other (the one screenshotted above; yay ⌘+Shift+3 and enough room on the boot floppy …) has a lovely greyscale screen but a dead hard drive. I suspect we’re going to have to do a head transplant.
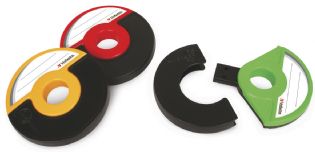
And no, I’m not having ¼-century 68030+68882 wish fulfillment one bit …

Fun things you learn from old computers …

The program on the left is running on the decimal interpreter, the one on the right the regular one

Microsoft used to supply two versions of its BASIC for Macintosh. One used decimal mathematics for precise tallying of small amounts. The other used the more familiar floating point mathematics, rounding errors and all. I don’t know what floating point library Microsoft used for sure — perhaps Motorola’s 32-bit Fast Floating Point system — but it introduces rounding errors pretty quickly. Modern routines don’t start displaying oddly until after 15 decimal places.

Consider this simple program:

10 LET x=36/10
20 LET a$="## #.#"
30 FOR n%=1 TO 18
40 PRINT USING a$; n%; x
50 LET a$=a$+"#"
60 NEXT n%
70 END

Along with the number of decimal places, it should print 3.6, 3.60, 3.600, 3.6000, … with an increasing line of zeroes after the 3.6. Bas makes a valiant but typical attempt:

 1 3.6
 2 3.60
 3 3.600
 4 3.6000
 5 3.60000
 6 3.600000
 7 3.6000000
 8 3.60000000
 9 3.600000000
10 3.6000000000
11 3.60000000000
12 3.600000000000
13 3.6000000000000
14 3.60000000000000
15 3.600000000000000
16 3.6000000000000001
17 3.60000000000000009
18 3.600000000000000089

Oddly enough, good old Locomotive BASIC on the Amstrad CPC does it more correctly somehow:

So the variables, they vary.

Mac to Linux: 1Password to KeePassX

I have too many passwords to remember, so I’ve been using a password manager for years. First there was Keyring for Palm OS, then 1Password on the Mac. 1Password’s a very polished commercial program, but it only has Mac and Windows desktop clients. Sadly, it had to go.

Finding a replacement was tough. It needed to be free, and yet cross-platform. It needed to work on iOS and Android. It also needed to integrate with a cloud service like Dropbox so I could keep my passwords in sync. The only program that met all of these requirements was KeePassX. I’ve stuck with the stable (v 0.4.3) branch rather than the flashy 2.0 version, as the older database format does all I need and is fully portable. MiniKeePass on iOS and KeePassDroid on Android look after my mobile needs. But first, I needed to get my password data out of 1Password.

1Password offers two export formats: a delimited text format (which seemed to drop some of the more obscure fields), and the 1Password Interchange Format (1PIF). The latter is a JSONish format (ಠ_ಠ) containing a dump of all of the internal data structures. There is, of course, no documentation for this file format, because no-one would ever move away from this lovely commercial software, no …

So armed with my favourite swiss army chainsaw, I set about picking the file apart. JSON::XS and Data::Dumper::Simple were invaluable for this process, and pretty soon I had all the fields picked apart that I cared about. I decided to write a converter that wrote KeePassX 1.x XML, since it was readily imported into KeePassX, would could then write a database readable by all of the KeePass variants.

To run this converter you’ll need Perl, the JSON::XS and Data::Dumper::Simple modules, and if your Perl is older than about 5.12, the Time::Piece module (it’s a core module for newer Perls, so you don’t have to install it). Here’s the code:

#!/usr/bin/perl -w
# 1pw2kpxxml.pl - convert 1Password Exchange file to KeePassX XML
# created by scruss on 02013/04/21

use strict;
use JSON::XS;
use HTML::Entities;
use Time::Piece;

# print xml header
print <<HEADER;
<!DOCTYPE KEEPASSX_DATABASE>
<database>
 <group>
  <title>General</title>
  <icon>2</icon>
HEADER

##############################################################
# Field Map
#
# 1Password			KeePassX
# ============================  ==============================
# title        			title
# username			username
# password			password
# location			url
# notesPlain			comment
#    -				icon
# createdAt			creation
#    -				lastaccess	(use updatedAt)
# updatedAt			lastmod
#    -				expire		('Never')

# 1PW exchange files are made of single lines of JSON (O_o)
# interleaved with separators that start '**'
while (<>) {
    next if (/^\*\*/);    # skip separator
    my $rec = decode_json($_);

    # throw out records we don't want:
    #  - 'trashed' entries
    #  -  system.sync.Point entries
    next if ( exists( $rec->{'trashed'} ) );
    next if ( $rec->{'typeName'} eq 'system.sync.Point' );

    print '  <entry>', "\n";    # begin entry

    ################
    # title field
    print '   <title>', xq( $rec->{'title'} ), '</title>', "\n";

    ################
    # username field - can be in one of two places
    my $username = '';

    # 1. check secureContents as array
    foreach ( @{ $rec->{'secureContents'}->{'fields'} } ) {
        if (
            (
                exists( $_->{'designation'} )
                && ( $_->{'designation'} eq 'username' )
            )
          )
        {
            $username = $_->{'value'};
        }
    }

    # 2.  check secureContents as scalar
    if ( $username eq '' ) {
        $username = $rec->{'secureContents'}->{'username'}
          if ( exists( $rec->{'secureContents'}->{'username'} ) );
    }

    print '   <username>', xq($username), '</username>', "\n";

    ################
    # password field - as username
    my $password = '';

    # 1. check secureContents as array
    foreach ( @{ $rec->{'secureContents'}->{'fields'} } ) {
        if (
            (
                exists( $_->{'designation'} )
                && ( $_->{'designation'} eq 'password' )
            )
          )
        {
            $password = $_->{'value'};
        }
    }

    # 2.  check secureContents as scalar
    if ( $password eq '' ) {
        $password = $rec->{'secureContents'}->{'password'}
          if ( exists( $rec->{'secureContents'}->{'password'} ) );
    }

    print '   <password>', xq($password), '</password>', "\n";

    ################
    # url field
    print '   <url>', xq( $rec->{'location'} ), '</url>', "\n";

    ################
    # comment field
    my $comment = '';
    $comment = $rec->{'secureContents'}->{'notesPlain'}
      if ( exists( $rec->{'secureContents'}->{'notesPlain'} ) );
    $comment = xq($comment);    # pre-quote
    $comment =~ s,\\n,<br/>,g;  # replace escaped NL with HTML
    $comment =~ s,\n,<br/>,mg;  # replace NL with HTML
    print '   <comment>', $comment, '</comment>', "\n";

    ################
    # icon field (placeholder)
    print '   <icon>2</icon>', "\n";

    ################
    # creation field
    my $creation = localtime( $rec->{'createdAt'} );
    print '   <creation>', $creation->datetime, '</creation>', "\n";

    ################
    # lastaccess field
    my $lastaccess = localtime( $rec->{'updatedAt'} );
    print '   <lastaccess>', $lastaccess->datetime, '</lastaccess>', "\n";

    ################
    # lastmod field (= lastaccess)
    print '   <lastmod>', $lastaccess->datetime, '</lastmod>', "\n";

    ################
    # expire field (placeholder)
    print '   <expire>Never</expire>', "\n";

    print '  </entry>', "\n";    # end entry
}

# print xml footer
print <<FOOTER;
 </group>
</database>
FOOTER

exit;

sub xq {                         # encode string for XML
    $_ = shift;
    return encode_entities( $_, q/<>&"'/ );
}

To run it,

./1pw2kpxxml.pl data.1pif > data.xml

You can then import data.xml into KeePassX.

Please be careful to delete the 1PIF file and the data.xml once you’ve finished the export/import. These files contain all of your passwords in plain text; if they fell into the wrong hands, it would be a disaster for your online identity. Be careful that none of these files accidentally slip onto backups, too. Also note that, while I think I’m quite a trustworthy bloke, to you, I’m Some Random Guy On The Internet. Check this code accordingly; I don’t warrant it for anything save for looking like line noise.

Now on github: scruss / 1pw2kpxxml, or download: 1pw2kpxxml.zip (gpg signature: 1pw2kpxxml.zip.sig)

SHA1 Checksums:

  • 3c25eb72b2cfe3034ebc2d251869d5333db74592 — 1pw2kpxxml.pl
  • 99b7705ff30a2b157be3cfd29bb1d4f137920c25 — readme.txt
  • de4a51fbe0dd6371b8d68674f71311a67da76812 — 1pw2kpxxml.zip
  • f6bd12e33b927bff6999e9e80506aef53e6a08fa — 1pw2kpxxml.zip.sig.txt

The converter has some limitations:

  • All attached files in the database are lost.
  • All entries are stored under the same folder, with the same icon.
  • It has not been widely tested, and as I’m satisfied with its conversion, it will not be developed further.

Fattery

I’ve had my MacBook for just over three years (just past AppleCare, alas), but recently the trackpad had been acting up. I couldn’t get it to click and drag at all. Opening up the case showed me that the battery was getting a bit, well, tubby — something that apparently happens as Lithium Ion batteries age.

I finally ordered a new one, and it came today. It’s nearly 50% slimmer, and sits flat on the table, unlike the old battery. My trackpad works perfectly again.

Arduino Uno USB invisible to OS X

as posted on the forum:

Just got my Uno after finding semi-permanent projects for two previous Duemilanoves. Upgraded to Arduino 0020. After rebooting, and power cycling the Uno, there’s still no serial port for the Uno.

The board is noted under Linux, which reports an unknown device with ID 2341:0001. On my MacBook (10.6.4), System Profiler lists:
Code:

Communication Device:

  Product ID:	0x0001
  Vendor ID:	0x2341
  Version:	 0.00
  Speed:	Up to 12 Mb/sec
  Location ID:	0x24110000
  Current Available (mA):	500
  Current Required (mA):	Unknown (Device has not been configured) 

There are no /dev/tty* or /dev/cu* devices that correspond to the device.

perhaps a slightly easier way to make SD cards bootable for CHDK under OS X

Now that CHDK has a working beta in the source tree for my Canon PowerShot SD790is, I actually have to prepare SD cards for it. The Bootable SD card – OS X instructions seem a bit contrived, so I took a look at the linux instructions, and modified them accordingly. These instructions should work for FAT16-formatted SD cards of 2GB capacity and under. It will not work for SDHC cards, which are generally formatted to FAT32.

This is all command-line only for here on in. It seems to work. Please note that you will be modifying raw file systems with root permissions here; there is no safety net. If you b0rk your main hard drive, don’t say I didn’t warn you.

Firstly, you’re going to have to find out where the SD card in mounted. Do this with:
df
I got:

Filesystem    512-blocks      Used Available Capacity  Mounted on
/dev/disk0s2   487463200 318749896 168201304    66%    /
devfs                222       222         0   100%    /dev
map -hosts             0         0         0   100%    /net
map auto_home          0         0         0   100%    /home
/dev/disk2s1     3969280      3328   3965952     1%    /Volumes/CANON_DC

There are three important concepts to note when looking at the mounted card:

  1. The mount point (or volume) – in this case /Volumes/CANON_DC. This is the location that you see in Finder when moving files around.
  2. The filesystem – here /dev/disk2s1. This is the partition on the disk, arranged according to a certain formatting scheme like MS-DOS FAT16.
  3. The disk device – which for me is /dev/disk2. This is the disk device itself, and it may contain several filesystems.

Your locations for these three could well be different, so please substitute your values.

You’ll need to unmount the device, as writing to a raw filesystem while the OS thinks it has control often results in hilariously unexpected results. I used the OS X-specific command

diskutil unmount /Volumes/CANON_DC

You should get a message like Volume CANON_DC on disk2s1 unmounted. Now you need to write the boot instruction:

echo -n BOOTDISK | sudo dd bs=1 count=8 seek=64 of=/dev/disk2s1

This will prompt you for your password.

If you need to, you can remount the filesystems on the card with

diskutil mountDisk /dev/disk2

(Note that we used the disk name here, not the filesystem. If there were several partitions on the disk, this command would mount all of them that it could. It’s also kinda handy for remounting USB devices that you’ve accidentally ejected from Finder.)

Update: Knowing a difficulty getting the firmware update method of getting CHDK to work on a Mac? Running a Leopard or newer machine? Then you need to learn all about Apple’s quarantine attribute and how to remove it with xattr: FAQ/Mac – Still having trouble?.

AddressBook 4.0 Help: Importing and exporting vCards

vCard Splitter used to be teh way to split up the huge vCard file that Apple Address book creates. But it doesn’t work under Snow Leopard, but I discovered this tip from Apple: To create multiple vCards at the same time, hold the Option key when dragging multiple cards out of the Address Book window.
To export all your contacts as separate vCards, select them all, hold down ‘Option’, and drag them to a folder in Finder. It would really help if this wasn’t the Desktop folder, unless you like major cleanups …

seq for OS X

It has always irked me that OS X doesn’t have the seq command (I am easily irked). Brian Peterson’s old e-mail Re: seq from core utils has it, but the link to sh-utils doesn’t work any more, since the project has been archived. Here’s the new link: http://ftp.gnu.org/old-gnu/sh-utils/. Compile it as Brian suggested, and all will be well.

$ seq 1 12
1
2
3
4
5
6
7
8
9
10
11
12

Joy!
(at least 99% of you will be mystified why anyone would want this.)

a small form of happiness is

… a USB key with the irritating U3 software uninstalled.

Seriously, U3 is a major annoyance if you:

  • use Mac
  • use Linux
  • work on a PC with locked-down permissions
  • work on a PC with a one-letter drive gap (like having D: and F:, but no E:); U3‘s read-only system will appear in the gap, but your data won’t be accessible.
    (It’s not really U3‘s fault. The fact that Windows still has drive letters amazes me; why don’t they go for the whole 70s thing and have punch cards and gargantuan 5MB hard disk packs?)

All four of the above apply to me, so u3 uninstall.exe is my friend.

All the printers I’ve ever owned …

bird you can see: hp print test

  • An ancient (even in 1985) Centronics serial dot-matrix printer that we never got working with the CPC464. The print head was driven along a rack, and when it hit the right margin, an idler gear was wedged in place, forcing the carriage to return. Crude, noisy but effective.
  • Amstrad DMP-2000. Plasticky but remarkably good 9-pin printer. Had an open-loop ribbon that we used to re-ink with thick oily endorsing ink until the ribbons wore through.
  • NEC Pinwriter P20. A potentially lovely 24-pin printer ruined by a design flaw. Print head pins would get caught in the ribbon, and snap off. It didn’t help that the dealer that sold it to me wouldn’t refund my money, and required gentle persuasion from a lawyer to do so.
  • Kodak-Diconix 300 inkjet printer. I got this to review for Amiga Computing, and the dealer never wanted it back. It used HP ThinkJet print gear which used tiny cartridges that sucked ink like no tomorrow; you could hear the droplets hit the page.
  • HP DeskJet 500. I got this for my MSc thesis. Approximately the shape of Torness nuclear power station (and only slightly smaller), last I heard it was still running.
  • Canon BJ 200. A little mono inkjet printer that ran to 360dpi, or 720 if you had all the time in the world and an unlimited ink budget.
  • Epson Stylus Colour. My first colour printer. It definitely couldn’t print photos very well.
  • HP LaserJet II. Big, heavy, slow, and crackling with ozone, this was retired from Glasgow University. Made the lights dim when it started to print. Came with a clone PostScript cartridge that turned it into the world’s second-slowest PS printer. We did all our Canadian visa paperwork on it.
  • Epson Stylus C80. This one could print photos tolerably well, but the cartridges dried out quickly, runing the quality and making it expensive to run.
  • Okidata OL-410e PS. The world’s slowest PostScript printer. Sold by someone on tortech who should’ve known better (and bought by someone who also should’ve known better), this printer jams on every sheet fed into it due to a damaged paper path. Unusually, it uses an LED imaging system instead of laser xerography, and has a weird open-hopper toner system that makes transporting a part-used print cartridge a hazard.
  • HP LaserJet 4M Plus. With its duplexer and extra paper tray it’s huge and heavy, but it still produces crisp pages after nearly 1,000,000 page impressions. I actually have two of these; one was bought for $99 refurbished, and the other (which doesn’t print nearly so well) was got on eBay for $45, including duplexer and 500-sheet tray. Combining the two (and judiciously adding a bunch of RAM) has given me a monster network printer which lets you know it’s running by dimming the lights from here to Etobicoke.
  • IBM Wheelwriter typewriter/ daisywheel printer. I’ve only ever produced a couple of pages on this, but this is the ultimate letter-quality printer. It also sounds like someone slowly machine-gunning the neighbourhood, so mostly lives under wraps.
  • HP PhotoSmart C5180. It’s a network photo printer/scanner that I bought yesterday. Really does print indistinguishably from photos, and prints direct from memory cards. When first installed, makes an amusing array of howls, boinks, squeals, beeps and sproings as it primes the print heads.

When you really haven’t chosen not to trust: Citrix, Mac OS X, and Entrust certificates

NB: this article is a few years old, and I haven’t tested any updates since I wrote it. It may still work; who knows?

This is one that the support desk of my employer really should’ve answered, but they gave their usual, “You mentioned Macintosh in your e-mail, so this conversation stops here” response.

Anyway, they’ve just upgraded their Citrix access, and what used to work now gives the rather cruddy response:

SSL Error 0: You have not chosen to trust

Just what SSL Error 0: You have not chosen to trust “Entrust.net Secure Server Certification Authority”,the issuer of the server’s security certificate. Error number: 183 is supposed to mean to anyone, I don’t know. (Well, actually, I do know, but in rants like this it’s customary to feign ignorance in a huffy manner. Work with me here, people.)

So, to fix this:

  1. Make sure that Citrix ICA Client is installed
  2. Go to entrust.net/developer and click on Download Root Certificates
  3. Select Personal Use, and click on Download Certificates
  4. Download entrust_ssl_ca.cer and entrust_ssl_ca.der to your desktop
  5. Open a terminal (it’s in Applications/Utilities), and enter the following:
    cd /Applications/Citrix\ ICA\ Client/keystore/cacerts/
    cp -p ~/Desktop/entrust_ssl_ca.* .
    ln -s entrust_ssl_ca.cer entrust_ssl_ca.crt
  6. Exit the terminal, and try your Citrix session again.

There might be some unnecessary steps there, and this might all be fixed by downloading the latest release of the ICA client, but this works for me now.

nostalgia for something that never existed

The Verbatim FlashDisc seems to be a solution without a problem to solve.

verbatim flashdisc

It’s a cheap ($4) but very tiny (16MB) USB memory key in the vague form of some kind of magnetic media. There are problems:

  • $0.25/MB may seem cheap, but it would mean that a 1GB key at this price was $256
  • It neatly blocks most of the USB ports on a machine
  • Just what kind of media is it supposed to be? It looks closest to an old spool of mag-tape, but folks buying this wouldn’t remember that.

Dexit® INSTEAD? No, Dexit is dead

dexit tag

I see that the number of Dexit terminals has reduced to almost nothing, and now they’re offering refunds of outstanding balance. Looks like it’s dead.

I’ve had a love/hate relationship with Dexit. It was almost a great idea, but offered no significant advantage over cash from the bank machine. I wonder how long it will be before you can buy the old terminals in Active Surplus?