elementary OS: could be worse

Imagine there’s a really nicely arranged screenshot of elementary OS here. You know, browser arranged just so, dock showing shiny icons, and a coy little dropdown showing that I’m playing music that’s faaaar hipper than you’ll ever be. Got that image? Good. ‘Cos I just spent a ½-hour setting it up, then deleted it in a second of unthought when I cleaned up the elementary OS VM from VirtualBox. Aargh!

elementary OS is a very pretty Ubuntu/Debian distro. It has a very strong visual identity, and is designed and managed by a very small group. This rigidity may annoy the seasoned Linux user,  but will likely work in a more logical way if you’re used other OSs. You won’t face jarringly mismatched user interface elements, as still happens with Ubunty/Unity. Linux UX allows too much choice, so you’re never sure which options do what at any given time.
(F’rinstance: Ctrl+Q used to quit programs. Now, Ubuntu wants us to use Ctrl+W, the old close-the-window command. Some programs no longer quit with Ctrl+Q, so you’re left with an awksmash of Ctrl+Q_no-I-meant_W. Don’t make me think!)

A couple of things put me off elementary OS:

  1. You can’t put files on the desktop. In an effort to be tidy, eOS forbids you putting the stuff you’re working on in the place you’ll see it. This is a major annoyance, but worse things are coming.
  2. It expects you to pay for it. No, really. They want $10 from you, right from the get-go. While you can get around this (click the “Download” button; it only looks like it’s linked to the payment button), they do something far, far worse:
    They use a PayPal popunder.
    Srsly. Gahh. Eww. Pop-unders are the web equivalent of taking a 💩 on an art gallery floor. If they’re low enough to pull that kind of stunt, who knows what leakage lurks under their pretty graphics?

The HP48: the best calculator ever

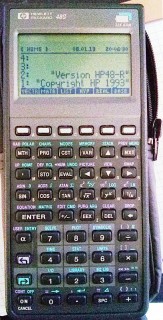
We had an unscheduled overnight stop in East Lansing last week, and I took the chance to visit the MSU Surplus Store.  For $15, they had HP48G calculators, seemingly unused:

hp48gThey still have a bunch of them: HP 48G Graphic Calculator.

They’re maybe not the quickest (the 4 MHz Saturn processor chugs sometimes, and wanders off to clean up memory when it feels like it), the display is downright chunky these days, but they have everything that a scientific calculator should have. The keys have a good action. It just works. Yes, your smartphone has hundreds of times the processing power, but it’s not specialized to the task. The HP48 is.

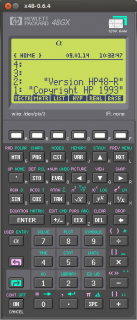
If you’re feeling really nerdy, you can run an HP48 (a GX, not the G which I have) under Linux using x48. Jeff has some useful tips on installing x48 on newer ubuntu versions (though you don’t have to do the font thing under Ubuntu 13.10).

x48Building it is a small matter of ./autogen.sh ; ./configure ; make ; sudo make install.  To run it, you’ll need to install the GX ROM image to ~/.hp48.  The first time you run it, I’d recommend running it from the terminal with:

x48 -connFont -misc-fixed-bold-r-normal--13-120-75-75-c-70-iso8859-16 -smallFont -misc-fixed-bold-r-normal--13-120-75-75-c-70-iso8859-16 -mediumFont -misc-fixed-bold-r-normal--14-130-75-75-c-70-iso8859-16 -largeFont -misc-fixed-bold-r-normal--15-140-75-75-c-90-iso8859-16 -reset -initialize -rom ~/.hp48/rom

as the ROM format has an outdated config file which causes it to complain weakly every time you start the emulator.

Scanned manuals are available from HP and archive.org here: HP 48g User Guide, HP 48g Quick Start Guide.

This is why we still have real calculators…

gnome-calculator fail

This is about scientific notation, and how Gnome Calculator still doesn’t do it correctly.

So I was checking a simple calculation today, and couldn’t find a proper calculator, so I reached for gnome-calculator on the desktop. That was a mistake.

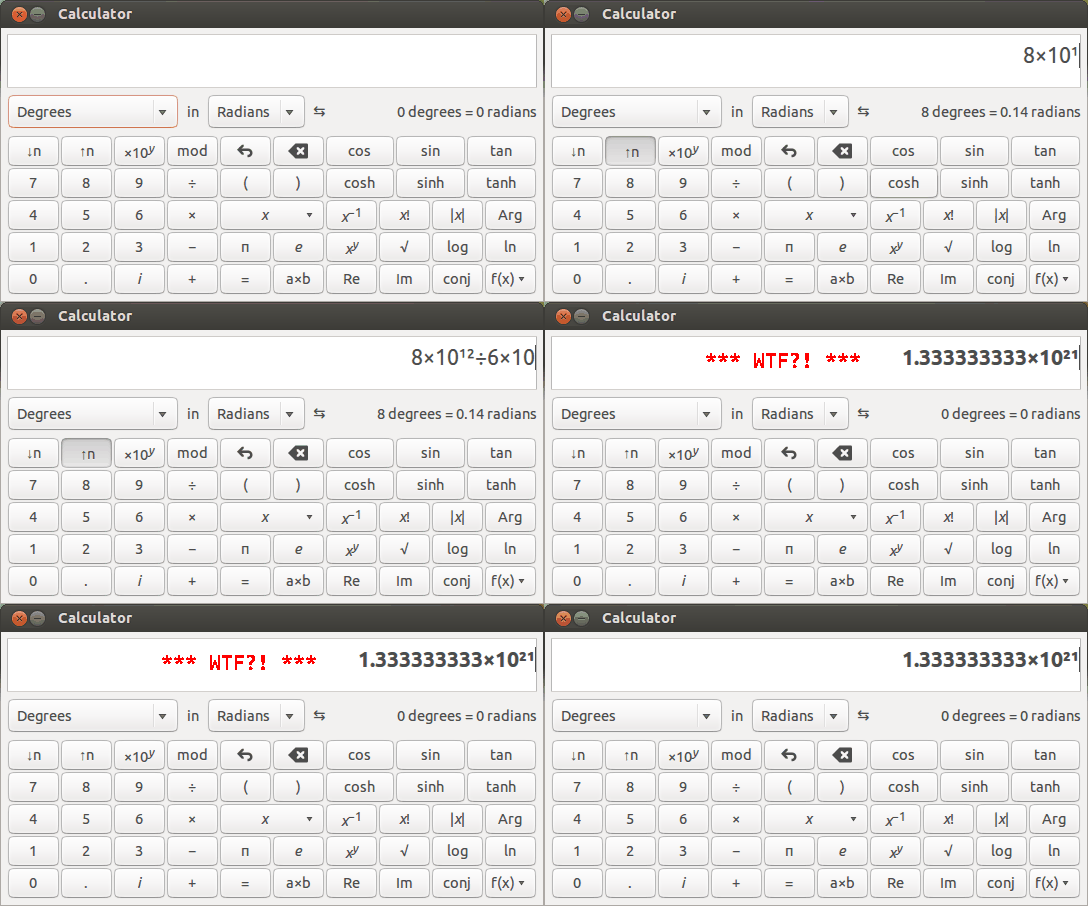
It seems to think that

8×10¹²÷6×10⁹

comes to

1.333333333×10²¹

which is not correct. It would, if I’d  typed it as:

8×1×10¹²÷6×1×10⁹

You can only get the right answer (1333.333…) if you type

(8×10¹²)÷(6×10⁹)

so it’s clear that gnome-calculator isn’t apply the right exponentiation operator precedence when you hit ‘×10y’. It would have been so much better if gnome-calculator supported ‘E’ scientific notation (1.333E21 for 1.333×10²¹).

A bug is filed, but I don’t think I trust it any more. I’m looking at having a proper calculator again, or maybe invest in one of the delightful tiny HP clones from SwissMicros.com.

HP 49G

Almost forgot that I had a barely-used HP 49G in the cupboard. It was barely used because the thing eats AAA batteries. Who knew that Dollarama would have a pair of NiMH AAAs for only $2?

Update, 2021: Use galculator instead. It does the right thing, and supports RPN like a calculator should. You don’t need to remember any precedence rules when you have The Truth.

A (mostly) colour-managed workflow for Linux for not too many $$$

Colour management is good. It means that what I see on the screen is what you meant it to look like, and anything I make with a colour-managed workflow you’ll see in the colours I meant it to have. (Mostly.) You can spend a lot of money to do this professionally, but you can also get most of the benefits for about $125, if you’re prepared to do some fiddly stuff.

The most important part is calibrating your display. Hughski’s ColorHug (which I’ve mentioned before) is as close to plug-and-play as you’ll get: plug it in, and the colour management software pops up with prompts on what to do next. Attach the ColorHug to the screen (with the newly supplied stretchy band), let it burble away for 10–20 minutes, and the next time you log in, colours will be just right.

Calibrating the scanner on my Epson WorkForce WF-7520 was much more work, and the process could use optimization. To calibrate any scanner, you need a physical colour target to scan and compare against reference data. The cheapest place to get these (unless there was one in the box with your scanner) is Wolf Faust’s Affordable IT 8.7 (ISO 12641) Scanner Colour Calibration Targets. If there are a bunch of likeminded folk in your area, it’s definitely worth clubbing together on a group buy to save on shipping. It’s also less work for Wolf, since he doesn’t have to send out so many little packages.

(I’ve known of Wolf Faust since my Amiga days. He produced the most glorious drivers for Canon printers, and Jeff Walker produced the camera-ready copy for JAM using Wolf’s code. While Macs had the high end DTP sewn up back then, you could do amazing things on a budget with an Amiga.)

colour targetThe target comes packed in a protective sleeve, and along with a CD-R containing the calibration data which matches the print run of the target. Wolf makes a lot of targets for OEMs, and cost savings from his volume clients allow him to sell to individuals cheaply.

Scanning the thing without introducing automatic image corrections was the hard part. I found that my scanner had two drivers (epson2 and epkowa), the latter of which claimed to support 48-bit scanning. Unfortunately, it only supports 24-bit, like the epson2 driver, so whichever I chose was moot. I used the scanimage command line tool to make the scan:

scanimage --mode Color -x 175 -y 125 --format=tiff --resolution 300 > Epson-Workforce_WF-7520-WFaust-R1.tiff

which looks, when reduced down to web resolution, a bit like this:
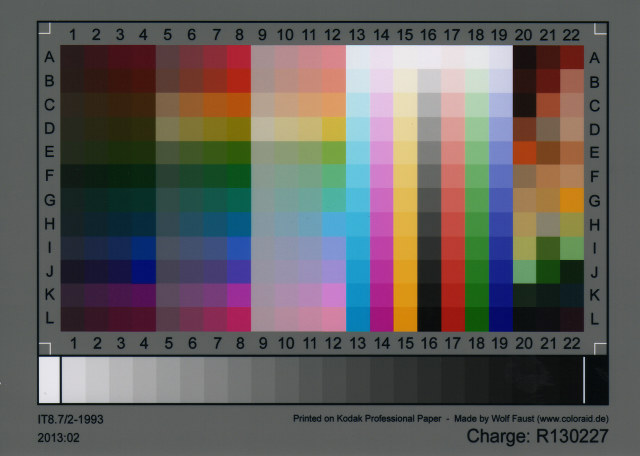
Epson-Workforce_WF-7520-WFaust-R1It looks a lot darker than the physical target, so it’s clear that the scanner needs calibrating. To do this, you need two tools from the Argyll Colour Management System. The first creates a text representation of the scanned target’s colour patches:

scanin -v Epson-Workforce_WF-7520-WFaust-R1.tiff /usr/share/color/argyll/ref/it8.cht IT87/r130227.txt diag.tiff

The result is a smallish text file Epson-Workforce_WF-7520-WFaust-R1.ti3 which needs one more step to make a standard ICC profile:

colprof -A Epson -M 'Workforce WF-7520' -D 'WFaust R1' -ax -qm Epson-Workforce_WF-7520-WFaust-R1

I didn’t quite need to add that much metadata, but I could, so I did. The resultant ICC file can be used to apply colour calibrations to scanned images. Here’s the target scan, corrected:
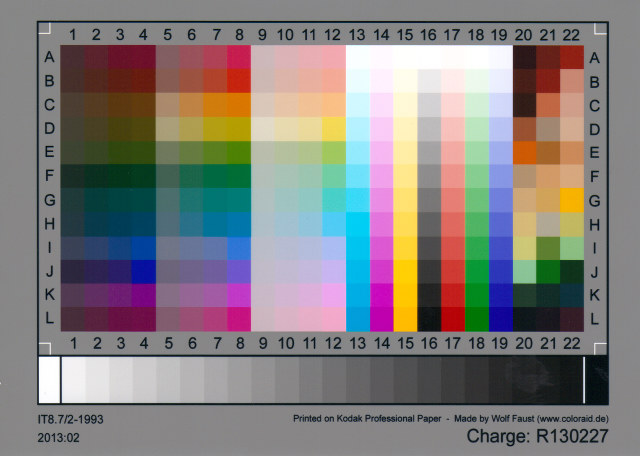
Epson-Workforce_WF-7520-WFaust-R1-corrected

(I’ve made this a mouseover with the original image, so you can see the difference. Also, yes, there is a greasy thumb-print on my scanner glass near the bottom right, thank you so much for noticing.)

I used tifficc from the Little CMS package to apply the colour correction:

tifficc -v -i Epson-Workforce_WF-7520-WFaust-R1.icc Epson-Workforce_WF-7520-WFaust-R1.tiff Epson-Workforce_WF-7520-WFaust-R1-corrected.tiff

There are probably many easier, quicker ways of doing this, but this was the first thing I found that worked.

To show you a real example, here’s an un-retouched scan of the cover of Algrove Publishing‘s book “All the Knots You Need”, scanned at 75 dpi. Mouseover to see the corrected version:

all-the-knots-you-need_algrove

(Incidentally, there are two old but well-linked programs that are out there that purport to do scanner calibration: Scarse and LPROF. Don’t use them! They’re really hard to build on modern systems, and the Argyll tools work well.)

The last part of my workflow that remains uncalibrated is my printer. I could make a target with Argyll, print it, scan it, colour correct it, then use that as the input to colprof as above. I’m suspecting the results would be mediocre, as my scanner’s bit depth isn’t great, and I’d have to do this process for every paper and print setting combination. I’d also have to work out what magic CUPS does and compensate. Maybe later, but not yet.
fixing firefox’s fugly fonts on Ubuntu

Update 2015-09: Better yet, install Infinality. It makes font rendering pretty.


Switching back to Linux from Mac is still a process of ironing out minor wrinkles. Take, for example, this abomination (enlarged to show texture):—

Screenshot from 2013-05-19 11:42:18

… No, I’m not talking about Mr Paul’s antics (or the typo in the TP post, either), but the horrid non-matching ligatures (‘attack’, ‘flubbed’, ‘targeting’) in a sea of blocky text. Almost every programme I was running had this problem. Mouse over the image to see how it could look if you apply this easy fix.

Create (or edit) the file ~/.fonts.conf ~/.config/fontconfig/conf.d, and add the following lines:

<match target="font" >
  <edit name="embeddedbitmap" mode="assign">
    <bool>false</bool>
  </edit>
</match>

Log out, log back in again, and text is properly pretty. Yay!

Ubuntu on the Samsung Series 7

My Late 2008 MacBook was getting a little slow, so I went laptop shopping. I ended up with the Samsung Chronos 7 (NP700Z5CH). Under my budget, but met my spec in every way.

Installing Ubuntu was a minor trial, but it works, and has preserved the Win 8 (blecch!) dual-boot. If it helps anyone, the procedure I followed was:

  • Updated the BIOS, made a recovery DVD and shrank the Windows partition using the DISKPART app (which reminds me so much of the old VMS admin tools).
  • Broadly following the UEFI instructions, I got the 64-bit Linux-Secure-Remix ISO and wrote it to a USB stick with UNetbootin.
  • In the BIOS (F2 when the Samsung logo shows), I disabled Secure Boot and Fast Boot, but kept EFI on, as Win8 won’t work without it. I also disabled (temporarily, with Shift+1) the HD and Windows Boot Manager from the boot sequence, moving USB boot up to first place.
  • After trying Ubuntu from the LiveUSB, I installed it. Once it had finished and rebooted, I re-enabled HD and Windows Boot Manager in the BIOS.
  • Ubuntu would work fine from here, but to restore Win8 to a usable (?) state, I had to reboot with the LiveUSB image and run Boot-Repair as suggested in the UEFI documentation.

The fan maybe runs a little more than it should, but everything I’ve tried works. There’s clearly been a lot of work done on Samsung/UEFI support recently, as any of the web tutorials I found from even 8 months ago recommended really arcane stuff I didn’t actually need.

(abstracted from my Reddit query: Linux-friendly future-proof MacBook replacement [13-15″, CA, $1600] : SuggestALaptop)

Running X11-Basic (almost perfectly) on Raspberry Pi

Update: Markus Hoffmann uploaded a new version of X11Basic-1.20.tar.gz to SourceForge that addresses most of these problems. I’ve edited the article to remove the obsolete bits.


More than 20 years ago, I really liked GFA-Basic. It ran blindingly fast on the Atari ST, and when it didn’t crash on the Amiga, it ran blindingly fast there too. I even wrote a review of it for comp.sys.amiga.programmer, which you can read to this day in all its textual glory. One of the e-mail addresses in that article still works, too.

I still sometimes think in BASIC, and there is much wringing of hands (not by me, really) that there isn’t a good interpreter for Raspbian on the Raspberry Pi. So when I found X11-Basic — a cross-platform GFA-Basic-like system — I had to take a look.

While I have managed to get X11-Basic demos to run, I have to say it’s not running super well. I’ll show you how to install X11-Basic 1.20 and get it (mostly) running, but it’s a bit rough on the ARM. Incidentally, these instructions also work on Ubuntu 12.mumble LTS on x86.

First, you need to install some (okay, a lot of) packages:

sudo apt-get install libreadline-dev tcsh libncurses5-dev xutils-dev libc6-dev libsdl1.2-dev libtool

Now download and extract the package:

tar xvzf X11Basic-1.20.tar.gz
cd X11Basic-1.20

For X11Basic-1.20, you have to issue an extra command before the standard ‘./configure ; make ; make install‘ sequence:

sudo mkdir -p /usr/local/share/man/man1
./configure
make
sudo make install

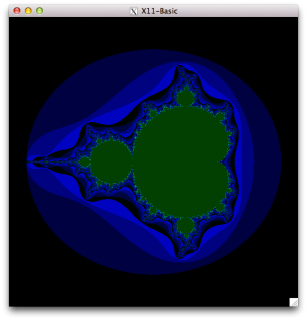
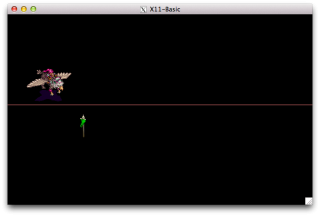
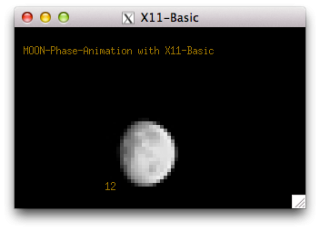
This is enough to make a working xbasic interpreter. I made some screenshots of some of the graphics demos —

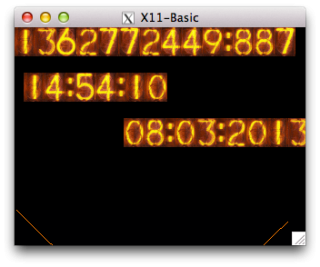
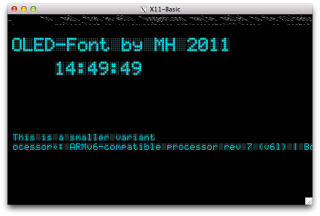
Screen Shot 2013-03-08 at 16.34.51 Screen Shot 2013-03-08 at 14.59.37 Screen Shot 2013-03-08 at 14.57.21 Screen Shot 2013-03-08 at 14.54.08 Screen Shot 2013-03-08 at 14.49.48As you can see, there’s some screen corruption, but most demos just worked. Incidentally, the Mandelbrot one took almost 1¼ hours to run. Took me right back, that did (or it would have, if I hadn’t been outside bombing about in the slush on my bicycle while it churned away).

In order to see just how fast the interpreter is, I ran the formerly fearsome Personal Computer World Benchmark #8 under X11-Basic. PCW#8 used to bring 8-bit home computers to their knees, typically taking more than a minute to run. Here’s the code, indented a bit and with a timing wrapper added:

	LET start=TIMER
	LET K=0
L30:
	LET K=K+1
	LET A=K^2
	LET B=LN(K)
	LET C=SIN(K)
	IF K<1000
		GOTO L30
	ENDIF
	PRINT TIMER-start
	QUIT

(yeah, GFA-style BASIC isn’t too pretty …)

It takes about ¼s to run. The old BBC B was supposed to take about 50s. By comparison, X11-Basic on a manky old dual-core Atom took 0.04s.

The native compiler xbc seems to work. To make a standalone binary of the above code, you do:

xbc -o PCWBenchmark PCWBenchmark.xbas

The compiled binary runs roughly twice as fast as the interpreted code. Not blazing fast, but a useful increase.

Unfortunately, the bytecode compiler xbbc doesn’t actually do anything on the Raspberry Pi yet. So here I leave it up to you to play with X11-Basic, and see what it can and can’t do.

JT65 on Ubuntu, finally

I’d been trying to get JT65 to work in Ubuntu for a long time. K1JT’s package is fiddly to set up, and the version in the repositories is ancient. I’d had minor success with the Windows version of JT65-HF under Wine, but it wasn’t very stable, and any attempt to switch programs (something I, Capt. Micro-Attention-Span, do a lot) caused it to crash.

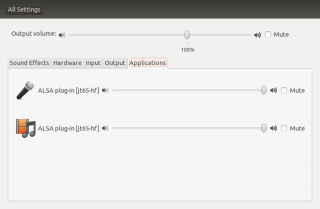
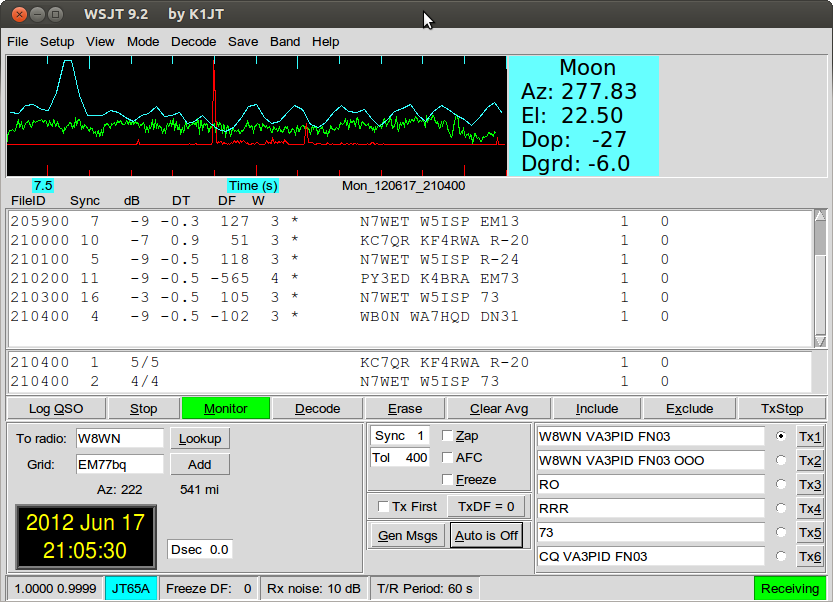
Thankfully, I found W6CQZ’s compiled version for Linux, which installed and ran almost without hitch. What you need to do is make your rig’s audio interface the default sound card, and then JT65-HF should pick up the interface and use it straight off:

That’s gnome-control-center confirming that JT65-HF is using the sound device. You do have to be a bit careful not to send computer audio across the airwaves when you do this, though.

The one good thing that is built into Ubuntu is that you don’t have to worry about clock synch like you do on Windows. Ubuntu pretty much keeps the system clock on perfect time, and Jt65 expects everyone to be synchronized. Doing this on Windows is much harder than it needs to be.

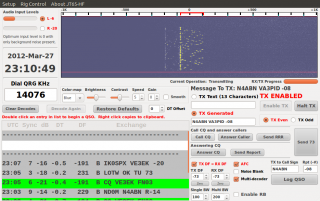
It’s a great mode. This is how I was heard earlier this evening:

They heard me in Australia, on 12W!

Update, 2012-06-17: W6CQZ’s binary won’t run under Ubuntu 12.04 LTS, so I had to bite the bullet and build from source. I grabbed the SVN repository, and followed M1GEO’s instructions Compiling WSPR. It’s still fiddly to choose which audio device (I use Pulse, and can use the same number for both input and output). See, lookit; signals!


SSTV is go (sorta)

Luc gave a really good introductory talk about SSTV last night at the radio club. I’d had no luck at all running qsstv on this Ubuntu box, so I thought I’d try MMSSTV under Wine … and it worked!

I picked this image up from N5HIC on 14.230 MHz. Sure, I need to fix the sync, so my images aren’t slanted. I also don’t seem to be able to transmit, since it fails with a “Can’t open sound card (3)” error. But it’s a start!

ffms2m3u.sh – create playlist for all files on a Firefly Media Server

ffms2m3u – create playlist for all files on a Firefly Media Server.

If you run Firefly Media Server, you can run this script to create an M3U of all the tracks on your server. You can play this in most audio players; VLC likes it, as does iTunes (though big playlists take an age to load). Rhythmbox and the default Ubuntu Movie Player won’t touch my playlist of over 17,000 tracks.

To configure the script you need to edit three lines:


# where the Firefly database lives
DATABASE="/usr/var/cache/mt-daapd/songs3.db"
# server domain name or IP address
SERVER="server.example.com"
# Port to talk to server - don't leave blank
PORT="3689"

If you’re running Ubuntu, you’ll probably only need to change the SERVER line. It spits the M3U playlist, ordered by album, to stdout. Note that in the default Ubuntu install, regular users can’t read the database file.

If you’re running this from a cron job, it’s probably a good idea to fill in the real paths for sqlite3 and awk.

ripping dvd audio with Ubuntu

With more than a little help from How to Rip DVD audio to mp3 or ogg — Ubuntu Geek, here’s how I’d rip audio from a DVD:
for f in $(seq 1 12)
do
transcode -i /dev/sr1 -x null,dvd -T 1,$f,1 -N 0x1 -y null,wav -m $(printf "%02d" $f).wav
done

Your track count and device name will vary. You’ll note that I caved, and used the annoying $(…) syntax instead of good old-fashioned backticks (which some youngsters will claim are deprecated, but I claim as job security). WordPress munges those badly, so we’re stuck with the ugly.
You could use livemp3 to convert to mp3s (if I remembered to upload the version that handles wav files) under controlled circumstances.

how to fix the annoying Ubuntu/Debian XML::SAX install problems

Debian and its derived distributions have a policy about packages not being able to modify the configuration of other packages. While this might generally seem like a good idea, for the TIMTOWTDI world of Perl, this causes problems.

The problem arises if you have installed Perl XML modules from both CPAN and the Debian (or Ubuntu, or whatever) repositories. Debian’s modifications subtly break the XML::SAX module, on which most Perl XML modules (including the brilliant XML::Simple) depend. If you’ve been naughty and used a module from CPAN, Debian gets its knickers in a knot, and won’t configure or run anything remotely related to libxml-sax-perl.

If you get the error Can’t locate object method “save_parsers_debian” via package “XML::SAX” at /usr/bin/update-perl-sax-parsers line 90, your system is affected. You might get the clue that any of your Perl XML handlers freak out and fail in weird ways.

Here’s a method (there’s always more than one, of course)  to fix it. This was combined from a couple of sources, each of which was on the right track but didn’t entirely work. Actually, the first might’ve been right on the money, but my hiragana’s a bit ropey …

  1. make sure you’ve got your system up to date with apt-get or aptitude.
  2. sudo cpan CPANPLUS (this will ask you lots of questions, to which you should almost always answer with the default)
  3. sudo cpanp -u XML::SAX (this takes quite a while, and produces no output for most of it)
  4. LC_ALL=C sudo apt-get install --reinstall libxml-sax-perl (the LC_ALL=C might not be strictly necessary, but it worked for me)

You must remember never to pretend to be smarter than the Debian maintainers, and suitably chastened, may now return to your normal OpenSSH patching activities …

mind you

I did just upgrade my server from the previous version of Ubuntu LTS to 8.04 LTS, and it went without a glitch. I had to edit one config file, and it’s all running smoothly.

my only gripe with the heron

I’m quite happy with Ubuntu. If a user didn’t have to be tied into specific, Windows-only applications, I’d recommend it. It’s stable, fast, intuitive and pretty.

My one annoyance is what the latest release has done to CD/DVD drive naming. In the past, my machine’s first DVD drive was hda. For no reason whatsoever, Ubuntu decide to call it sr0. Similarly, the drive’s name for command-line tools now has a different specification.So all my applications need to be told where the drives are; a pain.

Maybe I’ve been at this too long – I still like to use applications that I can see what’s running in the background, so I use grip over gstreamer (mainly because, unless you’re using lame, I’m not listening to your mp3s),  cdrdao over (whatever the young kids are using today to burn gapless audio). At the very least, I would have liked to get a summary of changes when I upgraded Ubuntu. Better still, I’d have liked a list of reasons for the changes. Unless my CD/DVD drive is now faster and more secure, why change?

need for speed

If you are finding your Ubuntu upgrade slow, I found it worth changing my default download server. Under System -> Administration -> Software Sources you can choose a new server. It has a Choose Best Server test, which pings all 185 Ubuntu download servers and picks the best one for you.

The default Canadian server is swamped at the moment, but the good people at Rochester Institute of Technology are the fastest for me.

not-so-smart meter

We got our smart meter installed today. Unfortunately, Catherine didn’t quite understand why there was a knock on the door, then her computer went beeeeyyooooww … then all our clocks caught the <blink> tag.

While I like smart meters, this one isn’t quite as smart as it could be. To me, a smart meter needs to have a big display of your current demand, and needs to be inscribed with a suitable message like “Quit using so much juice, you cretin!” It also needs to hook into local time-of-use pricing, which me being  green and a Bullfrog customer and all, I don’t get to take part in. Boo.

But what could have really gone sideways was my own desktop, which was quietly chugging away installing Ubuntu 7.10. Since I started using Linux in 1995, I don’t think I’ve ever had a system upgrade go totally smoothly. This time, though, I was lucky – the system must have fully initialised before we lost power.

I can’t honestly say I see any difference between Feisty Fawn and Gutsy Gibbon; they both are fairly pretty, and just work.