Mac to Linux: 1Password to KeePassX

I have too many passwords to remember, so I’ve been using a password manager for years. First there was Keyring for Palm OS, then 1Password on the Mac. 1Password’s a very polished commercial program, but it only has Mac and Windows desktop clients. Sadly, it had to go.

Finding a replacement was tough. It needed to be free, and yet cross-platform. It needed to work on iOS and Android. It also needed to integrate with a cloud service like Dropbox so I could keep my passwords in sync. The only program that met all of these requirements was KeePassX. I’ve stuck with the stable (v 0.4.3) branch rather than the flashy 2.0 version, as the older database format does all I need and is fully portable. MiniKeePass on iOS and KeePassDroid on Android look after my mobile needs. But first, I needed to get my password data out of 1Password.

1Password offers two export formats: a delimited text format (which seemed to drop some of the more obscure fields), and the 1Password Interchange Format (1PIF). The latter is a JSONish format (ಠ_ಠ) containing a dump of all of the internal data structures. There is, of course, no documentation for this file format, because no-one would ever move away from this lovely commercial software, no …

So armed with my favourite swiss army chainsaw, I set about picking the file apart. JSON::XS and Data::Dumper::Simple were invaluable for this process, and pretty soon I had all the fields picked apart that I cared about. I decided to write a converter that wrote KeePassX 1.x XML, since it was readily imported into KeePassX, would could then write a database readable by all of the KeePass variants.

To run this converter you’ll need Perl, the JSON::XS and Data::Dumper::Simple modules, and if your Perl is older than about 5.12, the Time::Piece module (it’s a core module for newer Perls, so you don’t have to install it). Here’s the code:

#!/usr/bin/perl -w
# 1pw2kpxxml.pl - convert 1Password Exchange file to KeePassX XML
# created by scruss on 02013/04/21

use strict;
use JSON::XS;
use HTML::Entities;
use Time::Piece;

# print xml header
print <<HEADER;
<!DOCTYPE KEEPASSX_DATABASE>
<database>
 <group>
  <title>General</title>
  <icon>2</icon>
HEADER

##############################################################
# Field Map
#
# 1Password			KeePassX
# ============================  ==============================
# title        			title
# username			username
# password			password
# location			url
# notesPlain			comment
#    -				icon
# createdAt			creation
#    -				lastaccess	(use updatedAt)
# updatedAt			lastmod
#    -				expire		('Never')

# 1PW exchange files are made of single lines of JSON (O_o)
# interleaved with separators that start '**'
while (<>) {
    next if (/^\*\*/);    # skip separator
    my $rec = decode_json($_);

    # throw out records we don't want:
    #  - 'trashed' entries
    #  -  system.sync.Point entries
    next if ( exists( $rec->{'trashed'} ) );
    next if ( $rec->{'typeName'} eq 'system.sync.Point' );

    print '  <entry>', "\n";    # begin entry

    ################
    # title field
    print '   <title>', xq( $rec->{'title'} ), '</title>', "\n";

    ################
    # username field - can be in one of two places
    my $username = '';

    # 1. check secureContents as array
    foreach ( @{ $rec->{'secureContents'}->{'fields'} } ) {
        if (
            (
                exists( $_->{'designation'} )
                && ( $_->{'designation'} eq 'username' )
            )
          )
        {
            $username = $_->{'value'};
        }
    }

    # 2.  check secureContents as scalar
    if ( $username eq '' ) {
        $username = $rec->{'secureContents'}->{'username'}
          if ( exists( $rec->{'secureContents'}->{'username'} ) );
    }

    print '   <username>', xq($username), '</username>', "\n";

    ################
    # password field - as username
    my $password = '';

    # 1. check secureContents as array
    foreach ( @{ $rec->{'secureContents'}->{'fields'} } ) {
        if (
            (
                exists( $_->{'designation'} )
                && ( $_->{'designation'} eq 'password' )
            )
          )
        {
            $password = $_->{'value'};
        }
    }

    # 2.  check secureContents as scalar
    if ( $password eq '' ) {
        $password = $rec->{'secureContents'}->{'password'}
          if ( exists( $rec->{'secureContents'}->{'password'} ) );
    }

    print '   <password>', xq($password), '</password>', "\n";

    ################
    # url field
    print '   <url>', xq( $rec->{'location'} ), '</url>', "\n";

    ################
    # comment field
    my $comment = '';
    $comment = $rec->{'secureContents'}->{'notesPlain'}
      if ( exists( $rec->{'secureContents'}->{'notesPlain'} ) );
    $comment = xq($comment);    # pre-quote
    $comment =~ s,\\n,<br/>,g;  # replace escaped NL with HTML
    $comment =~ s,\n,<br/>,mg;  # replace NL with HTML
    print '   <comment>', $comment, '</comment>', "\n";

    ################
    # icon field (placeholder)
    print '   <icon>2</icon>', "\n";

    ################
    # creation field
    my $creation = localtime( $rec->{'createdAt'} );
    print '   <creation>', $creation->datetime, '</creation>', "\n";

    ################
    # lastaccess field
    my $lastaccess = localtime( $rec->{'updatedAt'} );
    print '   <lastaccess>', $lastaccess->datetime, '</lastaccess>', "\n";

    ################
    # lastmod field (= lastaccess)
    print '   <lastmod>', $lastaccess->datetime, '</lastmod>', "\n";

    ################
    # expire field (placeholder)
    print '   <expire>Never</expire>', "\n";

    print '  </entry>', "\n";    # end entry
}

# print xml footer
print <<FOOTER;
 </group>
</database>
FOOTER

exit;

sub xq {                         # encode string for XML
    $_ = shift;
    return encode_entities( $_, q/<>&"'/ );
}

To run it,

./1pw2kpxxml.pl data.1pif > data.xml

You can then import data.xml into KeePassX.

Please be careful to delete the 1PIF file and the data.xml once you’ve finished the export/import. These files contain all of your passwords in plain text; if they fell into the wrong hands, it would be a disaster for your online identity. Be careful that none of these files accidentally slip onto backups, too. Also note that, while I think I’m quite a trustworthy bloke, to you, I’m Some Random Guy On The Internet. Check this code accordingly; I don’t warrant it for anything save for looking like line noise.

Now on github: scruss / 1pw2kpxxml, or download: 1pw2kpxxml.zip (gpg signature: 1pw2kpxxml.zip.sig)

SHA1 Checksums:

  • 3c25eb72b2cfe3034ebc2d251869d5333db74592 — 1pw2kpxxml.pl
  • 99b7705ff30a2b157be3cfd29bb1d4f137920c25 — readme.txt
  • de4a51fbe0dd6371b8d68674f71311a67da76812 — 1pw2kpxxml.zip
  • f6bd12e33b927bff6999e9e80506aef53e6a08fa — 1pw2kpxxml.zip.sig.txt

The converter has some limitations:

  • All attached files in the database are lost.
  • All entries are stored under the same folder, with the same icon.
  • It has not been widely tested, and as I’m satisfied with its conversion, it will not be developed further.

Ubuntu on the Samsung Series 7

My Late 2008 MacBook was getting a little slow, so I went laptop shopping. I ended up with the Samsung Chronos 7 (NP700Z5CH). Under my budget, but met my spec in every way.

Installing Ubuntu was a minor trial, but it works, and has preserved the Win 8 (blecch!) dual-boot. If it helps anyone, the procedure I followed was:

  • Updated the BIOS, made a recovery DVD and shrank the Windows partition using the DISKPART app (which reminds me so much of the old VMS admin tools).
  • Broadly following the UEFI instructions, I got the 64-bit Linux-Secure-Remix ISO and wrote it to a USB stick with UNetbootin.
  • In the BIOS (F2 when the Samsung logo shows), I disabled Secure Boot and Fast Boot, but kept EFI on, as Win8 won’t work without it. I also disabled (temporarily, with Shift+1) the HD and Windows Boot Manager from the boot sequence, moving USB boot up to first place.
  • After trying Ubuntu from the LiveUSB, I installed it. Once it had finished and rebooted, I re-enabled HD and Windows Boot Manager in the BIOS.
  • Ubuntu would work fine from here, but to restore Win8 to a usable (?) state, I had to reboot with the LiveUSB image and run Boot-Repair as suggested in the UEFI documentation.

The fan maybe runs a little more than it should, but everything I’ve tried works. There’s clearly been a lot of work done on Samsung/UEFI support recently, as any of the web tutorials I found from even 8 months ago recommended really arcane stuff I didn’t actually need.

(abstracted from my Reddit query: Linux-friendly future-proof MacBook replacement [13-15″, CA, $1600] : SuggestALaptop)

X10 home automation with Raspberry Pi: heyu

I never quite get the hang of setting timers for lights. Either I forget daylight savings completely, or I set something so general that I find the lights coming on mid-afternoon when it’s still light. Minor annoyances require the over-application of technology, and fast!

I scored an X10 ActiveHome Starter Kit for cheap(ish) on eBay. X10 is a pretty old technology (1970s! Scottish!) and has some severe limitations (slow! prone to interference! unencrypted!) but has a large user base, and did I mention it’s pretty cheap?

The key component of a computer controlled X10 system is the CM11 computer interface. It takes serial commands from a computer, and pushes them out (slowly) as signals modulated over your house wiring. Various plug-in modules pick up these signals, and if the device address in the command matches that of the module, the module turns on (or off, or dims).

Since the version of the CM11 interface that I have is serial, I’ll need a USB→Serial converter. All I had lying around was a very old Prolific PL2303 interface, which works fine with Raspbian, but I’d prefer an FTDI one for more reliability. Long-term stability of USB Serial on the Raspberry Pi is currently questionable; there’s some good discussion on kernel parameters that might help.

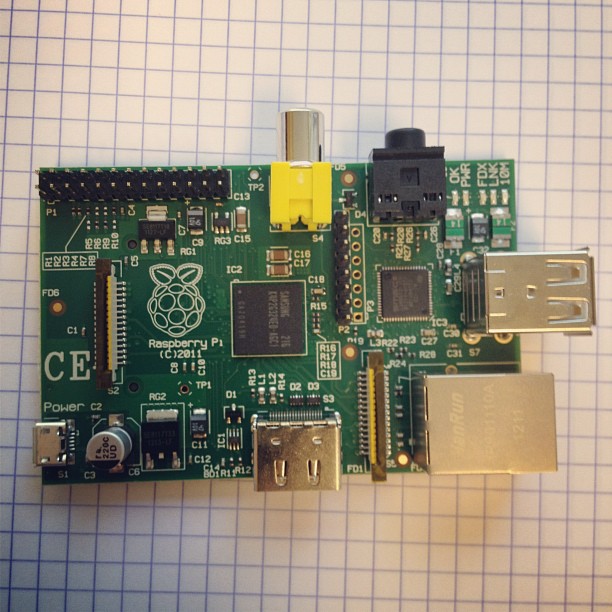
To send X10 commands from a Raspberry Pi (or indeed, any Linux computer) you need heyu. You have to build it from source, but the instructions are clear, and it takes about 10 minutes to build on a 256 MB Raspberry Pi. The install script asks you where your serial port is, and for my device it is /dev/ttyUSB0.

(Update: I re-imaged the Raspberry Pi that runs these tasks today and rebuilt heyu without success. Don’t assume you can do a ./configure; make; sudo make install here. You have to run heyu’s own ./Configure.sh first before make. It does some non-obvious magic. Read the README and you’ll be fine, unlike me …)

Most of the lights in our house are fluorescent, which is a problem for the standard X10 lamp modules. CFLs are not dimmable, and the standard lamp module doesn’t work with them. The lamp modules don’t work very well with low-voltage halogen lamps, either; extreme buzzing ensues, with a faint brownish light oozing out from the bulb and a vague burning smell. Best avoided, and better to use an appliance module, which is a simple mechanical relay.

The only controller that came with the kit that would work with my lights was the X10 transceiver, which also includes an appliance switch. I gave this device an address of H9 (house code H, unit code 9), and plugged in a lamp. To turn it on, I issued this command:

heyu on H9

After about 8-10 a couple of seconds and a loud CLUNK from the controller’s relay, the light came on (if it’s taking longer, read this comment). To turn it off, I told it:

heyu off H9

Whoa! Raw power! I can now turn AC devices on and off from my Raspberry Pi (Martin Creed, watch out!). I guess I could set up cron jobs to control the lights, but cron doesn’t know about solar time (Sunwait and SunCron do, if you want to futz with them). I’ve got MisterHouse running on the Raspberry Pi for more clever control, but more on setting that up later.

Incidentally, if you’re in Europe, Marmitek sell a variety of 220 V 50 Hz X10 modules. Their website is much clearer than the angry-fruit-salad that is x10.com. It looks like X10 have updated their starter kit to include the newer CM15 USB interface which will likely not work with heyu.

Sometimes, things do not go exactly as planned … C development for Amstrad CPC on Raspberry Pi

Hey! This is ancient! But since we’re talking about even more ancient computers, those bits still work. I’d recommend looking at the current installation instructions for z88dk rather than what I’ve got here.

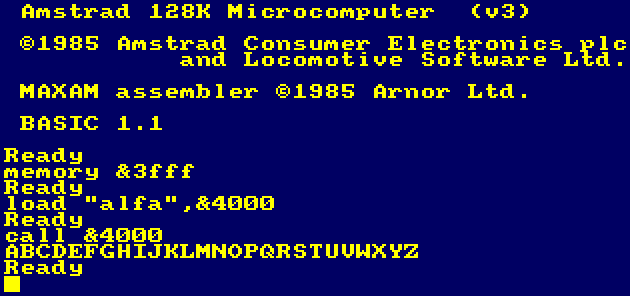
a very very crashed Amstrad CPC screen

If you crash an Amstrad CPC, you often got some pretty patterns. Like the one above, which was supposed to print the alphabet, but got about as far as R, then started making coloured spots on the screen. My alphabet doesn’t (usually) contain coloured spots, so something went wrong.

This post is only about the Raspberry Pi in that it’s the nearest always-on Linux system that I have. This would likely work fine on any Linux machine. While the Z80 cross compiler I use (z88dk) is available in the repos, I can’t get it to build anything, so I just pulled down the latest version. To build the compiler:

wget http://nightly.z88dk.org/z88dk-latest.tgz
tar xvzf z88dk-latest.tgz
cd z88dk
export Z80_OZFILES=$(pwd)/lib/
export ZCCCFG=${Z80_OZFILES}config/
export PATH=${PATH}:$(pwd)/bin
./build.sh

This should result in a working environment. We can test it with a simple C program:

/* alfa.c - print the alphabet */
#include <stdio.h>

int main(void) {
  char a='A';
  char b=26;
  while (b>0) {
    putchar(a);
    a++;
    b--;
  }
}

You can build it with:

zcc +cpc -create-app -make-app -O3 -unsigned -o alfa.bin alfa.c -lcpcfs -zorg=16384

You should end up with a file alpha.bin of approximately 4749 (!) bytes. You can copy it to a disc image using iDSK:

iDSK blank.dsk -i alfa.bin -c 4000 -e 4000 -t 1

It runs like this:

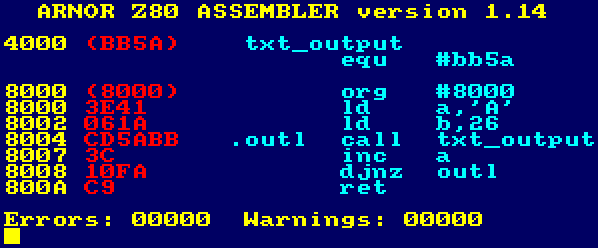
You can do the same with Z80 assembly language (shown here in the most gratuitously pretty Amstrad assembler, Maxam):
Although this results in only 11 bytes of code, it’s not portable; the C code above compiled and ran on both my Raspberry Pi and my Mac. It wouldn’t even run properly on a different Z80 system, as only the Amstrad CPC knows that call #bb5a prints the character in the A register. On the ZX Spectrum, for example, it was the completely different instruction rst 16 to print a character.

(There’s a lot more on z88dk on the CPCWiki.)

One year of amateur radio: what works

So I’ve just got my digital mode setup working again. It seems that somewhere, somehow, a driver for the SignaLink USB decided to stop working, and at best I got no signal on transmit and a very very quiet one on receive. Now my mind’s back in radio mode, I realise there’s a ton of stuff I’ve bought and found to be of variable utility. This is the good stuff:

  • Rigblaster Pro: this audio interface is far larger and far more expensive than it needs to be, but I got it used for a good price. Coupled with a $3 (!) USB sound card, it makes a sensitive and controllable sound device. I think I now prefer serial PTT-controlled audio interfaces to the SignaLink’s vox-style “Make a noise and I’ll transmit it” mode. It means you won’t accidentally tx system noises. That’s worth having another USB cable lurking about.
  • LDG autotuner: because of the wild and pointless diversity in radio interfacing, LDG makes a bunch of autotuners for specific radio models. Mine just works, and will tune my mini-G5RV from 10 to 80(ish) metres.
  • Big external meter: a cheap LDG meter is way better than the fiddly bar graph on the front of my FT-857D. I have it set up for signal on receive, and perhaps slightly unusually, AGC on transmit. Since I have a tuner and run almost entirely digital modes, it’s important that my signal doesn’t distort, so seeing AGC and being able to tweak it is important.
  • Heil Pro-Micro headset: this is comfy, and keeps the family sane. I have the footswitch too, which really helps to run nets.
  • Quarter-wave dual-bander HT antenna: The rubber ducks that all my HTs have are a bit rubbish. A simple replacement antenna allows me to talk through fairly distant repeaters from my sheltered back garden.
  • WinKeyer USB: I’m just starting morse. The WinKeyer kit was so well put together it was a delight to build, and seems to be an utterly sound keyer.
  • Fldigi: the digital mode program. Reliable, full-featured and free. It basically runs all the time on my shack computer.
  • Chirp: I can program all my HTs and my HF rig with this. It’s truly great, and miles better than proprietary programming software.
  • PSKReporter: a few minutes after calling CQ, I can see where in the world I’ve been heard. This automatic reverse-beaconing site is magic, and I’m amazed that a lot of digital users don’t even know it’s there.

My one annoyance about having a Linux-based shack is that ham radio is still very stuck in using serial ports. None of my computers have hard-wired RS232 ports, so I rely on USB serial adapters. These mostly work well, but Linux has a habit of shuffling the allocations around, so what was /dev/ttyUSB0 controlling your rig today might be ttyUSB1 tomorrow. You can get around this (if the software supports it) buy using long serial device names from /dev/serial/by-id/, which don’t change. They don’t change, that is, unless you have two Prolific serial interfaces that don’t have serial numbers set, so I can only have one attached at a time. Annoying.

confuzzled: fldigi seems to be interfering with itself …

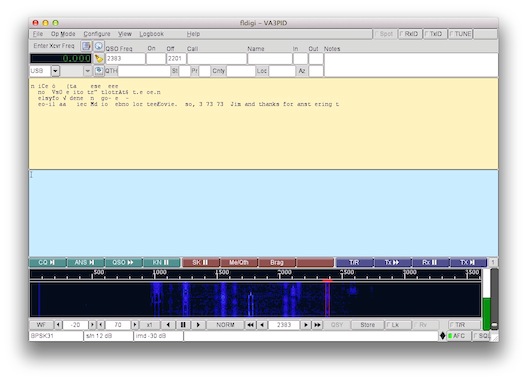
Fldigi used to work fine, but recent updates may have caused me to drop off the face of the (radio) earth. What it seems to be doing — and I don’t find this at all plausible — is causing interference with its own audio stream when its window has focus, but receiving perfectly when the program window is hidden. As Fldigi is a highly interactive program, this is not much use.

Here’s an audio sample showing what I mean: fldigi-psk14070-VA3PID-201206092107z. It’s about 45 seconds long, a sample of the 20m PSK31 band this afternoon, and comprises:

  • 0-15 seconds: fldigi’s window is in focus. None of the traces in the waterfall resolve to meaningful text.
  • 15-30 seconds: I changed focus to another program. The waterfall traces snap into focus; QSOs become readable. The conversation at 2383 Hz goes from line noise to a very clear “…  73 73  Jim and thanks for ans[w]ering the cq …”
  • 30-45 seconds: fldigi’s window is back in focus, and all decoding is cut off.

I’m running fldigi 3.21.43-1~kamal~precise from the Ubuntu Amateur Radio Software Updates repo. Hardware is a Thinkpad R51 (a bit old), latest Ubuntu 12.04 LTS, a FT-857D into a Signalink USB, and the audio’s being handled by PortAudio. I’m stumped!

Update: It was a volume thing. Linux had decided that I didn’t need my main system volume above 10%, so fldigi was picking up noise only.

JT65 on Ubuntu, finally

I’d been trying to get JT65 to work in Ubuntu for a long time. K1JT’s package is fiddly to set up, and the version in the repositories is ancient. I’d had minor success with the Windows version of JT65-HF under Wine, but it wasn’t very stable, and any attempt to switch programs (something I, Capt. Micro-Attention-Span, do a lot) caused it to crash.

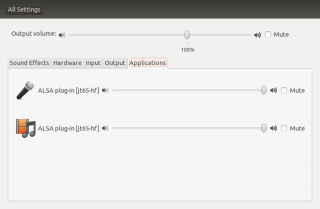
Thankfully, I found W6CQZ’s compiled version for Linux, which installed and ran almost without hitch. What you need to do is make your rig’s audio interface the default sound card, and then JT65-HF should pick up the interface and use it straight off:

That’s gnome-control-center confirming that JT65-HF is using the sound device. You do have to be a bit careful not to send computer audio across the airwaves when you do this, though.

The one good thing that is built into Ubuntu is that you don’t have to worry about clock synch like you do on Windows. Ubuntu pretty much keeps the system clock on perfect time, and Jt65 expects everyone to be synchronized. Doing this on Windows is much harder than it needs to be.

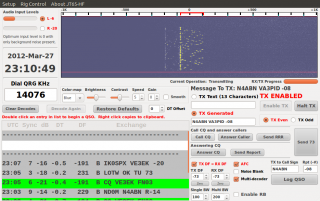
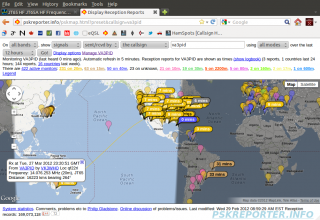
It’s a great mode. This is how I was heard earlier this evening:

They heard me in Australia, on 12W!

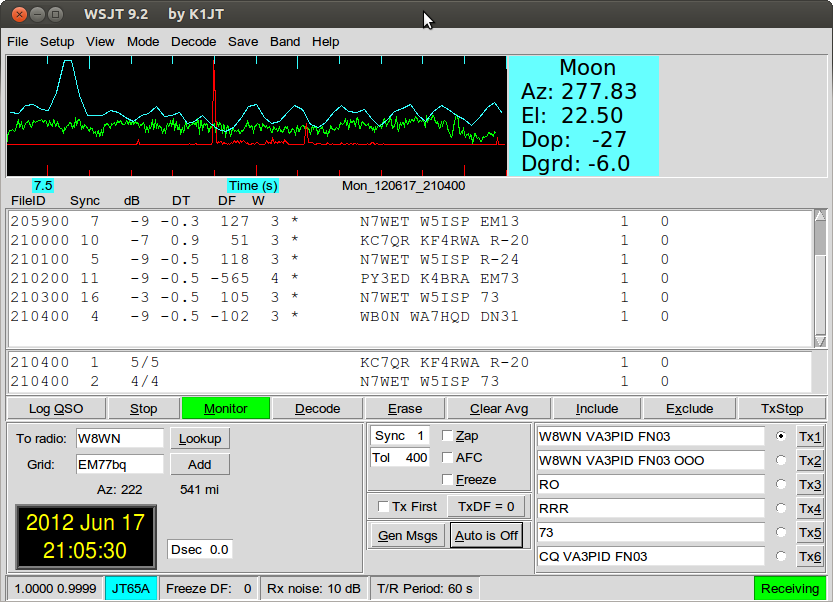
Update, 2012-06-17: W6CQZ’s binary won’t run under Ubuntu 12.04 LTS, so I had to bite the bullet and build from source. I grabbed the SVN repository, and followed M1GEO’s instructions Compiling WSPR. It’s still fiddly to choose which audio device (I use Pulse, and can use the same number for both input and output). See, lookit; signals!


ColorHug

I got my ColorHug calorimeter the other day. You can’t tell, but this laptop display is a bunch warmer than it was, and there are now colours springing out of what was formerly murk (sproing!).

It’s still very much in beta (and I mean that the way it used to mean), so it works but is a bit fiddly. It currently has to boot from a Linux live CD; there’s no native OS X or Windows support. There’s a very active user group, and issues are being found and squished daily.

Good old PCD0992 …

I found the good old Kodak Photo CD sample images on the site linked through from the photo. Test images for MFSK image radio transmission, here we come!

I got this CD with OS/2 Warp back in early 1995. My machine didn’t like Warp at all; it repeatedly fork-bombed in the file manager, so it was essentially a £40 paperweight. So burned was I with commercial software that I bought a Slackware distro so I could run something more fun that Windows 3.11. I’ve been happily running Linux since then.

Ham Radio Talk links

The ham radio talk went quite well last week; the usual TLUG (and Perl Mongers) suspects plus a couple of knowledgeable hams. For some reason, LibreOffice didn’t format the links correctly, so here they are as real links:

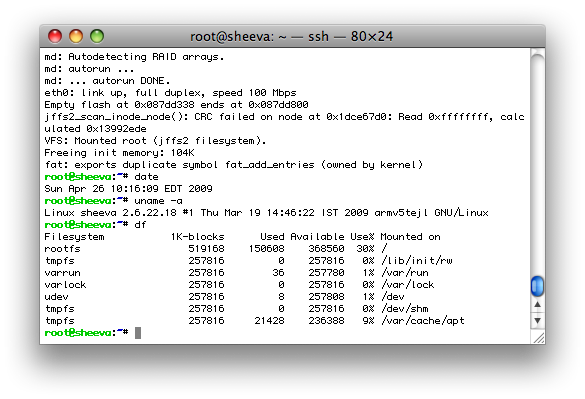
awe-inspiring terminal output

sheevaplug terminal outputWell, not really that awe-inspiring. But it does show that the Sheevaplug boots and runs out of the box. Given that it has only 512MB of RAM and the same amount of Flash storage, it’s a fairly small system.
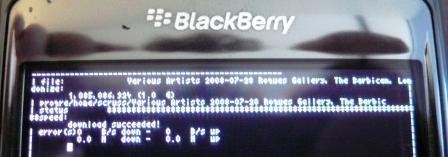
I really want to have this replace my Firefly Media Server installation on the laptop. First, I need to work out how to get it to boot from an external HD.

the little computer that should

My home server went phut last week. There was a brief power outage, and everything else came back on — except the server. It was a three year old Mini-ITX box, and I’m casting about for ways to replace it.

To serve my immediate music serving and podcasting needs, I have pressed The Only Computer That Runs Windows into service, running Ubuntu using Wubi. Unfortunately, I do still occasionally need to run Garmin Mapsource, which only runs on Windows, and also The Only Computer That Runs Windows is also rather too nice a laptop to be sat doing server duty.

I have some options:

  • Get a new motherboard for the mini-itx box. Via still has some crazy ideas about pricing (over $200 for a fanless C7?) but maybe I’ll go for Intel’s snappily-named D945GCLF, which looks okay for what I need and is only $80.
  • I could resurrect the old Athlon box I got in 2002, but it’s big, loud, and its components are probably near end of life. Also, why disturb a mature spider habitat?

What I was really looking for was one of those tiny fanless internet appliance boxes that were so 2007 (like the Koolu and the Zonbu, both of which have moved on to other things), but such units, without the tied storage service contract, are upwards of $500.

My needs are simple:

  • run Firefly to feed the Soundbridges;
  • generate the automatic podcast every day, which realistically means a linux box with Perl, sqlite and the like;
  • have something to ssh into when boredom strikes the need arises. Perhaps unwise having an open machine sitting directly on the internet, but only the ssh port will be open.

I really also need to get rid of all the computer junk in the basement. It now includes two fritzed mini-ITX systems and the world’s slowest PostScript laser printer. Such fun.

ripping dvd audio with Ubuntu

With more than a little help from How to Rip DVD audio to mp3 or ogg — Ubuntu Geek, here’s how I’d rip audio from a DVD:
for f in $(seq 1 12)
do
transcode -i /dev/sr1 -x null,dvd -T 1,$f,1 -N 0x1 -y null,wav -m $(printf "%02d" $f).wav
done

Your track count and device name will vary. You’ll note that I caved, and used the annoying $(…) syntax instead of good old-fashioned backticks (which some youngsters will claim are deprecated, but I claim as job security). WordPress munges those badly, so we’re stuck with the ugly.
You could use livemp3 to convert to mp3s (if I remembered to upload the version that handles wav files) under controlled circumstances.