Autumn in Canada: NAPLPS

NAPLPS rendered in PP3

My OpenProcessing demo “autumn in canada”, redone as a NAPLPS playback file. Yes, it would have been nice to have outlined leaves, but I’ve only got four colours to play with that are vaguely autumnal in NAPLPS’s limited 2-bit RGB.

Played back via dosbox and PP3, with help from John Durno‘s very useful Displaying NAPLPS Graphics on a Modern Computer: Technical Note.

This file only displays 64 leaves, as more leaves caused the emulated Commodore 64 NAPLPS viewer I was running to crash.

Autumn in Canada: PicoMite version

more leaves

So I ported autumn in canada from OpenProcessing to PicoMite BASIC on the Raspberry Pi Pico:

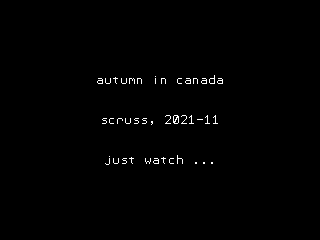
a small black screen images with text in the centre: autumn in canada scruss, 2021-11 just watch ...
no leaves
a small black screen images with text in the centre: autumn in canada scruss, 2021-11 just watch ... with one red and one orange maple leaf sitting on top of it
a couple of leaves
a small black screen images with text in the centre: autumn in canada scruss, 2021-11 just watch ... with four red/yellow/orange maple leaves sitting on top of it
more leaves
a small black screen images with text in the centre: autumn in canada scruss, 2021-11 just watch ... with sixteen simulated fallen maple leaves mostly covering it
plenty of leaves
a small black screen image completely covered with many simulated fallen maple leaves
far too many leaves

The biggest thing that tripped me up was that PicoMite BASIC starts arrays at 0. OPTION BASE 1 fixes that oversight. It would have been nice to have OpenProcessing’s HSV colour space, and an editor that could handle lines longer than 80 characters that didn’t threaten to bomb out if you hit the End key, but it’ll serve.

Source below:

' autumn in canada
' scruss, 2021-11
' a take on my https://openprocessing.org/sketch/995420 for picomite

OPTION base 1
RANDOMIZE TIMER
' *** initialize polar coords of leaf polygon and colour array
DIM leaf_rad(24), leaf_ang(24), px%(24), py%(24)
FOR i=1 TO 24
    READ leaf_rad(i)
NEXT i
FOR i=1 TO 24
    READ x
    leaf_ang(i)=RAD(x)
NEXT i

DIM integer c%(8)
FOR i=1 TO 8
    READ r%, g%, b%
    c%(i)=RGB(r%,g%,b%)
NEXT i

' *** set up some limits
min_scale%=INT(MIN(MM.HRES, MM.VRES)/8)
max_scale%=INT(MIN(MM.HRES, MM.VRES)/6)
min_angle=-30
max_angle=30
min_x%=min_scale%
min_y%=min_x%
max_x%=MM.HRES - min_x%
max_y%=MM.VRES - min_y%

CLS
TEXT MM.HRES/2, INT(MM.VRES/3), "autumn in canada", "CM"
TEXT MM.HRES/2, INT(MM.VRES/2), "scruss, 2021-11", "CM"
TEXT MM.HRES/2, INT(2*MM.VRES/3), "just watch ...", "CM"

kt%=0
DO
    cx% = min_x% + INT(RND * (max_x% - min_x%))
    cy% = min_y% + INT(RND * (max_y% - min_y%))
    angle = min_angle + RND * (max_angle - min_angle)
    sc% = min_scale% + INT(RND * (max_scale% - min_scale%))
    col% = 1 + INT(RND * 7)
    leaf cx%, cy%, sc%, angle, c%(7), c%(col%)
    kt% = kt% + 1
LOOP UNTIL kt% >= 1024

END

SUB leaf x%, y%, scale%, angle, outline%, fill%
    FOR i=1 TO 24
        px%(i) = INT(x% + scale% * leaf_rad(i) * COS(RAD(angle)+leaf_ang(i)))
        py%(i) = INT(y% - scale% * leaf_rad(i) * SIN(RAD(angle)+leaf_ang(i)))
    NEXT i
    POLYGON 24, px%(), py%(), outline%, fill%
END SUB

' radii
DATA 0.536, 0.744, 0.608, 0.850, 0.719
DATA 0.836, 0.565, 0.589, 0.211, 0.660, 0.515
DATA 0.801, 0.515, 0.660, 0.211, 0.589, 0.565
DATA 0.836, 0.719, 0.850, 0.608, 0.744, 0.536, 1.000
' angles
DATA 270.000, 307.249, 312.110, 353.267, 356.540
DATA 16.530, 18.774, 33.215, 3.497, 60.659, 72.514
DATA 90.000, 107.486, 119.341, 176.503, 146.785, 161.226
DATA 163.470, 183.460, 186.733, 227.890, 232.751, 270.000, 270.000
' leaf colours
DATA 255,0,0, 255,36,0, 255,72,0, 255,109,0
DATA 255,145,0, 255,182,0, 255,218,0, 255,255,0

You could probably use AUTOSAVE and paste the text into the PicoMite REPL. I used an ILI9341 SPI TFT LCD Touch Panel with my Raspberry Pi Pico along with some rather messy breadboard wiring.

Fun fact: the maple leaf polygon points are derived from the official definition of the flag of Canada.

Processing 2.1 + Oracle Java + Raspberry Pi + Serial + Arduino = ☺

Hey! This is very old and there’s an officially supported version out now coming out very soon.

Update for Raspberry Pi 2/Processing 2.2.1/Processing 3.0.5: Raspbian now ships with Java 8, and Processing only likes Java 7. oracle-java7-jdk is still in the repos, so install that, and follow the instructions below. It’s a bit flakey, but when it runs, runs quite fast on the Raspberry Pi 2. You might have more luck running Processing.js or p5.js in the browser.

With Sun Oracle hardfloat Java now available, Processing now runs at a decent clip on the Raspberry Pi. My old instructions are now very obsolete. Here are current, tested instructions for installing it under Raspbian.

[This is a particular solution to installing a Serial/Firmata-enabled Processing 2.1 distribution on a Raspberry Pi. Processing still has issues with other aspects of visual programming (particularly video) that I’m not addressing here.]

A lot of software is installed here, and much of it depends on previous steps. Don’t jump in mid-way and expect it to work.

Update the system

Always a good plan if you’re doing major upgrades:

sudo apt-get update
sudo apt-get dist-upgrade

Install Sun Oracle Java

sudo apt-get install oracle-java7-jdk

Check if the right version is installed as default: java -version should give

java version "1.7.0_40"
Java(TM) SE Runtime Environment (build 1.7.0_40-b43)
Java HotSpot(TM) Client VM (build 24.0-b56, mixed mode)

If you get anything else, you need to make Sun Oracle’s version the default:

sudo update-alternatives --config java

Download & Install Processing

Go to Download \ Processing.org and get the Linux 32-bit version.  It’s big; about 100 MB. I’m going to install it in my home directory, so the base path will be ~/processing-2.1. Extract it:

tar xvzf processing-2.1-linux32.tgz

Now you have to remove the included x86 Java runtime, and replace it with the Raspberry Pi’s armhf one:

rm -rf ~/processing-2.1/java 
ln -s /usr/lib/jvm/jdk-7-oracle-armhf ~/processing-2.1/java

You should now have a Processing installation that will run, but there’s some more we need to get serial and Arduino support.

Install the  java Simple Serial connector

Download jSSC-2.6.0-Release.zip and extract it:

unzip jSSC-2.6.0-Release.zip

Now overwrite the jssc.jar that ships with Processing with the one you just downloaded:

mv jSSC-2.6.0-Release/jssc.jar ~/processing-2.1/modes/java/libraries/serial/library/

(You can remove the jSSC folder now: rm -r jSSC-2.6.0-Release)

Test Processing’s serial support

You’re almost there! Fire up Processing:

~/processing-2.1/processing

and try Perhaps the World’s Most Boring Processing Sketchâ„¢:

// Example by Tom Igoe

import processing.serial.*;

// The serial port
Serial myPort;

// List all the available serial ports
println(Serial.list());
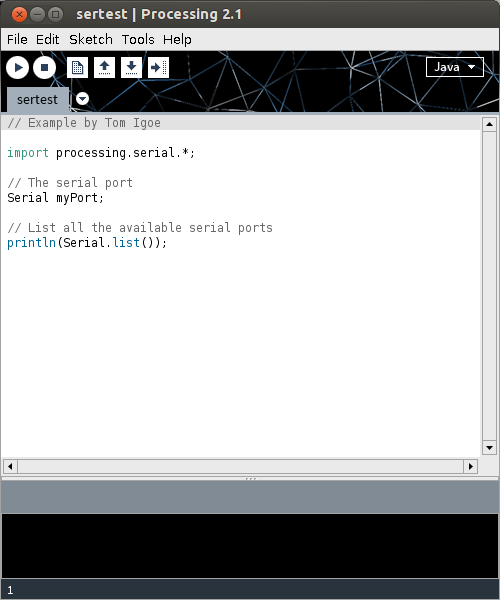
Screenshot from 2014-01-07 20:08:32When this runs (it’s a little slow), you should get a single line of output, which should start /dev/tty___:

/dev/ttyACM0

(I have an Arduino Leonardo attached, which usually appears as an ACM device.)

Installing Arduino/Firmata support

(I’m not going to go into uploading Firmata onto your Arduino here. All I can recommend is that you use the newest version at firmata/arduino, rather than the old code bundled with your Arduino distribution.)

Exit Processing, and download processing-arduino.zip from firmata/processing. Extract it into your Processing sketchbook:

unzip processing-arduino.zip -d ~/sketchbook/libraries/

For tedious reasons, you also have to rename one of the files:

mv  ~/sketchbook/libraries/arduino/library/Arduino.jar  ~/sketchbook/libraries/arduino/library/arduino.jar

Start up Processing again, and  save Most Probably the World’s Second Least Interesting Processing Programâ„¢:

import processing.serial.*;
import cc.arduino.*;
Arduino arduino;
int ledPin = 13;

void setup()
{
  println(Arduino.list());
  arduino = new Arduino(this, Arduino.list()[0], 57600);
  arduino.pinMode(ledPin, Arduino.OUTPUT);
}

void draw()
{
  arduino.digitalWrite(ledPin, Arduino.HIGH);
  delay(1000);
  arduino.digitalWrite(ledPin, Arduino.LOW);
  delay(1000);
}
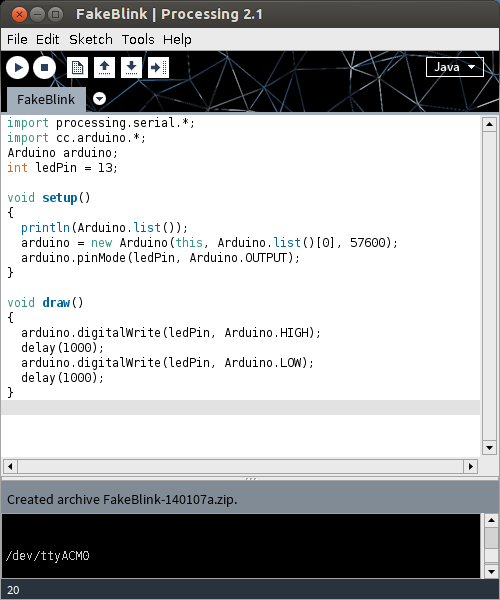
Screenshot from 2014-01-07 21:13:54
What this sketch does is emulate the µC’s “Hello World” program, Blink. It flashes the board’s LED once per second. Boring? Yes. But if it worked, you have a working Processing 2.1 installation on your Raspberry Pi. Go forth and make more interesting things.
(Props to bitcraftlab/wolfing for the basic outline for installing Processing, and for samaygoenka for the prodding needed to update and test the Processing installation process. If you’re still stuck, the Processing 2.0 Forum and the Raspberry Pi Forum are good places to ask.)

Controlling an Arduino from Raspberry Pi using Processing

Hey! This article is really old! The code might still work, but I’ve updated the installation instructions for Processing 2.1 and Sun Oracle Java here: Processing 2.1 + Oracle Java + Raspberry Pi + Serial + Arduino = ☺.

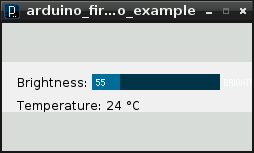
This might not look like much, but it was a lot of work to get here. It’s the display from a small Processing sketch, running on a Raspberry Pi, talking to an Arduino controlling the brightness of an LED with the slider, and reading from an LM35 temperature sensor.

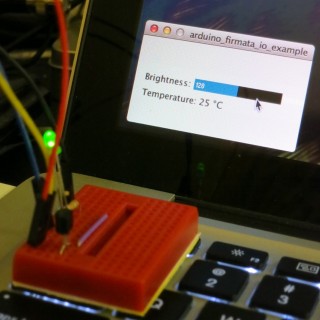
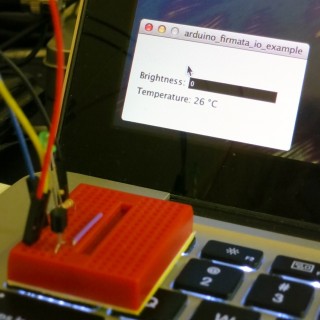
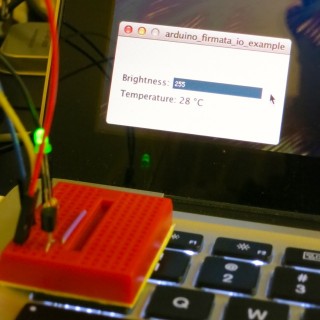
I wanted to see if I could get graphical control of an Arduino on the Raspberry Pi. I wrote about the simplest sketch in Processing that combined output (to control a small green LED through a resistor) and input (from an LM35, that simplest of sensors). This is how it looks running on a slightly faster machine than the Raspberry Pi:

LED at half brightness, LM35 showing 25°C

LED off, sensor at 26°C

LED full on, LM35 warmed up

I had the same results on the Raspberry Pi; just much, much slower. The sketch is below the fold.

Running Processing on Raspberry Pi

Processing is both written in and generates Java, so there’s some hope that it can run on most platforms. Up-to-date installation instructions. These instructions are modified from Processing sur Raspberry Pi, for which thanks are given to the original author:

  1. Install the JDK and Java serial library: sudo apt-get install librxtx-java openjdk-6-jdk
  2. Download the Linux version of Processing, and unpack it to somewhere permanent in your home directory
  3. Delete the java folder in the Processing directory; for me, that was processing-1.5.1/java
  4. Replace that java folder with a link to your system’s installation: ln -s /usr/lib/jvm/java-6-openjdk-armhf java
  5. In the Processing folder, remove or rename modes/java/libraries/serial/library/linux32/librxtxSerial.so; it’s an x86 binary, and will fail
  6. In the Processing folder, also remove modes/java/libraries/serial/library/RXTXcomm.jar, and replace it with a copy of /usr/share/java/RXTXcomm.jar
    (If you don’t do this, you’ll get a warning: “WARNING:  RXTX Version mismatch”, and any serial comms will fail.)
  7. Download and install the controlP5 library for Processing
  8. Download and install the Arduino library for Processing
  9. Program your Arduino with Firmata; the version that comes with the Arduino software is fine a bit old.
  10. Connect your Arduino to the Raspberry Pi with a USB cable; it may require external power.

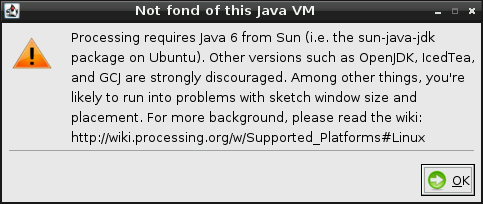
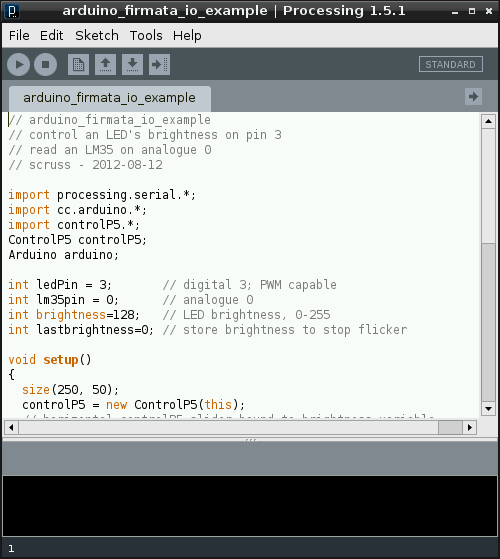
Now fire up Processing. It will used to take a while to start up, and will throw the following warning:

Despite this, it should eventually should start up fine:

Now, this is slow. It takes tens of seconds to start up. It might not be the most practical development tool, but Processing sketches are very portable, so you can develop on one machine, and then run on the Raspberry Pi.

The code at the end of this article expects:

  • an Arduino running the Firmata DAQ sketch attached to a USB port;
  • a small LED connected from digital pin 3, through a 1kΩ resistor to ground;
  • an LM35 with the following connections: +Vs → +5V, Vout → analogue pin 0, and GND → GND.

If you run this, after about half a minute, the blank sketch window appears, and about half a minute later, the slider and temperature reading appears. If it doesn’t, there’s a good chance that the serial libraries are wrong. Try this sketch:

import processing.serial.*;
import cc.arduino.*;

Arduino arduino;
println(Arduino.list());

This should return a number and a serial port where the Arduino was found; something like ‘[0] /dev/ttyACM0’.

What I really want to do now is get this same hardware running with Python and tkinter. It’s not that Python’s my favourite language; it’s just that the Raspberry Pi Foundation chose Python as the official language for the board. I’d rather work to further the aims of this educational foundation rather than work against it. Processing’s pretty much unworkably slow on the Raspberry Pi — but it does work!