Hey! This article is really old! The code might still work, but I’ve updated the installation instructions for Processing 2.1 and Sun Oracle Java here: Processing 2.1 + Oracle Java + Raspberry Pi + Serial + Arduino = ☺.
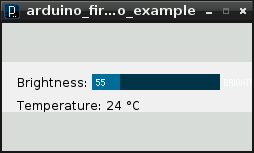
This might not look like much, but it was a lot of work to get here. It’s the display from a small Processing sketch, running on a Raspberry Pi, talking to an Arduino controlling the brightness of an LED with the slider, and reading from an LM35 temperature sensor.
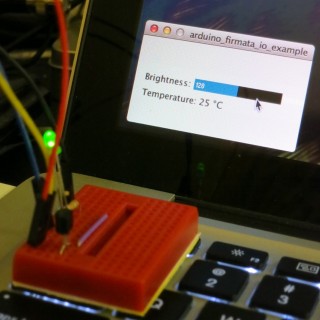
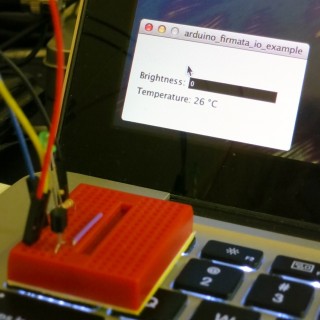
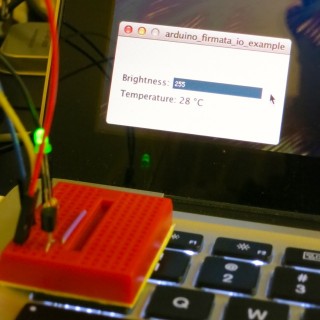
I wanted to see if I could get graphical control of an Arduino on the Raspberry Pi. I wrote about the simplest sketch in Processing that combined output (to control a small green LED through a resistor) and input (from an LM35, that simplest of sensors). This is how it looks running on a slightly faster machine than the Raspberry Pi:
LED at half brightness, LM35 showing 25°C
LED off, sensor at 26°C
I had the same results on the Raspberry Pi; just much, much slower. The sketch is below the fold.
Running Processing on Raspberry Pi
Processing is both written in and generates Java, so there’s some hope that it can run on most platforms. Up-to-date installation instructions. These instructions are modified from Processing sur Raspberry Pi, for which thanks are given to the original author:
Install the JDK and Java serial library:sudo apt-get install librxtx-java openjdk-6-jdkDownload the Linux version of Processing, and unpack it to somewhere permanent in your home directoryDelete the java folder in the Processing directory; for me, that wasprocessing-1.5.1/javaReplace that java folder with a link to your system’s installation:ln -s /usr/lib/jvm/java-6-openjdk-armhf javaIn the Processing folder, remove or renamemodes/java/libraries/serial/library/linux32/librxtxSerial.so; it’s an x86 binary, and will failIn the Processing folder, also removemodes/java/libraries/serial/library/RXTXcomm.jar, and replace it with a copy of/usr/share/java/RXTXcomm.jar
(If you don’t do this, you’ll get a warning: “WARNING:Â RXTX Version mismatch”, and any serial comms will fail.)- Download and install the controlP5 library for Processing
- Download and install the Arduino library for Processing
- Program your Arduino with Firmata; the version that comes with the Arduino software is
finea bit old. - Connect your Arduino to the Raspberry Pi with a USB cable; it may require external power.
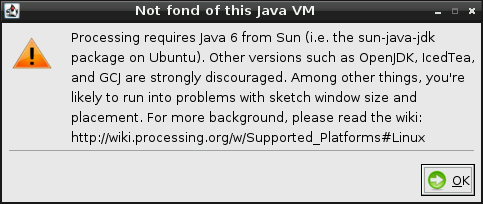
Now fire up Processing. It will used to take a while to start up, and will throw the following warning:
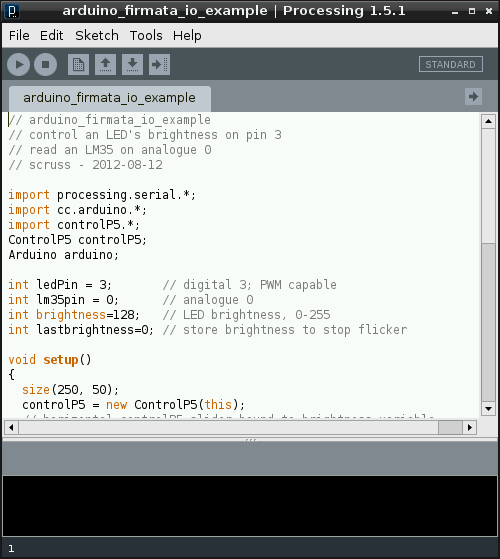
Despite this, it should eventually should start up fine:
Now, this is slow. It takes tens of seconds to start up. It might not be the most practical development tool, but Processing sketches are very portable, so you can develop on one machine, and then run on the Raspberry Pi.
The code at the end of this article expects:
- an Arduino running the Firmata DAQ sketch attached to a USB port;
- a small LED connected from digital pin 3, through a 1kΩ resistor to ground;
- an LM35 with the following connections: +Vs → +5V, Vout → analogue pin 0, and GND → GND.
If you run this, after about half a minute, the blank sketch window appears, and about half a minute later, the slider and temperature reading appears. If it doesn’t, there’s a good chance that the serial libraries are wrong. Try this sketch:
import processing.serial.*;
import cc.arduino.*;

Arduino arduino;
println(Arduino.list());
This should return a number and a serial port where the Arduino was found; something like ‘[0] /dev/ttyACM0’.
What I really want to do now is get this same hardware running with Python and tkinter. It’s not that Python’s my favourite language; it’s just that the Raspberry Pi Foundation chose Python as the official language for the board. I’d rather work to further the aims of this educational foundation rather than work against it. Processing’s pretty much unworkably slow on the Raspberry Pi — but it does work!
Here’s the example code:
// arduino_firmata_io_example
// control an LED's brightness on pin 3
// read an LM35 on analogue 0
// scruss - 2012-08-12

import processing.serial.*;
import cc.arduino.*;
import controlP5.*;
ControlP5 controlP5;
Arduino arduino;

int ledPin = 3;       // digital 3; PWM capable
int lm35pin = 0;      // analogue 0
int brightness=128;   // LED brightness, 0-255
int lastbrightness=0; // store brightness to stop flicker

void setup()
{
  size(250, 50);
  controlP5 = new ControlP5(this);
  // horizontal controlP5 slider bound to brightness variable
  controlP5.addSlider("brightness",0,255,128,90,12,128,16);
  // set up first Arduino we find
  arduino = new Arduino(this, Arduino.list()[0]);
  arduino.pinMode(ledPin, Arduino.OUTPUT);
}

void draw() {
  background(240);             // blank screen
  fill(0,0,0);                 // black text
  text("Brightness:", 15, 25); // slider label
  // read LM35 and print
  text("Temperature: " + str(int(read_lm35(lm35pin))) + " °C", 15, 48);
  if (brightness != lastbrightness) {
    // LED flickers if we keep doing analogWrite() with same value
    //  so only write if slider brightness value has changed
    arduino.analogWrite(ledPin, brightness);
  }
  lastbrightness=brightness;
}

float read_lm35(int pin) {
  // read lm35 on pin, and return float °C
  // assumes 5V supply, and 0-100°C range
  return (5.0 * arduino.analogRead(pin) * 100.0)/1024.0;
}
It might look small, but i feel your pain sir,
Much Appreciated!!!
any updates on the oracle release of java used with processing? I installed it, and deleted java folder and created a system link to the new java directory but processing only shows a shell script. very new to linux so help greatly appreciated.
I wasn’t aware of a stable, armhf version of Java 7 for the Raspberry Pi. Where did you get it?
hi,
could you please tell me which image of RaspberryPI which you used?
thanks.
BR,
Ming
I’m using Raspbian.
Have you tested OPENGL on the Raspberry Pi? What version of Linux did you download?
No, haven’t tried OpenGL. I’m just using whatever the stock version of Raspbian was at the time.
Hey, thx for the great explanation. However, I have been tinkering with this for multiple hours now (+10) and keep getting errors concerning the serial communication.
I have redone your tutorial for about 3 times now, but still without success. I keep getting the following error :
java ClassNotFoundException: gnu.io.SerialPortEventlistener
I have tried more or less everything (including different versions Processing, but can’t get it up and running).
Any hint or idea that I could try ?
David, a lot has changed in the Raspberry Pi world since I wrote this. That would be the error you’d get if librxtx wasn’t installed correctly.
Thx… I’ll give it a try again then, I think, by removing and re-installing librxtx.
It’s 1 of the disadvantages of the RPi… it’s popularity, makes the development evolve a supersonic speed.
Yes, it’s all a bit frantic. Once there’s a reliable Sun Java for armhf I’ll revisit this topic.
Hey all,
I just wanted to give an update that I finally succeeded in getting it to work.
In the end I ended up installed openjdk-7-jdk instead of openjdk-6-jdk and started revisiting every single step.
I actually feel a bit ashamed that I didn’t notice it any earlier, but my error had to do with replacing the RXTXcomm.jar .
As written in the original explanation above, I just quickly copied the RXTXcomm.jar to modes/java/libraries/serial/library/RXTXcomm.jar, without even noticing that it wasn’t a file but actually a shortcut to the real file, which in my case is named : RXTXcomm-2.2pre2.jar . All I had to do was copy both the shortcut and the file, which solved that part.
I ended up downloading a more recent arduino-library as well at https://github.com/pardo-bsso/processing-arduino , because the one I got from the link above was giving access/permissions errors.
Hope this will help some of you, to get it up and running as well. Unfortunately it’s terribly slow, but as long as you don’t need to much interaction (e.g. like sliding bars or so), it’s feasible.
Enjoy
Thanks for the helpful extra information, David. Processing is a rather slow; that’s why I started to use Tkinter on Python.
Tkinter is on my list as well, but I needed to try and get this up and running, simply out of principle to get it running 😉
I’m having the same problems as David above, I’ve managed to get Processing up and running but with a similar error: “NoClassDefFoundError: gnu/io/SerialPortEvent Listener” I relatively new to RPi and at the moment I would like it so that when I click my onboard LED on my Uno turns on and off. I have this working with the same code on my PC, but I require it working on the RPi for a wireless robot project. I’m not using Firmata, as I just want the Pi to send a char to the Arduino.
My processing code is this:
import processing.serial.*;
Serial myPort;
void setup()
{
size(200, 200);
println(Serial.list());
myPort = new Serial(this, Serial.list()[0], 9600);
}
void draw() {
background(255);
rect(50, 50, 100, 100);
}
void mouseClicked() {
myPort.write(‘o’);
}
Hello. Hello. Thanks for the tutorial helped me. a question: have you tried the version with JAVA8 2.0.7.by processing. Java8 will do better than this but I get Java6 problems nada.Alguien library and will not have any ideas?
Not yet. I’m waiting for an official release, rather than a preview.
Could you help?
I had processing working fine, however earlier today I tried to execute the processing shell script, and nothings happening. No errors at all. The CPU monitor shows full for about 5 seconds then falls back down. I’ve tried going through the steps again, but nothing’s happening.
What changed in your system?
No idea! However I deleted the .processing folder and reinstalled and now its working. However just reinstalling by itself didn’t cure it originally
Thank you very much. I was more than 12 hours trying to connect firmata with processing in debian wheezy, read thousand blogs and official forums until I found the solution in your post. Also I tried it on my raspberry pi with raspbian, ssh and vnc, it’s amazing. Thank you very much. greetings from Mexico.
Hi!, someone has exported the application and it works?
I get an error when trying to run it from console using Java6: rxtxserial not in java.library.path.
Any way to fix it?
Just thought I leave a note that I got the Java 8 JDK running on the pi along with Processing ver 2.08b. I know nothing about Linux, so I was pretty lost trying to folllowing everyone’s instructions and I thought my notes might help somone.
To install Java
I followed:
http://www.savagehomeautomation.com/projects/raspberry-pi-installing-oracle-java-se-8-with-javafx-develop.html
To install processing I followed:
http://scruss.com/blog/2012/08/12/controlling-an-arduino-from-raspberry-pi-using-processing/
download 32bit version of Processing from http://processing.org/download/ I wasn’t sure which one to install.
used WinSCP to copy the file to /home/pi
unpack the fil using
tar xvzf ~/processing-2.0b8-linux32.tgz
deleted the processing java folder
/home/pi/preocessing-2.0b.8/java
made a link
ln -s /opt/java/jdk1.8.0 java
renamed
/home/pi/processing-2.0b8/modes/java/libraries/serial/library/linux32/librxtxSerial.so to .old
found
modes/java/libraries/serial/library/RXTXcomm.jar
can’t find
/usr/share/java/RXTXcomm.jar
doing a search for the file. I can’t find it. So I left it alone. I’m not sure of the implications.
Not sure what to do, so when all else fails, try running it anyway.
running procssing with the command
./processing
errors in running:
No X11 Display variable was set, the …
I ignored the errors, went into the graphical users interface
went to the processing directory
ran processing
It works! Hurray!
I wrote a simple program and it works, but it is slow, but it’s not too unbearable. I was able to create the Linux 32 version and run it right from the file manager. Nice.
All can be done, but I need to know how slow is it ? Im making a project that includes playing 6 different sounds according to what it reads from serial , it works like a charm on PC will it work on the pi ?
It should work fine; it’s just the startup that’s very slow.
Last time I tried it, it wasn’t usable, the sliding bar wasn’t sliding anymore and only advanced with 10 to 20 steps at a time. The Pi couldn’t keep up with its resources
Thanks David! I had the same problem, but thanks to your instructions I resolved it 😉
Hey Alex,
i get the same error and followed the same instructions as you.
No X11 DISPLAY variable was set, but this program performed an operation which requires it.
How did you get it to run in the graphic interface?
Hey,
I got all steps done from Alex.
But I do not know how to link the java folder up.
this command does not work.
Andreas
Hi,
I managed to get processing to run. One time with the java decribe in this post (librxtx-java openjdk-6-jdk) and one time with the java SE 8 from this post (http://www.savagehomeautomation.com/projects/raspberry-pi-installing-oracle-java-se-8-with-javafx-develop.html)
But when I run my program which involves a camera a get this error.
>> Exception in thread “Animation Thread”
java.lang.UnsatisfiedLinkError: jndispatch
(/com/sun/jna/linux-arm/libjnidispatch.so) not found in path.
I looked around and saw that others also have this problem but nobody seems to have found a solution yet.
Can somebody please help?
I am having an issue un packing
pi@raspberrypi ~ $ su pi tarxvzf ~/processing-2.0b8-linux32.tgz
Password:
bash: tarxvzf: No such file or directory
pi@raspberrypi ~ $ su pi tar xvzf processing-2.0b8-linux32.tgz
Password:
/bin/tar: /bin/tar: cannot execute binary file
pi@raspberrypi ~ $ ls
Desktop ocr_pi.png
Documents processing-1.5.1-linux.tgz
hello.py processing-2.0b8-linux32.tgz
logmein-hamachi_2.1.0.86-1_armel.deb python_games
logmein-hamachi_2.1.0.86-1_armel.deb.1 Scratch
logmein-hamachi_2.1.0.86-1_armel.deb.2
thank you
‘su pi’ has no effect; you’re already the pi user. Don’t do that. That’s why it’s asking for a password and messing things up. Just do:
tar xvzf processing-2.0b8-linux32.tgz
Hi,
I still could not solve this error with java.
No I got the libjnidispatch.so from github and placed it in the processing folder /home/pi/processing-2…./lib/
Now I am getting a different error when running my processing program
unstatisfiedLinkError: can´t obtain static newinstance method for class com.sun.jna,Structure
Do you not get the same error? Are all processing programs you run work?? Where you be able to run a processing program that uses the camera?
Blimey. … And the Pi is meant for school kids to use ?! lol. us adults stand no chance…
Great work, thanks for sharin..
Brilliant article, I had been trying to figure all of this out myself but had pretty much given up until I discovered this article. Thanks again for all your good work here!