FreeCAD on Raspberry Pi 4

Hey! This is really old! FreeCAD 0.19 is in the Raspberry Pi OS Bullseye repo now:

sudo apt install freecad

FreeCAD window displaying red and white traffic cone model
FreeCAD 0.18.4 running on a Raspberry Pi 4

FreeCAD and the Raspberry Pi haven’t always got on too well. For complex technical reasons the standard package would load and immediately crash on a Raspbian system. For user reasons, this was just another annoyance.

Recent releases seem to run fairly well on a Raspberry Pi 4, though, but only after building them from source. Here’s a method that got FreeCAD 0.18.4 running for me. It’s lightly modified from FreeCAD forum MartijnD‘s post:

sudo apt install cmake build-essential libtool lsb-release swig libboost-dev libboost-date-time-dev libboost-filesystem-dev libboost-graph-dev libboost-iostreams-dev libboost-program-options-dev libboost-python-dev libboost-regex-dev libboost-serialization-dev libboost-signals-dev libboost-thread-dev libcoin-dev libeigen3-dev libgts-bin libgts-dev libkdtree++-dev libmedc-dev libopencv-dev libproj-dev libvtk6-dev libx11-dev libxerces-c-dev libzipios++-dev qt4-dev-tools libqt4-dev libqt4-opengl-dev libqtwebkit-dev libshiboken-dev libpyside-dev pyside-tools python-dev python-matplotlib python-pivy python-ply python-pyside libocct*-dev occt-draw libsimage-dev doxygen libcoin-doc dh-exec libspnav-dev

wget https://github.com/FreeCAD/FreeCAD/archive/0.18.4.zip

unzip 0.18.4.zip

rm 0.18.4.zip

mkdir freecad-build

cd freecad-build

cmake -DPYTHON_EXECUTABLE=/usr/bin/python2.7 -DPYTHON_INCLUDE_DIR=/usr/include/python2.7 -DPYTHON_LIBRARY=/usr/lib/arm-linux-gnueabihf/libpython2.7.so  -DPYTHON_PACKAGES_PATH=/usr/local/lib/python2.7/dist-packages/  ../FreeCAD-0.18.4/

make -j4

Notes:

  • The only modifications I made to Martijn’s method were in the Python paths in the cmake command. Some of the paths given aren’t valid any more on an up-to-date Buster system
  • I built this on a Raspberry Pi 4 with 4 GB of RAM. It takes quite a bit of free storage: I wouldn’t attempt to build this with less than 4 GB free
  • make -j4 took 95 minutes, and even with a fan my Raspberry Pi 4 was at 70°C
  • Yes, it’s using Python 2.7, but it works
  • I’ve got no idea how to make it install properly, but it runs from the freecad-build/bin directory.

If you want to learn how to use it, look at the tutorials: even the Raspberry Pi Foundation have written some. The UK Traffic Cone model you can have: it’s what I made to learn a bit more about FreeCAD. Don’t worry, I’m still on Team OpenSCAD …

The Modern Hectographer

Way back, if you wanted more than one copy of something you’d written there was no print button. If you wanted copies, each one required a bit of work. Before copiers and printers there were duplicators where you could type or draw onto special membranes that either transferred ink to a printing sheet (Banda or Ditto brand machines) or made holes in a screen to allow ink through (Gestetner or Mimeograph brands). Risograph machines are modern digital ink duplicators still in use and active development today.

One of the predecessors of duplicators was the hectograph. In the 19th century they still knew their Greek and yet were totally okay with hype, the hectograph was named after the extremely, um, aspirational idea that you could pull a hundred (εκατό = hundred, in modern Greek) copies from one master. Once you’ve made a few hectograph copies, you’ll be more wondering what the heck they were thinking: you might get a few tens of legible copies if you’re extremely careful.

Some hectographic copies, all pulled from the one jelly sheet impression

A hectograph copier is basically a sheet of jelly that soaks up certain kinds of ink from a master copy, then oozes the copies back onto paper pressed onto its surface. The ink slowly diffuses down through the thickness of the jelly, allowing different copies to be made with the same plate a day or so later.

Getting the right ink is a little tricky these days. Tattoo artists use hectograph ink to make stencils, so I got a small bottle of ink ($15) from Studio One (940 Queen St. East, Toronto). You can also use hecto/indelible pencils, but the National Tattoo brand one I got from Studio One barely transfers at all.

Making a copier in a kitchen is easy. There are several recipes online (University of Iowa Library and W0IS‘s being two: if you follow The New Standard Formulary historic ones, remember that white glue now is quite different from the hoof-and-hide renderings they used then). My recipe is a bit of a blend of all of these:

  • 28 g Gelatin
    (powdered, unflavoured; in North America, it’s sold under the Knox brand in little boxes containing 4× 7 g sachets)
  • 175 ml Glycerin
    (from the pharmacy, possibly sold in the skin care section; about ¾ cup)
  • 75 g Sugar
    (regular white sugar, about â…“ cup)
  • 350 ml Water
    (1½ cups)

You’ll need a flat tray, larger that the paper you want to use. Dollar store baking trays are ideal. I used a slightly-too-small toaster oven tray, which seemed like a good idea at the time.

  1. Stir gelatin and sugar into the water and leave it to soak for a few hours. It should form a translucent gel
  2. Heat the glycerin in a double boiler until the boiler water is just simmering
  3. Add the gelatin/sugar solution and stir gently until the boiler water resumes simmering. Keep heating for a few minutes until the solution turns clear
    (The liquid doesn’t have to boil, just get hot enough for the gelatin to melt. Avoiding bubbles is worthwhile, as gelatin foam is not what we’re looking for here)
  4. Carefully pour the hot liquid into your tray, avoiding forming bubbles if at all possible
    (Bubbles can be shepherded off to the edge of the plate with the tip of a scrap of paper before the liquid sets)
  5. Allow the tray to cool and set. This may take several hours at room temperature. The solid jelly hardly changes in appearance from the liquid form

surface of a freshly-cooled jelly plate: extremely clear with a faint texture

Now draw your master. Hectographic ink is loaded with dye, so a little goes a long way. It’s also not a modern non-blotting ink, so you need to be more sparing with it than I was.

The unused master sheet, drawn in hecto ink (purplish black), copying pencil (grey) with guidelines from a plotter pen (red)

Stick the master face down onto the jelly sheet and leave it there for about a minute. I used a brayer to press the ink onto the surface. When you lift the master off the surface, you’ll end up with a slightly ruined master —

The used master sheet: probably too blurred to be usable again. Next time I’ll be more careful not to blot. (Colour balance made it yellow, btw; it’s the same sheet as before)

— and a crisp, reversed image in the jelly plate. I hope yours will be less blot-ridden than mine:

Image transferred onto jelly. Note blots (dammit!) and complete lack of visibility from hecto/copying pencil. Red lines from plotter pen are clear, though they didn’t end up transferring through to the paper copies

Now lay your copy paper onto the jelly sheet for a few seconds. Again, I used a brayer.

First copy, on mulberry paper

The copies come out remarkably dry, but should still be allowed to dry off for a while: this is a wet copy process, after all. The copier is reusable indefinitely, and should be very lightly dampened before use.

This is after use (6-7 copies), a light misting of water and a wipe down with a damp sponge.

This is the same plate, roughly 12 hours after use. The ink has blurred and diffused more deeply into the surface. It was possible to pull a very faint and impossibly blurry copy from this, but it’s pretty close to being ready to reuse

This process is kind-of on the edge of practicality, but is not without its charms. It might be worth looking at:

  1. alternative jellies, such as arrowroot or hypromellose. Gelatin is hydrolyzed animal collagen, and this may create ethical issues for some users. Some glycerin is also from animal sources, but less so than in the past.
  2. other ink/dye sources, including inkjet ink, certain water-soluble colouring pencils and other indelible/copying pencils. I have some vintage — possibly old enough to be quite toxic — copying pencils on the way to me via ebay which may work better.
  3. making 3d printed stamps to transfer to the jelly plate. Since the plate doesn’t need to accept a perfectly flat impression, a relief design might work better than a 3d printed direct stamp.

(aside: I’d previously tried to make a copying pad from several layers of damp kitchen towel to transfer a drawing made with Stabilo All water-soluble pencils. As you can imagine, the ink quickly diffused along the cellulose fibres, making this process at best a very qualified success …

A copy attempt made with damp paper towels. The less said about this, the better

)

Combined Restart / Shutdown Button for Raspberry Pi

Hey! This is obsolete. There are better solutions out there now. You should use the system-supplied and supported gpio-shutdown option instead.

A very simple systemd service for Raspberry Pi that provides a software-controlled restart / shutdown button. Code: scruss/shutdown_button

Use

Default behaviour is:

  • your Raspberry Pi will reset if the button is held for more than two seconds but fewer than five seconds;
  • your Raspberry Pi will shut down if the button is held for more than five seconds.

By default, the software assumes the switch is connected to pin BCM 27. Both the pin and the timing can be changed in the Python source file.

Requirements

Hardware

  • A Raspberry Pi (tested on a model 2B, 3B and Zero, and on a model B after minor software modification)
  • A normally open, momentary contact button. I use surplus ATX power buttons (as used on desktop PCs), as they’re cheap and come with a handy set of wires and header connectors. Virtually any button will do the job, though. Just make sure it’s normally open (push to close).

Software

  • A Debian-based operating system that uses systemd (tested on Raspbian Jessie and Stretch)
  • the python3-gpiozero package to provide GPIO Zero (tested on version 1.4.0)

Installation

Hardware

40-pin GPIO connector (B+, 2B, 3B, Zero)

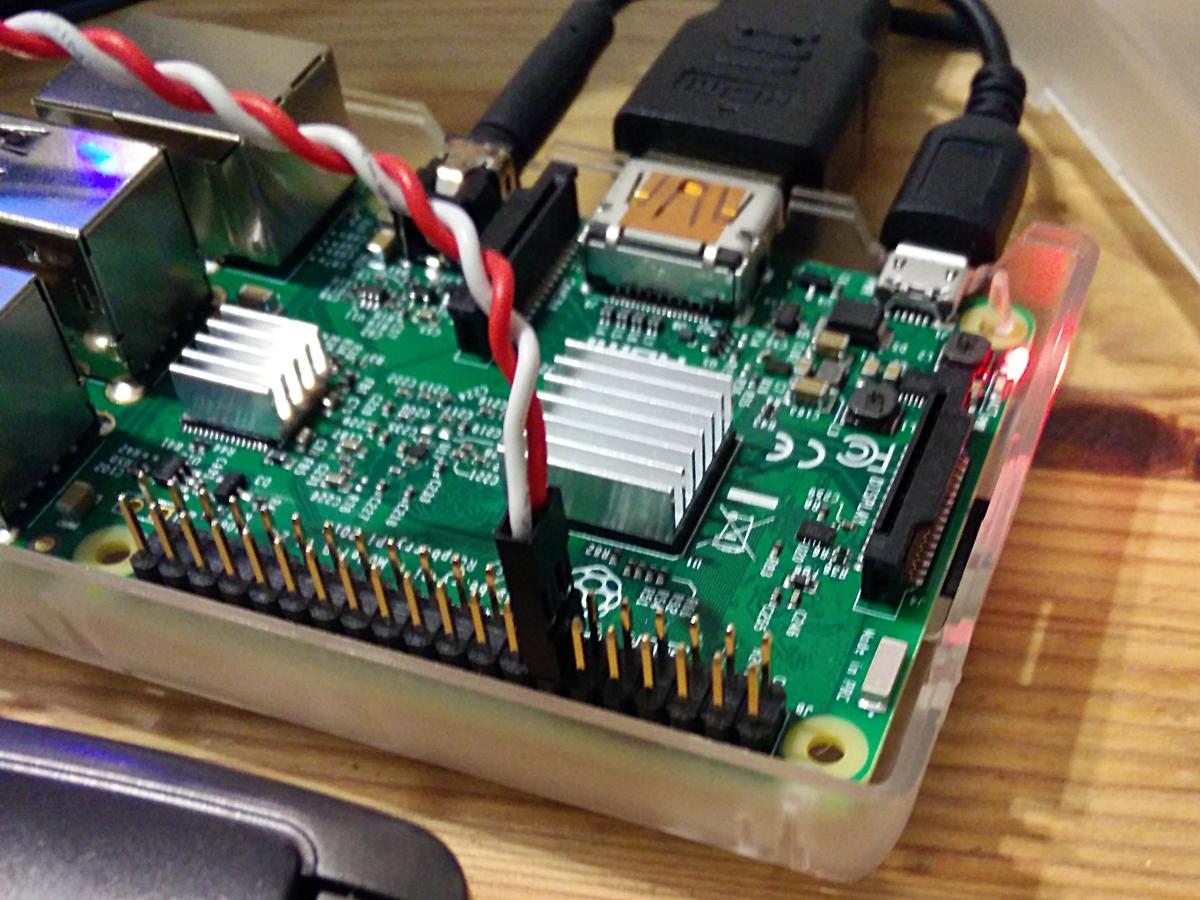
Connect the button between GPIO 27 and GND. If you use an ATX power button and a Raspberry Pi with a 40-pin GPIO header, connect it across the seventh column from the left:

            -
· · · · · ·|·|· · · · · · · · · · · · · 
· · · · · ·|·|· · · · · · · · · · · · · 
            -

This shorts GPIO 27 (physical pin 13) to ground (physical pin 14) when the button is pressed.

26-pin GPIO connector (models B and A only)

GPIO 27 is not exposed on the original Raspberry Pi header, so GPIO 17 is a reasonable option. If you use an ATX power button and a Raspberry Pi with a 26-pin GPIO header, connect it across the fifth and sixth columns of the second row:

 . . . . ._. . . . . . . .
 . . . .|. .|. . . . . . .
          -

You will also need to change line 7 of shutdown_button.py to read:

use_button=17

Software

Download the software first. I prefer to use

git clone https://github.com/scruss/shutdown_button.git

but you can download the zip file. If you do that, though, make sure to

unzip shutdown_button-master
cd shutdown_button-master

The software is installed with the following commands:

sudo apt install python3-gpiozero
sudo mkdir -p /usr/local/bin
chmod +x shutdown_button.py
sudo cp shutdown_button.py /usr/local/bin
sudo cp shutdown_button.service /etc/systemd/system
sudo systemctl enable shutdown_button.service
sudo systemctl start shutdown_button.service

Troubleshooting

Enabling the service should produce output very similar to:

Created symlink /etc/systemd/system/multi-user.target.wants/shutdown_button.service → /etc/systemd/system/shutdown_button.service.

You can check the status of the program at any time with the command:

systemctl status shutdown_button.service

This should produce output similar to:

● shutdown_button.service - GPIO shutdown button
   Loaded: loaded (/etc/systemd/system/shutdown_button.service; enabled; vendor 
   Active: active (running) since Sat 2017-10-21 11:20:56 EDT; 27s ago
 Main PID: 3157 (python3)
   CGroup: /system.slice/shutdown_button.service
           └─3157 /usr/bin/python3 /usr/local/bin/shutdown_button.py

Oct 21 11:20:56 naan systemd[1]: Started GPIO shutdown button.

If you’re seeing anything other than Active: active (running), it’s not working. Does the Python script have the right permissions? Is it in the right place? If you modified the script, did you check it for syntax errors?

The output from dmesg will show you any error messages generated by the service.

Modifications

If you use a HAT/pHAT/Bonnet/etc. with your Raspberry Pi, check pinout.xyz to see if it uses BCM 27. If you do need to change the pin, best to pick one that doesn’t have a useful system service like serial I/O or SPI. If you’re using an ATX button with a two pin connector, make sure you choose a pin physically adjacent to a ground pin.

If you modify the timing, please ensure that you keep the shutdown button press duration longer than the reboot one. Otherwise you’ll only be able to shut down.

Notes

You should not need to reboot to enable the service. One machine of mine — a Raspberry Pi Zero running Raspbian Stretch — did need a reboot before the button worked.

The reboot code is based on the Shutdown button example from the GPIO Zero documentation.

This is not the only combined shutdown/reset button project to use GPIO Zero. gilyes/pi-shutdown also does so, but pre-dates the implementation of the various hold time functions in GPIO Zero.

GPIO 27 was used, as it’s broken out onto a physical button on the Adafruit PiTFT+ display I own.

This is my first systemd service, and I’m still at the “amazed it works at all” stage. The service file may not contain the ideal configuration.

Connector Pinouts

From GPIO Zero’s pinout command

40 pin

   3V3  (1) (2)  5V    
 GPIO2  (3) (4)  5V    
 GPIO3  (5) (6)  GND   
 GPIO4  (7) (8)  GPIO14
   GND  (9) (10) GPIO15
GPIO17 (11) (12) GPIO18
GPIO27 (13) (14) GND   
GPIO22 (15) (16) GPIO23
   3V3 (17) (18) GPIO24
GPIO10 (19) (20) GND   
 GPIO9 (21) (22) GPIO25
GPIO11 (23) (24) GPIO8 
   GND (25) (26) GPIO7 
 GPIO0 (27) (28) GPIO1 
 GPIO5 (29) (30) GND   
 GPIO6 (31) (32) GPIO12
GPIO13 (33) (34) GND   
GPIO19 (35) (36) GPIO16
GPIO26 (37) (38) GPIO20
   GND (39) (40) GPIO21

26 pin

   3V3  (1) (2)  5V    
 GPIO0  (3) (4)  5V    
 GPIO1  (5) (6)  GND   
 GPIO4  (7) (8)  GPIO14
   GND  (9) (10) GPIO15
GPIO17 (11) (12) GPIO18
GPIO21 (13) (14) GND   
GPIO22 (15) (16) GPIO23
   3V3 (17) (18) GPIO24
GPIO10 (19) (20) GND   
 GPIO9 (21) (22) GPIO25
GPIO11 (23) (24) GPIO8 
   GND (25) (26) GPIO7