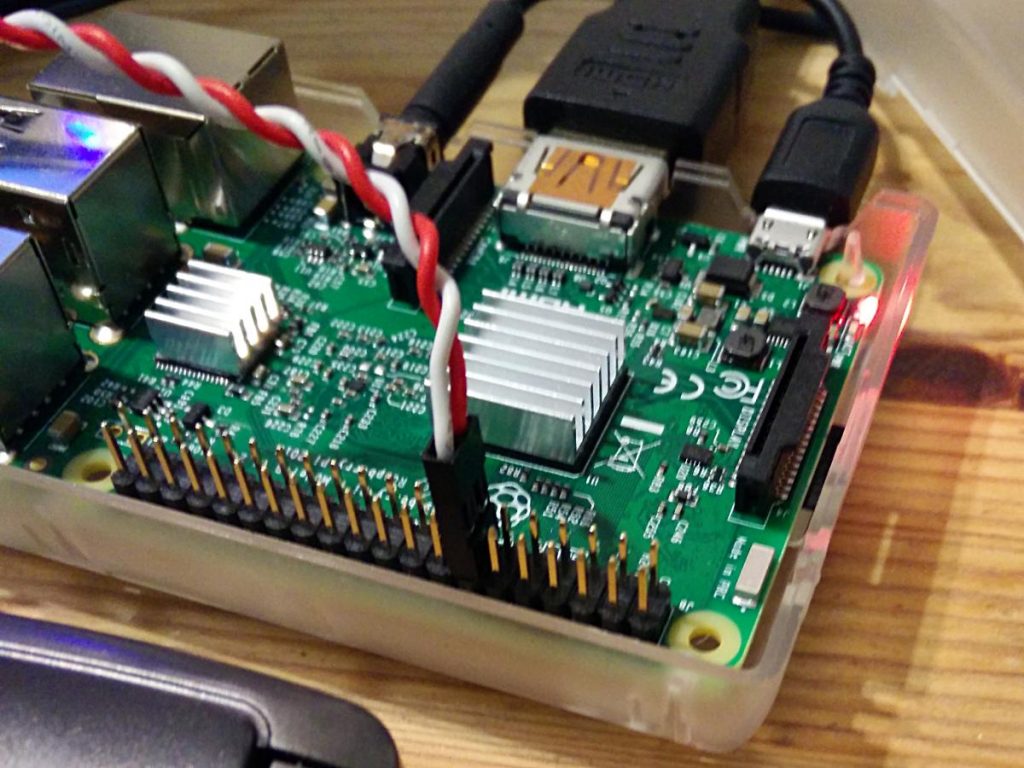
Creating a systemd user service on your Raspberry Pi

Flushed with success from yesterday’s post where I made my first systemd service, I got carried away and wanted to show you how to create a service that runs as a regular user.

A fairly common question on the Raspberry Pi Forums is “How do I run a script every time I reboot?”. The traditional answer (and one I’ve given more than once) is to add a @reboot clause to your crontab. This will indeed run a command when the computer reboots, but it will run pretty early on in the boot sequence when there’s no guarantee of network or time services. So the usual remedy is a bit of a kludge:

@reboot sleep 60 && …

This waits a full minute after rebooting, then executes the command. Network and time services are really likely to be available, but it’s not very elegant. Cron also has some weird gotchas with PATH settings, so while it’s ubiquitous and has worked for decades, it’s not easy to get working. Systemd, however, has a much better way of doing it, and better yet, you can do it all without ever hitting sudo.

I’ll take as a basis for this post the forum query “python and crontab”. The asker wanted to log the time when their Raspberry Pi had rebooted, but they’ve hit the usual problem that the clock didn’t have the right time when their script was triggered, so the log was useless.

(I’m not going to do exactly what the forum poster did, but this is more a demo of a systemd user service than recreating their results.)

First off, here’s the script to log the time to a file (saved as ~/bin/boot_time.py):

#!/usr/bin/python3
from time import strftime
with open("/home/pi/logs/boot_time.txt", "a") as log:
 log.write(strftime("%d-%m-%Y,%H:%M:%S\n"))

I’d have done this as a shell script, but the OP used Python, so why fight it?

FUN FACT: Under most Linux flavours, if you create a bin folder in your home directory, it’s automatically added to your path. So I could just type boot_time.py and the shell would find it.
(You might have to log out and log back in again for the shell to review your path.)

In order to get that to run, I need to do a little housekeeping: make the script executable, and make sure the logs folder exits:

chmod +x ~/bin/boot_time.py
mkdir -p ~/logs

Now we need to do the bits that pertain to systemd. First off, you must make a folder for user services:

mkdir -p ~/.config/systemd/user

NOTE: mkdir -p … is useful here as it makes the directory and any parent directories that don’t exist. It also doesn’t complain if any of them already exist. It’s kind of a “make sure this directory exists” command. Make friends with it.

And here’s the service file, which I saved as ~/.config/systemd/user/boot_time_log.service:

[Unit]
Description=boot time log
DefaultDependencies=no
After=local-fs.target time-sync.target

[Service]
Type=oneshot
ExecStart=/home/pi/bin/boot_time.py

[Install]
WantedBy=default.target

The service file does the following (even if I’m slightly mystified by some of the headings …):

  • Unit
    • Description — a plain text name for the service. This appears in logs when it starts, stops or fails.
    • DefaultDependencies — as this service runs once at boot-up, it doesn’t need the normal systemd functions of restarting and shutting down on reboot. Most service files omit this line.
    • After — here we tell systemd what service targets must be running before this service is started. As we need to write to a file and have the right time, the local-fs.target and time-sync.target seem sensible.
  • Service
    • Type — this is run once, so it’s a oneshot rather than the usual simple service.
    • ExecStart — this is the command to run when the service is required.
  • Install
    • WantedBy — tbh no idea what this does, but if you omit it the service won’t install. Found the answer in this SE, and it works. So I guess what it does is make the service not fail …

Finally, you enable the service with:

systemctl --user enable boot_time_log.service

Next time you reboot, the time will be appended to the log file ~/logs/boot_time.txt.

Unlike most (that is, Type=simple) services, it’s perfectly fine if this one spends most of its time inactive:

$ systemctl status --user boot_time_log.service
● boot_time_log.service - boot time log
 Loaded: loaded (/home/pi/.config/systemd/user/boot_time_log.service; enabled;
 Active: inactive (dead) since Sun 2017-10-22 22:17:56 EDT; 1h 5min ago
 Process: 722 ExecStart=/home/pi/bin/boot_time.py (code=exited, status=0/SUCCES
 Main PID: 722 (code=exited, status=0/SUCCESS)

It has executed successfully, so the process doesn’t have to stick around.

Combined Restart / Shutdown Button for Raspberry Pi

Hey! This is obsolete. There are better solutions out there now. You should use the system-supplied and supported gpio-shutdown option instead.

A very simple systemd service for Raspberry Pi that provides a software-controlled restart / shutdown button. Code: scruss/shutdown_button

Use

Default behaviour is:

  • your Raspberry Pi will reset if the button is held for more than two seconds but fewer than five seconds;
  • your Raspberry Pi will shut down if the button is held for more than five seconds.

By default, the software assumes the switch is connected to pin BCM 27. Both the pin and the timing can be changed in the Python source file.

Requirements

Hardware

  • A Raspberry Pi (tested on a model 2B, 3B and Zero, and on a model B after minor software modification)
  • A normally open, momentary contact button. I use surplus ATX power buttons (as used on desktop PCs), as they’re cheap and come with a handy set of wires and header connectors. Virtually any button will do the job, though. Just make sure it’s normally open (push to close).

Software

  • A Debian-based operating system that uses systemd (tested on Raspbian Jessie and Stretch)
  • the python3-gpiozero package to provide GPIO Zero (tested on version 1.4.0)

Installation

Hardware

40-pin GPIO connector (B+, 2B, 3B, Zero)

Connect the button between GPIO 27 and GND. If you use an ATX power button and a Raspberry Pi with a 40-pin GPIO header, connect it across the seventh column from the left:

            -
· · · · · ·|·|· · · · · · · · · · · · · 
· · · · · ·|·|· · · · · · · · · · · · · 
            -

This shorts GPIO 27 (physical pin 13) to ground (physical pin 14) when the button is pressed.

26-pin GPIO connector (models B and A only)

GPIO 27 is not exposed on the original Raspberry Pi header, so GPIO 17 is a reasonable option. If you use an ATX power button and a Raspberry Pi with a 26-pin GPIO header, connect it across the fifth and sixth columns of the second row:

 . . . . ._. . . . . . . .
 . . . .|. .|. . . . . . .
          -

You will also need to change line 7 of shutdown_button.py to read:

use_button=17

Software

Download the software first. I prefer to use

git clone https://github.com/scruss/shutdown_button.git

but you can download the zip file. If you do that, though, make sure to

unzip shutdown_button-master
cd shutdown_button-master

The software is installed with the following commands:

sudo apt install python3-gpiozero
sudo mkdir -p /usr/local/bin
chmod +x shutdown_button.py
sudo cp shutdown_button.py /usr/local/bin
sudo cp shutdown_button.service /etc/systemd/system
sudo systemctl enable shutdown_button.service
sudo systemctl start shutdown_button.service

Troubleshooting

Enabling the service should produce output very similar to:

Created symlink /etc/systemd/system/multi-user.target.wants/shutdown_button.service → /etc/systemd/system/shutdown_button.service.

You can check the status of the program at any time with the command:

systemctl status shutdown_button.service

This should produce output similar to:

● shutdown_button.service - GPIO shutdown button
   Loaded: loaded (/etc/systemd/system/shutdown_button.service; enabled; vendor 
   Active: active (running) since Sat 2017-10-21 11:20:56 EDT; 27s ago
 Main PID: 3157 (python3)
   CGroup: /system.slice/shutdown_button.service
           └─3157 /usr/bin/python3 /usr/local/bin/shutdown_button.py

Oct 21 11:20:56 naan systemd[1]: Started GPIO shutdown button.

If you’re seeing anything other than Active: active (running), it’s not working. Does the Python script have the right permissions? Is it in the right place? If you modified the script, did you check it for syntax errors?

The output from dmesg will show you any error messages generated by the service.

Modifications

If you use a HAT/pHAT/Bonnet/etc. with your Raspberry Pi, check pinout.xyz to see if it uses BCM 27. If you do need to change the pin, best to pick one that doesn’t have a useful system service like serial I/O or SPI. If you’re using an ATX button with a two pin connector, make sure you choose a pin physically adjacent to a ground pin.

If you modify the timing, please ensure that you keep the shutdown button press duration longer than the reboot one. Otherwise you’ll only be able to shut down.

Notes

You should not need to reboot to enable the service. One machine of mine — a Raspberry Pi Zero running Raspbian Stretch — did need a reboot before the button worked.

The reboot code is based on the Shutdown button example from the GPIO Zero documentation.

This is not the only combined shutdown/reset button project to use GPIO Zero. gilyes/pi-shutdown also does so, but pre-dates the implementation of the various hold time functions in GPIO Zero.

GPIO 27 was used, as it’s broken out onto a physical button on the Adafruit PiTFT+ display I own.

This is my first systemd service, and I’m still at the “amazed it works at all” stage. The service file may not contain the ideal configuration.

Connector Pinouts

From GPIO Zero’s pinout command

40 pin

   3V3  (1) (2)  5V    
 GPIO2  (3) (4)  5V    
 GPIO3  (5) (6)  GND   
 GPIO4  (7) (8)  GPIO14
   GND  (9) (10) GPIO15
GPIO17 (11) (12) GPIO18
GPIO27 (13) (14) GND   
GPIO22 (15) (16) GPIO23
   3V3 (17) (18) GPIO24
GPIO10 (19) (20) GND   
 GPIO9 (21) (22) GPIO25
GPIO11 (23) (24) GPIO8 
   GND (25) (26) GPIO7 
 GPIO0 (27) (28) GPIO1 
 GPIO5 (29) (30) GND   
 GPIO6 (31) (32) GPIO12
GPIO13 (33) (34) GND   
GPIO19 (35) (36) GPIO16
GPIO26 (37) (38) GPIO20
   GND (39) (40) GPIO21

26 pin

   3V3  (1) (2)  5V    
 GPIO0  (3) (4)  5V    
 GPIO1  (5) (6)  GND   
 GPIO4  (7) (8)  GPIO14
   GND  (9) (10) GPIO15
GPIO17 (11) (12) GPIO18
GPIO21 (13) (14) GND   
GPIO22 (15) (16) GPIO23
   3V3 (17) (18) GPIO24
GPIO10 (19) (20) GND   
 GPIO9 (21) (22) GPIO25
GPIO11 (23) (24) GPIO8 
   GND (25) (26) GPIO7