Tag: 3dprinter
-
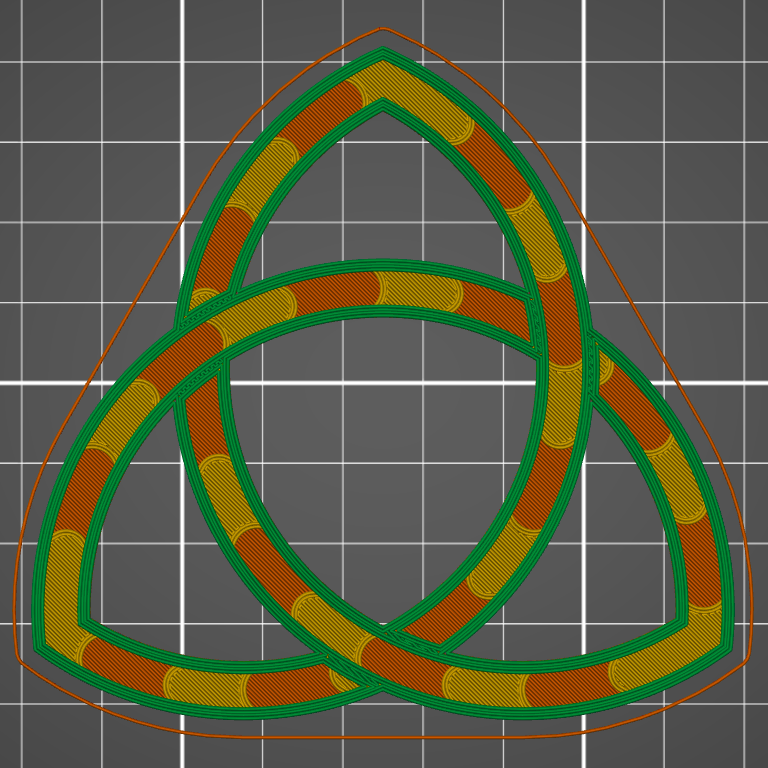
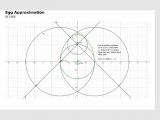
knotwork + strapwork
lots of trial and error in OpenSCAD to get this interleaving even slightly bearable -
who isn’t?

From the box of the rather excellent Creality Ender 3 3d printer I just bought from Digitmakers.
Instagram filter used: Normal
-
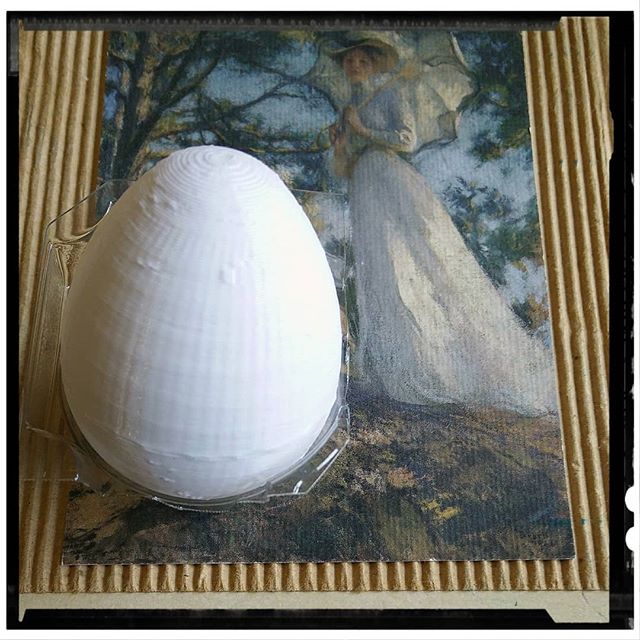
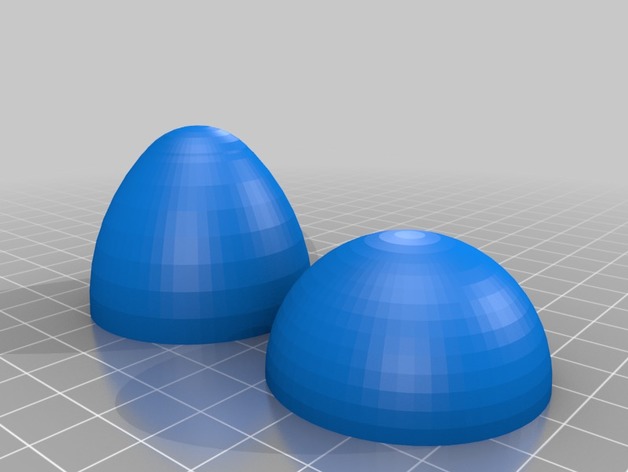
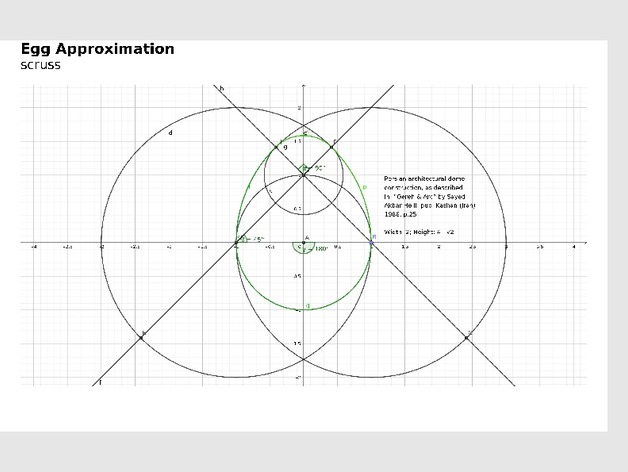
An egg. Because _egg_


3d files here — egg.zip — or get them on Thingiverse: Egg by scruss – Thingiverse
Instagram filter used: Normal
-
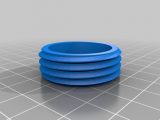
vase mode
I’m still a sucker for vase mode/spiral contour prints … this one made in OpenSCAD:
Thanks to Andrew at ProtoLab for the loan of the PrintrBot. I’ve got a demo at UofT on Wednesday, and my Reach 3D isn’t exactly portable. Yeah, I should probably get a cheap Monoprice printer to lug around to occasional demos, but I’d need to find a donor …
-
Thingiverse Customizer: a tiny guide
Thingiverse‘s Customizer allows users to customize suitable OpenSCAD models without knowing any OpenSCAD code. While it does have some documentation to help developers along, there’s still a lot of guesswork.
 I released my first (working!) Customizer design the other week: Parametric Finger Pen Holder (Vertical). While the docs are the primary source of developer information, you might want to know the following:
- Customizer assumes that every variable defined before the first module definition in the script is a user parameter. To give it a hint that it should stop displaying variables, add an empty module (such as module naff() { }) after the last variable definition you want Customizer to display.
(There’s supposed to be a CUSTOMIZER VARIABLES/CUSTOMIZER VARIABLES END comment pair that will do this too, but it didn’t work for me) - Customizer will fail if there’s any character other than strict ASCII in the script, and won’t give useful diagnostics about the problem. Check your comments for accents and fancy punctuation
- Customizer displays a real-time preview of your model. This means the rendering will be a little rough, especially if you use set operations such as union(), difference() and intersection(). If you have to hit F6 to render your model in OpenSCAD properly, it’s going to look a bit off in Customizer
- If you must use resource-intensive functions such as hull() and minkowski(), try to limit them to 2D paths that are subsequently extruded. Everyone else in the Customizer job queue will thank you
- Similarly, keep the circle smoothness variables ($fa, $fn, $fs) in sensible ranges
- Customizer creates a new Thing under your name rather than just letting you download your customized model. You likely want to delete that once you’re finished with it.
(This also means that Customizer only works for registered Thingiverse users. I can’t see any way around this, unfortunately)
- Customizer assumes that every variable defined before the first module definition in the script is a user parameter. To give it a hint that it should stop displaying variables, add an empty module (such as module naff() { }) after the last variable definition you want Customizer to display.
-
Flashprint except without the prints falling over
I use a FlashForge Creator Pro 3D printer for work. It’s okay, but I wouldn’t recommend it: you have to manually level the print bed (ಠ_ಠ), you can’t print via USB, it pretends to be a knock-off MakerBot (same USB ID: naughty naughty) and its slicing software is a mishmash of GPL and other code all bundled up in one proprietary lump. It also doesn’t used g-code, which is a bit poo.
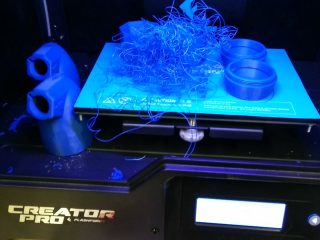
As Vik said: “The Flying Spaghetti Monster has cast forth His noodly appendage and made output in His own image.†I have been having endless trouble will tall prints losing adhesion, falling over, and leaving a noodly mess everywhere.
I’ve fixed it by making some manual changes to the config file, the process as described here: Flashprint advanced print settings by editing the default.cfg configuration file. What I changed was:[brim] enable = true # valid range {true, false}, default is false # CHANGED extruderId = 0 # valid range {0, 1}, default is 0 margin = 10.0 # valid range [1.0, 10.0], default is 5.0 # CHANGED layerCnt = 2 # valid range [1, 5], default is 1 # CHANGED speed = 60 # valid range [10, 200], default is 60 excludeInterior = true # valid range {true, false}, default is false # CHANGEDThis makes a colossal double-width, double thickness brim around the prints so that they will not topple. I’m very happy with the results so far.Rather than mucking about with config files, if you enable “Expert Mode” in Flashprint’s preferences:

Then you can make a brim that stops prints coming off the print bed.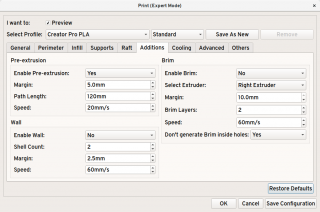
expert brim settings = prints not fall over And lo, there was much rejoicing …
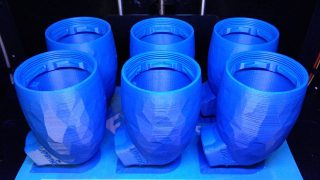
23½ hour print job done! (They’re LipSync shells, btw) -
A few seconds from a 12- hour print job
Instagram filter used: Lo-fi
… which of course failed 95% through:
As Vik said: “The Flying Spaghetti Monster has cast forth His noodly appendage and made output in His own image.†You gotta brim all the time.
-
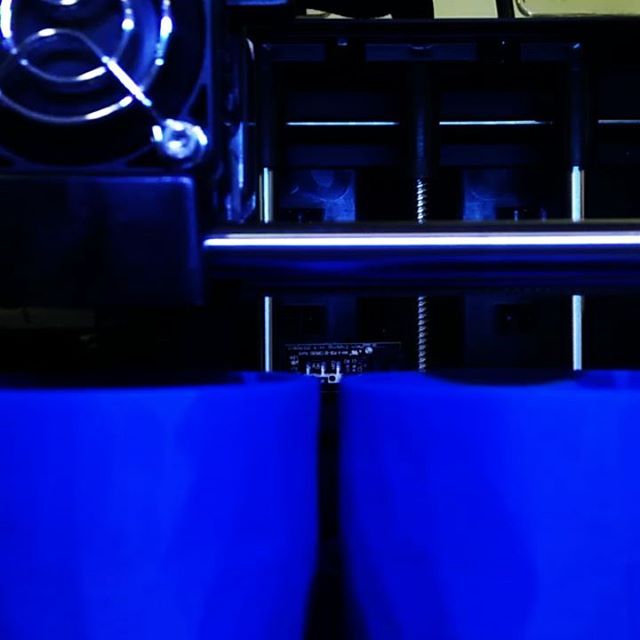
birb chirper v2.0
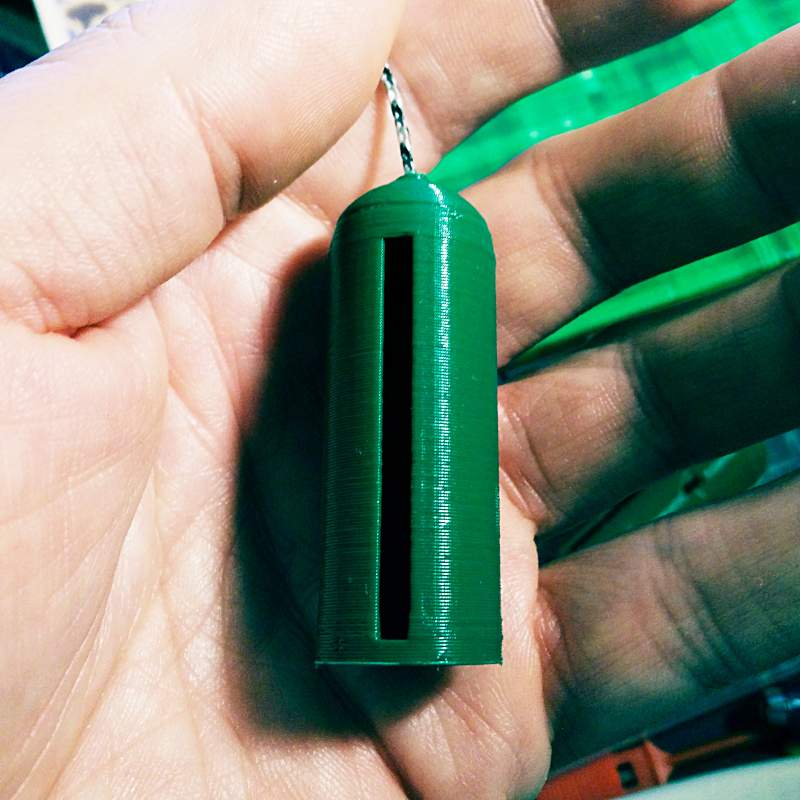
This is one of those toys that you whirl around on a piece of string and it makes a chirping sound like a flock of sparrows. I have no idea what they’re called, so I called it birb_chirper.
Print Settings
Printer: Reach 3D
Rafts: Doesn’t Matter
Supports: Doesn’t Matter
Resolution: 0.3 mm
Infill: 0%Notes: This is a thin-walled model, so use at least two shells and no infill for smooth walls.
Post-Printing
Take a piece of thin string about 1 metre long (I used micro-cord, very fine paracord), pass it through the hole in the tip, then tie off a jam knot that’s big enough to stop in the hole in the top but still pass back through the slot in the side. Now whirl the thing around fast by the string, and it should start to chirp.
This is intended for the amusement of small children and the annoyance of adults.
How I Designed This
The tip of this thing is an ogee curve. I’ve included my library for creating simple ogee and ogive profiles in OpenSCAD.
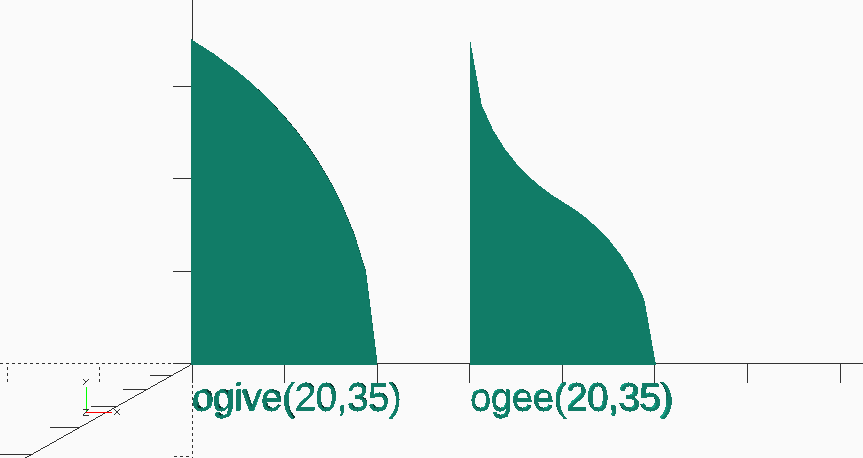
// ogive-ogee example // scruss, 2018 use <ogive_and_ogee.scad>; ogive(20, 35); translate([0, -5])text("ogive(20,35)", size=3); translate([30, 0])ogee(20, 35); translate([30, -5])text("ogee(20,35)", size=3);Download: Thingiverse —birb_chirper by scruss. Local copy: birb_chirper.zip
-
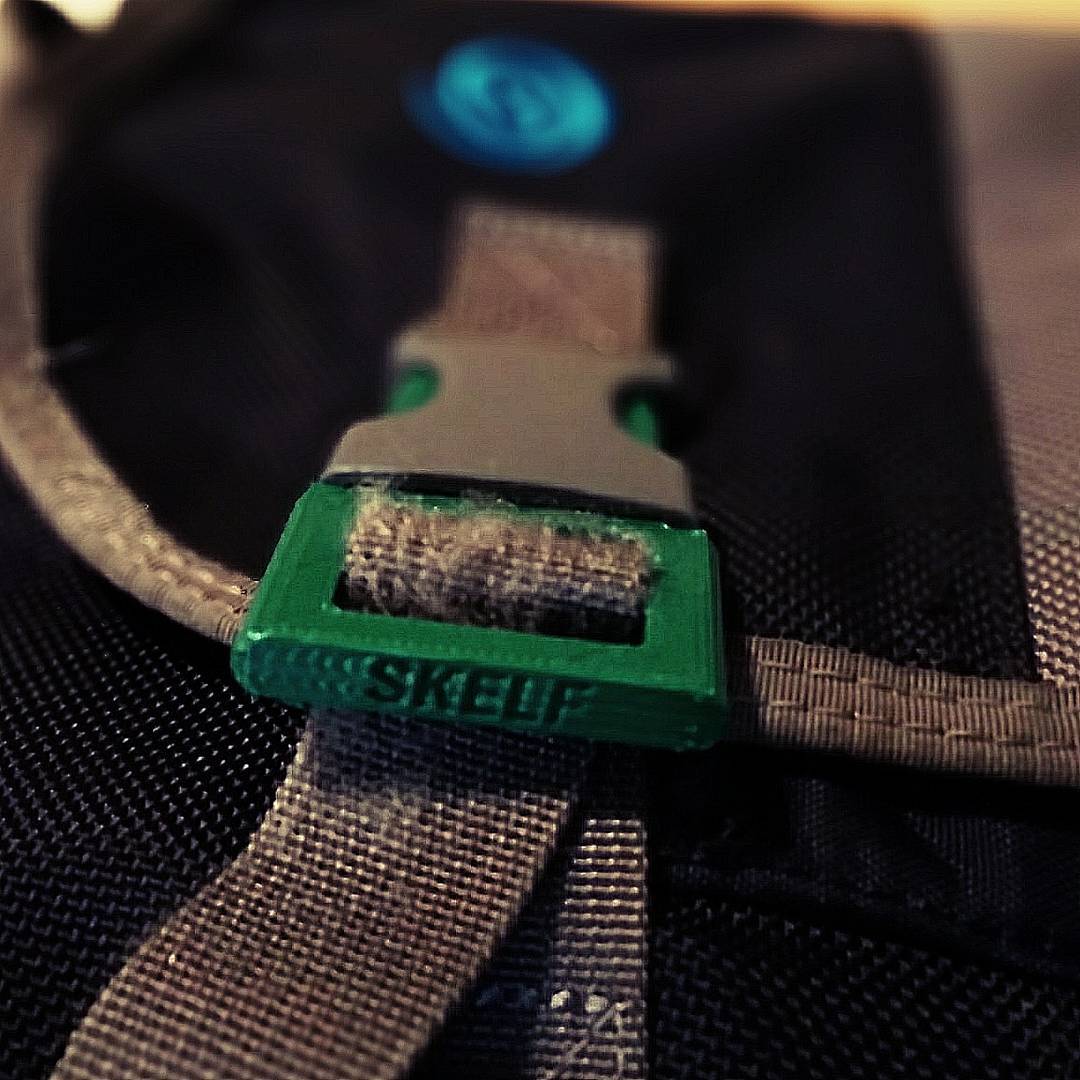
When you fix a thing and it just works …
Skelf is a Scots word for splinter or shard and is a weak pun on the Stealth clips that splintered for me. When both clips broke within a week on my Timbuk2 messenger bag, I knew I had to do something. This coincided with me fixing my 3d printer (it was the extruder feed: it was too loose all along!), so I was able to prototype a new clip.

The files are on Thingiverse: Messenger Bag Replacement 25 mm Webbing Clip, or there’s a local copy here: Messenger_Bag_Replacement_25_mm_Webbing_Clip.zip.
-
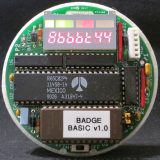
3D printed back cover for 6502 badge
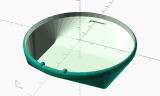
Update, 2017-12-03: So of course, as soon as I show this to someone, they ask: “Can it stand up like a display case?†It can now!
I must remember to dust before taking pics 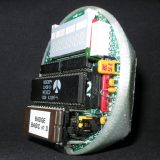
Standing on edge, just like Josh asked! 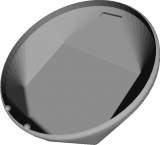
Virtual render of rev 2 in Meshlab STL file and OpenSCAD source for rev 2: VCF-6502-badge.zip
(licence: CC BY-NC-SA 2.5 CA)Thingiverse: https://www.thingiverse.com/thing:2687960
Rev 1: This worked better than I could have hoped, and so the 6502 40th Anniversary Computer Badge now has a snug-fitting case to prevent shorting, and to keep the batteries in place.
Virtually … 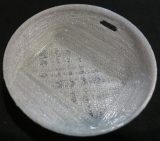
Really … 
Case back with 6502 badge installed 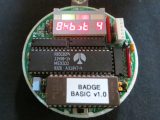
Running snugly in the case 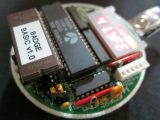
It says “8-bit 4 LYFEâ€, btw 
Side view; any greebles my 3d printer’s fault -
The Pocket DEC Pretender (PDP) Zero
PDP (Pocket DEC Pretender) Zero: lettering came out a bit more, um, artisanal than I’d hoped … Digital (aka DEC) used to make some very solid minicomputers back when a minicomputer was fridge-sized and people were still building nuclear power stations to be controlled by them. The Raspberry Pi Zero is a very mini computer indeed, and in USB gadget mode running SimH it makes a nice little emulation platform.
The case is from Thingiverse: One Piece Raspberry Pi Zero + Camera Case (with GPIO) by Superrei, but with the DEC PDP logo in relief on the top.
DEC minis were famous for their arrays of blinkenlights. The Pocket DEC Pretender, not so much: it has one tiny green light that flickers a bit now and again:
PDP (Pocket DEC Pretender) Zero: case open, very few blinkenlights But it’s a genuinely useful (for my values of useful) emulation platform. Here it is pretending to be a PDP-8, running BASIC under OS-8:
PDP (Pocket DEC Pretender) Zero: PDP-8 BASIC! (background in case pictures woven in Toronto by Deftly Weft)