3D printed back cover for 6502 badge

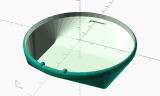
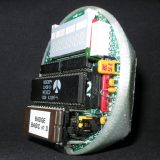
Update, 2017-12-03: So of course, as soon as I show this to someone, they ask: “Can it stand up like a display case?” It can now!

STL file and OpenSCAD source for rev 2: VCF-6502-badge.zip
(licence: CC BY-NC-SA 2.5 CA)

Thingiverse: https://www.thingiverse.com/thing:2687960

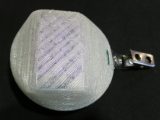
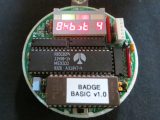
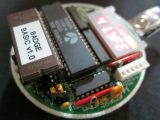
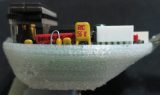
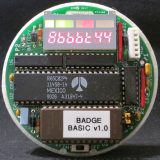
Rev 1: This worked better than I could have hoped, and so the 6502 40th Anniversary Computer Badge now has a snug-fitting case to prevent shorting, and to keep the batteries in place.

BASIC on the 6502 badge

As if it weren’t nerdy enough, the 6502 40th Anniversary Computer Badge runs Lee Davison’s EhBASIC. There are 1024 whole bytes free for your programs, so it’s not exactly spacious. It’s got useful floating point support, though:

Yup, that’s the second most boring BASIC example program, after the quadratic root finder.

100 REM HERON ROOTS
110 EP=0.0001
120 INPUT "X";X
130 N=1:RN=X/2
140 PRINT"COUNT","ROOT","DELTA":PRINT"======","======","======"
150 DE=ABS(RN*RN-X)
160 PRINT N,RN,DE
170 RN=(RN+X/RN)/2
180 N=N+1
190 IF DE>EP THEN GOTO 150

Update: Josh got my badge working again (it wasn’t, for $reasons …) and I re-ran this code. If you try the code for X=100000 and larger, it won’t converge. You might want to add:

185 IF N>25 THEN PRINT "EPSILON TOO LARGE, EXITING":END

so that the loop will exit after 25 times. Alternatively, make the value of EP depend upon the size of X. Aren’t numerical analysis and floating point foibles fun?

6502 badge is go!

Yes readers, I built one:

All of 2 KB RAM, but the form factor can’t be beat. I’m sure I’ll be the hippest cat on the block when I pair it with my happening 2012 Hamvention lanyard …

Thanks to Josh Bensadon for bringing a 6502 40th Anniversary Badge back from VCF Midwest. Josh also got my Apple //e going again by replacing RAM chips: I can’t thank him enough for that, too!

VCF-MW 2017 6502 badge, with almost everything socketed

I did make some minor mods to the build:

  • I socketed the main chips. The 6502 is in 2× cut up 20-pin narrow sockets. Under the EPROM is the 2K×8 SRAM, socketed too. This means that the EPROM is in two stacked sockets and sticks out far too far. But at least it’ll allow me to upgrade the RAM
  • I used real pin-header jumpers and links for RAM and EPROM size selection instead of solder links. This meant a horrible kludge for the RAM selector under the SRAM chip involving angled and bent headers, a filed-down chip socket and a hand-knotted wire jumper (artisanal af!)
  • Even though there’s no mention of it in the manual, I stuck the battery pack on the back
  • One bad mod: the HL-340 RTS mod suggested in the manual is much harder than it looks. I trashed the supplied USB adapter, but I have others …

it lives!

After being used as a wall-hanging for approximately 20 years, then surviving an intercontinental trip in my luggage, the Synertek SYM-1 is running. I think a few segments of the display are iffy, but it responds to the keyboard and beeps. Next step is to hook up the serial port.

These single boards sure do produce a lot of RFI. Waving the almost exactly ten year old radio near it produces howls and churrs.