Modding an Adafruit PIR for 3.3 volts

green circuit board covered in surface mount components. A grey wire has been soldered to the output pin of the SOT-89 package 7133-1 voltage regulator
slightly dodgy soldering of a grey jumper wire to the Vout pin of the PIR’s voltage regulator

Consider the Adafruit PIR (motion) sensor (aka PIR Motion Sensor, if you’re in Canada). Simple, reliable device, but only runs from a 5 V supply. Yes, there are smaller PIRs that run off 3.3 V, but if this is what you have, you need to do some soldering. Annoyingly, the sensor on the board is a 3.3 V part, but the carrier was designed in Olden Tymes when King 5 V ruled.

You can try powering it from 3.3 V, but it’ll go all off on its own randomly as its own power supply won’t be supplying enough voltage. There are a couple of sites on how to modify these PIRs that either describe old kit you can’t get any more, or do it completely wrongly. Just one post on the Adafruit support forum gets it right.

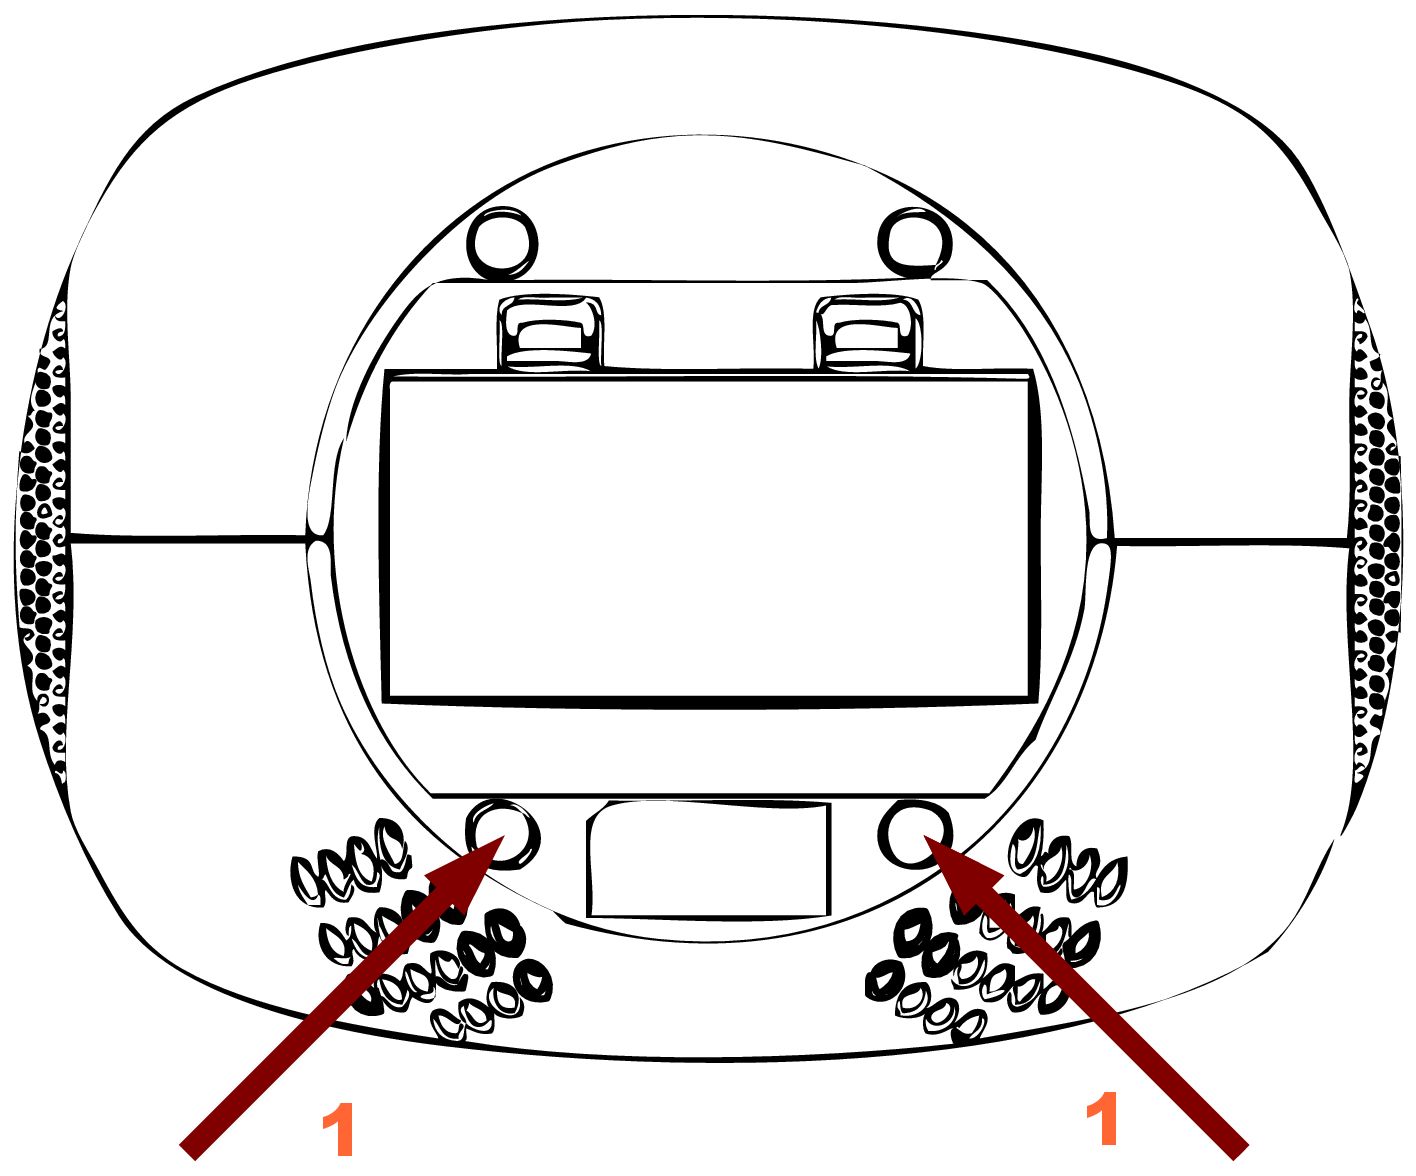
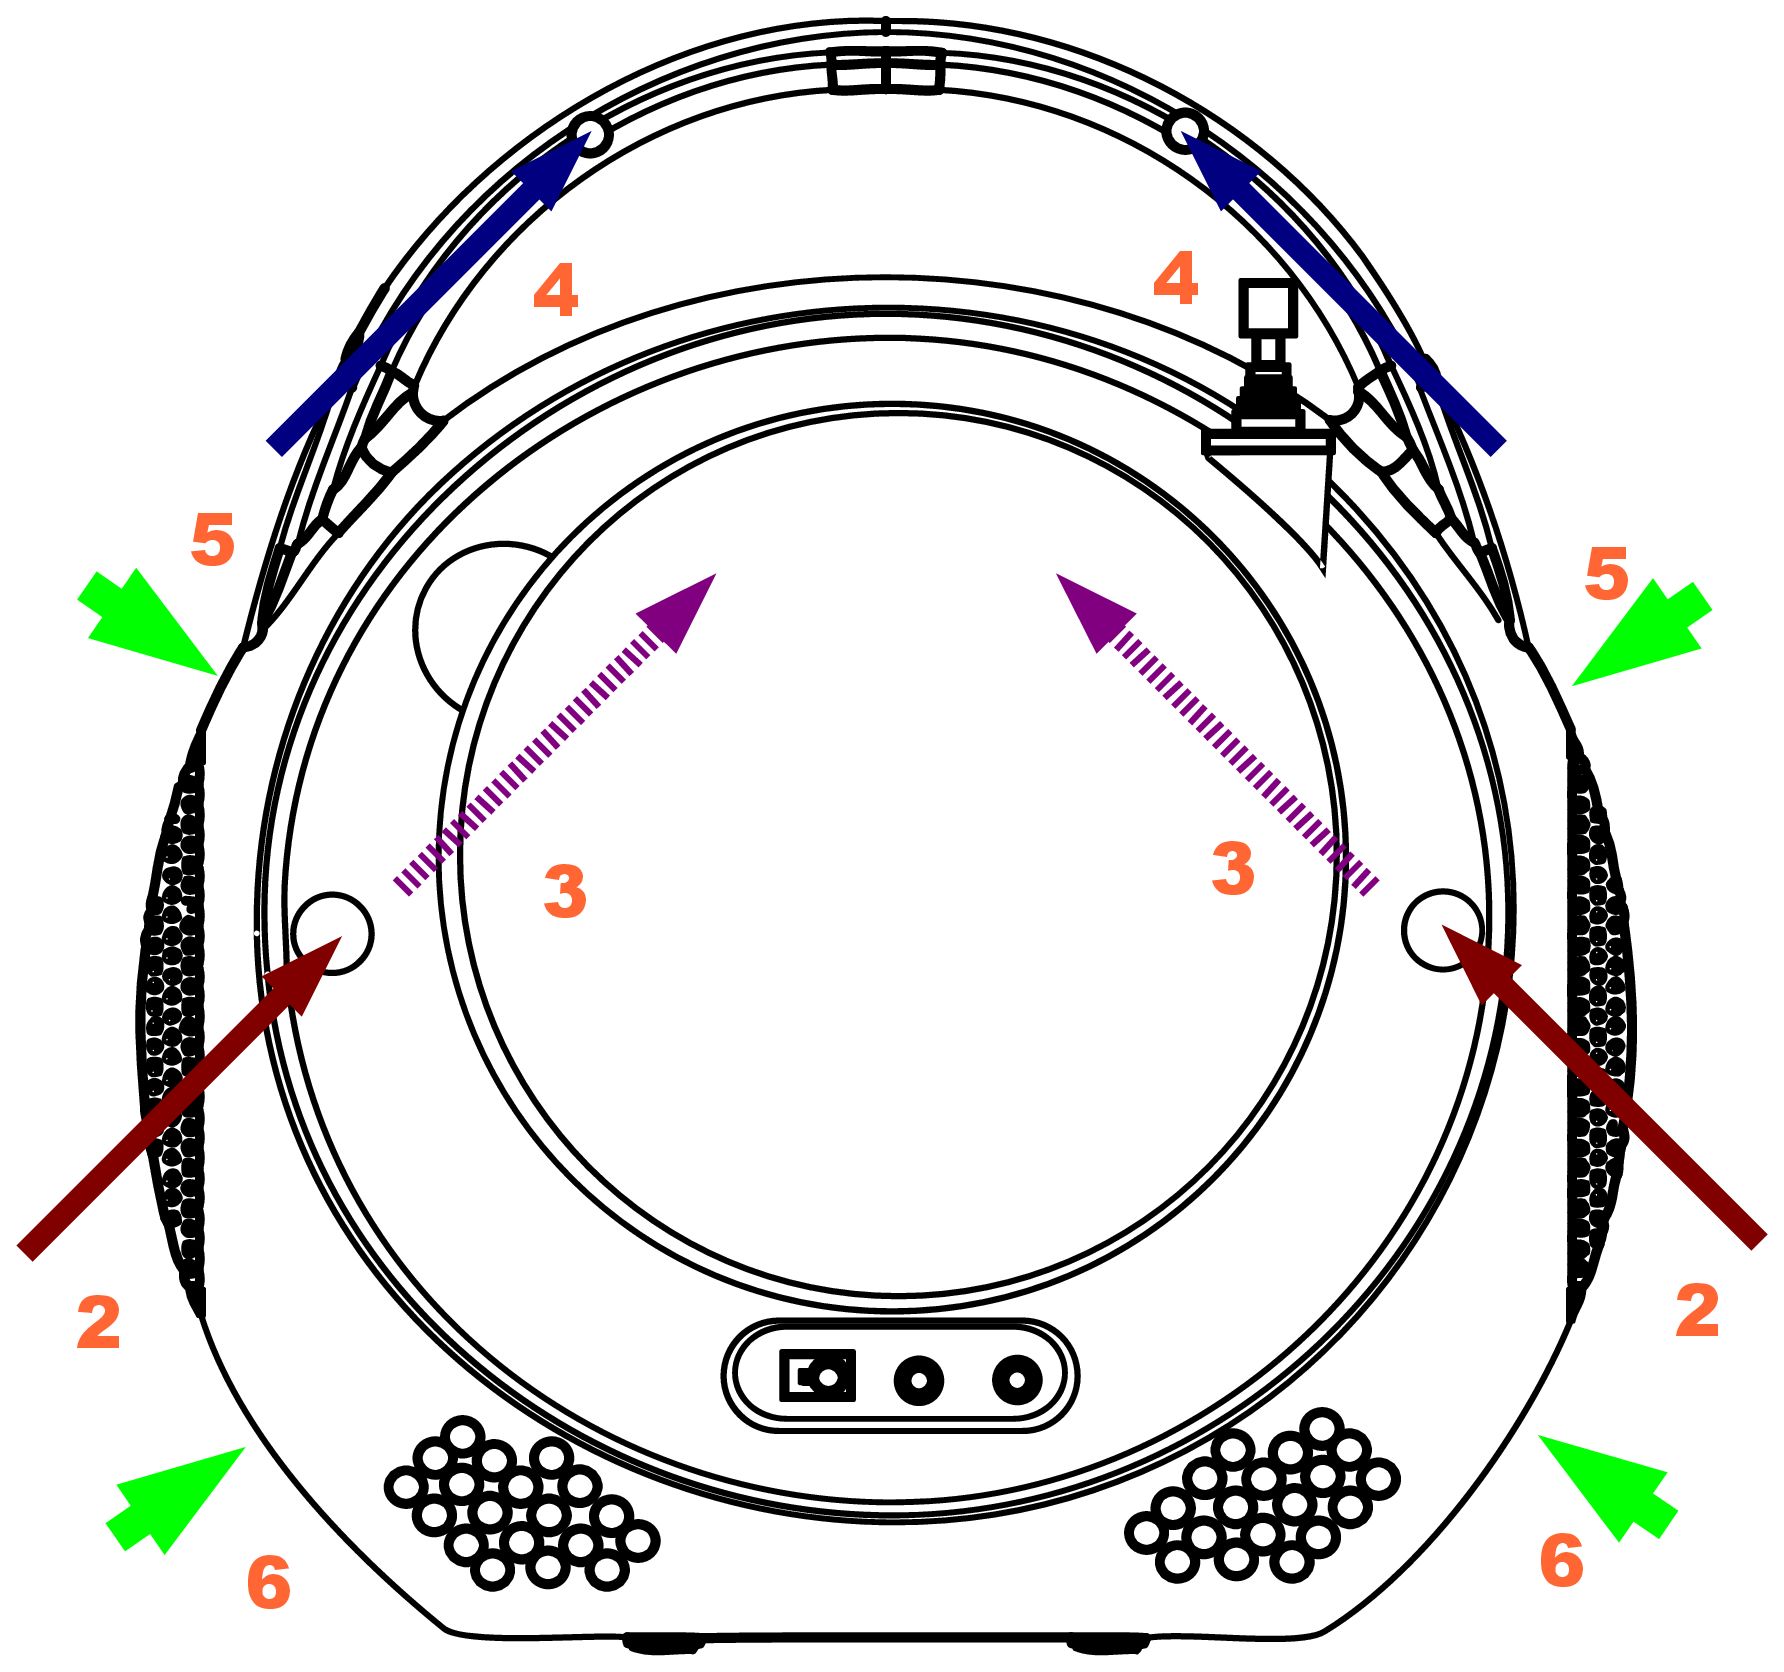
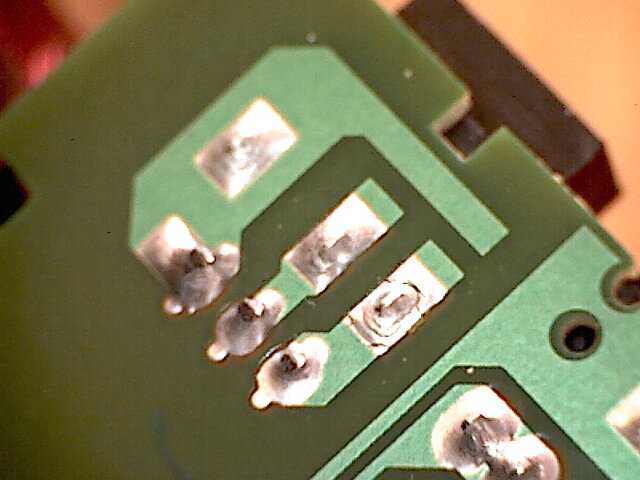
One way of doing this is to provide 3.3 V directly to the output pin of the voltage regulator, and ignore the 5 V power line entirely. The regulator’s a SOT89-3 part that looks a bit like this:

71xx-1 SOT-89 package outline, with three pins at the bottom and one large ground tab (connected to centre pin, but not visible) at the top
wee leggy thing

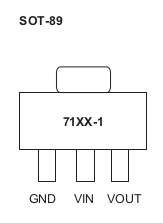
In the photo above, it’s flipped over. Whichever way it’s oriented, we want to put power directly into the Vout pin. There may be easier points to solder this to than a tiny surface mount pin (almost definitely one of the capacitors) but this has held for me.

How to use it in MicroPython? Like the TTP223 capacitive touch sensors I looked at before, a PIR gives a simple off/on output, so you can use something like this:

from machine import Pin
from time import sleep_ms

pir = Pin(21, Pin.IN)

while True:
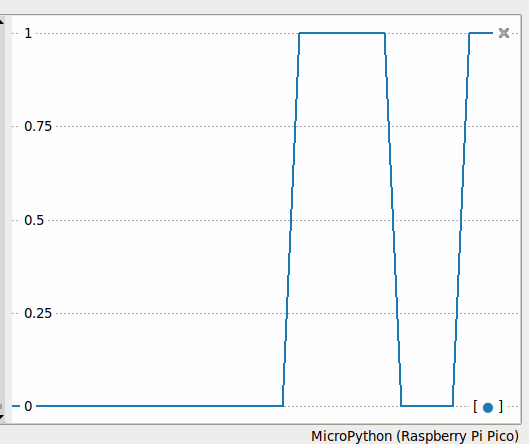
    print("[", pir.value(), "]")
    sleep_ms(1000)

value() will return 1 if there’s movement, 0 if not. There are trigger time and sensitivity potentiometers to fiddle with on the board if you need to tweak the output.

line graph showing output signal going from 0 to 1, back down to 0 and ending at one over a period of about 20 seconds
Thonny plotter output showing a couple of movement detections. High output (on my device) stays up for about 4 seconds, so you can be pretty leisurely about polling PIRs

Just remember: don’t connect the 5 V power line if you make this mod. I’m not responsible for any smoke emitted if you do — but I can always sell you a replacement …

Fixing a broken boombox

Catherine‘s Insignia CD Boombox with FM Radio Model: NS-BIPCD01 (CD-player/iPod dock thingy) just stopped working. The traces on the power connector broke when it got bumped. It was a bit of a bear to open up. I was going to submit this to iFixit, but their editor is horrid.

You will need:

  1. Phillips #0 screwdriver
  2. Phillips #1 screwdriver
  3. Nice thick guitar pick.

Insignia-NS-BIPCD01-opening1Underneath the device, peel off the two sticky feet next to the product label at (1). Underneath are #1 Phillips screws you should remove. These are countersunk, and should be kept separate from the other screws.

Insignia-NS-BIPCD01-opening2At (2), peel off the sticky covers and remove the #1 screws.

Open the CD door, and remove the #1 screws near the top at (3).

Remove the #0 screws in the handle at (4). We’ve accounted for all the screws holding the case together, but there are a couple of clips we’ll need to work on.

Starting from near the top of the handle, pry the two halves of the case apart with the guitar pick. There’s an insert in the handle which will fall out; keep it aside.

At (5) and at (6), there are clips inside the case which you’ll need to press on with the guitar pick to get them open. They’re quite fragile, and I broke two out of four. If you do break them, make sure the loose bits don’t rattle about the case.

The case should slip apart now, and there are several short cables connecting buttons, displays and power supplies. If you lay the box on its back (with the iPod dock uppermost) you can set the top of the case up on the main circuit board. This will allow you to get at the power/audio board, which is secured by two large-flange #0 screws.

2014-03-15-131248… and there’s the problem: the power trace (the lower of the three near the middle of the picture) has cracked. I re-soldered it, and also ran jumper wires between the pins. If this cracks again, the jumpers will be much more robust.

ZX Spectrum → Canada

Ah, the ZX Spectrum… so many hours of my youth wasted on this book-sized computer. Now anything with a display can emulate one in its spare processor cycles, the 30 year old hardware itself is a bit chunky:
IMG_0623That’s a lot of discrete components; all through-hole, too. I brought this one back from the UK earlier this year in the hope of getting it working.

First item that needed attention was the power supply. The original had a 230 V AC to 9 V DC, 1.4 A supply of some extremely dodgy regulation. I replace this with a Circuit-Test AC/DC Adapter – 9 V DC 2.2 A, which will have plenty of current. Since the adapter has a 2.1 mm centre positive DC barrel connector, and the Spectrum uses a centre negative connector, I used the soldering opportunity to wire in an inline switch. The Speccy’s famous lack of a power or reset switch really isn’t part of my retrocomputing experience.

Next up, bypass the UK PAL TV modulator. This required disassembling the computer, and disconnecting the legendarily fragile keyboard membrane edge connectors. It’s a very simple soldering job to re-route the composite video feed (dot crawl and all) from the PCB to the Video Out. Put it all back together, plug it into the TV, and:

IMG_0971

… another partial success. My TV doesn’t talk 50 Hz PAL composite well, giving an oversized black and white display. I’ll either need to buy a PAL to NTSC converter box, or spring for a tiny monitor which supports both standards.

No work of art …

but it is my first working lead-free, SMT soldered circuit. I have two SoftRock Ensemble RXTX radios to build, and I thought it would be better to melt a $10 trainer kit than a $100 radio. It works as expected, though I wouldn’t describe the red/green LED’s insane flickering to be “an attractive and functional SMD dual color LED flasher”.

Flux is your friend here. I tried Chaney’s recommended method of supergluing components on the board, but that didn’t work. What ended up best was applying flux to all the pads, supplying the thinnest layer of solder possible, refluxing the pads, then flowing on the components. A steady hand, a magnifier, tiny (½mm) solder, good tweezers and a pointy soldering iron helps. Some kind of fume extraction is good, too, as Pb-free flux is a tad acrid.

I don’t miss eutectic leaded solder. Sure, it’s easy to use, and it’s got a kind of magical quality that it’s below the melting point of either lead or tin. But Sn-Ag solder is toxic enough, and I don’t need to dump more lead in the world.