Thermal Printer driver for CUPS, Linux, and Raspberry Pi: zj-58


Update:build instructions have changed, 2019. If any manufacturer wants to see if their printer works, send me one (I’m easy to find) for free and I’ll check it out and add it here.

This might be my last post on mini-printers, as I’ve found a driver that just works with CUPS on Raspberry Pi. It also works on Ubuntu on my laptop, and should work (though untried) on Mac OS. You’ll have to build it from source, but it’s not too hard.

The hard part is working out if your thermal printer will work or not. There are many out there, and they’re all slightly different. If they support the ESC/POS bitmap command GS v 0 on 58 mm wide paper, they should work. The ones I’ve tested are:

  1. Catex POS5890U — USB, cheap, fast.
  2. “701” control board panel printer — fairly generic, decent quality printer with serial input. A bit slow for daily use at 9600 baud.
  3. Xiamen Embedded Printer DP-EH600 — as above.

The following should also work, but haven’t been tried:

  • Adafruit Mini Thermal Receipt Printer — again, serial, so not super fast.
  • Sparkfun thermal printer — which now appears to be identical to the Adafruit unit, and is referred to as the “A1 (or A2) micro panel printer” in the documentation.

Known not to work:

  • BTHT-V6 printer — which uses a completely different command set. (Roughly that of an Epson FX-80 for image commands, if you care.)

If you have a manual for your printer, check it to see if it prints bitmaps by sending a three byte header of 29 118 48 (or 1D 76 30 in hexadecimal). If you’re not sure, try it with a small test image, and be ready by the power switch …

Getting and building the driver

The driver is meant for a ZiJiang ZJ-58 printer, and lives here on Github: klirichek/zj-58.

Now read and follow the Building & Installing section of the README, and do what it says. I’ll wait …

Setting up the printer

This bit is much more graphical. You’ll need the system-config-printer package:

sudo apt install -y system-config-printer cups

Open up the printer settings window (Preferences → Print Settings):

2015-07-11-220946_452x281_scrot
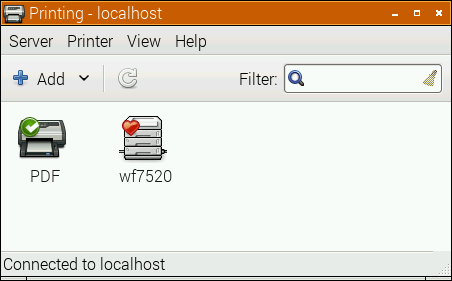
Select the Add icon, and the New Printer window opens:

2015-07-11-221141_602x592_scrot
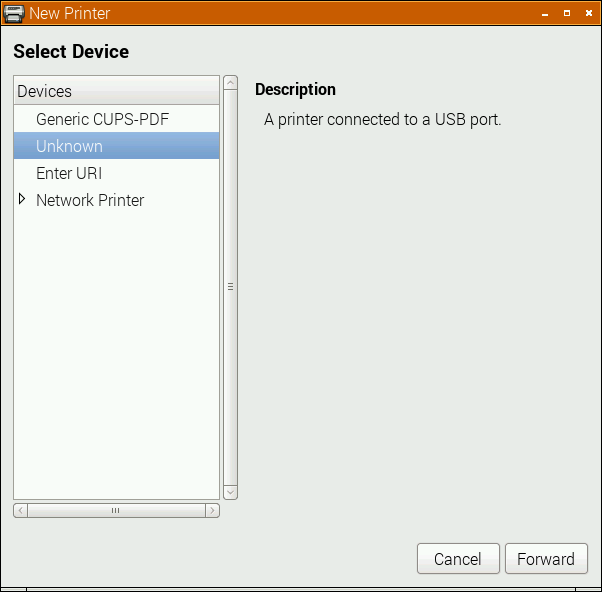
The POS5890U shows up as “Unknown” on my USB port, as Linux doesn’t know the name of this device from its USB ID.

Update (for the slightly desperate): In the land of “Things have changed!”, my Catex printer isn’t/wasn’t showing up at all. I had to resort to this in the Enter URI option:

thermal printer usb lp uri
(hey, this image doesn’t quite match the flow. Look only at the the “Device URI” bit please)

parallel:/dev/usb/lp0 seems to work. Another option might be looking at the output of

sudo /usr/lib/cups/backend/usb

which suggests that usb://Unknown/Printer might work too. (All of this might need to have been preceded by

sudo usermod -a -G lp pi

and a logout or reboot; I did say this was for the slightly desperate …)

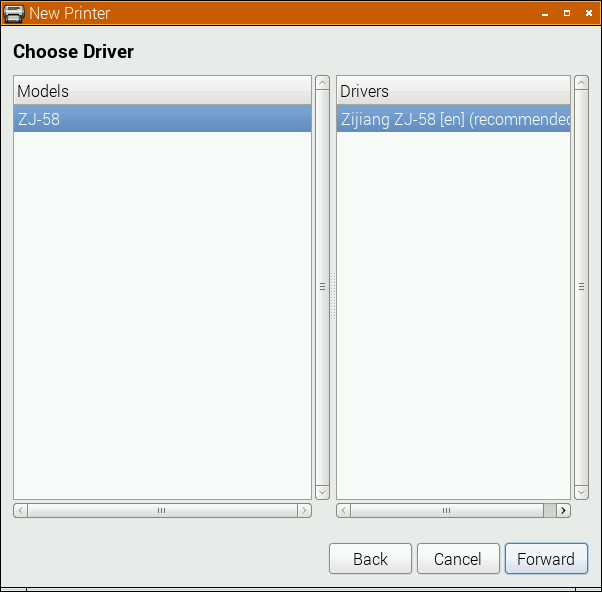
If the above doesn’t apply, your printer might have an known ID, or show up as a serial port. Select the right one, and click Forward:

2015-07-11-221221_602x592_scrot
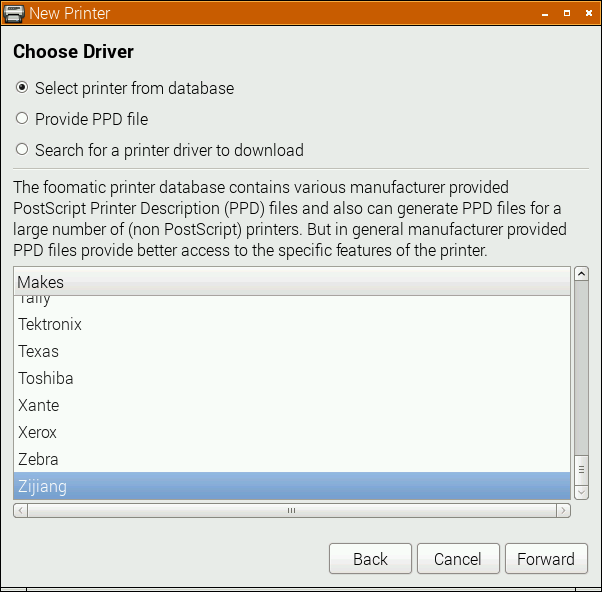
Here, I’m really pleased that the driver is for a Zijiang unit, as it’s conveniently at the end of the list. Click Forward …

2015-07-11-221240_602x592_scrotNo options here, so again, Forward …

2015-07-11-221311_602x592_scrot
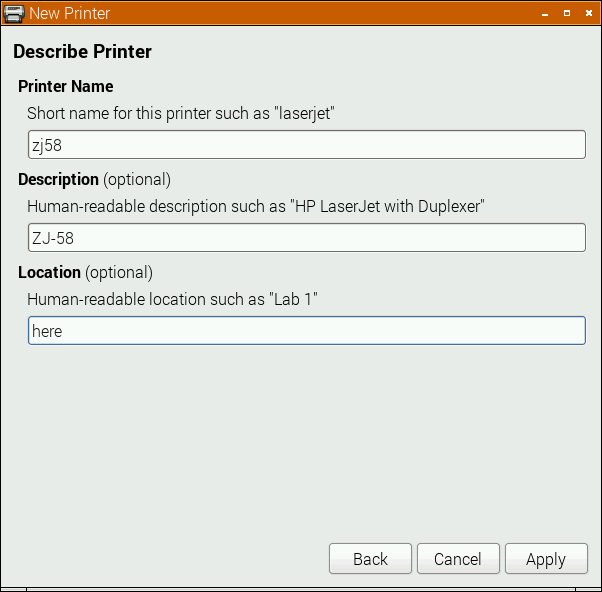
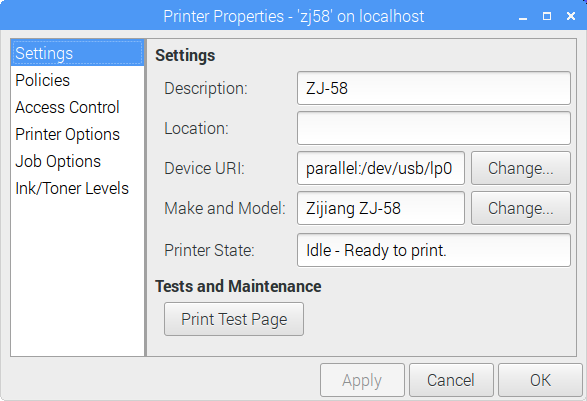
I changed the name from the default ZJ-58 to the more unixly zj58. You don’t have to, but either way, Apply the changes.

2015-07-11-222030_452x281_scrot
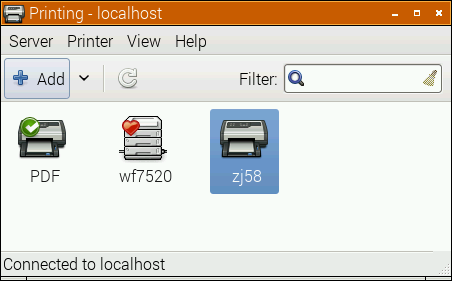
And there it is, registered as a printer!

Printer Options

Most printers expect paper wider than 58 mm, but mini-printers can’t do that. To tell the system about paper sizes, right click on the printer’s icon, and change the printer settings:

2015-07-11-222225_570x560_scrot
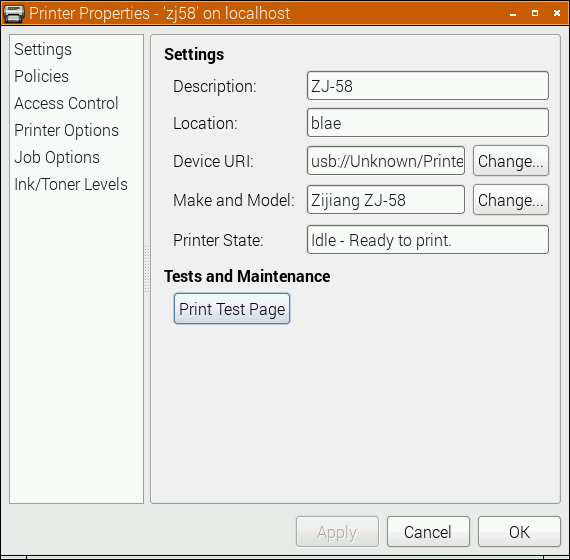
A test page might print properly now, but you should probably go into Printer Options first:

2015-07-11-222239_570x560_scrot
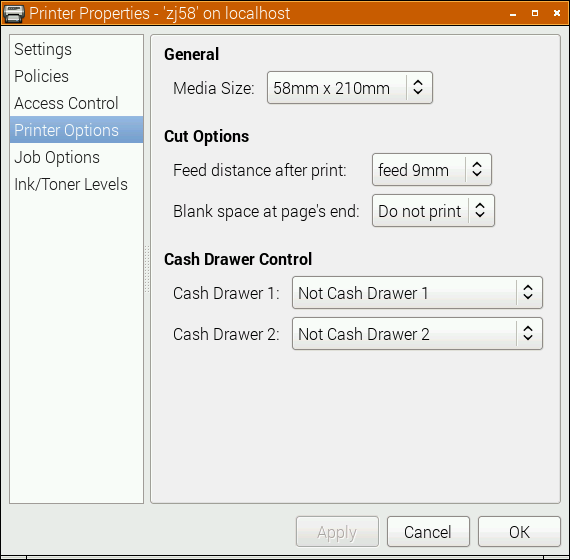
You do want to set the media size to at least 58 × 210 mm. This is just the longest strip it will print in one ‘page’; if your print is shorter, it won’t waste extra paper. You can choose longer prints, but not wider. The default assume your local standard paper size which —be it A4, Letter, or whatever — will not be what you want here. Hit OK.

Printing something

You could print the self test page, but it’s long and boring. If you’re fairly sure your printer will be supported, try this scaled PDF version of the Raspberry Pi Logo: raspberry-pi-logo.  Printed and scanned, it came out like this:

raspberry-pi-logo-miniprinterNot the best rendition, but not bad for a $30 receipt printer. My test image came out like this (iffy scan, sorry):

zj58-driver-test
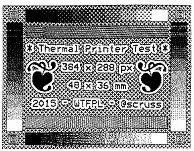
I haven’t covered the intricacies of setting up serial port connections here; maybe another time. Also, there’s a short delay (maybe 10–20 s) between selecting Print and the printer coming to life. CUPS is pretty complex, and is doing things in the background while you wait.

(Seeing as I use their logo prominently up there, I should totes acknowledge that “Raspberry Pi is a trademark of the Raspberry Pi Foundation”. Also, I couldn’t have done all this without the support of Reed Zhao. Though Reed has moved on to bigger things and doesn’t sell printers any more, his help — not to mention the generous gift of a couple of printers — was very welcome.)

→ you might also be interested in my notes on mini-printers and Linux – it has some manuals too.

101 comments

  1. Hi, thanks for pointing out this driver! I was able to get it working by just following your instructions on my Linux Mint Debian Edition desktop. Yay! Only issue I have is whenever I want to print an image either from Evince/Document Viewer or from an lp command line it wants to center the image vertically (and horiz.) which makes for a bunch of wasted paper before the image. In Evince “Print…” dialog I can manually change the centering settings and distance from top of page to eliminate the space but on the next print it defaults right back. Can you suggest any settings I’ve missed or something else I can do to eliminate the default to image centering?

  2. It will always waste some, but check that you don’t have auto-rotate and centre set in your driver. I think I actually prefer driving this printer with raw data, as CUPS assumes too much.

  3. Thanks for the reply. I’ve since been able to get somewhat sensible behavior by printing with the following command line:

    lp -d zj58 -o position=top-right -o landscape -o media=Custom.58x210mm CSH_logo.png

    But no luck finding our where the centering is being set by default.

  4. Don, this may not be much help, but the page media should really be set to 48 mm wide with no margins.There’s a fixed 5 mm margin that’s the difference between the width of the print element and the paper.

  5. I finally found the auto-rotation setting. Turns out it is not under printer options but rather job options in the printer admin settings. Still can’t find the auto center setting/option anywhere (reviewed the ppd line-for-line) but with auto-rotation and scaling turned off I get better results, and now can omit the custom media option entry in the command line. Thanks again.

  6. You’re welcome, Don. CUPS is slightly overkill for these little printers, I feel. They’re just 384 black or white pixels across a page. I have more control and reliability if I generate the bitmap and feed it directly.

  7. I’m back. 🙂 May I ask what are you using to print directly?

    I’d tried using raw escpos codes and the escpos-php software as shown at http://mike.bitrevision.com/blog/2015-03-getting-a-usb-receipt-printer-working-on-linux with mixed result. That was before I found your post here.

    I’m again working on a project for an admission sales system for a non-profit. They have an upcoming event where we’re selling admission at a variable price and anything paid over the cash value requires a receipt be generated for tax/donation purposes. I want to include a logo graphic on the receipt plus a bunch of text showing the applicable amount, etc.

    I’m planning to use a rpi as the server for this web application with the printer attached and tablet(s) running a browser as the cashier interface.

  8. Well, I can confirm that this procedure works with NaviaTEC 5890T. Its a cheap POS printer which i have payed 50 €.

  9. Hi, thanks for these instructions.

    For some reason I don’t know why the system-config-printer is not showin this USB printer at all… dmesg and lusb shows that the printer is detected and tried every USB port on this computer.

    Running on (I cannot dist-upgrade):
    DISTRIB_ID=Ubuntu
    DISTRIB_RELEASE=11.10
    DISTRIB_CODENAME=oneiric
    DISTRIB_DESCRIPTION=”Ubuntu 11.10″

  10. You could always feed it raw bitmaps via one of the little Python code snippets I’ve published here. If it’s a USB model, it’ll be pretty quick.

  11. Hi, Thank you for your work.

    I buy a Excelvan POS-58 for 46€.

    On the site where I bought it, they said there were drivers for windows, mac, linux, etc. Only, there was only drivers for window.

    So I search and I came across your post.

    Your driver work properly with this printer on a Raspberry PI (and CUPS). But when I print (a generated pdf file) for a reason that an Escape me I have sometimes a few unwanted / unreadable characters that are added on top of the ticket.

    To you ever had this problem? Are you in an idea or a track?

    I reduced the width of the pdf file, it works, but when I change a line or I add a line, it can again print these unwanted and unreadable characters.

    I can send you, the generated PDF file and scanned the ticket if you want.

    I look to see if it came from an even or odd number the lines, but I do not think it comes from.

    The only connection I’ve found, is the size of the pdf file (width) and / or margins of pdf file (again on the width). But nothing consistent.

  12. My PDF generated document is 48mm wide and all margins are set to 0.

    I try differents setup, when I foud one who work, il try this setup with a different number of line, and I have these unwanted and unreadable characters.

    I don’t know if is the PDF contains something that is not appropriate for the printer / driver / CUPS. Or if it is the driver who does not quite fit in the printer.

    This is the result (Certainly better than my English Approximate ^^) :
    https://goo.gl/photos/W6dxGT7BgShz4wGP8

    The lines ” DarkTerra ” repeated is normal, I was just too lazy to write something different for each line.

    If someone an idea ?
    thank you in advance

  13. Thank you for the link, I had not seen.

    But the driver epsonsimplecups will not boot at all.

    But, when I intalled a new time your driver, settings that I changed (Feed distance after- print) for hegemonically a space between the last line and the end of the ticket, the original configured to 9mm. I had changed to 18mm the first time (before I write you a comment). It would seem it comes from , I chose this time 21mm and after printing at a short walk of 50 tickets(with different set of lines). I think that to solve the problem . So I assume that the PDF was not involved, and that it comes eventually CUPS or printer that is not perfectly suited to the driver .

    Anyway, I am happy to have found a solution ^^ .

    Again thank you for your help, without which I certainly never thought to touch this option, and thank you for the driver that you provided to us !

    Good continuation !

  14. Hello , unfortunately I’m back , I reboot my Today RPI and the printer, and it is back to normal (or at least I did not test every possibility of the world lol) . I’m about 95% sure that it is not from the generated PDF , as I try on traditional printers and I generated PDFs from other applications and still have the same result. I think the problem is either between CUPS and the driver , between the driver and printer. I ‘m looking for another driver to test , unfortunately, it is not easy to find drivers for CUPS and ticket printer .

    If anyone reads this comment and knows another , I prenneur .

    Good continuation 🙂

  15. Hi thanks for making this info available, any chance on letting us know how to modify this for the ZJ-80, 80mm version? Thanks Mike.

  16. Hi all,

    I’ve bought a TTL mini printer. I’ve installed those libraries from your tutorial, but cannot print a test page using my Raspi2.

    I surely know that the wires and input voltage is Ok, it prints its own test page when push the hardware buttom. But somehow, I can’t make it print a test page from the properties of the printer.

    Thanks for your time!
    Juasmilla

  17. In the printer control panel, what is its status? I’ve found that these printer sometimes go offline for no good reason.

  18. Hi Scruss again,

    Inside Policies tab, I tick Enable state. Then, returning to Setting tab, the printer state says: Idle.
    When I try to test, it pop-ups a Error message:’There was a problem sending document ‘Test page'(job 9) to the printer’. Now the printer State is: ‘Stopped – Rendering completed’. When I diagnose that problem on the error pop-up, I choose the writer, then it says that the queue ‘ZJ-58’ is not enabled. The reason given is: ‘Rendering complete’.

    I need to add that, the Serial port is disable into raspberry configuration.
    Also, from Printer properties, as Device URL is serial:/dev/ttyAMA0?baud=9600, and sorry, but I’m not an expertise here, but there is no file called like that in my /dev/ folder, and maybe that could be the issue…

    Thanks again for your time,
    Juasmilla

  19. Hi again,

    Here is now in what I’ve ended-up:

    After many tries, and still following the tutorial for printing images, I’ve already connected the TTL printer through TX and RX serial connections. Also succesfully added as a printer (Zijiang ZJ-58 -> serial:/dev/ttyAMA0?baud=9600), and print test page when I click on test page print, but, the problem is when I try to send a “Hello world. test” or an image file through CUPS. The data is sent, but what I have as output is a endless bunch of Chinesse chars.

    Here is the proof:
    https://www.dropbox.com/s/kvg67243tf9e73m/20160710_171531__2.jpg?dl=0
    Code sent for the output:

    $ lpr -o fit-to-page raspberry-pi-logo.pdf

    I’m using Raspbian. Raspberry Pi 2. CUPS libraries.
    Also tried with and without adding a 1Kohm resistor on Rx and Tx wires.

    Is there any issue? Is there something that need to be calibrated? What am I doing wrong?
    Thanks!

  20. I’m curious if anybody reading this thread has encountered issues with qrcodes (generated with qrencode)?

    I am able to print other images directly with lpr, but for whatever reason the PNG images that qrencode puts out (1-bit colormap, non-interlaced) never actually come out. I am able to print EPS output files from qrencode, but printing them does result in some a lot of wasted paper =).

    Just wondering if anyone else has done what I’m doing and has any tip for making the printer, well, print the qrcode?

  21. Yeah, I couldn’t get the PNGs to print either. My solution is not to use PNGs. EPS should print the same size.

  22. First off, thanks for the guide. It was really helpful in getting my printer set up.

    I’m going crazy trying to figure this out, though: The test page from the printer has a left margin of about 1/8″ (sorry, I don’t have a metric ruler around), but when I try to print a picture, the margin jumps to just over 1/4″. The picture (BMP and PNG) is exactly 384 pixels wide, and as far as I can tell, the margins for the printer, as set by the Raspberry Pi settings menus are zero. Any ideas?

  23. Hi Nate – glad to be able to help.

    If you’re using the zj-58 driver, CUPS always wants to add its own little bit of ‘magic’ to the output. CUPS is not really designed to work with roll-fed printers with zero margins. There may be a way of forcing zero margins through lp options, but I don’t see anything.

    If you are pre-rendering bitmaps at exactly the right size – and I recommend this if you’re not using a slow serial printer – bypass CUPS and the ZJ58 device completely and use a simple script like one of my python gists to drive the printer directly. That way, you control the margins, and CUPS doesn’t get in the way.

  24. I fiddled around with some of the Python printing to mixed success, but I’ll worry more about that later, I think. My new issue is that my printer seems to have a really hard time printing solid horizontal lines, which makes sense I suppose. Have you had any experience with this and how to get around it, or how to make the printer heat up more to be “prepared” for the lines?

    I’m printing what are basically long receipts, and whenever there is a horizontal line, no matter how thin, it will skip both it and the next ~3-5mm of content, with seemingly no way to cheese myself around it, by adding more white space in between, or whatever. Mysteriously enough, a 1px line at the very beginning of the receipt prints 100% of the time, while other 1px lines don’t. No idea.

    (The adafruit library has a spot about heat time for the printer, but I couldn’t get it to print anything decent one way or another)

  25. Is your power supply providing enough current? They need quite a bit. I think one of my serial printers worked best with a 5V 3A supply.

  26. Hi!

    Let me say thanks for this tutorial because it actually worked the first time I followed it. The bad news is that I have let the printer in it’s box on my desk to play with a Raspberry Pi camera for a week and when I tried to plug it back on my Raspberry Pi 3B GPIO pins, the printer didn’t output anything. I have tried to follow some threads about this issue and added the line “enable_uart=1” to the “boot/config.txt” file, I changed the printer url to “/dev/serial0” and “/dev/ttyS0” but nothing worked.

    I also found this and tried everything without success : http://spellfoundry.com/2016/05/29/configuring-gpio-serial-port-raspbian-jessie-including-pi-3/

    I am kind of lost right now and it would be awesome if you knew how to fix this issue.

    Thanks!
    O

  27. Which value you have to change to make this driver work with the 80mm version?

    Thanks in advance

  28. Back a few months later with another question.

    When you printed the images in this post, did it also print about extra space before the image itself? I’m printing smaller images/PDFs now, and it always prints some huge amount of white space, though the amount does seemingly get smaller the larger the image is. Setting a custom media size with [ lp -o media=Custom.48xYYmm filename.bmp ] doesn’t seem to do anything at all, either. Using the gists or other libraries might help, but I’ve just had terrible luck with them in the past.

  29. Hi Nate – not a huge amount of space extra, no. Unfortunately, the zj58 driver doesn’t support ‘-o media=Custom’, but there is a BlankSpace option that might help. Here’s what my printer supports regarding options:

    $ lpoptions -p zj58 -l
    PageSize/Media Size: *X48MMY210MM X48MMY297MM X48MMY3276MM
    FeedDist/Feed distance after print: 0feed3mm 1feed6mm *2feed9mm 3feed12mm 4feed15mm 5feed18mm 6feed21mm 7feed24mm 8feed27mm 9feed30mm 10feed33mm 11feed36mm 12feed39mm 13feed42mm 14feed45mm
    BlankSpace/Blank space at page's end: 0Print *1NoPrint
    CashDrawer1Setting/Cash Drawer 1: *0NotCashDrawer1 1NotCashDrawer1BeforePrinting 2NotCashDrawer1BeforePrinting
    CashDrawer2Setting/Cash Drawer 2: *0NotCashDrawer2 1NotCashDrawer2BeforePrinting 2NotCashDrawer2BeforePrinting

  30. java print question
    hello, i use the zj-58 printer, when i test print, it work ok.
    but when i printer from a java program, it always printer a half, from the page middle, the paper’s left side always white. and the characters bigger than print test.

  31. I don’t know anything about printing from Java. But if your text is too big with a large left margin, that usually means that your computer is assuming a much larger paper size. If you can, set the page width to 48 mm with no margins.

  32. Hi scruss,

    thank you so much for this nice tutorial. Without your help i was searching about a solution for days i think. With the Windows Driver you can print without margins. I read your post about the problem with cups. Is there a solution in the meantime?

  33. I got it! With a few changes in the ppd., the margins are optimized now for 58mm.
    Everyone can use his/her own settings. If anyone need the file, please reply to the post. I will upload it for you.

    Thanks scruss for giving a nice start.

Leave a comment

Your email address will not be published. Required fields are marked *