CardKB mini keyboard with MicroPython

small computer screen with text
*** APPALLING TYPEWRITER ***
** Type stuff, Esc to end **

then further down: "hello I am smol keeb"
it really is the size of a credit card
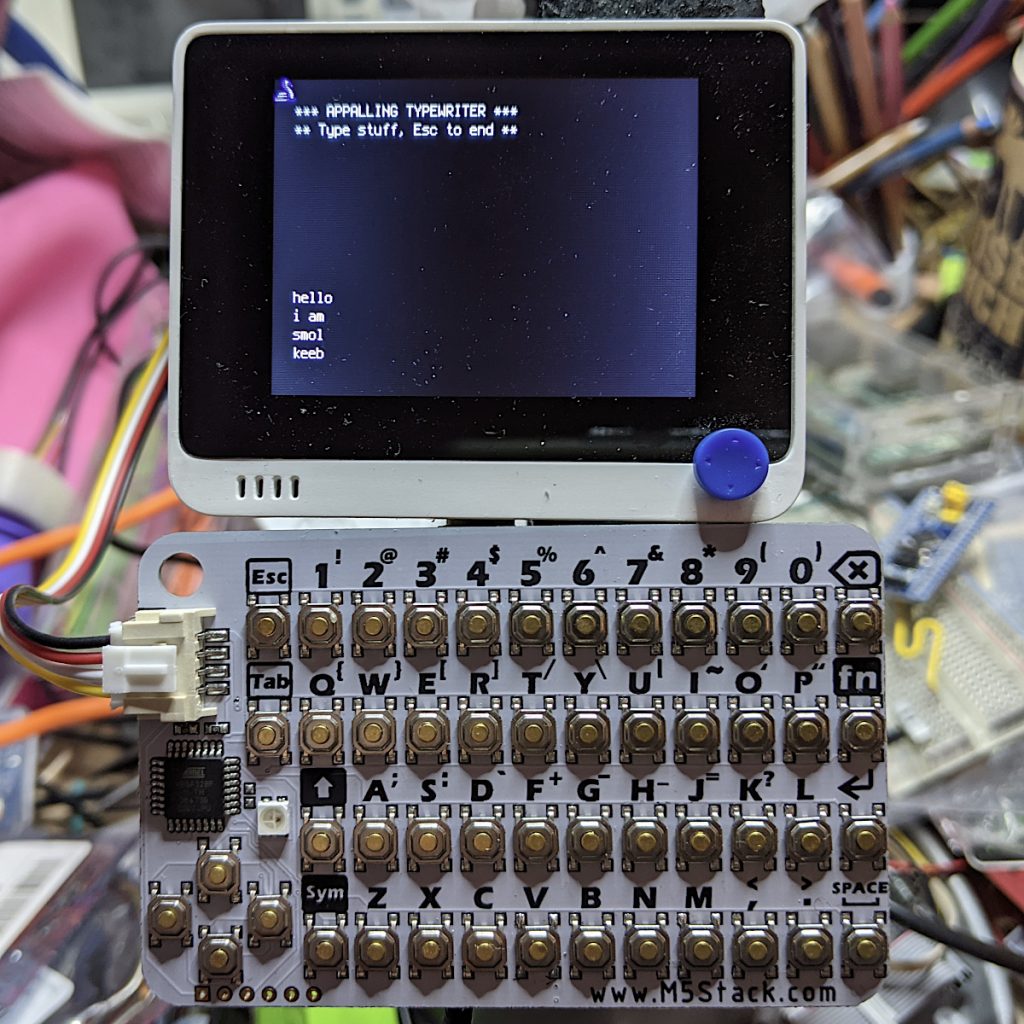
(running with a SeeedStudio Wio Terminal)

I got one of these CardKB Mini Keyboards to see if I could use it for small interactives with MicroPython devices. It’s very small, and objectively not great as a mass data entry tool. “Better than a Pocket C.H.I.P. keyboard” is how I’d describe the feel. It’s also pretty reliable.

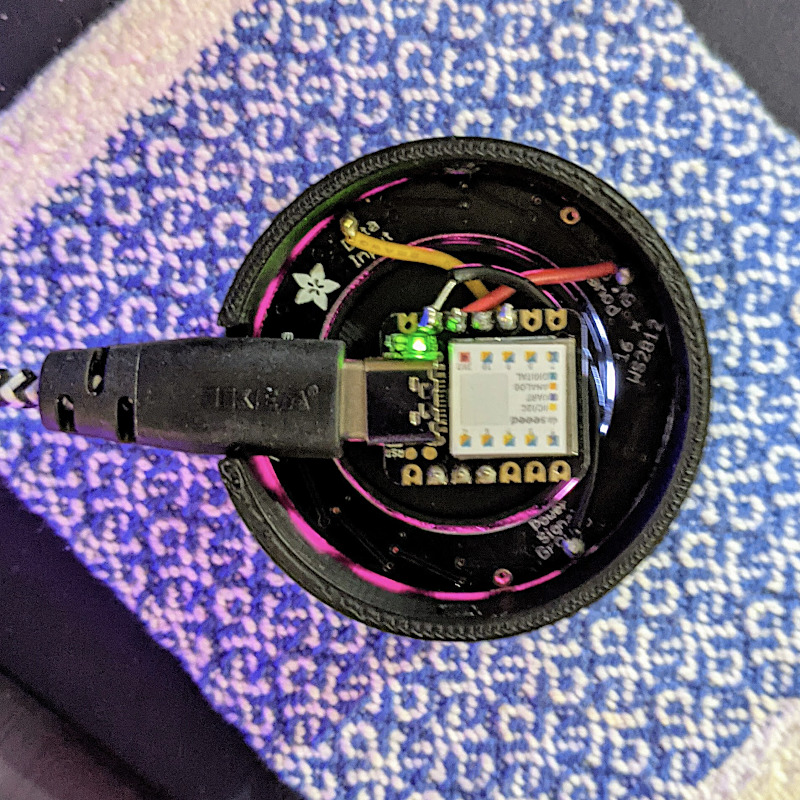
It’s got an I²C Grove connector, and its brains are an ATMega chip just like an Arduino. It’s strictly an ASCII keyboard: that is, it sends the 8-bit ASCII code of the key combination you pressed. It doesn’t send scan codes like a PC keyboard. The driver source is in the CardKB m5-docs, so if you really felt ambitious you could write a scan code-like firmware for yourself.

The device appears at I²C peripheral address 95, and returns a single byte when polled. That byte’s either 0 if no key was pressed, or the character code of what was pressed. The Esc key returns chr(27), and Enter returns CR. If you poll the keyboard too fast it seems to lose the plot a little, so a tiny delay seems to help

Here’s a small demo for MicroPython that acts as the world’s worst typewriter:

# M5Stack CardKB tiny keyboard - scruss, 2021-06
# MicroPython - Raspberry Pi Pico

from machine import Pin, I2C
from time import sleep_ms

i2c = I2C(1, scl=Pin(7), sda=Pin(6))
cardkb = i2c.scan()[0]  # should return 95
if cardkb != 95:
    print("!!! Check I2C config: " + str(i2c))
    print("!!! CardKB not found. I2C device", cardkb,
          "found instead.")
    exit(1)

ESC = chr(27)
NUL = '\x00'
CR = "\r"
LF = "\n"
c = ''

print("*** APPALLING TYPEWRITER ***")
print("** Type stuff, Esc to end **")

while (c != ESC):
    # returns NUL char if no character read
    c = i2c.readfrom(cardkb, 1).decode()
    if c == CR:
        # convert CR return key to LF
        c = LF
    if c != NUL or c != ESC:
        print(c, end='')
    sleep_ms(5)

And here’s the CircuitPython version. It has annoying tiny differences. It won’t let me use the I²C Grove connector on the Wio Terminal for some reason, but it does work much the same:

# M5Stack CardKB tiny keyboard - scruss, 2021-06
# CircuitPython - SeeedStudio Wio Terminal
# NB: can't use Grove connector under CPY because CPY

import time
import board
import busio

i2c = busio.I2C(board.SCL, board.SDA)

while not i2c.try_lock():
    pass

cardkb = i2c.scan()[0]  # should return 95
if cardkb != 95:
    print("!!! Check I2C config: " + str(i2c))
    print("!!! CardKB not found. I2C device", cardkb,
          "found instead.")
    exit(1)

ESC = chr(27)
NUL = '\x00'
CR = "\r"
LF = "\n"
c = ''
b = bytearray(1)

# can't really clear screen, so this will do
for i in range(12):
    print()
print("*** APPALLING TYPEWRITER ***")
print("** Type stuff, Esc to end **")
for i in range(8):
    print()

while (c != ESC):
    # returns NUL char if no character read
    i2c.readfrom_into(cardkb, b)
    c = b.decode()
    if c == CR:
        # convert CR return key to LF
        c = LF
    if c != NUL or c != ESC:
        print(c, end='')
    time.sleep(0.005)

# be nice, clean up
i2c.unlock()

Seeeduino XIAO simple USB volume control with CircuitPython

round computer device with USB cable exiting at left. Small microcontroller at centreshowing wiring to LED ring and rotary encoder
Slightly blurry image of the underside of the device, showing the Seeeduino XIAO and the glow from the NeoPixel ring. And yes, the XIAO is really that small

Tod Kurt’s QTPy-knob: Simple USB knob w/ CircuitPython is a fairly simple USB input project that relies on the pin spacing of an Adafruit QT Py development board being the same as that on a Bourns Rotary Encoder. If you want to get fancy (and who wouldn’t?) you can add a NeoPixel Ring to get an RGB glow.

The QT Py is based on the Seeeduino XIAO, which is a slightly simpler device than the Adafruit derivative. It still runs CircuitPython, though, and is about the least expensive way of doing so. The XIAO is drop-in replacement for the Qt Py in this project, and it works really well! Everything you need for the project is described here: todbot/qtpy-knob: QT Py Media Knob using rotary encoder & neopixel ring

I found a couple of tiny glitches in the 3d printed parts, though:

  1. The diffuser ring for the LED ring is too thick for the encoder lock nut to fasten. It’s 2 mm thick, and there’s exactly 2 mm of thread left on the encoder.
  2. The D-shaft cutout in the top is too deep to allow the encoder shaft switch to trigger.

I bodged these by putting an indent in the middle of the diffuser, and filling the top D-shaft cutout with just enough Blu Tack.

Tod’s got a bunch of other projects for the Qt Py that I’m sure would work well with the XIAO: QT Py Tricks. And yes, there’s an “Output Farty Noises to DAC” one that, regrettably, does just that.

Maybe I’ll add some mass to the dial to make it scroll more smoothly like those buttery shuttle dials from old video editing consoles. The base could use a bit more weight to stop it skiting about the desk, so maybe I’ll use Vik’s trick of embedding BB gun shot into hot glue. For now, I’ve put some rubber feet on it, and it mostly stays put.


Hey! Unlike my last Seeed Studio device post, I paid for all the bits mentioned here.

Circuit Playground Express Chord Guitar

Hey! This doesn’t work any more, as CircuitPython changed and I haven’t found a way to update it with the new interpreter.

Since there are seven touch pads on a Circuit Playground Express, that’s enough for traditional 3-chord (â… , â…£, â…¤) songs in the keys of C, D and G. That leaves one pad extra for a â…¥min chord for so you can play Neutral Milk Hotel songs in G, of course.

CircuitPython source and samples: cpx-chord_guitar.zip. Alternatively, on github: v1.0 from scruss/cpx_chord_guitar

The code is really simple: poll the seven touch pads on the CPX, and if one of them is touched, play a sample and pause for a short time:

# Circuit Playground Express Chord Guitar
# scruss - 2017-12

# these libraries should be installed by default in CircuitPython
import touchio
import board
import time
import neopixel
import digitalio
import audioio

# touch pins, anticlockwise from battery connector
touch_pins= [
    touchio.TouchIn(board.A1),
    touchio.TouchIn(board.A2),
    touchio.TouchIn(board.A3),
    touchio.TouchIn(board.A4),
    touchio.TouchIn(board.A5),
    touchio.TouchIn(board.A6),
    touchio.TouchIn(board.A7)
]

# 16 kHz 16-bit mono audio files, in same order as pins
chord_files = [
    "chord-C.wav",
    "chord-D.wav",
    "chord-E.wav",
    "chord-Em.wav",
    "chord-F.wav",
    "chord-G.wav",
    "chord-A.wav"
]

# nearest pixels to touch pads
chord_pixels = [ 6, 8, 9, 0, 1, 3, 4 ]

# set up neopixel access
pixels = neopixel.NeoPixel(board.NEOPIXEL, 10, brightness=.2)
pixels.fill((0, 0, 0))
pixels.show()

# set up speaker output
speaker_enable = digitalio.DigitalInOut(board.SPEAKER_ENABLE)
speaker_enable.switch_to_output(value=True)

# poll touch pins
while True:
    for i in range(len(touch_pins)):
        # if a pin is touched
        if touch_pins[i].value:
            # set nearest pixel
            pixels[chord_pixels[i]] = (0, 0x10, 0)
            pixels.show()
            # open and play corresponding file
            f=open(chord_files[i], "rb")
            a = audioio.AudioOut(board.A0, f)
            a.play()
            # blank nearest pixel
            pixels[chord_pixels[i]] = (0, 0, 0)
            pixels.show()
            # short delay to let chord sound
            # might want to try this a little shorter for faster play
            time.sleep(0.2)

This is roughly how I synthesized the samples, but I made them quieter (the MEMS speaker on the CPX went all buzzy at full volume, and not in a good way) and added a bit of reverb. Here’s the sox command from the modified script:

sox -n -r 16000 -b 16 "chord-${chord}.wav" synth 1 pl "$first" pl "$third" pl "$fifth" delay 0 .05 .1 remix - fade p 0 1 0.5 norm -5 reverb

Really, you do want to take a look at shortening the delay between the samples: you want it long enough for all of the notes of the chord to sound, but short enough that you can play faster songs. I came up with something that worked for me, kinda, and quickly; it’s worth fixing if you have the time.