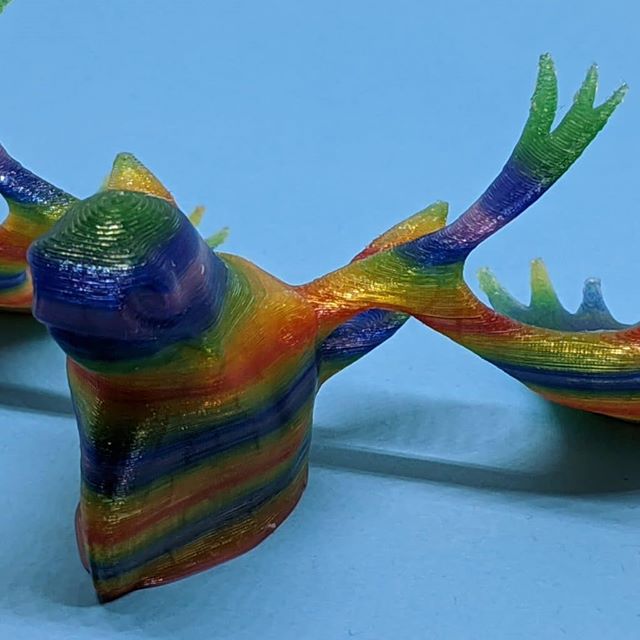
Instagram filter used: Lo-fi
Further to the Canaduino STM32 boards with MicroPython writeup, I thought I’d start showing how you’d interface common electronics to the WeAct F411 boards. First off, NeoPixels!
Rather than use the Adafruit trade name, these are more properly called WS2812 LEDs. Each one contains a tiny microcontroller and it only takes three connections to drive a long chain of addressable colour LEDs. The downside is that the protocol to drive these is a bit of a bear, and really needs an accurate, fast clock signal to be reliable.
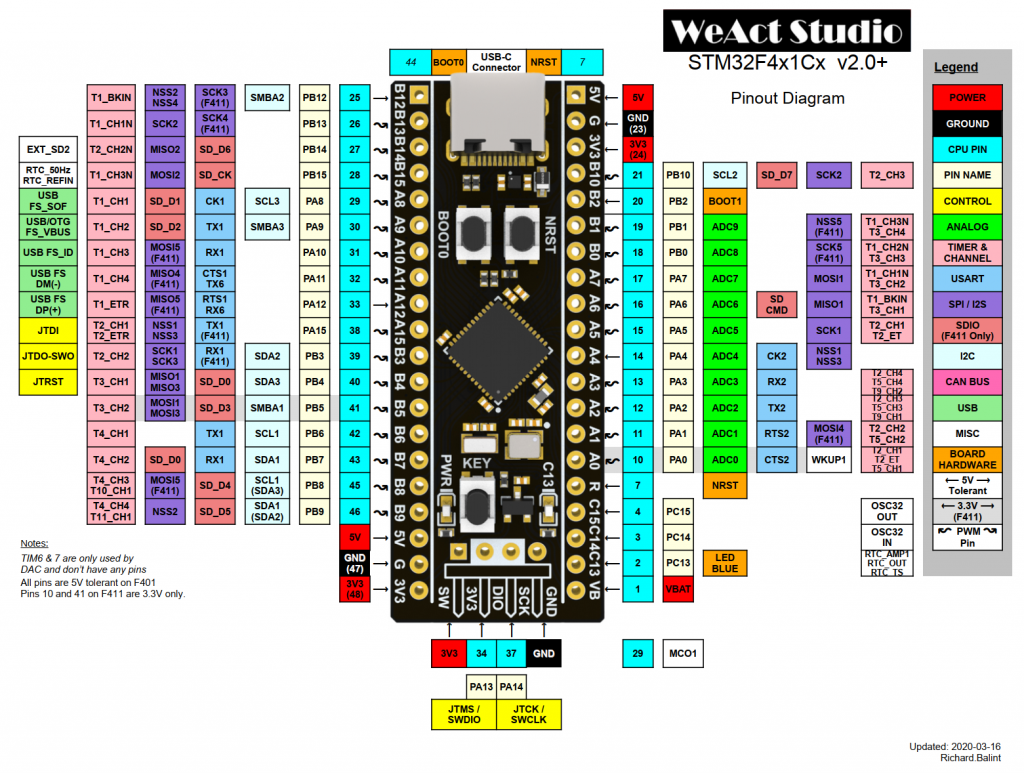
The STM32F411 chip does have just such a clock, and the generic micropython-ws2812 library slightly misuses the SPI bus to handle the signalling. The wiring’s simple:
Next, copy ws2812.py into the WeAct F411’s flash. Now create a script to drive the LEDs. Here’s one to drive 8 LEDs, modified from the library’s advanced example:
# -*- coding: utf-8 -*-

import time
import math

from ws2812 import WS2812

ring = WS2812(spi_bus=2, led_count=8, intensity=0.1)

def data_generator(led_count):
    data = [(0, 0, 0) for i in range(led_count)]
    step = 0
    while True:
        red = int((1 + math.sin(step * 0.1324)) * 127)
        green = int((1 + math.sin(step * 0.1654)) * 127)
        blue = int((1 + math.sin(step * 0.1)) * 127)
        data[step % led_count] = (red, green, blue)
        yield data
        step += 1

for data in data_generator(ring.led_count):
    ring.show(data)
    time.sleep_ms(100)
Previously I said you’d see your WS2812s flicker and shimmer from the SPI bus noise. I thought it was cool, but I suspect it was also why the external flash on my F411 board just died. By pumping data into PA7, I was also hammering the flash chip’s DI line …
Volker Forster at Universal Solder was kind enough to send me a couple of these boards for free when I asked about availability. By way of thanks, I’m writing this article about what’s neat about these micro-controller boards.
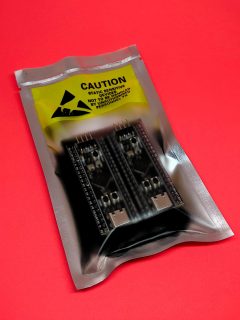
Can I just say how nicely packaged Universal Solder’s own or customized products are? They want it to get to you, and they want it to work.
I’d previously played around with Blue Pill and Black Pill boards with limited success. Yes, they’re cheap and powerful, but getting the toolchain to work reliably was so much work. So when I read about the WeAct STM32F411CEU6 board on the MicroPython forum, I knew they’d be a much better bet.
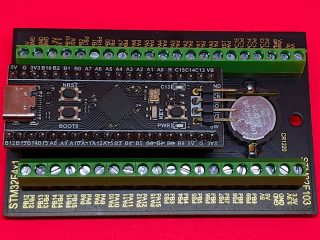
Volker sent me two different things:
Let’s start with the STM32 Screw Terminal Adapter:
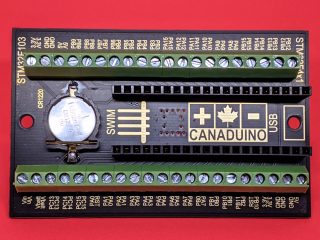
It’s a neat, solid board built on a black 1.6 mm thick PCB. Apart from the obvious screw terminals — essential for long-term industrial installations — it adds three handy features:
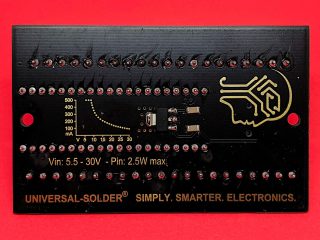
I made a little slip-case for this board so it wouldn’t short out on the workbench. The project is here: Canaduino STM32 Screw Terminal board tray and you can download a snapshot here:
The boards themselves are pretty neat:
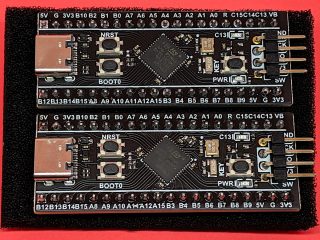
Gone are the lumpy pin headers of the earlier Blue and Black Pill boards, replaced by tactile switches. The iffy micro USB connectors are replaced by much more solid USB C connectors. According to STM32-base, the STM32F411 has:
About the only advanced features it’s missing are a true RNG, a DAC for analogue outputs, and WiFi. But on top of all this, Volker added:
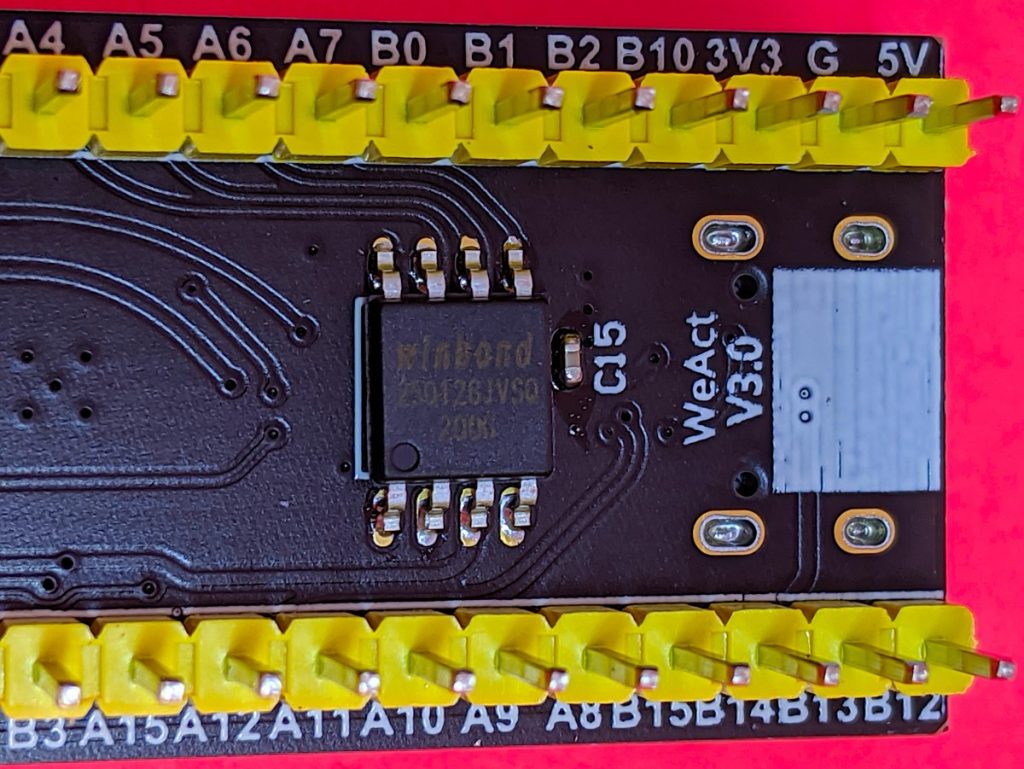
128 Mbit of Flash! This gives the board roughly 16 MB of storage that, when used with MicroPython, appears as a small USB drive for your programs and data. I found I was able to read the ADC more than 22,000 times/second under MicroPython, so who needs slow-to-deploy compiled code?
This is surprisingly easy. You’ll need to install the gcc-arm-none-eabi compiler set before you start, but following the instructions at mcauser/WEACT_F411CEU6: MicroPython board definition for the WeAct STM32F411CEU6 board will get you there.
I had to run make a couple of times before it would build, but it built and installed quickly. This board doesn’t take UF2 image files that other boards use, so the installation is a little more complicated than other. But it works!
Once flashed, you should have a USB device with two important MicroPython files on it: boot.py and main.py. boot.py is best left alone, but main.py can be used for your program. I’m going into more details in a later article, but how about replacing the main.py program with the fanciest version if Blink you ever saw:
# main.py -- fancy Blink (scruss, 2020-05)

from pyb import LED
from machine import Timer
tim = Timer(-1)
tim.init(period=1000, mode=Timer.PERIODIC,
         callback=lambda t: LED(1).toggle())
None of that blocking delay() nonsense: we’re using a periodic timer to toggle the user LED every second!
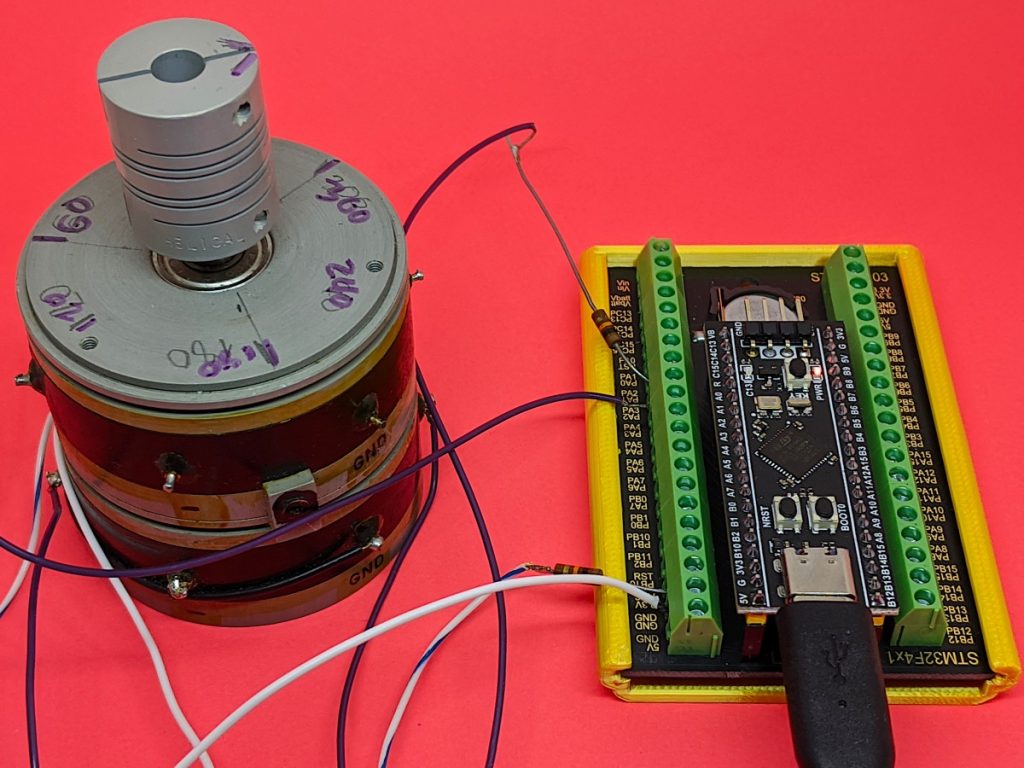
I’m really impressed with the Universal Solder-modified board as an experimentation/discovery platform. MicroPython makes development and testing really quick and easy.
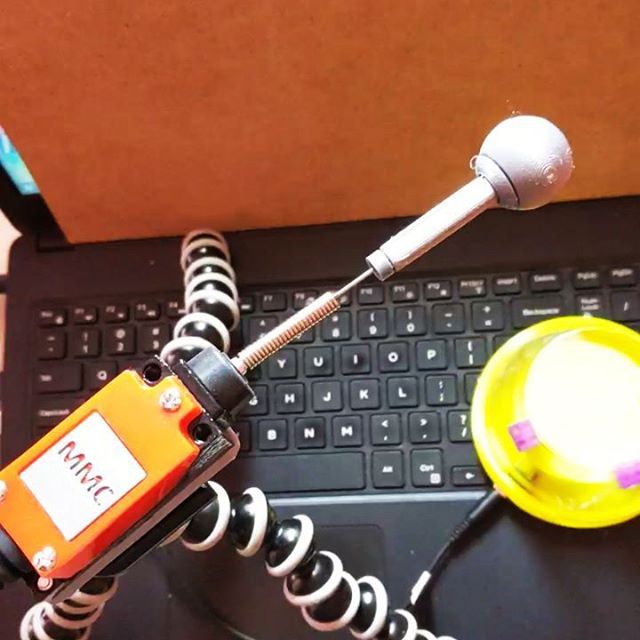
[and about the mystery huge potentiometer: it’s a Computer Instruments Corporation Model 206-IG multi-turn, multi-track potentiometer I picked up from the free table at a nerd event. I think it’s a 1950s (so Servo-control/Cybernetics age) analogue equivalent of a shaft encoder, looking at the patent. Best I can tell is that each pot (there are two, stacked, with precision bearings) appears to have two 120° 10k ohm sweep tracks offset 90° to one another. The four wipers are labelled -COS, -SIN, +COS and +SIN. If anyone knows more about the thing, let me know!]
I just found my first ESP8266 dev board. This was from way back before Arduino support, and long before MicroPython
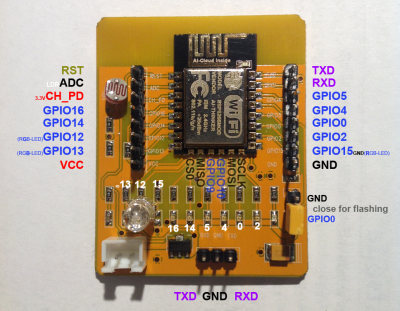
It’s not really in a useful form factor, but it’s got some sensors and outputs:
My board can’t quite be the earliest of the early, as it has 1 MB of flash. This is enough to install MicroPython, so I wrote a tiny test program for the outputs:
Here’s the code:
# esp8266 old explorer board
# see https://www.esp8266.com/wiki/lib/exe/detail.php?id=esp8266-dev-boards&media=esp8266-12_mod.png

from time import sleep
from machine import Pin, PWM
# LEDs are 16, 14, 5, 4, 0, 2 - L to R
# inverted logic: 1 = off
leds = [Pin(2, Pin.OUT, value=1), Pin(0, Pin.OUT, value=1), Pin(4, Pin.OUT, value=1), Pin(
    5, Pin.OUT, value=1), Pin(14, Pin.OUT, value=1), Pin(16, Pin.OUT, value=1)]

# RGB for PWM on [15, 12, 13]
rgb = (PWM(Pin(15)), PWM(Pin(12)), PWM(Pin(13)))
# LDR on ADC


def cos_wheel(pos):
    # Input a value 0 to 255 to get a colour value.
    # scruss (Stewart Russell) - 2019-03 - CC-BY-SA
    from math import cos, pi
    if pos < 0:
        return (0, 0, 0)
    pos %= 256
    pos /= 255.0
    return (int(255 * (1 + cos(pos * 2 * pi)) / 2),
            int(255 * (1 + cos((pos - 1 / 3.0) * 2 * pi)) / 2),
            int(255 * (1 + cos((pos - 2 / 3.0) * 2 * pi)) / 2))


i = 1
while True:
    i = i + 1
    i = i % 64
    w = cos_wheel(4 * i)
    for j in range(3):
        rgb[j].duty(4 * w[j])

    for k in range(6):
        if i & (1 << k):
            leds[k].value(0)
        else:
            leds[k].value(1)
    sleep(1)
The PC I put together a few years ago (well, Scott Sullivan told me which bits to get, I bought them and assembled it) is still working really well. It was quite spiffy in its day — i7-4790K, 32 GB DDR3, Asus H97M-E — and is quite fast enough for me.
One thing, though, has never worked. The hardware serial port (the old kind, not the USB kind) refused to do anything. Only in the last day or so did I work out why and managed to fix it.
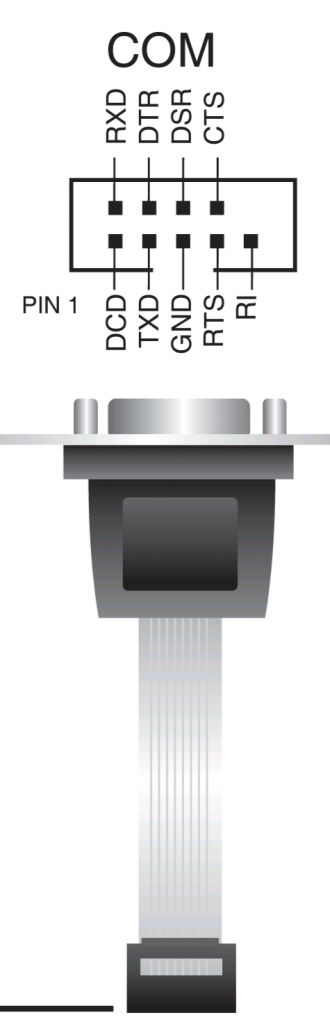
PC serial ports for roughly the last 25 years connected to the motherboard like this:
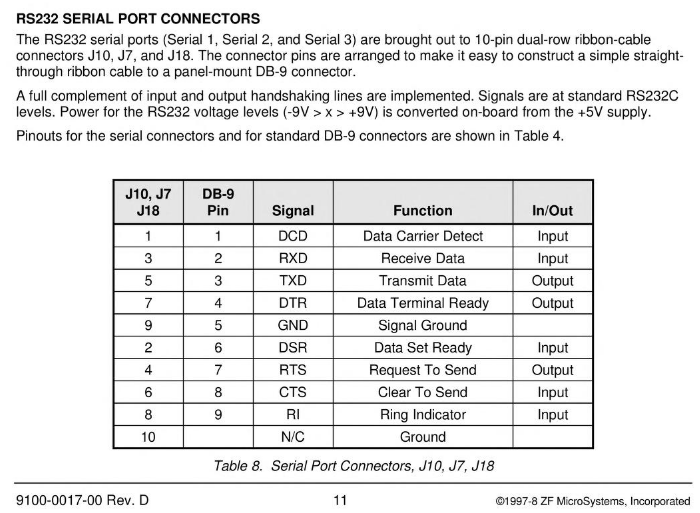
This rather strange mapping makes sense as soon as you see an IDC ribbon-cable DB-9 connector:
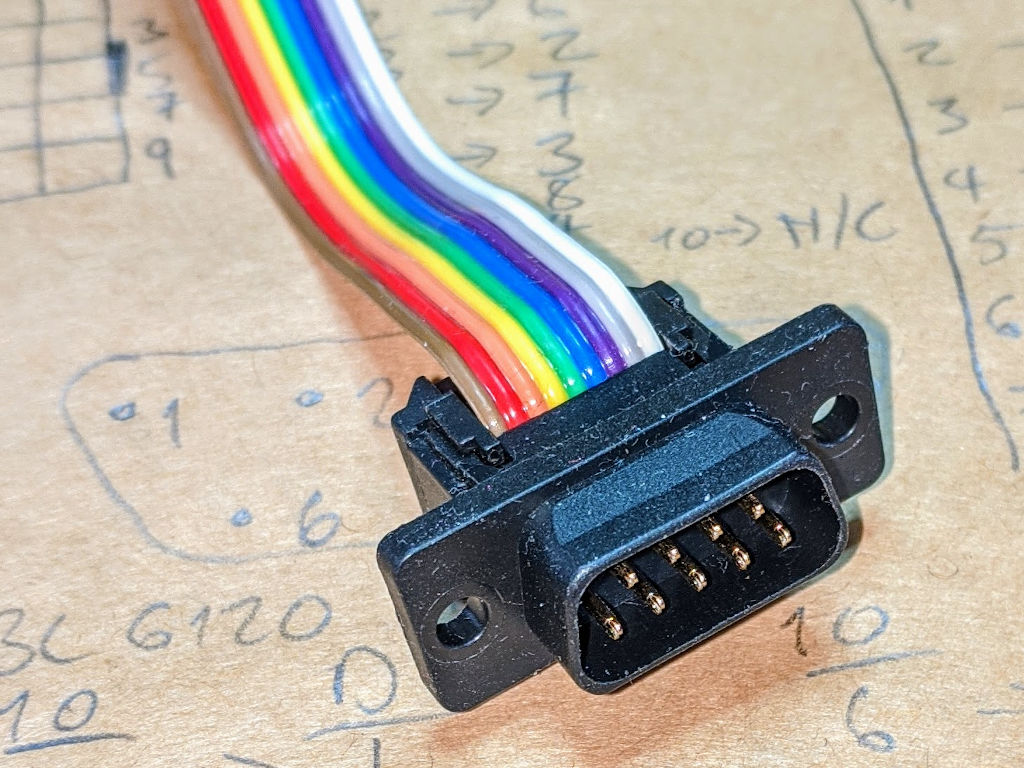
Going along the cable from left to right (reversed in the photo above), we have:
    1 2 3 4 5 6 7 8 9

    1   2   3   4   5
      6   7   8   9
This was good enough for everyone except ASUS, who decided that they needed their own way of arranging cables. Because of course they would:
With a bit of resoldering, I’ve got a working serial port. You can never have too many.
Long ago, the was a thing that called itself SimStapler©. It was a very early clicker game: every ten times you clicked on the virtual stapler, you got bonus audio. That was all it did.

A couple of days ago, lee posted a video with reminded me so much of that virtual stapler:
Today is a stapler switch pic.twitter.com/RkjHWT0Qyn
lee cyborg 🦞🔭 (@Leeborg_) April 22, 2020
Since I have the hardware and for various reasons my social calendar isn’t what it was, I set out on the bold plan to make Sim-SimStapler©… or SimStapler© Simulator … or RealStapler … or … look, I’ve spent more effort in trying to come up with a name for this than I did making the thing, so call it what you want.
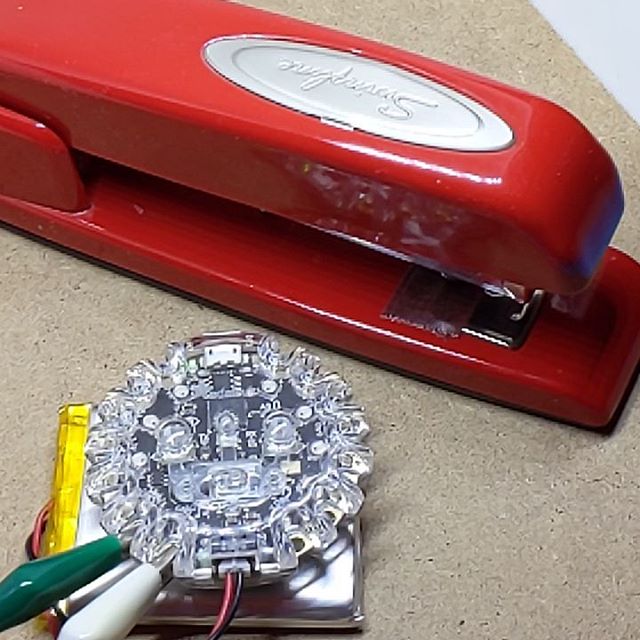
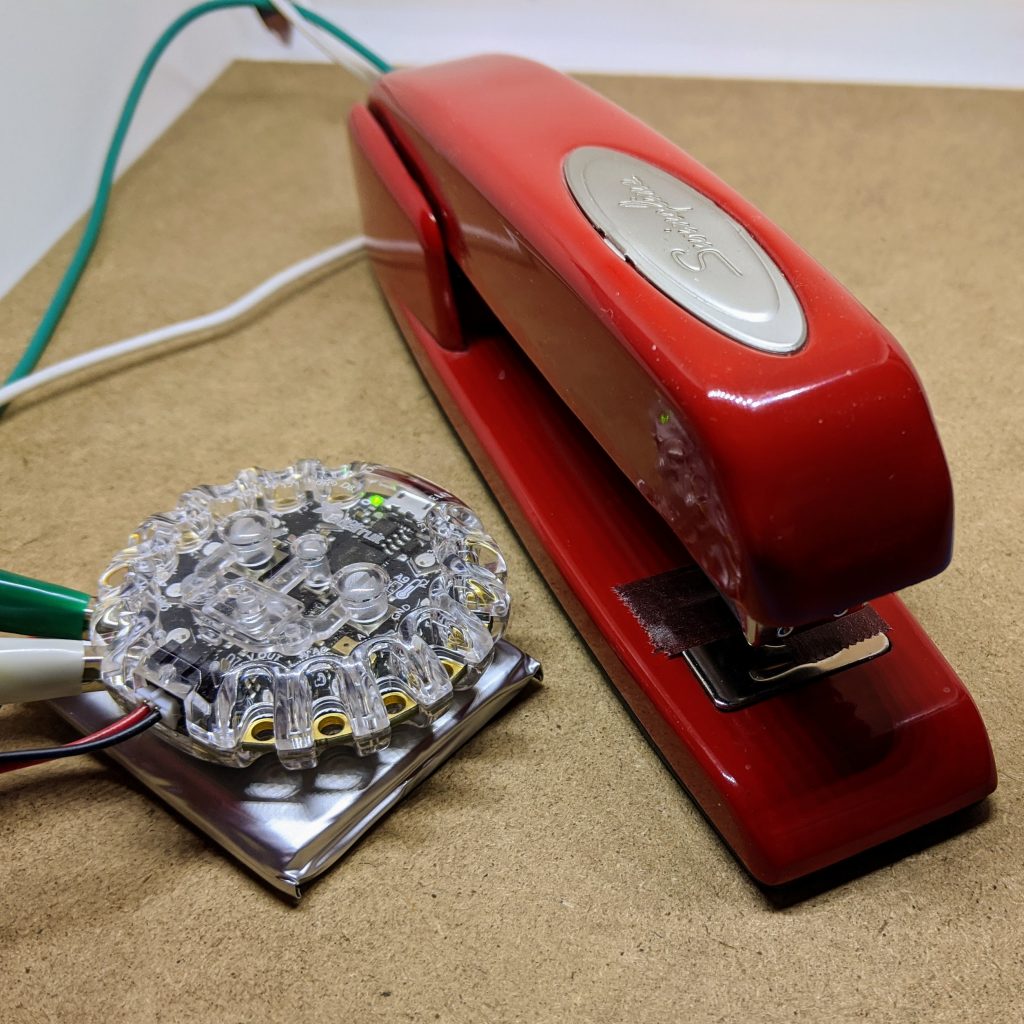
You’ll need a Circuit Playground Express, a couple of alligator clip test leads, and a stapler. And maybe some tape and a paperclip, too
The important thing about a switch is that it has two electrically isolated parts that come together to close a circuit. And that’s exactly what the Swingline® 747® stapler doesn’t have: its entire metal body and mechanism is electrically conductive. So we have to rig something up …
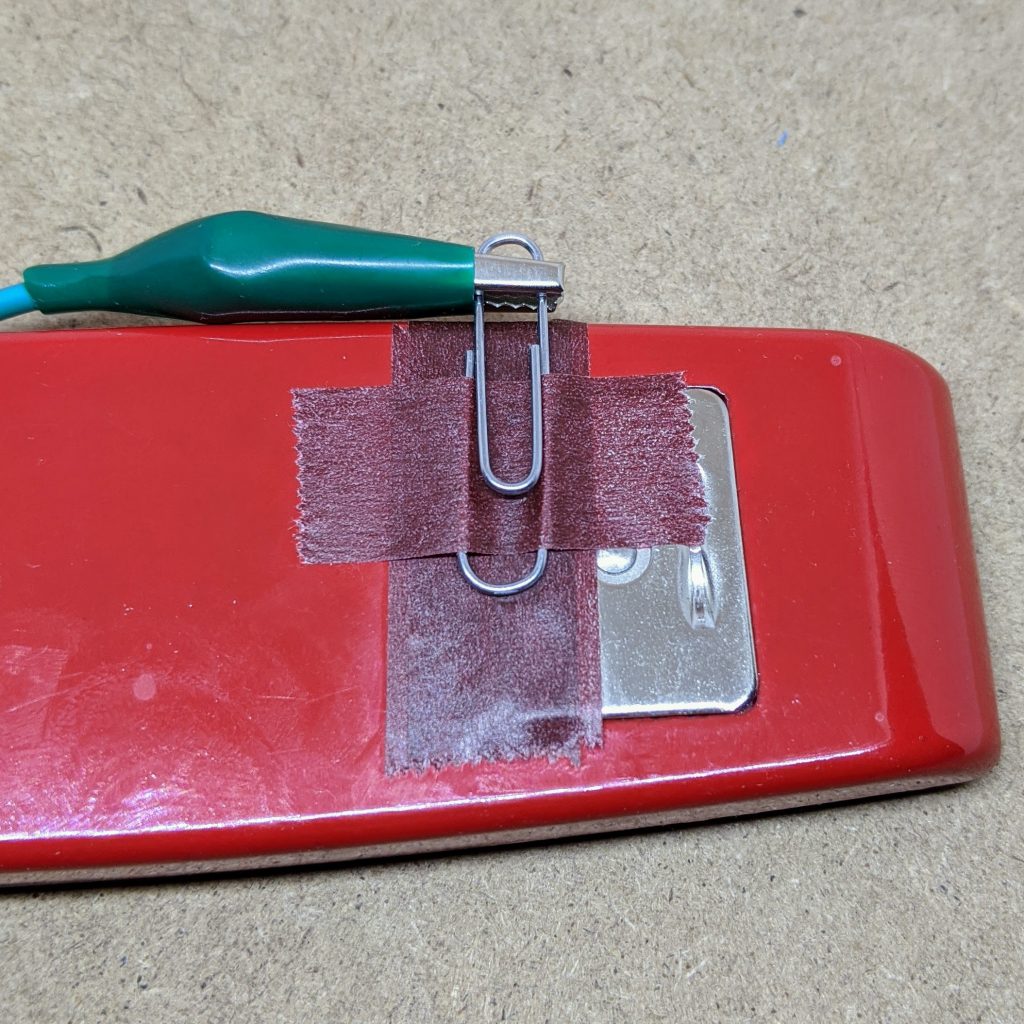
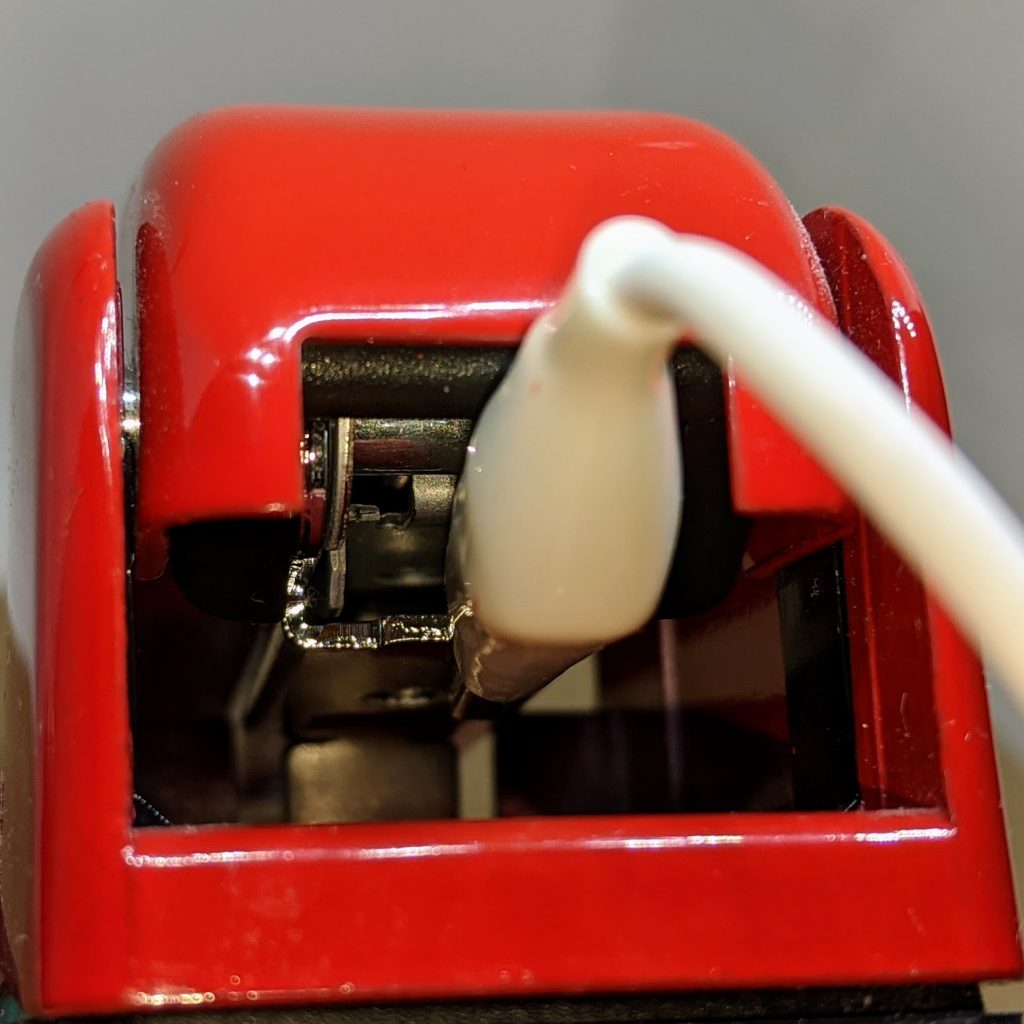
Did I say take the staples out yet? No? Take the staples out of the stapler. Possibly even before doing anything else.
The code we’re going to run on the Circuit Playground Express is very simple:
Here’s the code:
# SIM-SimStapler / RealStapler - scruss, 2020-04
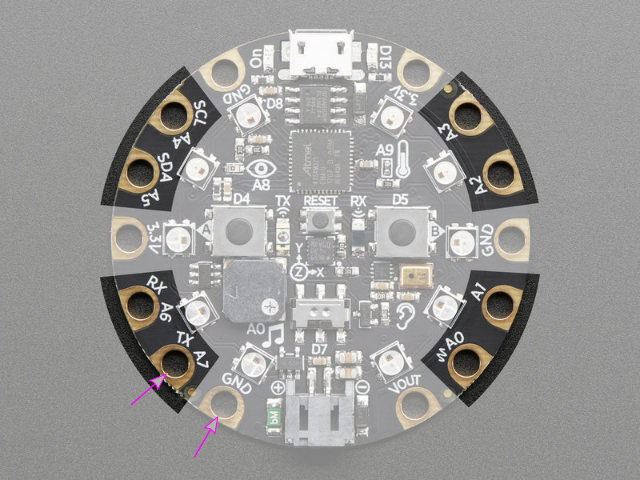
# circuitpython on CPX - stapler between D1 (A7) and GND

from adafruit_circuitplayground import cp
import board
from digitalio import DigitalInOut, Direction, Pull
import time

# set up stapler on pin D1 (port A7): goes LOW when pressed
stapler = DigitalInOut(board.D1)
stapler.direction = Direction.INPUT
stapler.pull = Pull.UP

# set up pixels - not too bright
cp.pixels.brightness = 0.1
# turn all pixels off
for i in range(10):
    cp.pixels[i] = (0, 0, 0)

count = 0
while True:
    # stapler pressed, so increase count
    if not stapler.value:
        count = count + 1
        # only count first press, not if held
        while not stapler.value:
            pass
        time.sleep(0.1)

    # light up pixels clockwise for each press
    for i in range(count):
        cp.pixels[9 - i] = (0, 255, 0)

    # get a bonus Penelope Keith every ten presses
    if count == 10:
        cp.play_file("splendid.wav")
        # turn all pixels off after bonus
        for i in range(count):
            cp.pixels[i] = (0, 0, 0)
        # and reset counter for next time
        count = 0
Here’s the code and sample ready to be copied to your CIRCUITPYTHON drive:
(The sample is a slightly tweaked version of Freeverse’s original Bonus.wav. I ran it through an equalizer to make it sound less awful through the CPX’s tinny little speaker. I was also today years old when I found out that the sample wasn’t Penelope Keith from To the Manor Born, but Jen Krasinski, a staffer at Freeverse.)
The connection (singular) is simple:
Have an appropriate amount of fun!
I suppose I could also have done this on the BrainPad, but I haven’t set it up with MicroPython yet, and I don’t have time to drag coding blocks around. Also, this is not any project to associate with the word “brain” …
If the video doesn’t work: local link.
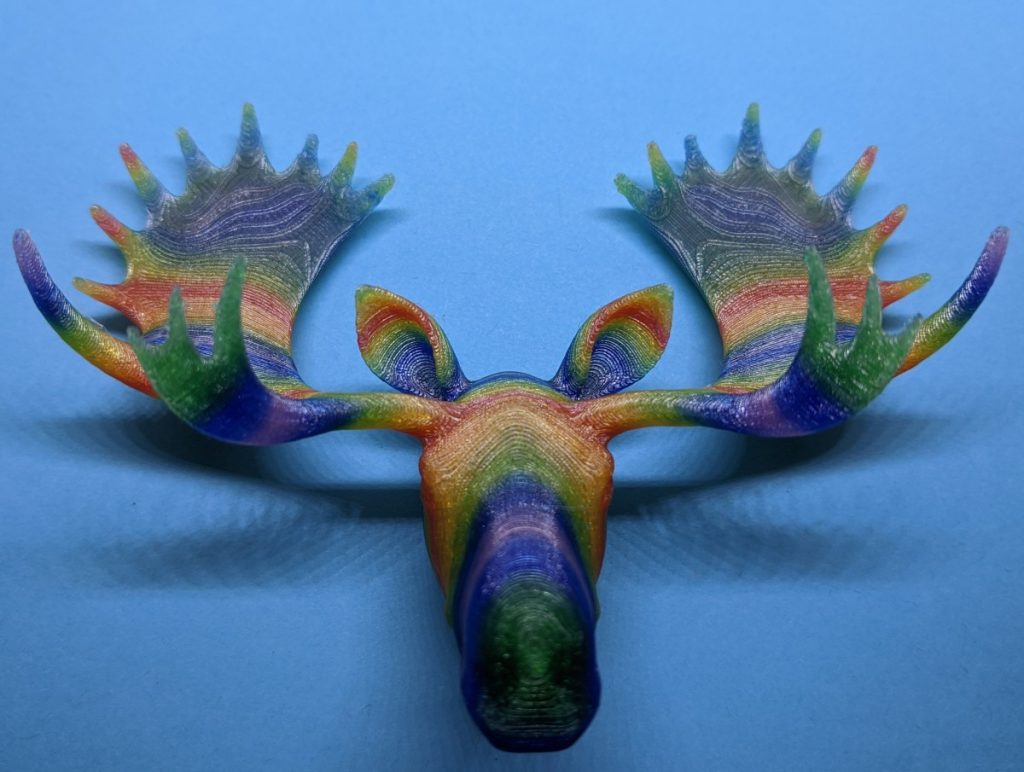
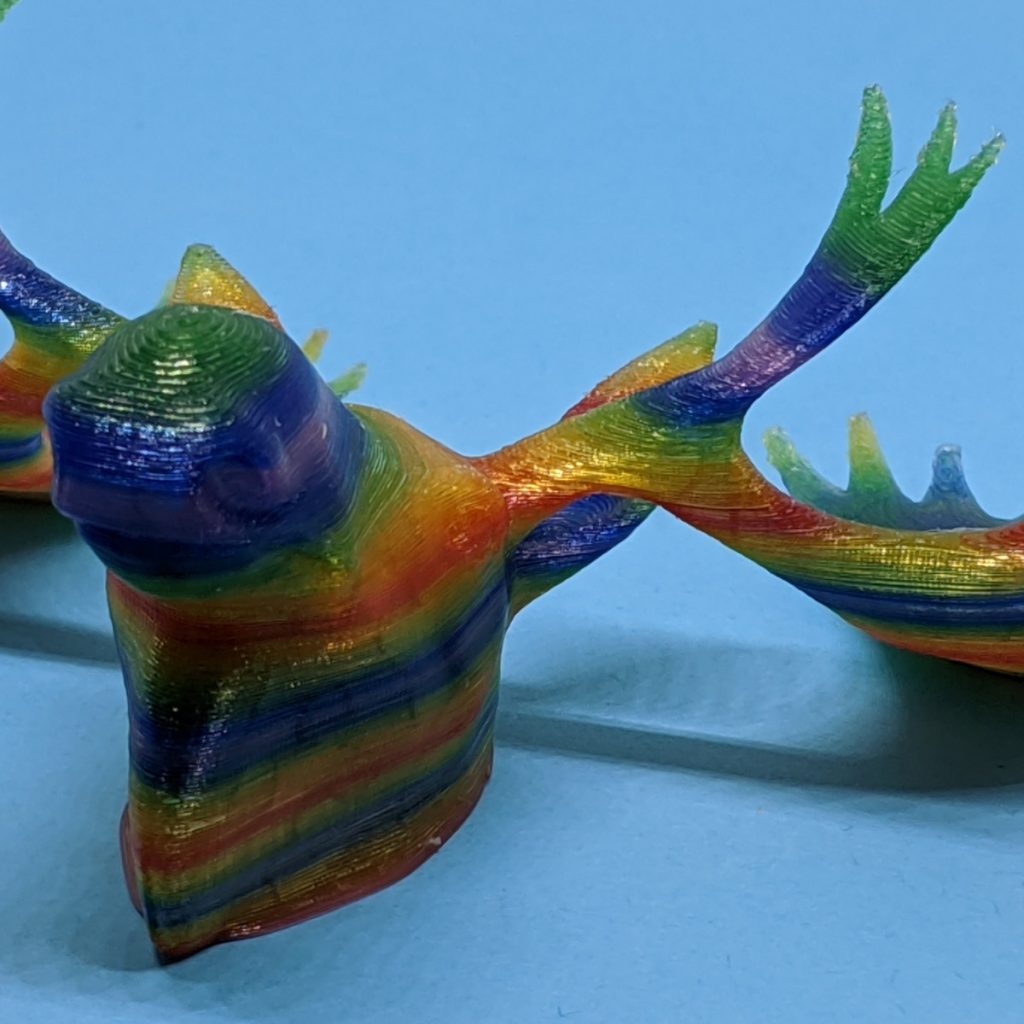
Model: Moose Head for Materio3D by Morena Protti (modified)
Clear PLA with manual colouring using ShinHan Touch markers