BBC BASIC bot [beta2] on Twitter is lovely. You tweet a BBC BASIC program to it and it replies with an animation rendering of what your program would look like on a BBC Micro.
which readers might recognize as 10 PRINT, the endless random maze one-liner for the C64. This program even inspired its own book – also called 10 PRINT CHR$(205.5+RND(1)); : GOTO 10 – about simple generative art.
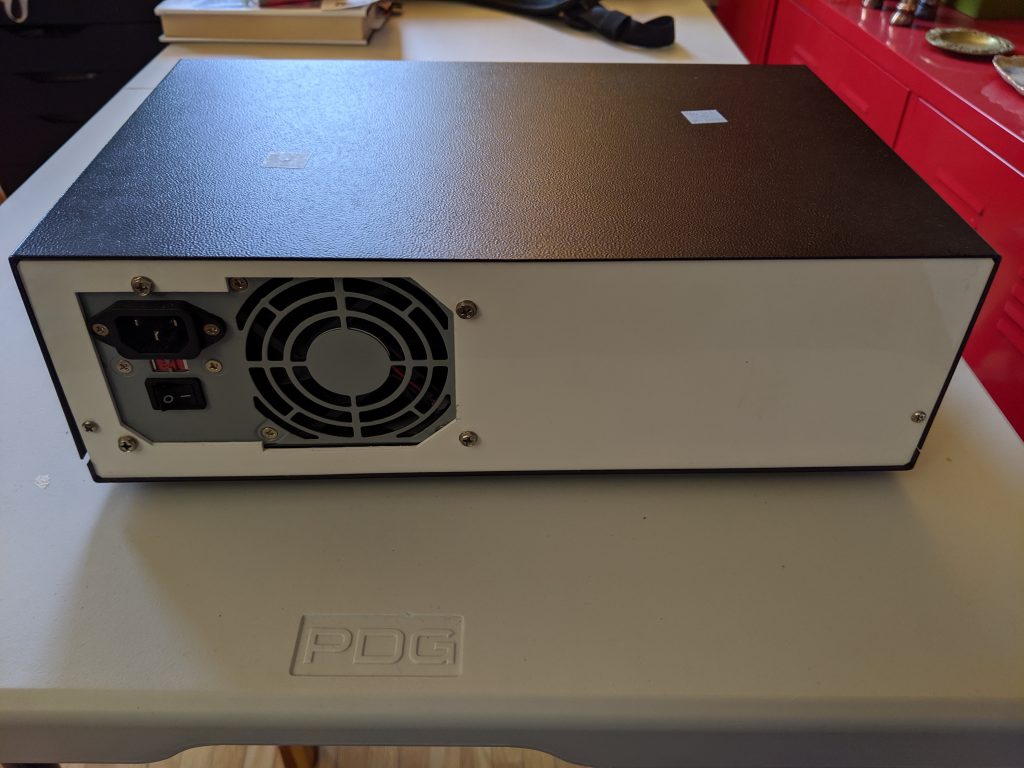
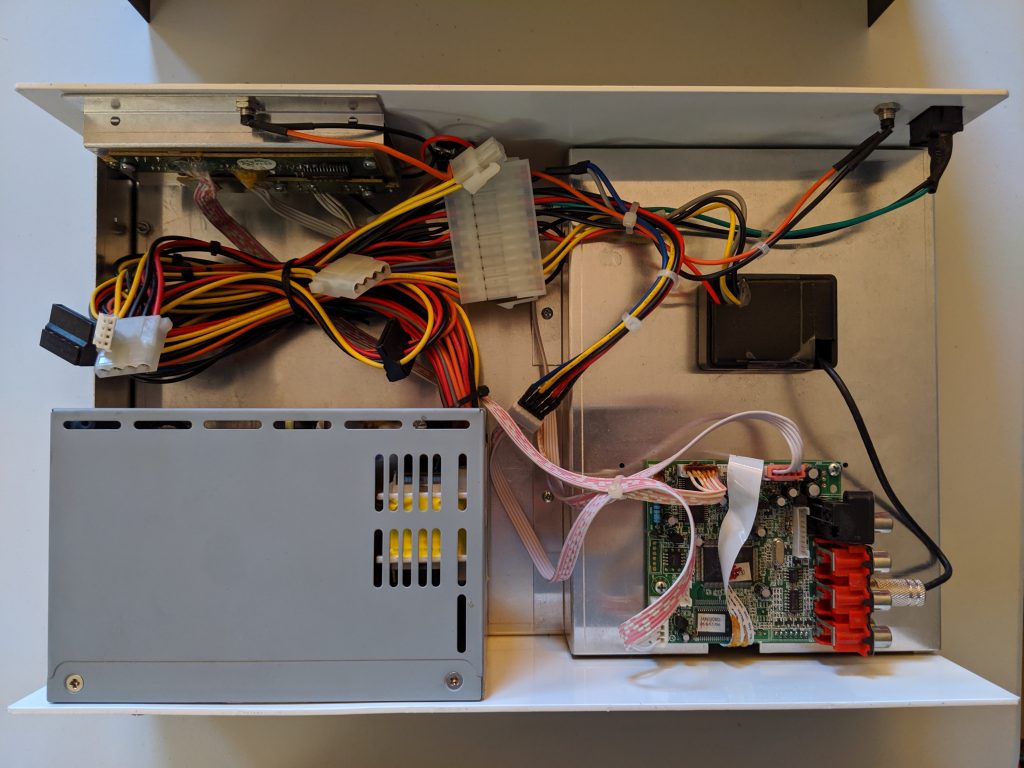
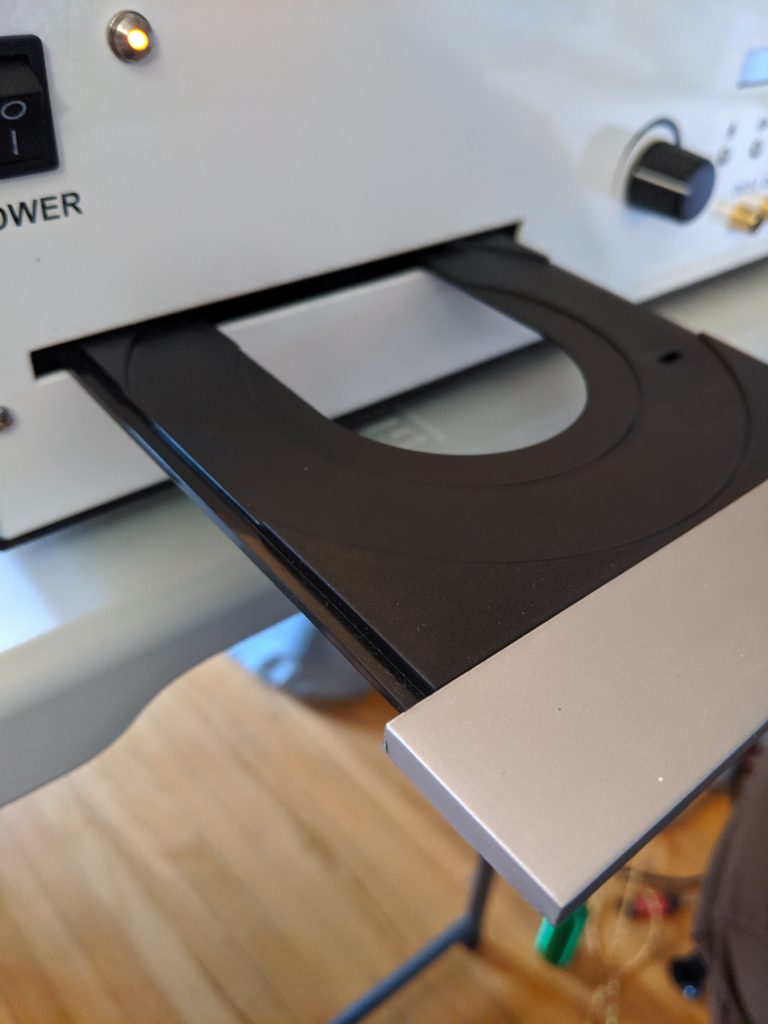
I killed some time this lunchtime in a thrift store. I was half-looking for a case for a kit computer, but wasn’t expecting much to turn up. But I found this:
No identifying marks on this device
Back panel looks hand cut – and is that a PC power supply?
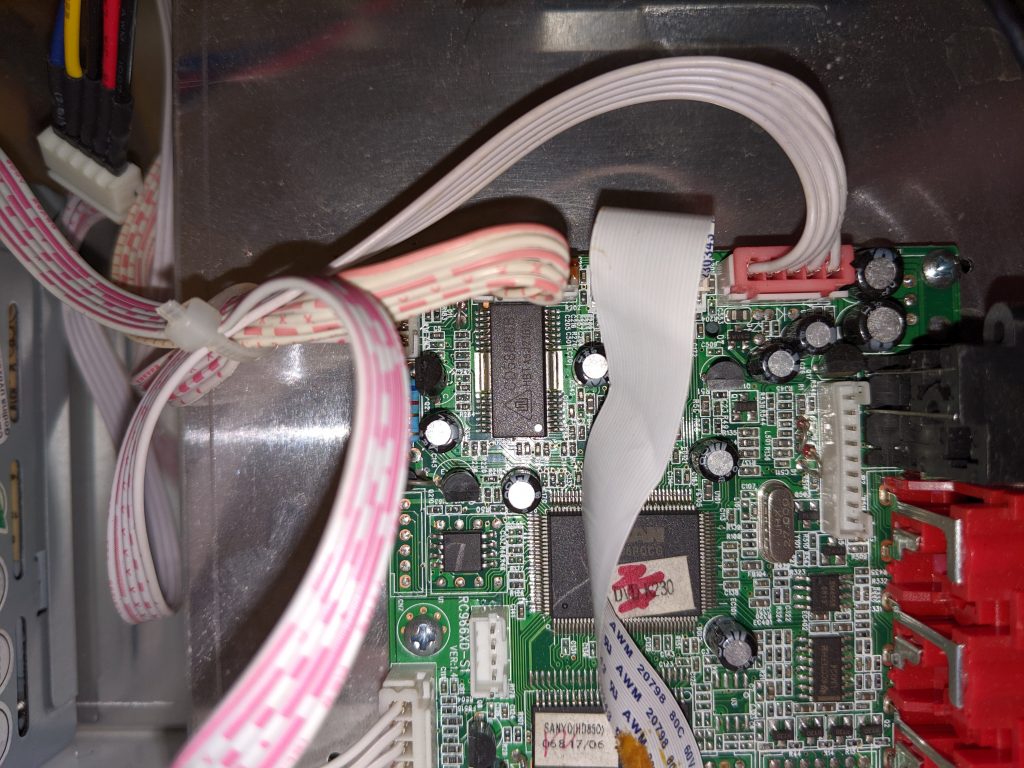
Inside is just … wow!
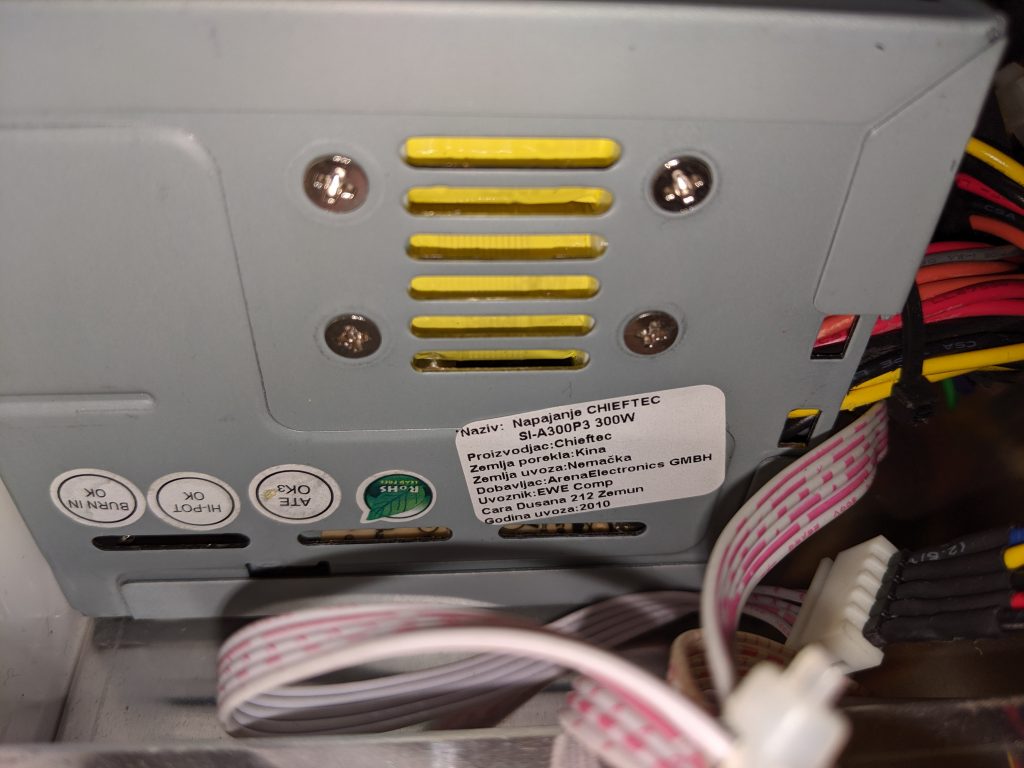
Power supply is from EWE Comp in Belgrade, Serbia
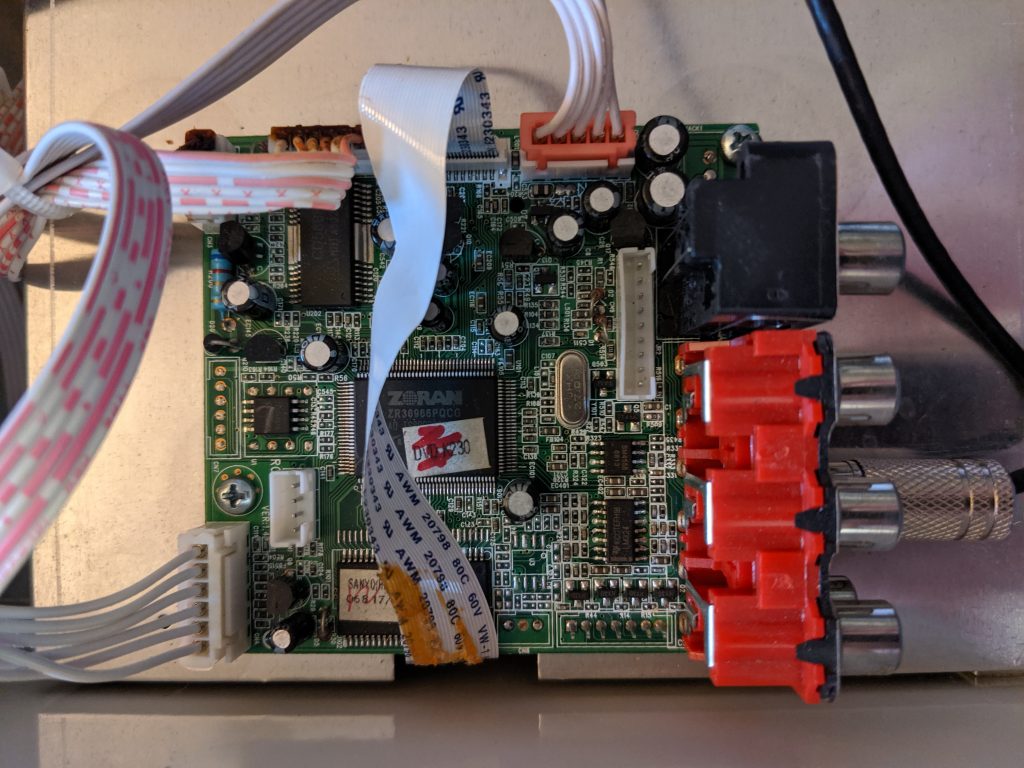
DVD decoder/preamp board
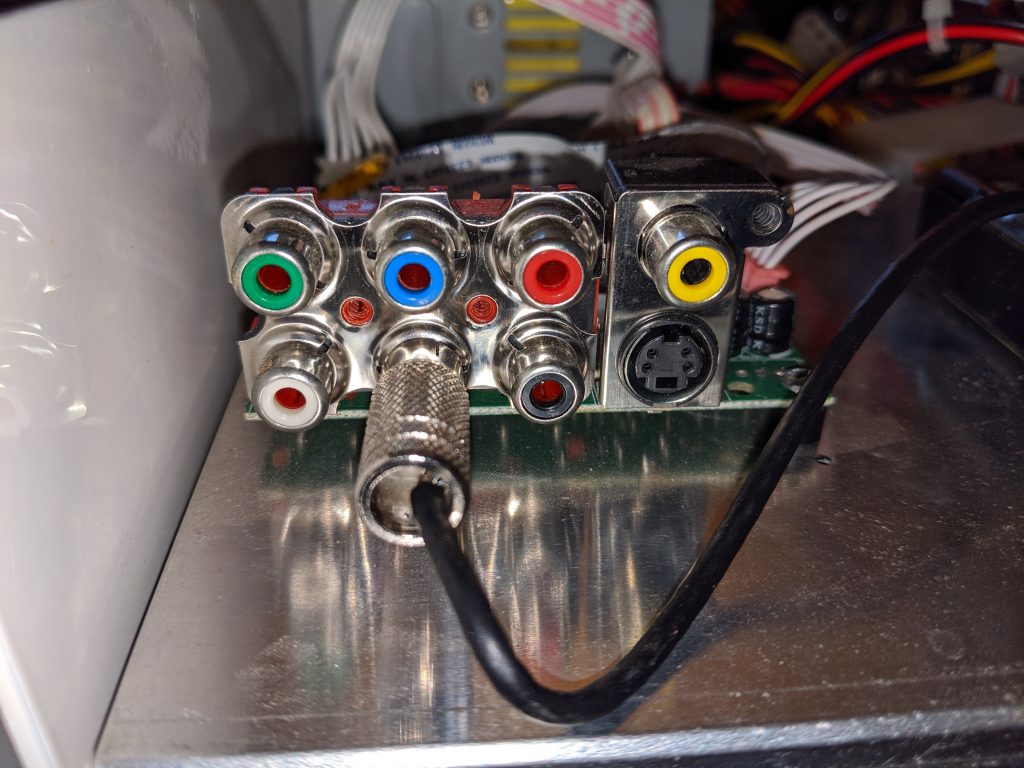
looks like a full DVD player output board
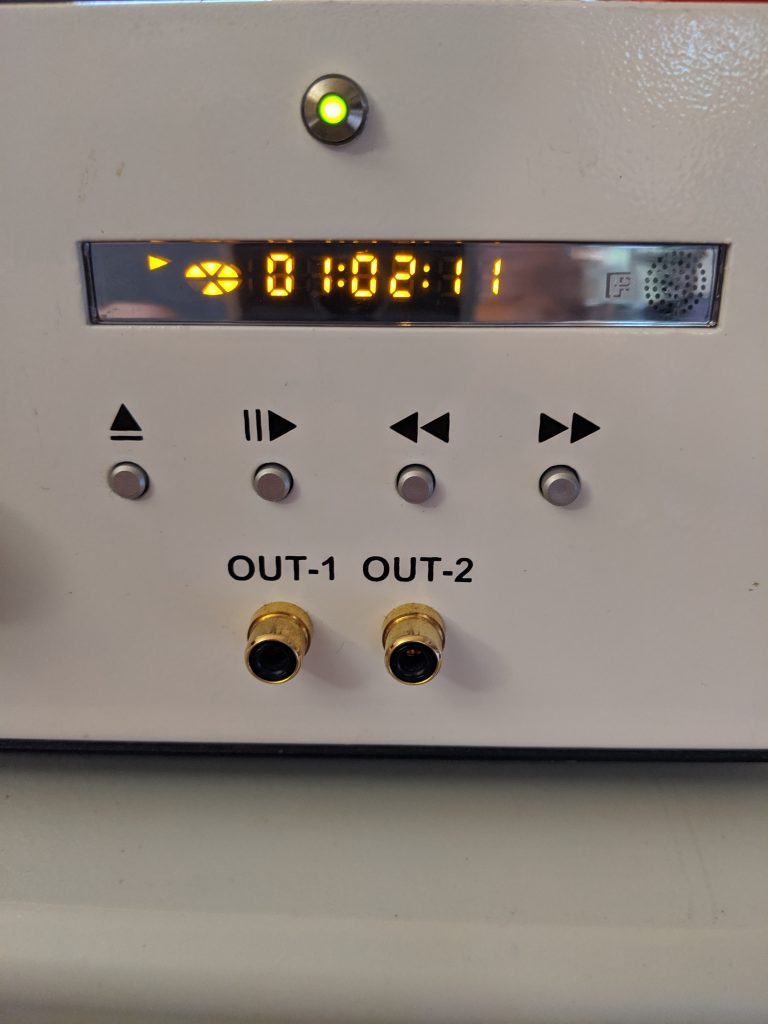
surprisingly tidy displays
more of the board
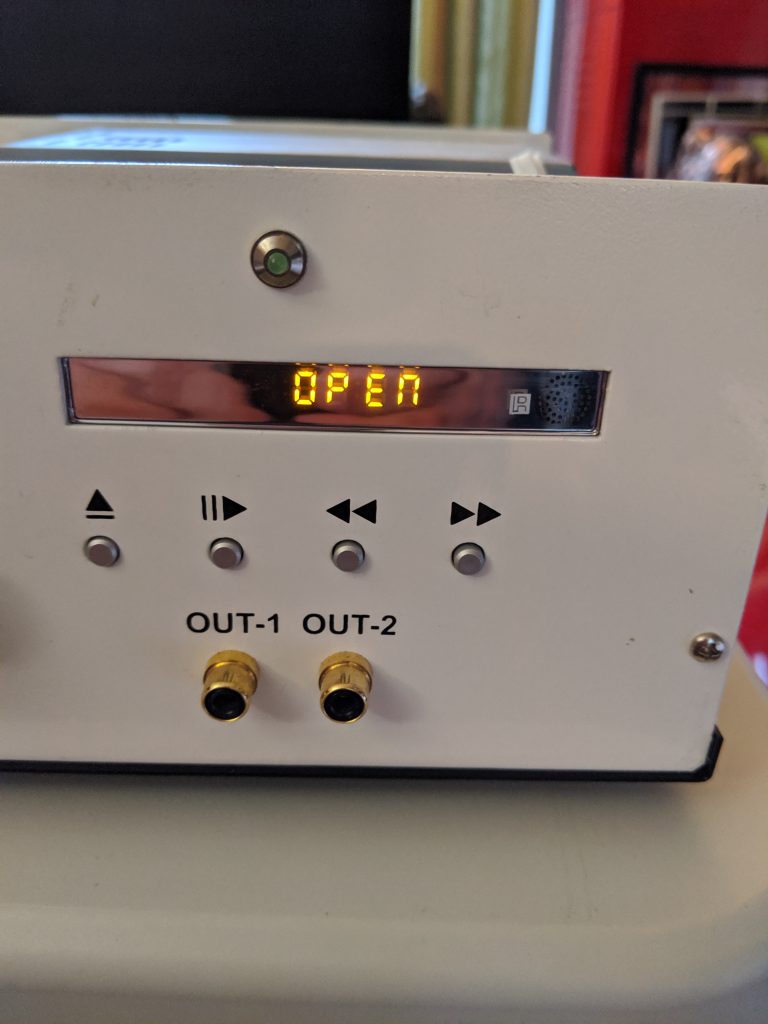
nice simple front panel
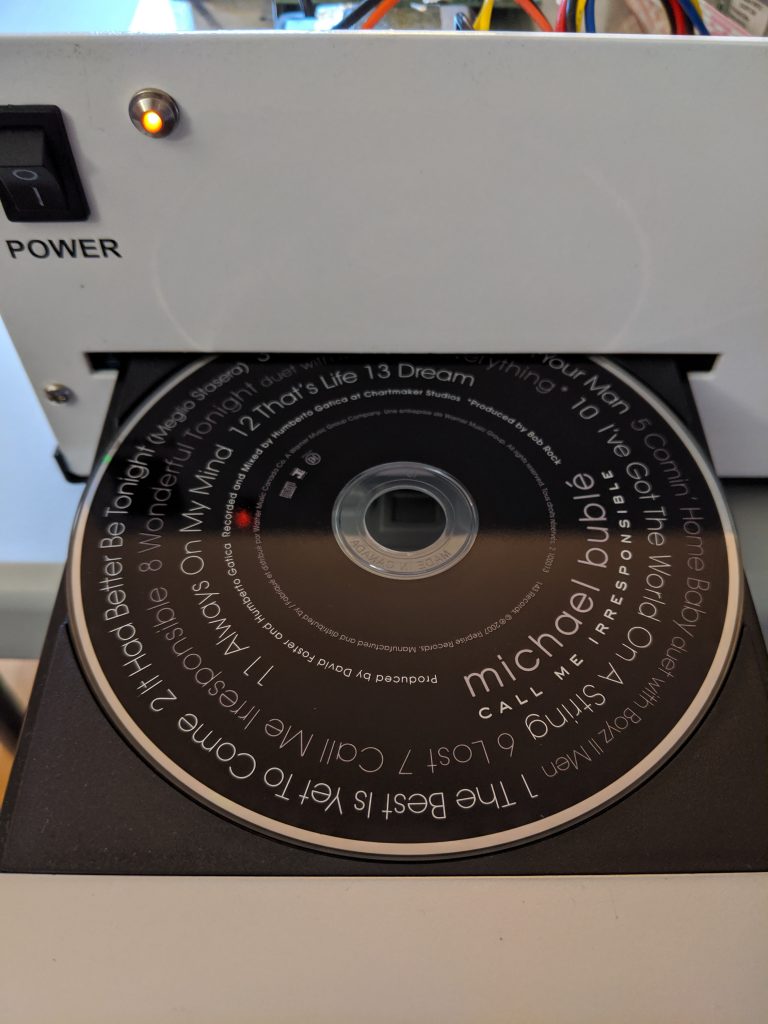
surprise inside
hey, free CanCon!
that tray’s a bit flimsy
There really are no identifying marks on this. No idea how it got to be in Canada.
Robyn Hitchcock – Trilobite – Live At Sonic Boom Records In Toronto
YouTube’s automatic transcription is not quite there yet:
… it’s got a different feel to it it’s um I write this in a shower in Thunder Bay I mean you know like a shower that you clean yourself in not a shower of rain or you could clean yourself in a shower of rain but you don’t always know it’s gonna rain and you’re not necessarily dirty at precisely the right time to go out into the rain but it would be great if people could time their dirt so they went out and obviously if you’ve got small kids and you need to bathroom regularly because they’re not old enough to voluntarily shower or bathe you could just wait for for the shower that would doom for you none for the infants anyway I wrote this in Thunder Bay and it’s about a creature that’s been extinct now for about 100 million years but it lasted about 400 million years which is a lot longer than we are likely to nonetheless we in our brief lifespan have already named this creature and it’s it looks kind of like a ladies shaving device from the 1940s but obviously it made a stone because it’s fossilized it’s called a trilobite because it has three lobes three sections to it and you can find a lot of these still fossilized trilobite sand cliffs in various parts of the world they may even be on on the moon for honor but it’s very hard to prove either way but you know we’ve called it this thing the trilobite but long after it’s like as if somebody dug one of you up in years to come and said these are the bones of Gloria Swanson you know you always who remember you sir particularly and not Gloria Swanson um as far as I know because you haven’t proved you on but I’m assuming you are for all I know all of you are actually called Gloria Swanson which only proves my point the chorus of the song refers to refers to Elton John buying cheap confectionery in a down market cafe in the late 60s before he became famous and wasn’t able to do that had to get someone else to do it for him and it has no connection with the rest of the song so ok that’s set the scene for this anyway trilobite right Dwight’s in the light by trilobite right in the light by Dwight trilobite right Dwight’s in the light by trilobite right in the light by Dwight basking on the shores of time the little Stein creature ain’t dead to the world they call him trilobite right rights in the light by trilobite right in the light by Dwight trilobite right rights in the light by trilobite brighten the light by Dwight Weldon Johnson but real name is Richard wood creaking away for a second of Fame a billion years later they give it a name they call a trilobite right and whites in life by trilobite right in the light by Dwight when I’m too wasted these rocks to clamber then lean me on the cliff and encase me in amber and the creature from the future in way out when can clop my fossil and name me span that’s a nice day built for a world where nothing needs shaving yoga then stone ants and I are waving trilobite right and whites in the light by trial of pipe right in the light by Dwight let’s hold a clicking championship the trilobite wins and everybody else loses trilobite try to buy
Robyn Hitchcock, Trilobite, as transcribed by YouTube
The chorus in real life is:
Trilobite, right Dwight’s in the Lite Bite Trilobite, right in the Lite Bite, Dwight
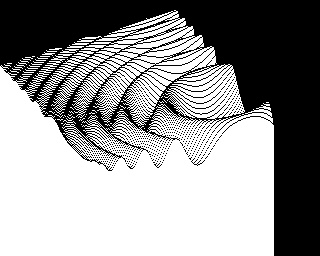
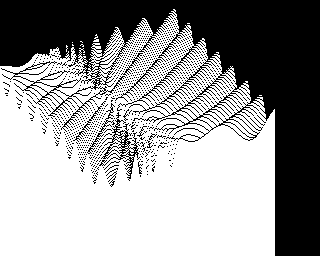
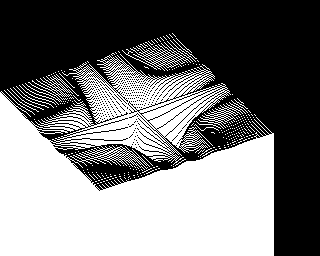
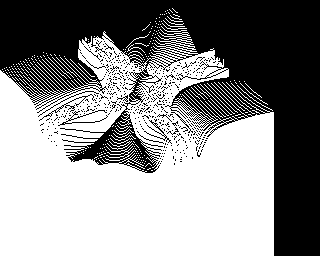
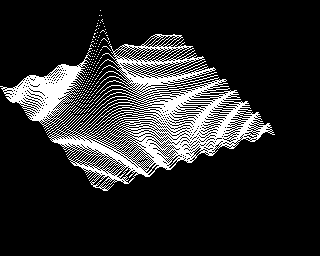
PLOTPOURRI at many times original speed on emulated Apple II
PLOTPOURRI is an old BASIC graphics demo for the Apple II. It plots 3D functions immensely slowly. It was noticed on the stardot forum, and a BBC BASIC version was requested.
Printing from computers goes through waves of being difficult to being easy, then back to difficult again. This is likely due to the cycles of technology, complexity and user demand flow in and out of sync. I think we’re at peak annoyance right now.
It’s even harder with Raspberry Pis, as when printer drivers support Linux, 90% of them are for x86 or x86_64 computers only (Canon: ಠ_ಠ). ARM doesn’t get a look in. But one technology does actually seem to help: network printers that support IPP — Internet Printing Protocol.
We had an old Brother laser printer that just got slower and crankier and less useful as a printer, so yesterday I got a new Brother DCP-L2550DW to replace it. It says it supports Linux in the spec, but I knew not to be too optimistic with my Raspberry Pis. And indeed, it was seen on the network but no driver was found. I had a sad.
What turned my frown upside down was finding out about Raspbian’s cups-ipp-utils package. For desktop use, install it this way:
(leave off system-config-printer if you’re running from the terminal.)
Update: while you’re here, you might also want to install the print-to-PDF driver too. This allows you to print without wasting paper. Install it (and the IPP driver) with:
In many cases, this might be all you need to do: the network printers should be automatically found and added as devices.
Adding the new printer
On the desktop, open up Preferences → Print Settings and add a new printer. Yes, it prompts for your user password which you may have forgotten. I’ll wait while you try to remember it …
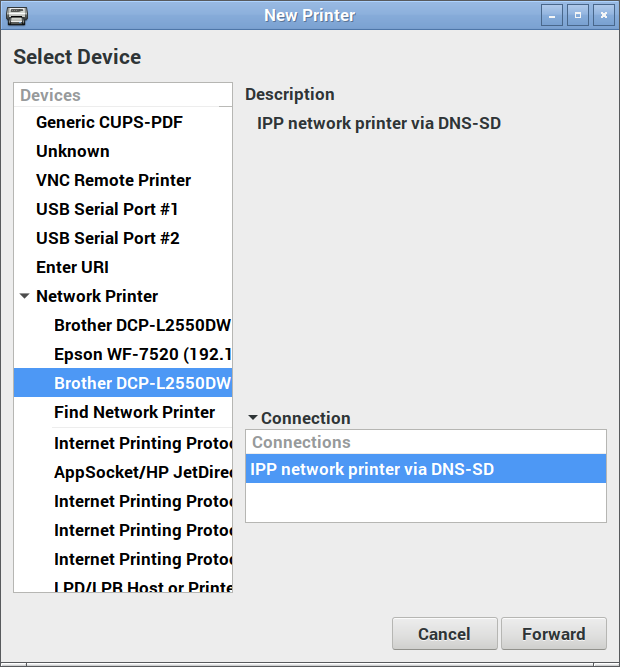
Now under Network Printers, you should see a device you recognize. Pick the one that says IPP network printer somewhere:
IPP network printer
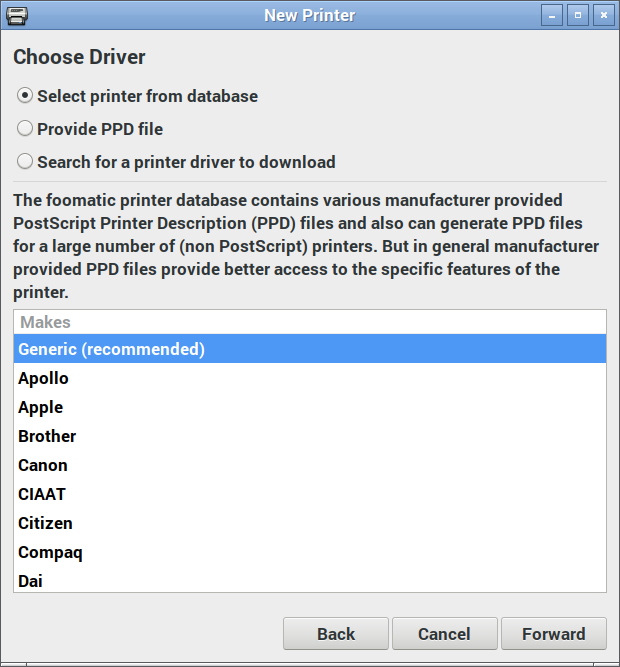
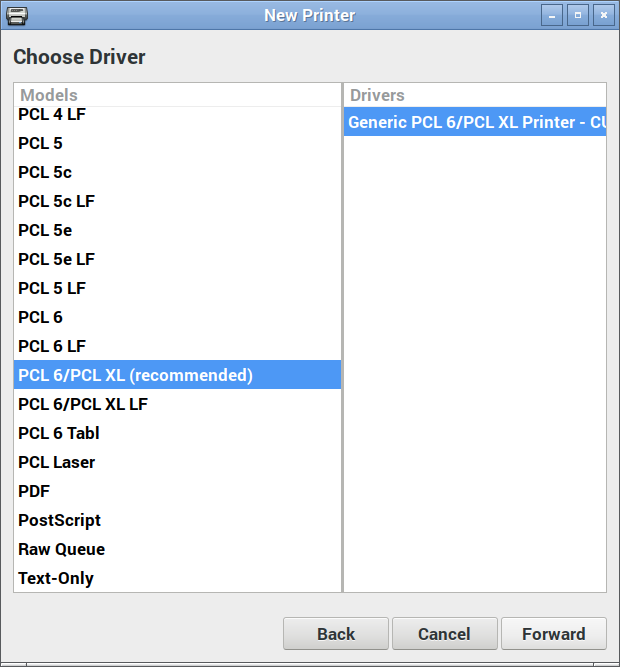
Here’s where the magic happens: you actually want to pick the generic driver for once:
Select Generic (recommended) manufacturer
And again, the IPP utilities package will have picked the right driver for you:
Just go with what the driver suggests
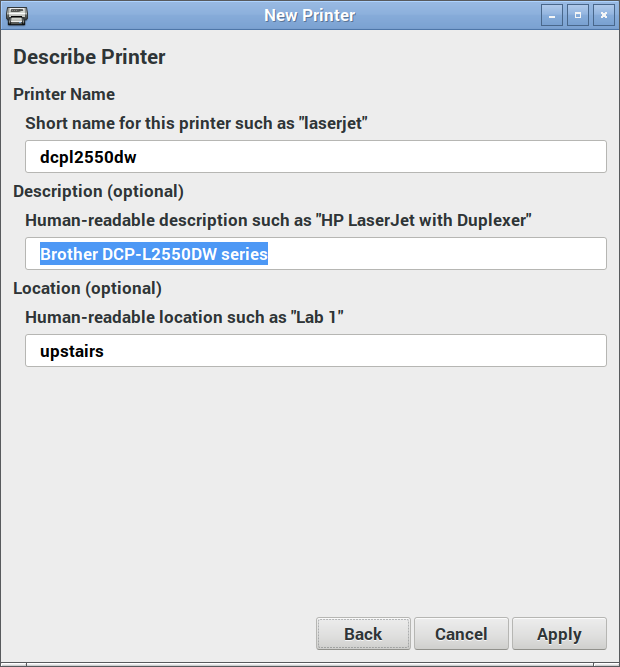
Changing the name and location is optional:
Your new printer’s almost ready to go!
Hit Apply, and you should be printing!
(Hey, printer manufacturers have been known to be evil and make good, working stuff suddenly not work. IPP is supposed to make everything sparkly again, but I can’t guarantee that something wicked won’t come this way.)
Update: After a few months of using the Brother DCP-L2550DW, I don’t recommend you buy it. It’s a perfectly capable printer, but it takes ‘chipped’ toner cartridges that:
stop dead when you hit their page count limit, wasting toner and preventing you from finishing the print job;
can’t easily be refilled by local technicians, so are wasteful of resources.
To get around (1), select Continue instead of Stop in the Toner Out configuration menu.
Update, January 2020: with sales and all needing a printer for work, the DCP-L2550DW will go with me to the office. I now have a MFC-L2750DW at home that scans to network, amongst other things. IPP proved it was magic yet again by the new printer being found and justworked with all my machines as soon as I added it to the network.
The greatest common divisor (gcd) of two natural numbers is the largest number that evenly divides both. For instance gcd(8, 12) is 4. There are many clever and efficient ways to calculate the gcd of two numbers on a Linux machine. The method presented here is not among them.
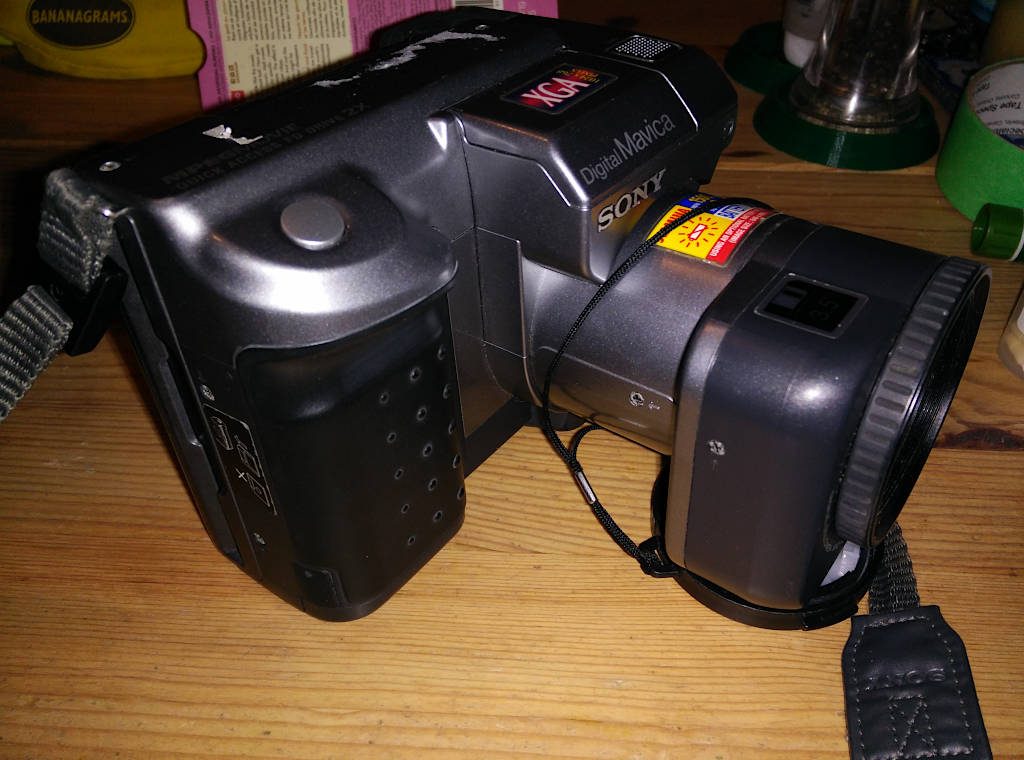
Most annoyingly, the camera really only likes real Sony batteries, or it shuts down with an “InfoLithium” battery error (swearies in link). As this battery format is now used in generate photo lighting systems and Sony don’t make it any more, this may be a camera that dies from DRM before anything else.
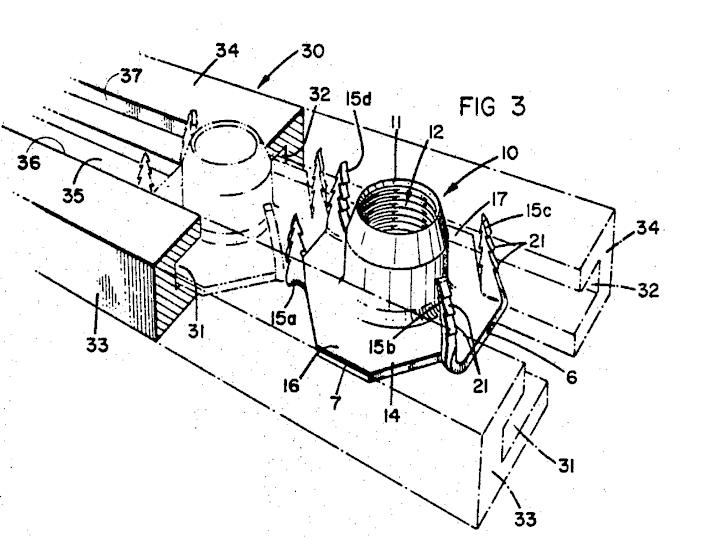
Simple things like fasteners don’t seem to be invented. It’s almost as if they’ve always been around. Like T-nuts — those hammer-in furniture nuts that also find use as 3D printable tripod mounts — someone invented those?
Sure enough, it seems that local company Sigma Tool & Machine have a lot to do with T-nut development. They’re now on Nantucket Blvd just north of me, and they used to be at 96 Crockford Blvd very close by.
The Microwriter was a late 1970s/early 1980s gadget that was essentially a portable word processor. Unusually, its keyboard was a single-hand 6 key layout — the thumb did double duty — that was operated by chording multiple keys at the same time. Later on in the Microwriter’s life it evolved into the Quinkey, a chording adaptive keyboard for computers of the time.
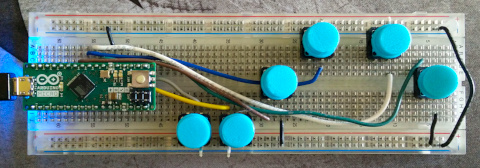
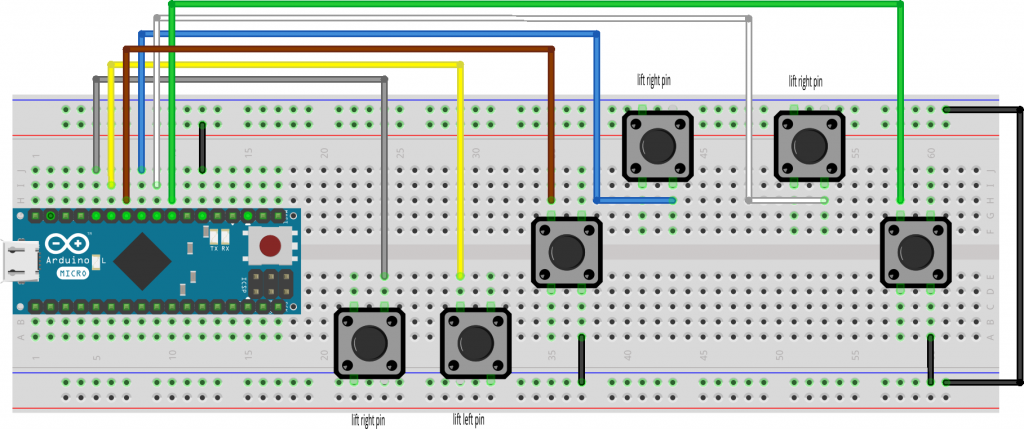
Technology has moved on a bit, and the ability to wire up a cheap USB-capable microcontroller and 3d print your own case is here. I used an Arduino Micro on a breadboard and six Omron momentary buttons.
I didn’t quite wire it the way that Vik intended:
Note lifted pins to prevent useless buttons
The buttons are wired like this:
Pin      Button
=======  =======
 D8       Control
 D7       Thumb
 D6       Index
 D5       Middle
 D4       Ring
 D3       Pinkie
This requires changing line 22 of Vik’s code from:
const int keyPorts[] = {8, 7, 6, 5, 4, 9};
to
const int keyPorts[] = {8, 3, 4, 5, 6, 7};
While there are great tutorials on “microwriting” in the original manuals on Bill Buxton’s site, here are the basic alphabetic set derived from Vik’s code:
Thumb |Index ||Middle |||Ring ||||Pinkie â—â—‹â—‹â—‹â—‹ : Space â—‹â—â—‹â—‹â—‹ : e â—â—â—‹â—‹â—‹ : i â—‹â—‹â—â—‹â—‹ : o â—â—‹â—â—‹â—‹ : c â—‹â—â—â—‹â—‹ : a â—â—â—â—‹â—‹ : d â—‹â—‹â—‹â—â—‹ : s â—â—‹â—‹â—â—‹ : k â—‹â—â—‹â—â—‹ : t â—â—â—‹â—â—‹ : r â—‹â—‹â—â—â—‹ : n â—â—‹â—â—â—‹ : y â—‹â—â—â—â—‹ : . â—â—â—â—â—‹ : f â—‹â—‹â—‹â—‹â— : u â—â—‹â—‹â—‹â— : h â—‹â—â—‹â—‹â— : v â—â—â—‹â—‹â— : l â—‹â—‹â—â—‹â— : q â—â—‹â—â—‹â— : z â—‹â—â—â—‹â— : - â—â—â—â—‹â— : ' â—‹â—‹â—‹â—â— : g â—â—‹â—‹â—â— : j â—‹â—â—‹â—â— : , â—â—â—‹â—â— : w â—‹â—‹â—â—â— : b â—â—‹â—â—â— : x â—‹â—â—â—â— : m â—â—â—â—â— : p
The astute reader may note that these are binary values (low bit to high) of the character positions in Vik’s alphaTable variable. And yes, that’s supposed to be preformatted text.
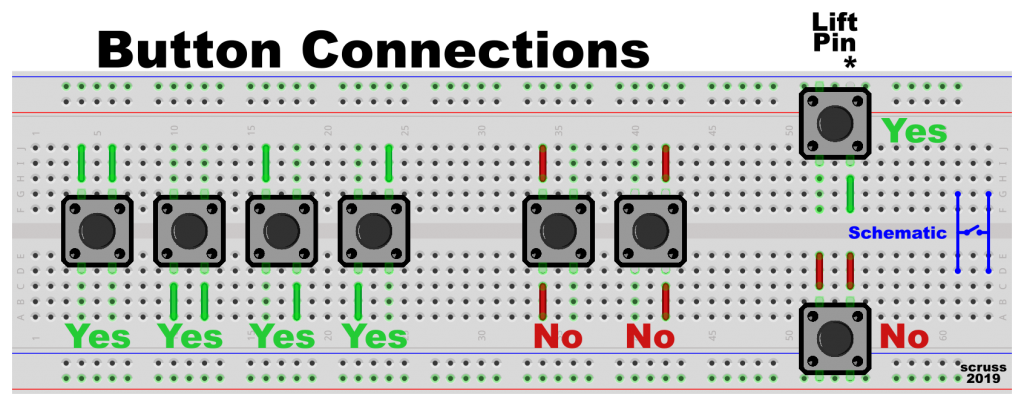
Buttons, Tactile switches, Momentaries, Clickies, SPST-NO; call ’em what you will, but my world seems to be full of them right now. Wiring them or breadboarding them may not be as simple as they look.
Whether they are the tiny 6 mm ones or the less-easily-lost 12 mm ones, both types typically have four pins or legs, two on the top and two on the bottom. If your appear to have the legs on the sides, flip ’em 90°: they won’t fit in breadboard sockets the wrong way.
The pins on the left and right side are common, so connecting top left to bottom left won’t ever change state if you press the button. So use either the pins both on the same side or those diagonally opposed if you want the switch to work.
You can use these buttons on a common breadboard rail. You must remember to have only one button pin connecting to the rail; lift the other pin so it won’t connect. You can then use just one wire connected diagonally across the the common rail pin and you’ve got a working button. This is especially useful when using a microcontroller with built-in pull up resistors (that’s most of them these days).
If you connect both pins to a common rail, you’ve just made a SPST-AO (single pole, single throw – always open) switch. Those aren’t much use at all.
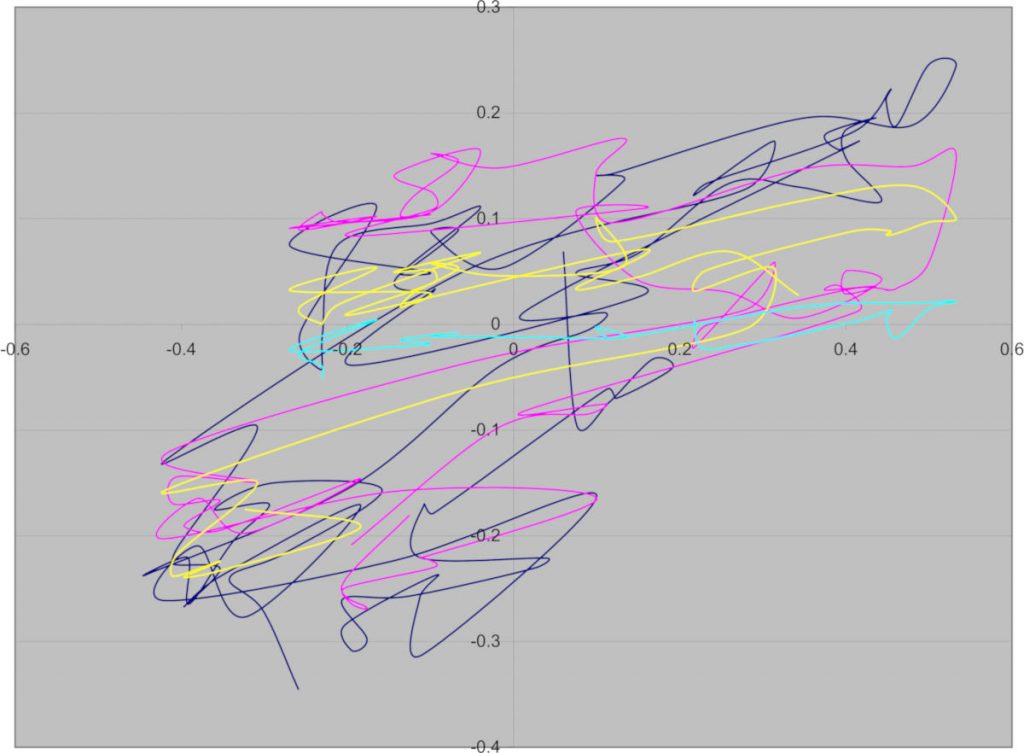
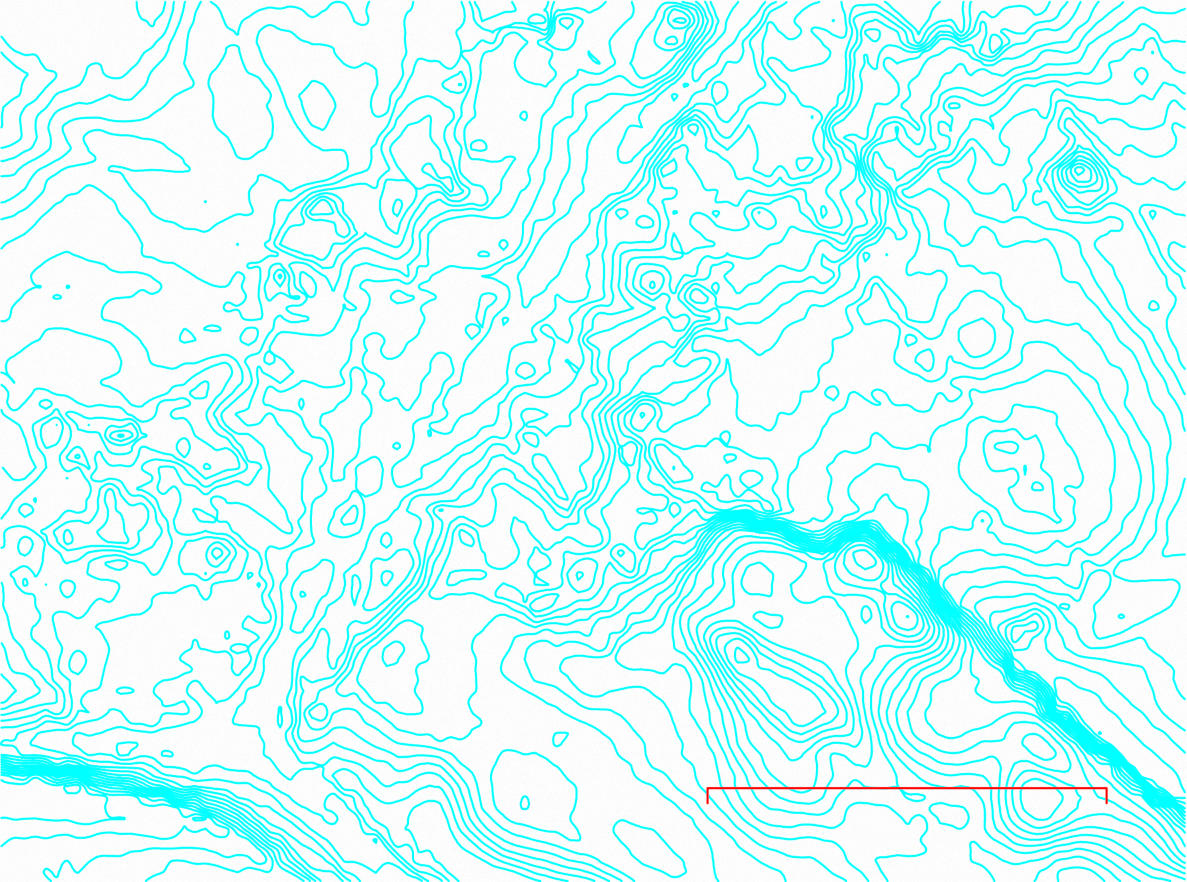
This was a real graph from a project I worked on. I’m not at liberty to tell you what it’s from, but it had a use at the time. It’s not just random scribbles
I just got brian d. foy’s Learning Perl 6 from the library. It’s a pretty good book, though it’ll take a good few readings for some of Perl 6’s features to stick.
Since Perl 6 is built using Unicode from the ground up, it does two rather wonderful things when dealing with numbers:
regular expressions match numerals beyond 0–9: ٤ is as much four as 4
numeric constants can (pretty much) be expressed in terms of Unicode values in your Perl 6 source code. Assigning π to a variable does what you think it does. Dividing by ¼ is the same as multiplying by, well, ٤.
So herewith a table (probably incomplete, and very unlikely to render properly for you) of Unicode glyphs accepted by Perl 6 as numeric values:
Way back, if you wanted more than one copy of something you’d written there was no print button. If you wanted copies, each one required a bit of work. Before copiers and printers there were duplicators where you could type or draw onto special membranes that either transferred ink to a printing sheet (Banda or Ditto brand machines) or made holes in a screen to allow ink through (Gestetner or Mimeograph brands). Risograph machines are modern digital ink duplicators still in use and active development today.
One of the predecessors of duplicators was the hectograph. In the 19th century they still knew their Greek and yet were totally okay with hype, the hectograph was named after the extremely, um, aspirational idea that you could pull a hundred (εκατό= hundred, in modern Greek) copies from one master. Once you’ve made a few hectograph copies, you’ll be more wondering what the heck they were thinking: you might get a few tens of legible copies if you’re extremely careful.
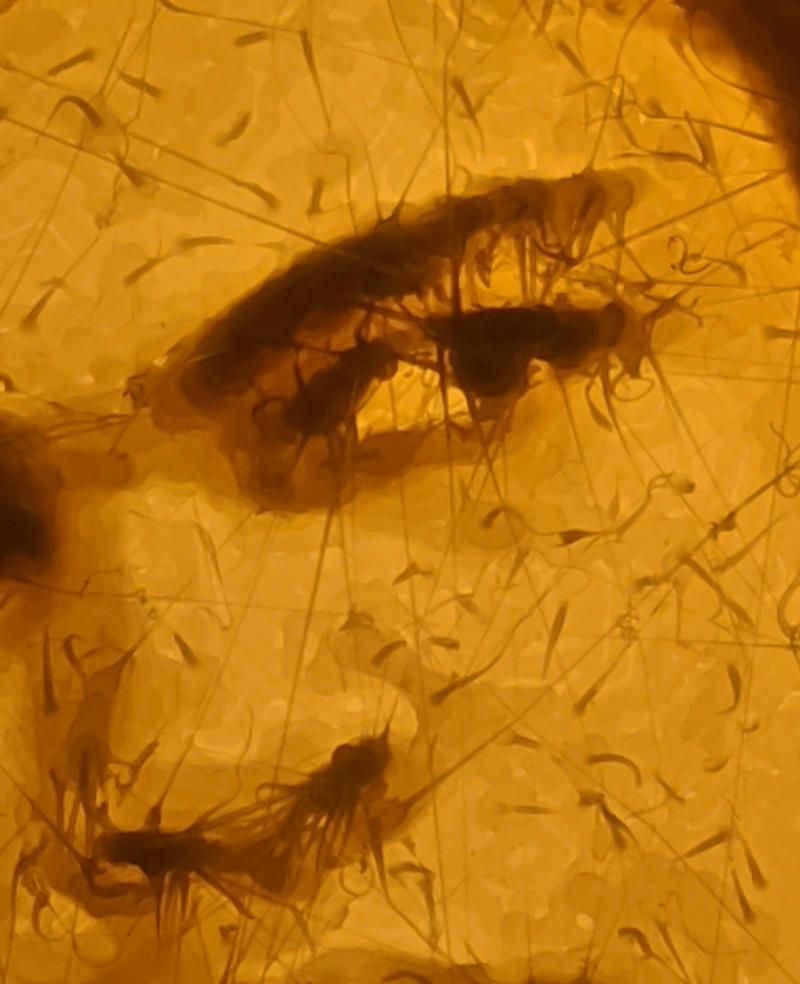
Some hectographic copies, all pulled from the one jelly sheet impression
A hectograph copier is basically a sheet of jelly that soaks up certain kinds of ink from a master copy, then oozes the copies back onto paper pressed onto its surface. The ink slowly diffuses down through the thickness of the jelly, allowing different copies to be made with the same plate a day or so later.
Getting the right ink is a little tricky these days. Tattoo artists use hectograph ink to make stencils, so I got a small bottle of ink ($15) from Studio One (940 Queen St. East, Toronto). You can also use hecto/indelible pencils, but the National Tattoo brand one I got from Studio One barely transfers at all.
Making a copier in a kitchen is easy. There are several recipes online (University of Iowa Library and W0IS‘s being two: if you follow The New Standard Formulary historic ones, remember that white glue now is quite different from the hoof-and-hide renderings they used then). My recipe is a bit of a blend of all of these:
28 g Gelatin (powdered, unflavoured; in North America, it’s sold under the Knox brand in little boxes containing 4× 7 g sachets)
175 ml Glycerin (from the pharmacy, possibly sold in the skin care section; about ¾ cup)
75 g Sugar (regular white sugar, about ⅓ cup)
350 ml Water (1½ cups)
You’ll need a flat tray, larger that the paper you want to use. Dollar store baking trays are ideal. I used a slightly-too-small toaster oven tray, which seemed like a good idea at the time.
Stir gelatin and sugar into the water and leave it to soak for a few hours. It should form a translucent gel
Heat the glycerin in a double boiler until the boiler water is just simmering
Add the gelatin/sugar solution and stir gently until the boiler water resumes simmering. Keep heating for a few minutes until the solution turns clear (The liquid doesn’t have to boil, just get hot enough for the gelatin to melt. Avoiding bubbles is worthwhile, as gelatin foam is not what we’re looking for here)
Carefully pour the hot liquid into your tray, avoiding forming bubbles if at all possible (Bubbles can be shepherded off to the edge of the plate with the tip of a scrap of paper before the liquid sets)
Allow the tray to cool and set. This may take several hours at room temperature. The solid jelly hardly changes in appearance from the liquid form
surface of a freshly-cooled jelly plate: extremely clear with a faint texture
Now draw your master. Hectographic ink is loaded with dye, so a little goes a long way. It’s also not a modern non-blotting ink, so you need to be more sparing with it than I was.
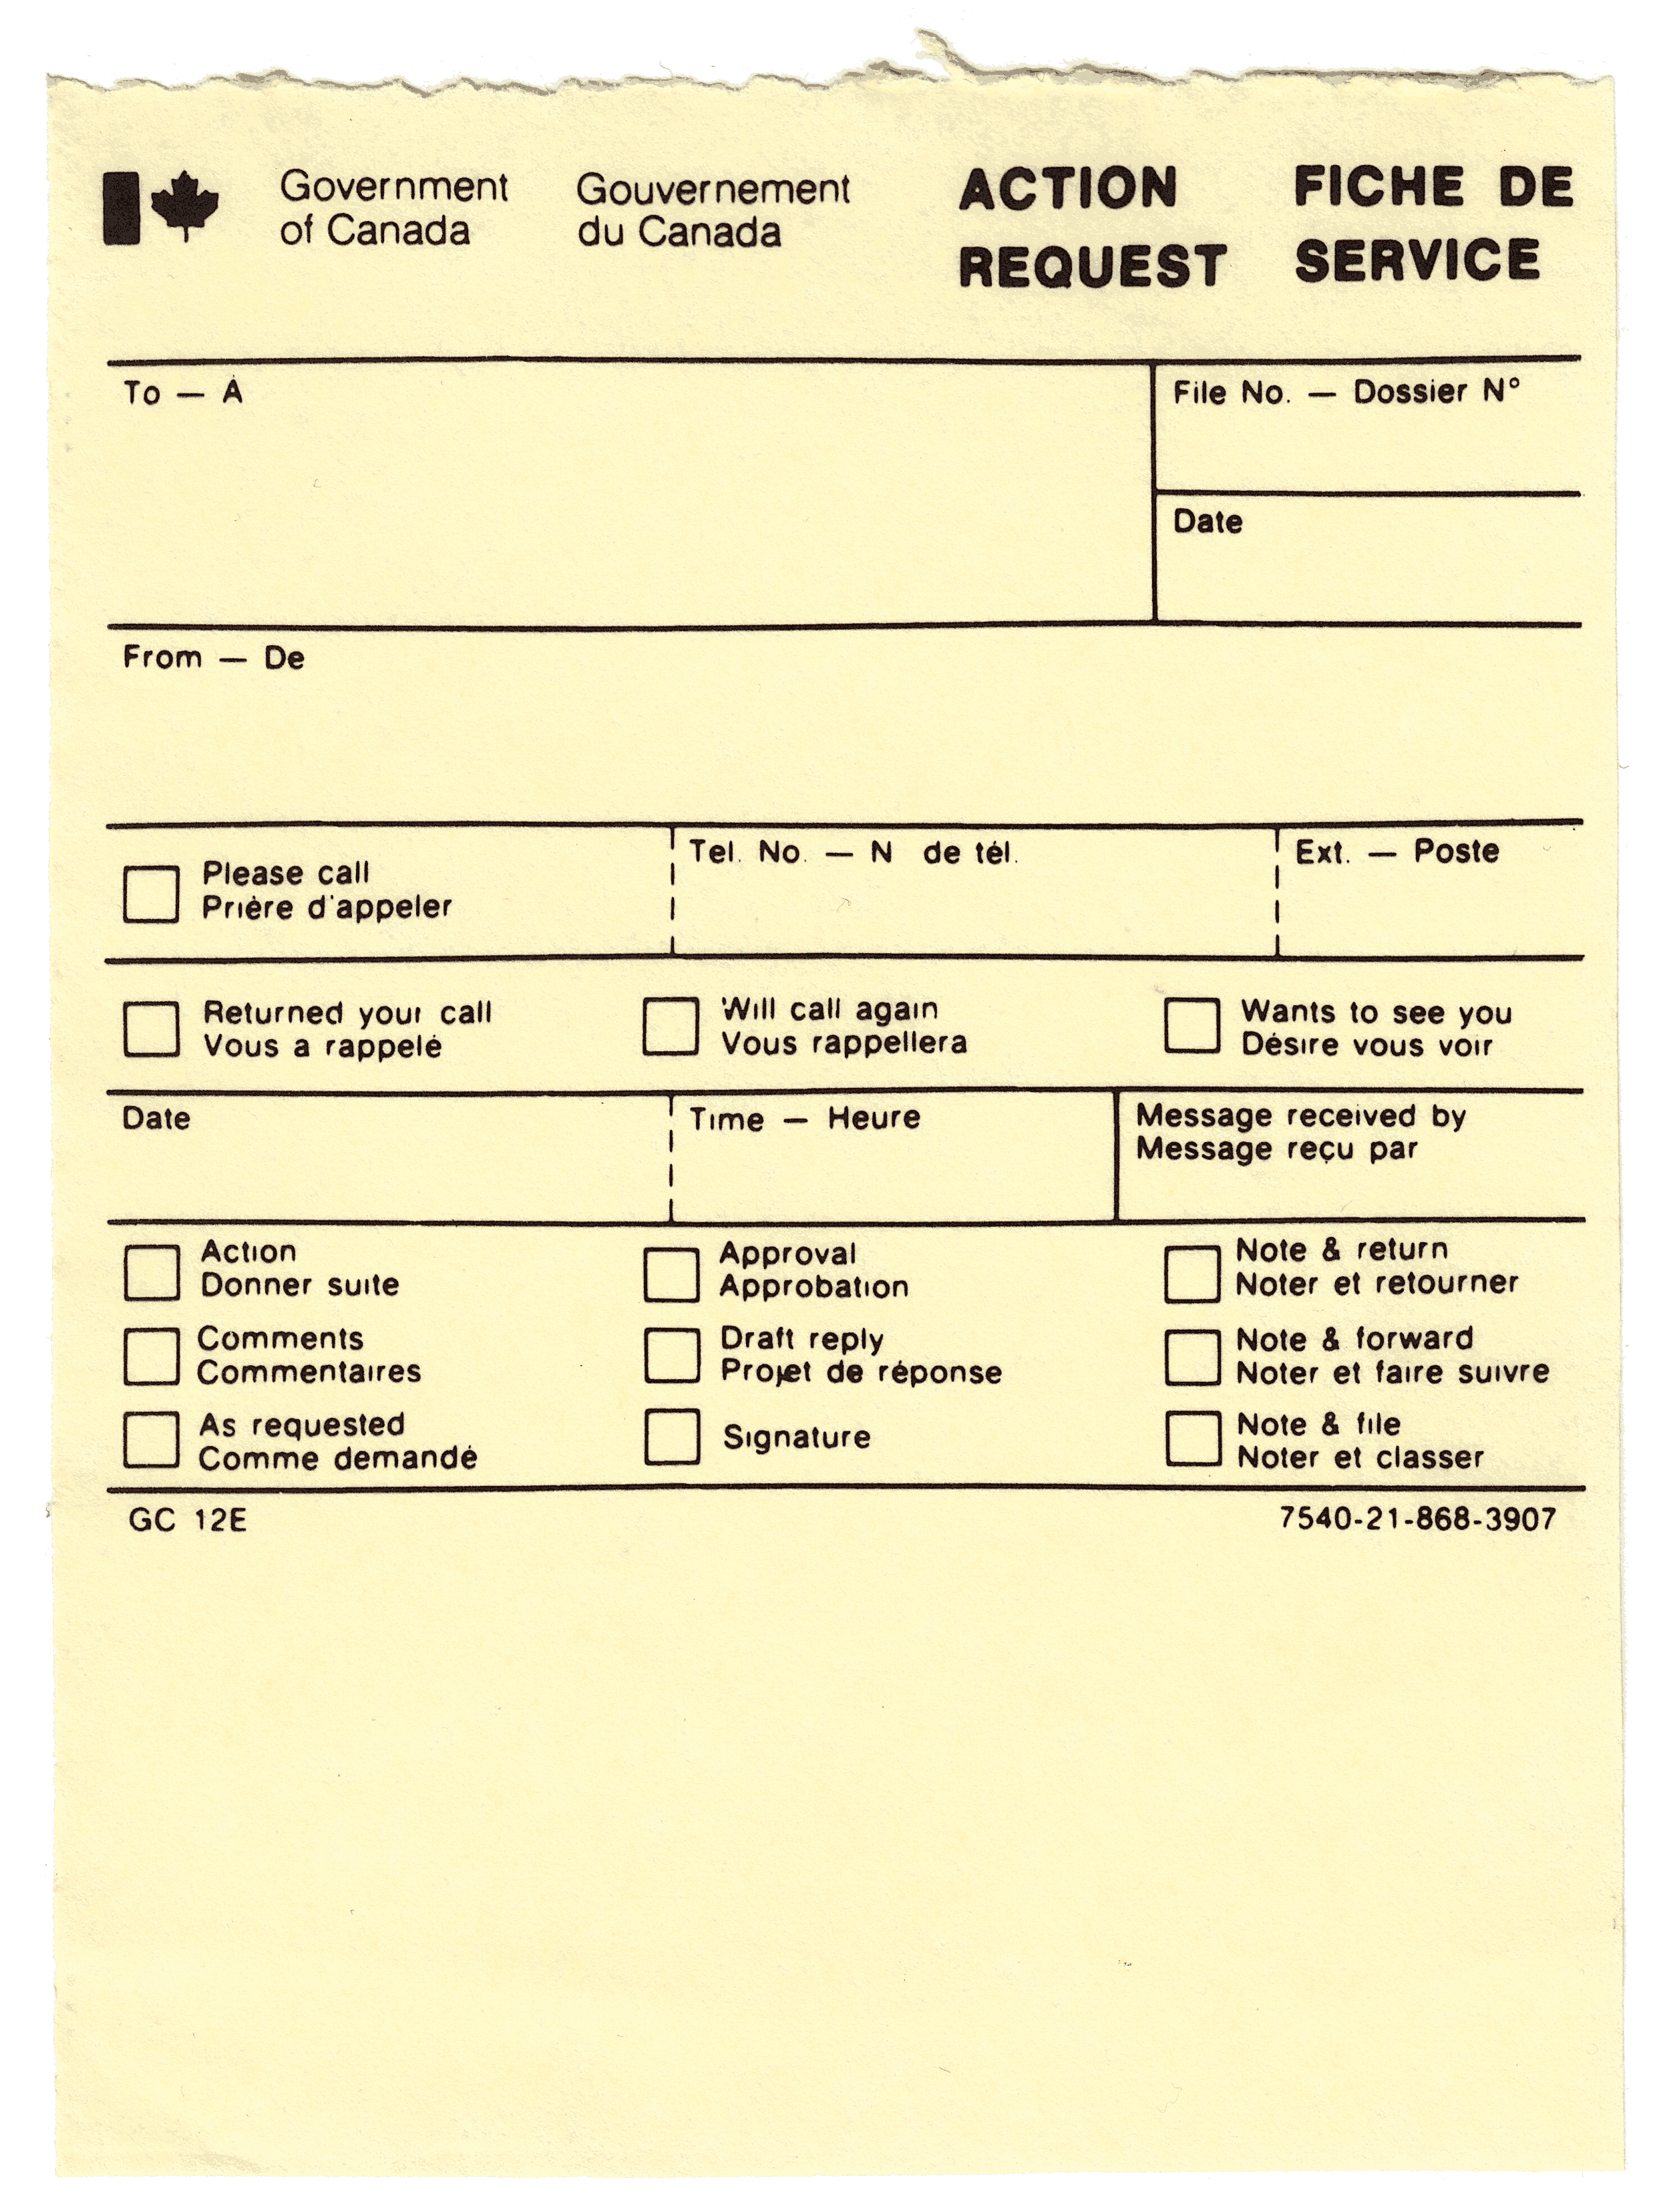
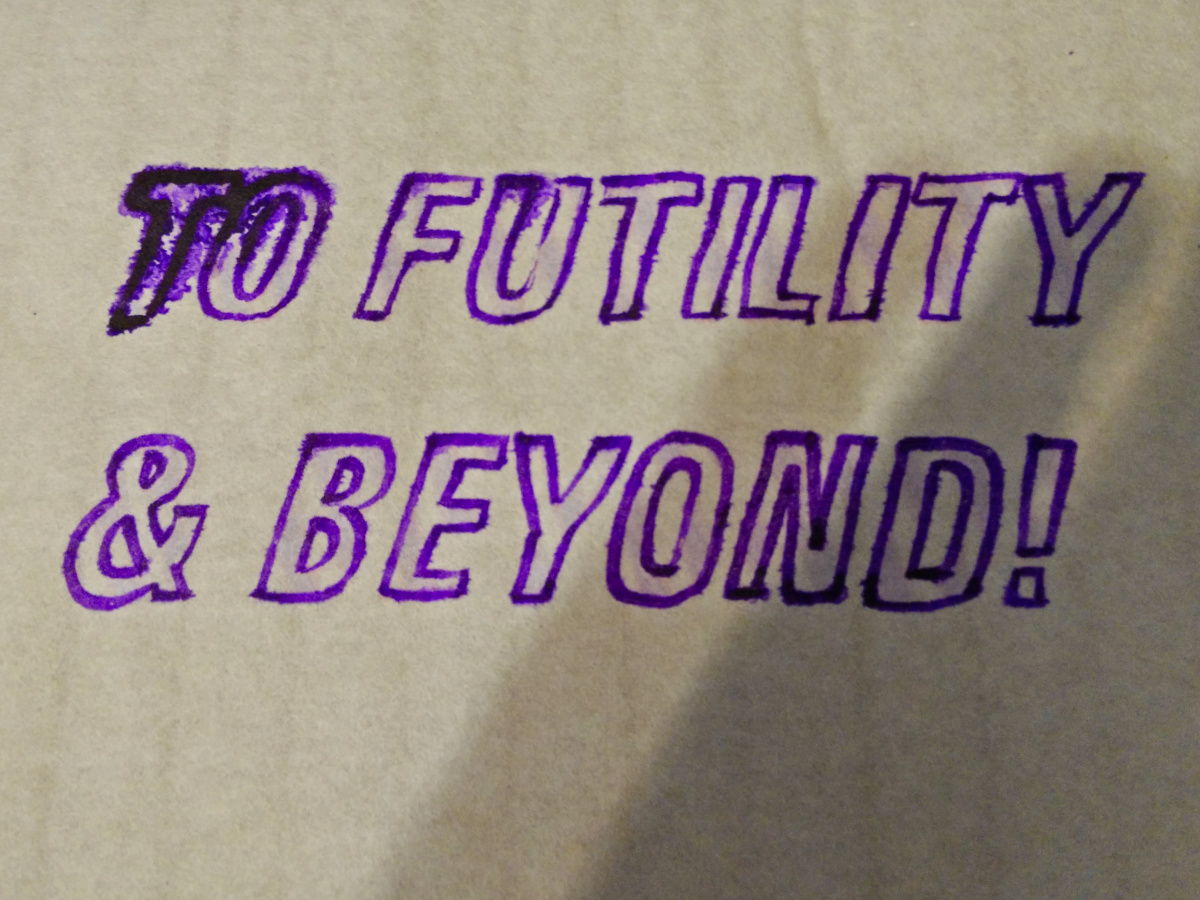
The unused master sheet, drawn in hecto ink (purplish black), copying pencil (grey) with guidelines from a plotter pen (red)
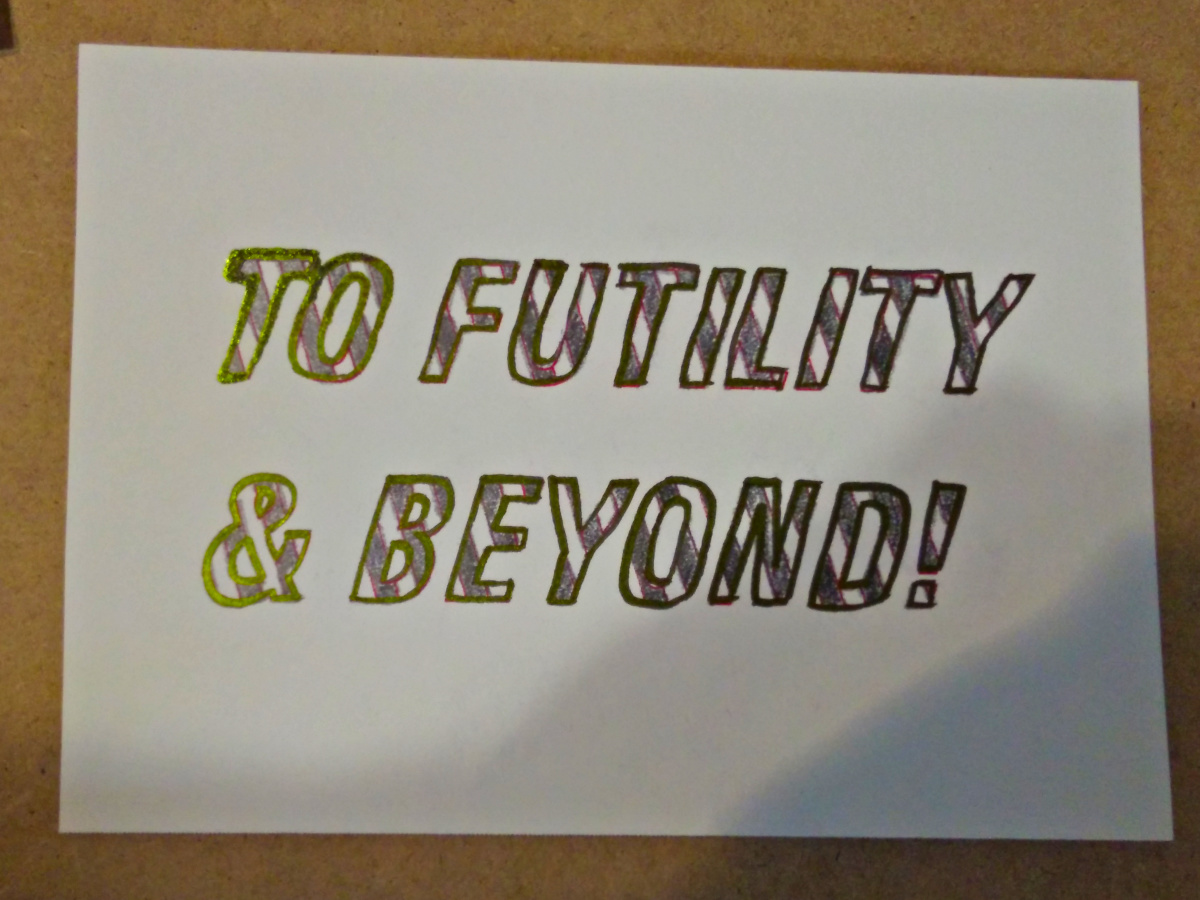
Stick the master face down onto the jelly sheet and leave it there for about a minute. I used a brayer to press the ink onto the surface. When you lift the master off the surface, you’ll end up with a slightly ruined master —
The used master sheet: probably too blurred to be usable again. Next time I’ll be more careful not to blot. (Colour balance made it yellow, btw; it’s the same sheet as before)
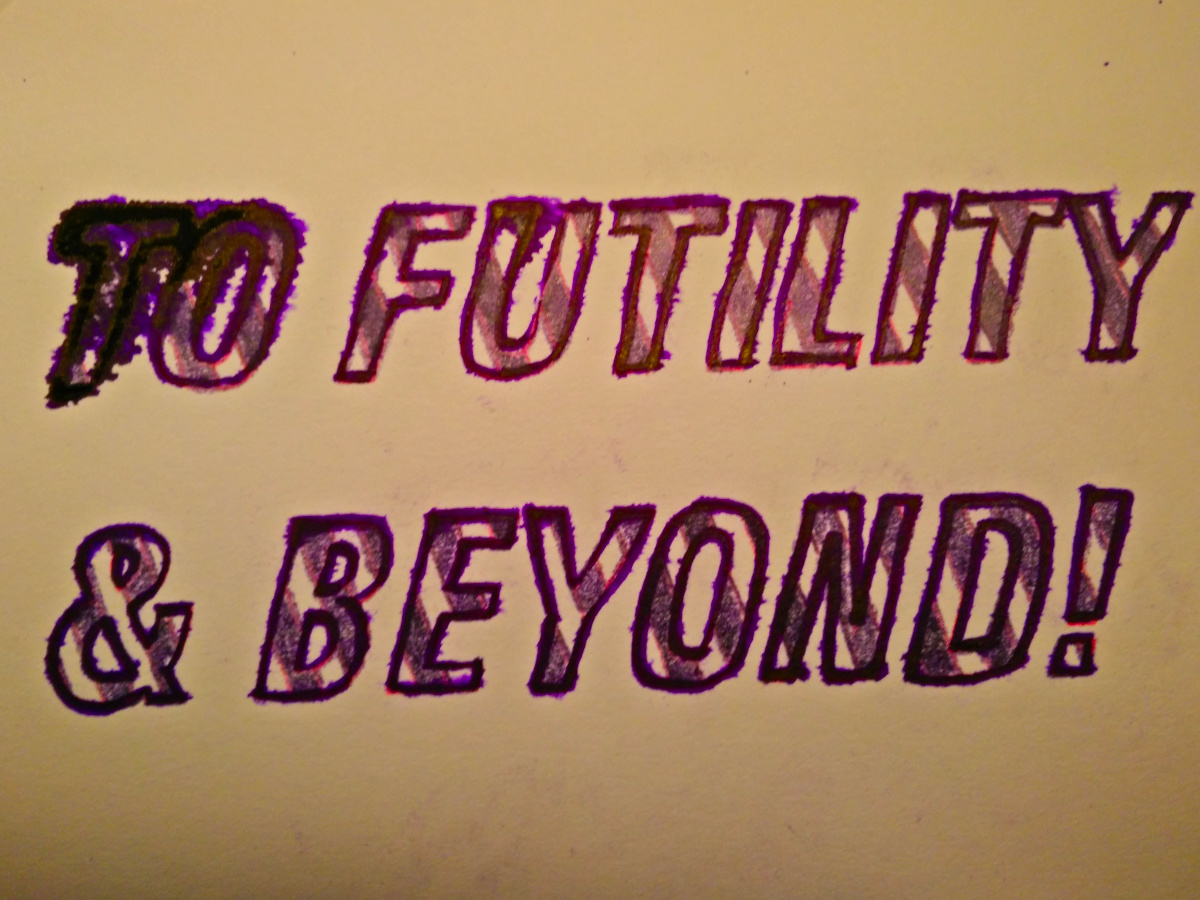
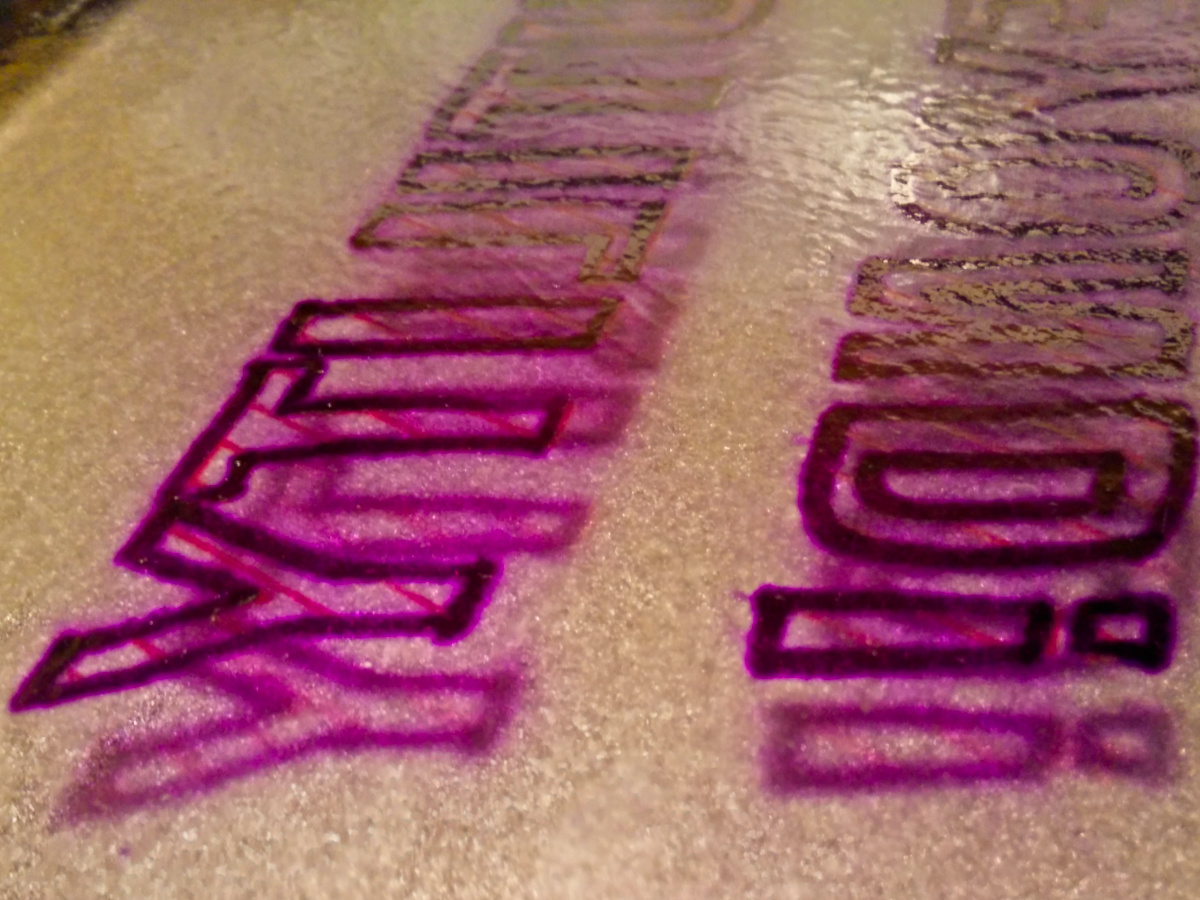
— and a crisp, reversed image in the jelly plate. I hope yours will be less blot-ridden than mine:
Image transferred onto jelly. Note blots (dammit!) and complete lack of visibility from hecto/copying pencil. Red lines from plotter pen are clear, though they didn’t end up transferring through to the paper copies
Now lay your copy paper onto the jelly sheet for a few seconds. Again, I used a brayer.
First copy, on mulberry paper
The copies come out remarkably dry, but should still be allowed to dry off for a while: this is a wet copy process, after all. The copier is reusable indefinitely, and should be very lightly dampened before use.
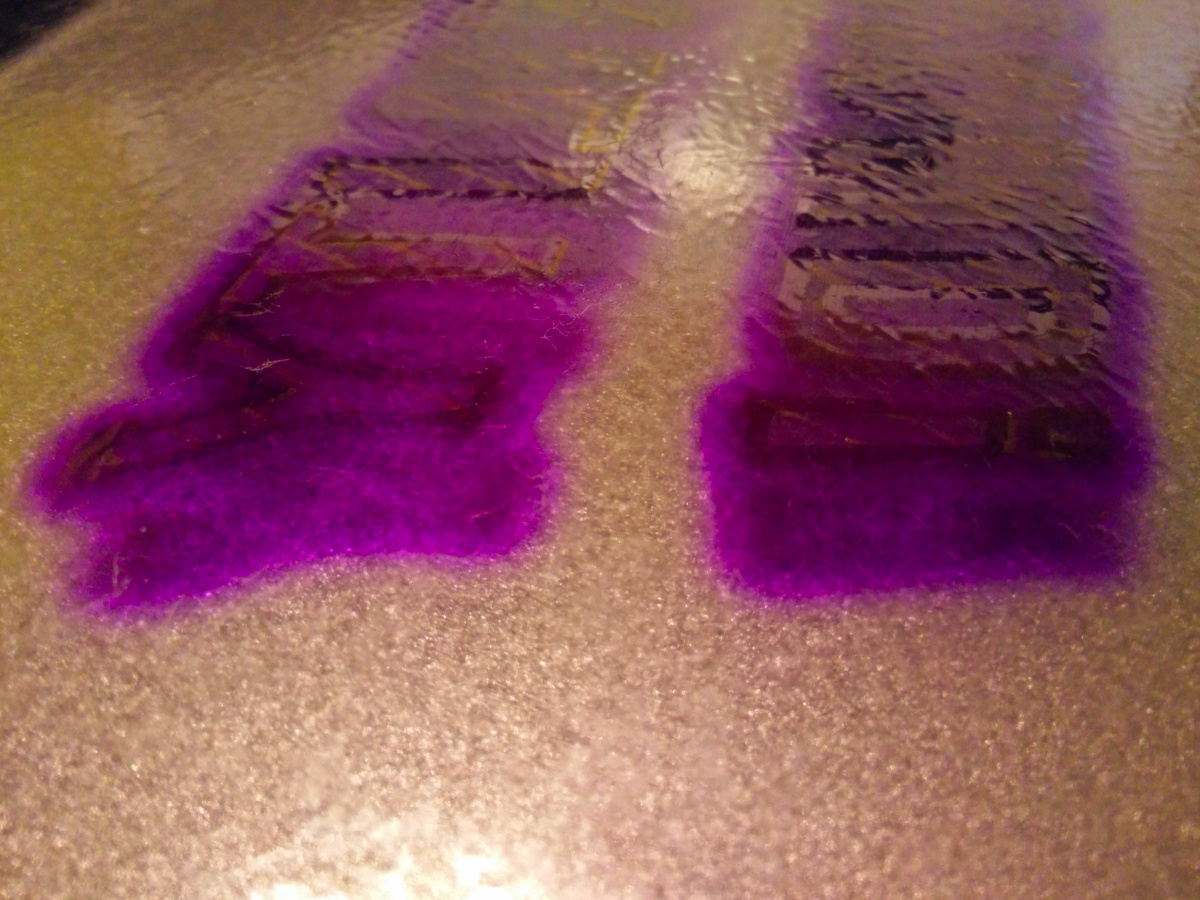
This is after use (6-7 copies), a light misting of water and a wipe down with a damp sponge.This is the same plate, roughly 12 hours after use. The ink has blurred and diffused more deeply into the surface. It was possible to pull a very faint and impossibly blurry copy from this, but it’s pretty close to being ready to reuse
This process is kind-of on the edge of practicality, but is not without its charms. It might be worth looking at:
alternative jellies, such as arrowroot, hypromellose or agar agar. Gelatin is hydrolyzed animal collagen, and this may create ethical issues for some users. Some glycerin is also from animal sources, but less so than in the past.
other ink/dye sources, including inkjet ink, certain water-soluble colouring pencils and other indelible/copying pencils. I have some vintage — possibly old enough to be quite toxic — copying pencils on the way to me via ebay which may work better.
making 3d printed stamps to transfer to the jelly plate. Since the plate doesn’t need to accept a perfectly flat impression, a relief design might work better than a 3d printed direct stamp.
(aside: I’d previously tried to make a copying pad from several layers of damp kitchen towel to transfer a drawing made with Stabilo All water-soluble pencils. As you can imagine, the ink quickly diffused along the cellulose fibres, making this process at best a very qualified success —
A copy attempt made with damp paper towels. The less said about this, the better
this, but with alternate lines from the plot file drawn with alternate pens. The original was slow because it had a point roughly every 0.1 mm, and this has been smoothed. Still took maybe 15-20 minutes to draw, though.


