Instagram filter used: Lo-fi
Long ago, the was a thing that called itself SimStapler©. It was a very early clicker game: every ten times you clicked on the virtual stapler, you got bonus audio. That was all it did.

A couple of days ago, lee posted a video with reminded me so much of that virtual stapler:
Today is a stapler switch pic.twitter.com/RkjHWT0Qyn
lee cyborg 🦞🔭 (@Leeborg_) April 22, 2020
Since I have the hardware and for various reasons my social calendar isn’t what it was, I set out on the bold plan to make Sim-SimStapler©… or SimStapler© Simulator … or RealStapler … or … look, I’ve spent more effort in trying to come up with a name for this than I did making the thing, so call it what you want.
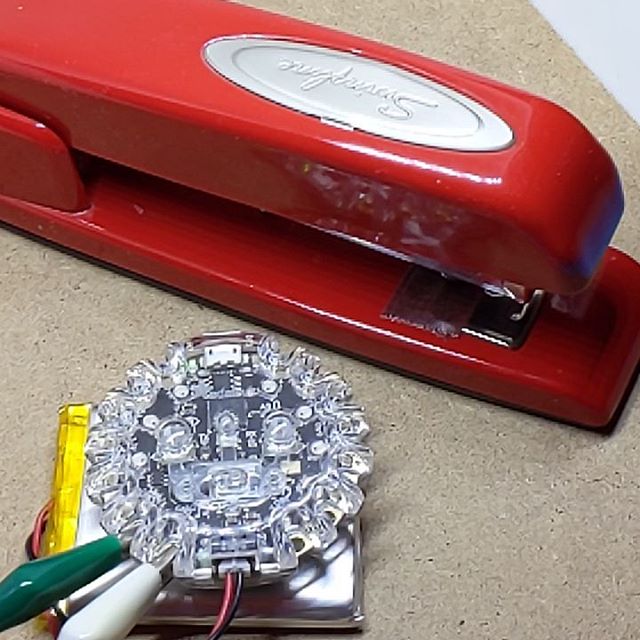
You’ll need a Circuit Playground Express, a couple of alligator clip test leads, and a stapler. And maybe some tape and a paperclip, too
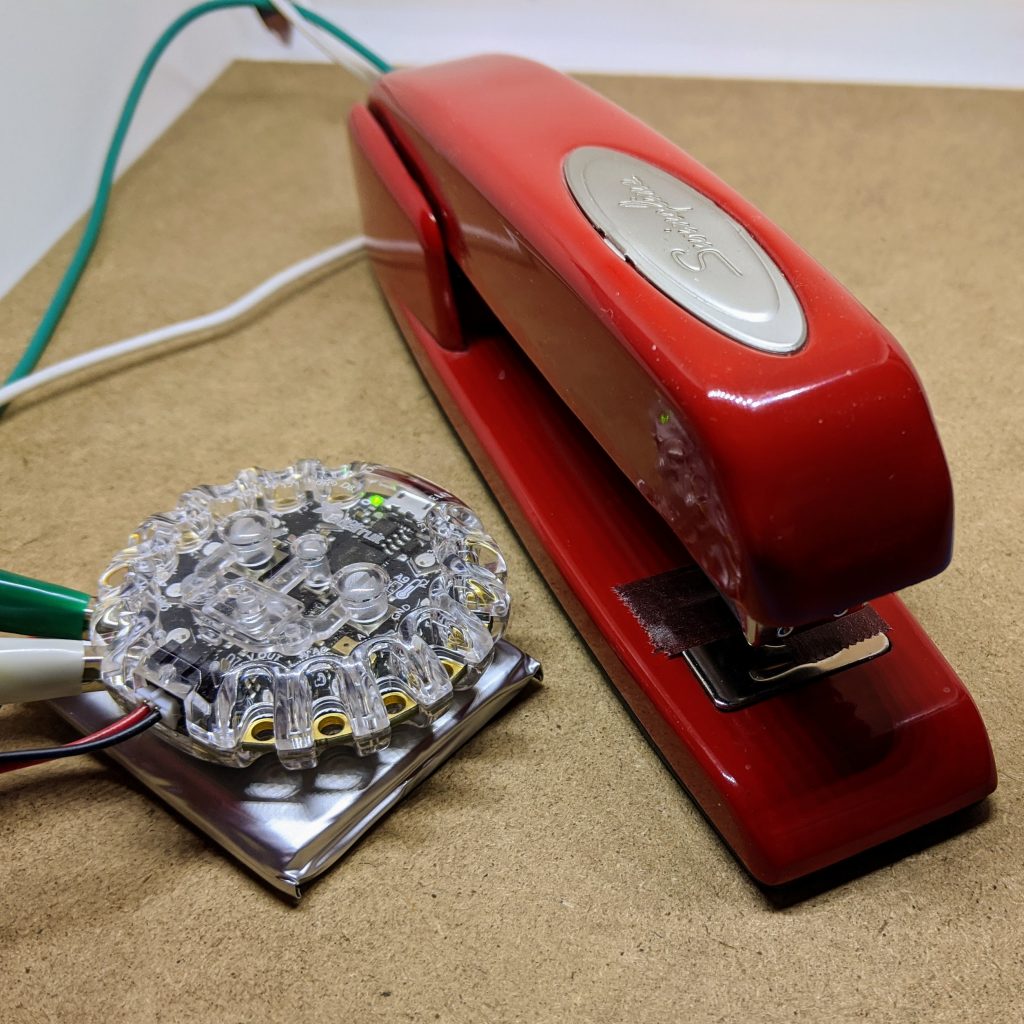
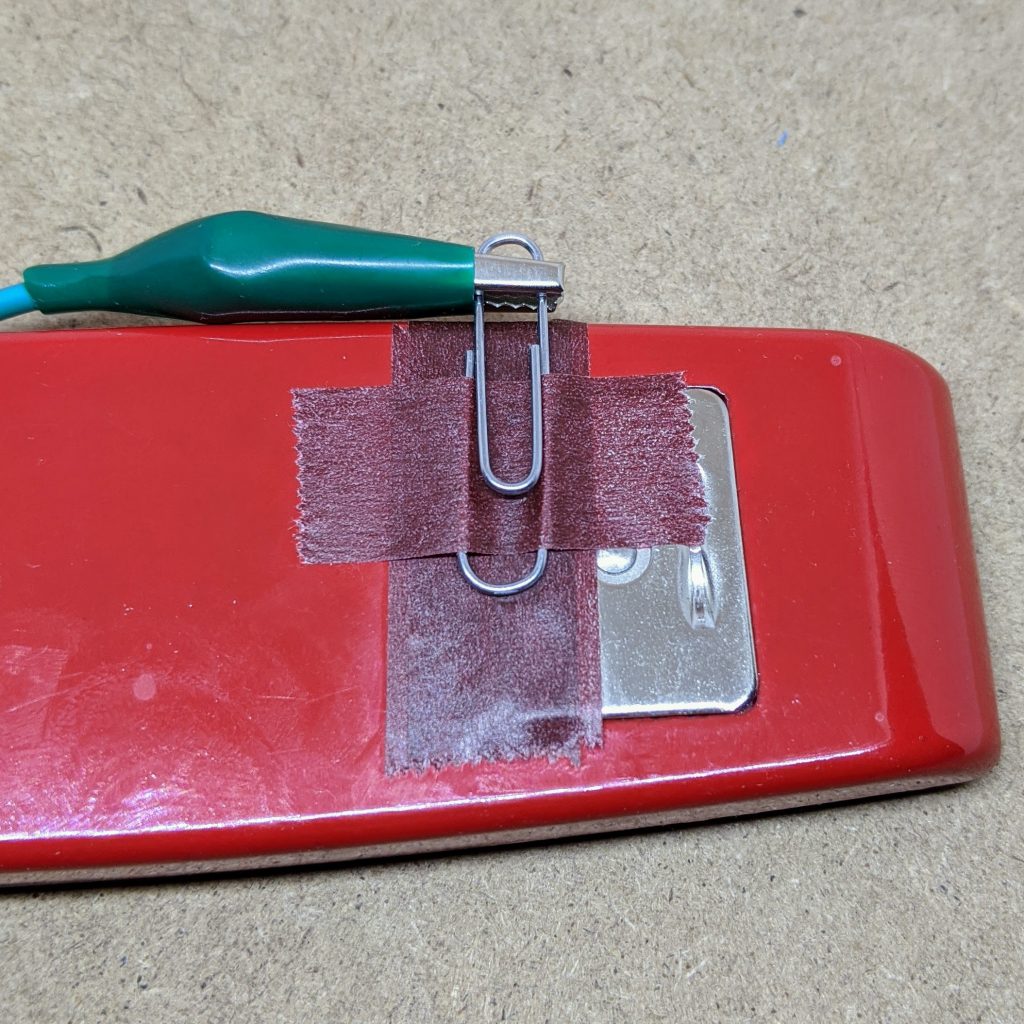
The important thing about a switch is that it has two electrically isolated parts that come together to close a circuit. And that’s exactly what the Swingline® 747® stapler doesn’t have: its entire metal body and mechanism is electrically conductive. So we have to rig something up …

Did I say take the staples out yet? No? Take the staples out of the stapler. Possibly even before doing anything else.
The code we’re going to run on the Circuit Playground Express is very simple:
Here’s the code:
# SIM-SimStapler / RealStapler - scruss, 2020-04
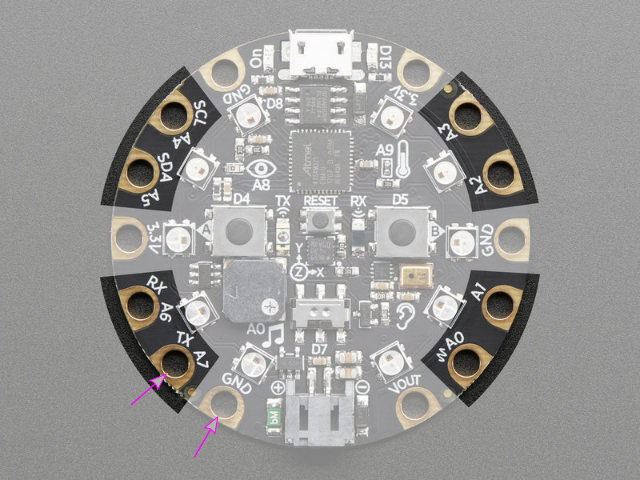
# circuitpython on CPX - stapler between D1 (A7) and GND
from adafruit_circuitplayground import cp
import board
from digitalio import DigitalInOut, Direction, Pull
import time
# set up stapler on pin D1 (port A7): goes LOW when pressed
stapler = DigitalInOut(board.D1)
stapler.direction = Direction.INPUT
stapler.pull = Pull.UP
# set up pixels - not too bright
cp.pixels.brightness = 0.1
# turn all pixels off
for i in range(10):
cp.pixels[i] = (0, 0, 0)
count = 0
while True:
# stapler pressed, so increase count
if not stapler.value:
count = count + 1
# only count first press, not if held
while not stapler.value:
pass
time.sleep(0.1)
# light up pixels clockwise for each press
for i in range(count):
cp.pixels[9 - i] = (0, 255, 0)
# get a bonus Penelope Keith every ten presses
if count == 10:
cp.play_file("splendid.wav")
# turn all pixels off after bonus
for i in range(count):
cp.pixels[i] = (0, 0, 0)
# and reset counter for next time
count = 0
Here’s the code and sample ready to be copied to your CIRCUITPYTHON drive:
(The sample is a slightly tweaked version of Freeverse’s original Bonus.wav. I ran it through an equalizer to make it sound less awful through the CPX’s tinny little speaker. I was also today years old when I found out that the sample wasn’t Penelope Keith from To the Manor Born, but Jen Krasinski, a staffer at Freeverse.)
The connection (singular) is simple:
Have an appropriate amount of fun!
I suppose I could also have done this on the BrainPad, but I haven’t set it up with MicroPython yet, and I don’t have time to drag coding blocks around. Also, this is not any project to associate with the word “brain” …
If the video doesn’t work: local link.

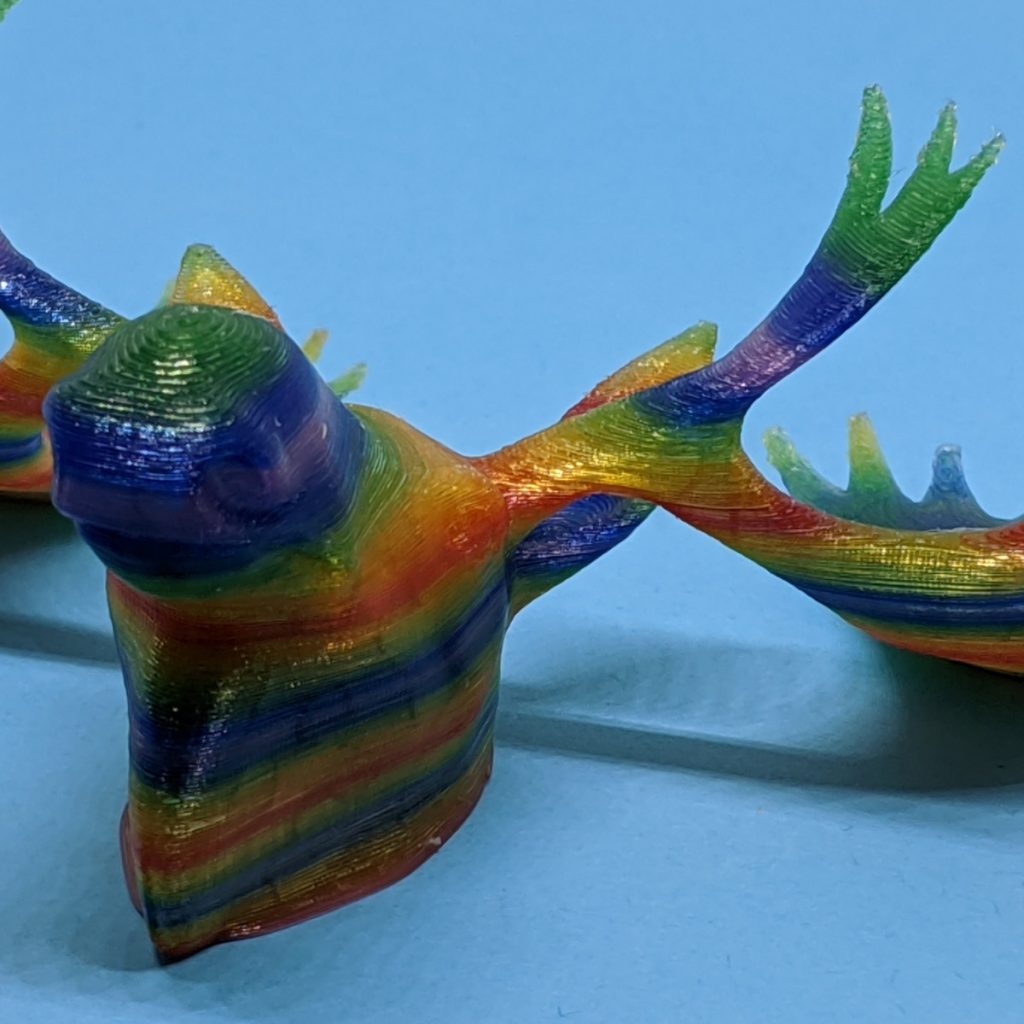
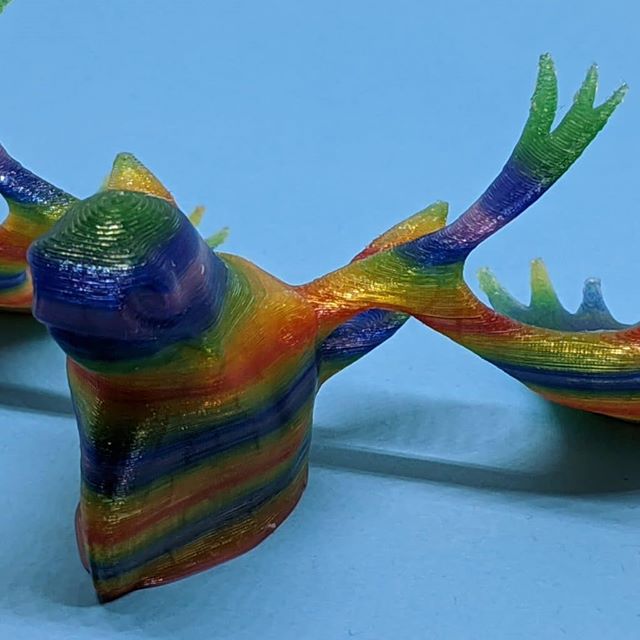
Model: Moose Head for Materio3D by Morena Protti (modified)
Clear PLA with manual colouring using ShinHan Touch markers
For it-seemed-like-a-good-idea-at-the-time reasons, I’ve ended up with a couple of tubes of the big dome LEDs. A tube is a lot; something over 20 pieces. Oh well, I’ll find uses for them eventually.
It seems these are LEDTronics 806 Series ‘Super Intensity 20mm Big Dome 6-Chip LEDs’. The datasheet shows they are configured as a DIP-12, with LED cathodes and anodes alternating around the pins:
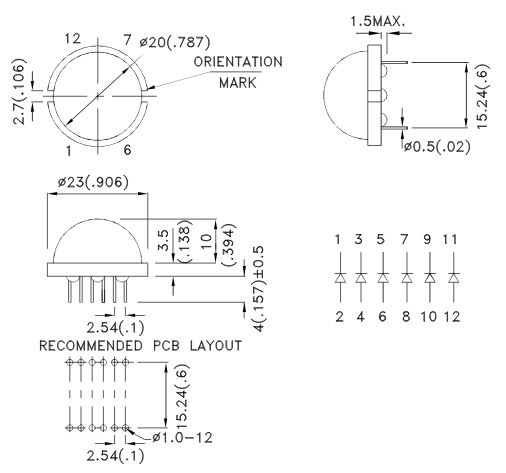
The six LEDs are enough to use all of the available PWM pins on a regular Arduino. The green LEDs I have look like they’re supposed to take a current-limiting resistor of ≥ 75 Ω or so at 5 V. The 100 Ω resistors I used did pretty much max out the weedy regulator on the cheap Arduino Nano I was using, so you may want to use bigger resistors if you want to avoid having your USB disappear.
No Fritzing model of the part yet, but here’s a sketch that works, but quite fails to use any interesting PWM functions at all:
// do a whirly thing with the 6 LEDs inside a LEDTronics L806T_UG-LIME 20 mm Big Dome unit
// scruss - 2020-04
// https://www.ledtronics.com/Products/ProductsDetails.aspx?WP=281
// each thru 100R resistor - which might be rather small

#define MAXPINS 5
int pwmpins[] = { 3, 5, 6, 9, 10, 11 };
int i = 0;

void setup() {
  // pwm pins as output, all initially off
  for (i = 0; i <= MAXPINS; i++) {
    pinMode(pwmpins[i], OUTPUT);
    analogWrite(pwmpins[i], 0);
  }
}

void loop() {
  if (i > MAXPINS) {
    i = 0;
  }
  analogWrite(pwmpins[i], 255);
  analogWrite((i > 0) ? pwmpins[i - 1] : pwmpins[MAXPINS], 0);
  delay(30);
  i++;
}
or if you must: Ender-3 plays LG on YouTube.
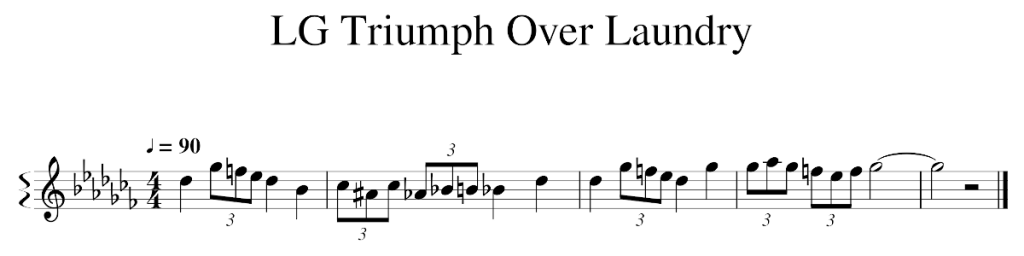
I’ll admit that this version is strongly influenced by Washing Machine Sheet music for Percussion, which seems to have a couple of off notes.
Midi, MuseScore, gcode and PDF file:
But this is mostly about the discovery of I wrote a program that converts MIDI files to G-Code, enabling my printer to play music with its LCD buzzer on reddit, with the converter at: MIDI to M300
So here’s the gcode to play this:
M300 P632 S554
M300 P35 S0
M300 P222 S740
M300 P222 S698
M300 P222 S622
M300 P632 S554
M300 P35 S0
M300 P632 S466
M300 P35 S0
M300 P222 S494
M300 P222 S466
M300 P222 S494
M300 P222 S415
M300 P222 S466
M300 P222 S494
M300 P632 S466
M300 P35 S0
M300 P632 S554
M300 P35 S0
M300 P632 S554
M300 P35 S0
M300 P222 S740
M300 P222 S698
M300 P222 S622
M300 P632 S554
M300 P35 S0
M300 P632 S740
M300 P35 S0
M300 P222 S740
M300 P222 S831
M300 P222 S740
M300 P222 S698
M300 P222 S622
M300 P222 S698
M300 P2532 S740
One of the quirks of the SBC6120-RBC boards I just built is that its serial port talks a protocol that’s very rarely seen these days: 7 bits, mark parity, 1 stop bit. minicom supports it, but seemingly can’t set it from the command line.
Kermit, of course, can. Kermit (not the frog, but named after him) is the connect-to-anything, with-anything comms package. It’s been in constant development since 1981, and there’s hardly a computer system that exists that it won’t run on. The Unix/Linux variant, C-Kermit, has an incredibly intricate hand-crafted makefile that predates autoconf or cmake or any of those newfangled toys. Unfortunately, though, this means it may need a lot of reading and a little hand to compile.
There may be some additional dependencies, but to build a simple version of C-Kermit 9.0.304 Dev.23 on Ubuntu 19.10 and Raspbian Buster you need this patch, and do something like:
mkdir ckermit
cd ckermit
wget http://www.kermitproject.org/ftp/kermit/test/tar/cku304-dev23.tar.gz
tar xvzf cku304-dev23.tar.gz
wget https://src.fedoraproject.org/rpms/ckermit/raw/master/f/ckermit-9.0.302-fix_build_with_glibc_2_28_and_earlier.patch
patch < ckermit-9.0.302-fix_build_with_glibc_2_28_and_earlier.patch
make linux
and it should build correctly. There are many, many options: make linux+ssl gives some extra network security features; make install puts it in the system path.
The command line I use to connect to the SBC6120-RBC is:
kermit -l /dev/ttyUSB0 -p m -b 38400 -m none -c
That drops you straight into a connection. To get you back to Kermit’s command mode, type Ctrl + \ + C.
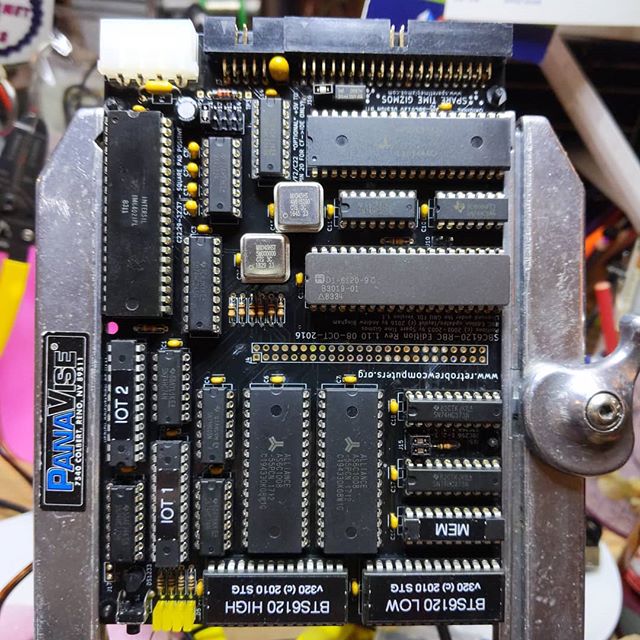
A couple of years back, I said I was building a single board computer and then things went quiet. Yes, I screwed up. A mix of dry joints and possibly burning through traces caused by following old instructions, impatience and a very unforgiving solder type made the original board almost unusable. I finally got a replacement board (thanks, Andrew!) and put in a humongous Digikey order for all the projects that I want to finish, and got going.
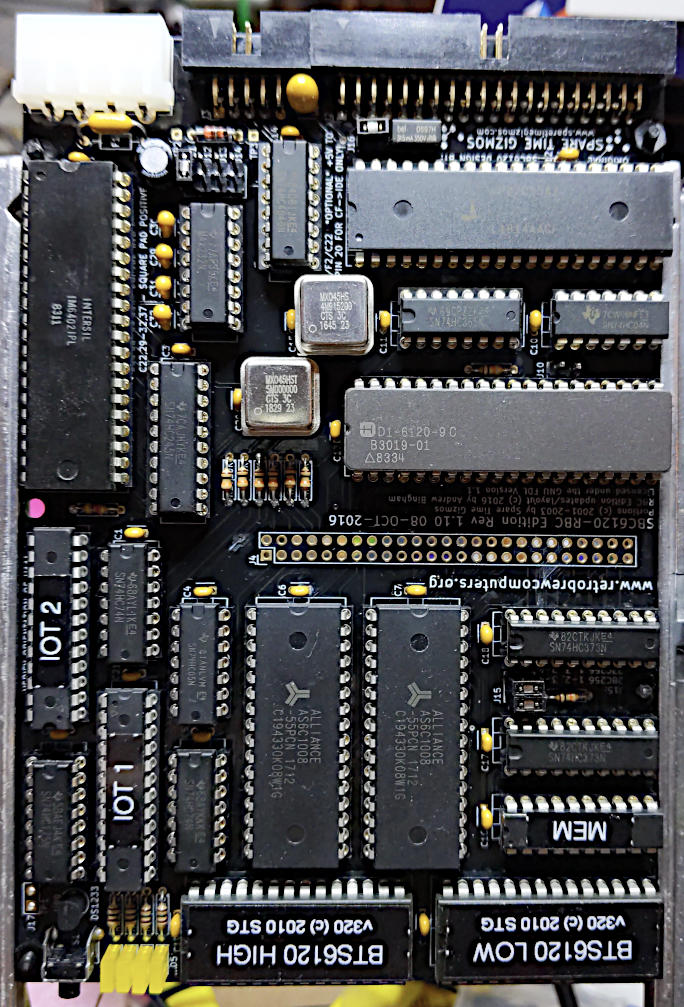
I took quite a bit more care building this, but it was still only a couple of evenings to put it together. While I still used lead-free solder, I hardly needed extra flux at all. The nice ($$$) turned-pin sockets hold the chips much more securely than the cheaper plain sockets I used before.
After a minor hiccup (homebrew null modem cable needs both RX and TX to be useful), it lives!
SBC6120 ROM Monitor V320 Checksum 3752 6072 3515 09-APR-10 21:15:39
Copyright (C) 1983-2010 by Spare Time Gizmos. All rights reserved.
NVR: Not detected
IDE: 489MB - LEXAR ATA FLASH
IOB: Not detected
B
-IDA0
.BASIC
NEW OR OLD--OLD
FILE NAME--ASCART
READY
LIST
ASCART BA 5B
100 FOR Y=-12 TO 12
110 FOR X=-39 TO 39
120 C1=X*.0458
130 C2=Y*.08333
140 A=C1
150 B=C2
160 FOR I=0 TO 15
170 T=A*A-B*B+C1
180 B=2*A*B+C2
190 A=T
200 IF (A*A+B*B)>4 GOTO 240
210 NEXT I
220 PRINT " ";
230 GOTO 270
240 IF I<=9 GOTO 260
250 I=I-57
260 PRINT CHR$(48+I);
270 NEXT X
280 PRINT
290 NEXT Y
300 END
READY
RUN
ASCART BA 5B
000000011111111111111111122222233347E7AB322222111100000000000000000000000000000
000001111111111111111122222222333557BF75433222211111000000000000000000000000000
000111111111111111112222222233445C 643332222111110000000000000000000000000
011111111111111111222222233444556C 654433332211111100000000000000000000000
11111111111111112222233346 D978 BCF DF9 6556F4221111110000000000000000000000
111111111111122223333334469 D 6322111111000000000000000000000
1111111111222333333334457DB 85332111111100000000000000000000
11111122234B744444455556A 96532211111110000000000000000000
122222233347BAA7AB776679 A32211111110000000000000000000
2222233334567 9A A532221111111000000000000000000
222333346679 9432221111111000000000000000000
234445568 F B5432221111111000000000000000000
864332221111111000000000000000000
234445568 F B5432221111111000000000000000000
222333346679 9432221111111000000000000000000
2222233334567 9A A532221111111000000000000000000
122222233347BAA7AB776679 A32211111110000000000000000000
11111122234B744444455556A 96532211111110000000000000000000
1111111111222333333334457DB 85332111111100000000000000000000
111111111111122223333334469 D 6322111111000000000000000000000
11111111111111112222233346 D978 BCF DF9 6556F4221111110000000000000000000000
011111111111111111222222233444556C 654433332211111100000000000000000000000
000111111111111111112222222233445C 643332222111110000000000000000000000000
000001111111111111111122222222333557BF75433222211111000000000000000000000000000
000000011111111111111111122222233347E7AB322222111100000000000000000000000000000
READY
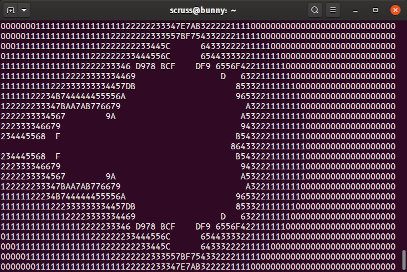
It compiles and runs a slightly modified ASCIIART.BAS Mandelbrot set benchmark in 144 seconds. This is comparable to many 8-bit computers. The modifications were:
I went out for a very soggy bike ride this morning just to get out of the house. There were a few more people out than I expected, as it’s a regular work day for most people in Ontario. COVID-19 meant that most workplaces were shuttered.
Splashing through the puddles at Centennial College’s deserted Ashtonbee campus (round about here, if you need a precise location) I heard this mockingbird giving its very best performance. I only got a little over a minute of it, but in that time there was some American Robin, Gull, hawk of some kind and best of all (starting just after 40 s) car alarm.
Centennial’s got a big automotive section, and the empty parking lot’s usually full of cars. Mimus was just repeating what it usually heard. I wonder how long they’ll remember and replay car alarms after we’re gone?
Back in the mid-80s — right around the “computers are the future, innit?†phase of history — Strathclyde University decided that every student should have access to a computer. Unfortunately, the computer they chose was the Sinclair QL:
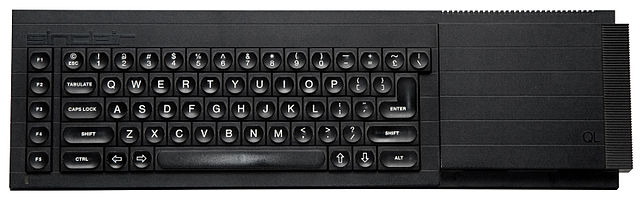
In UK computing, the QL is basically a punchline. With Clive Sinclair’s legendary lavish spending and attention to detail, it shipped late, was initially fiercely buggy, had a keyboard that was 100% nope and used microdrives (an endless loop of magnetic tape in a tiny cartridge) to provide occasionally-retrievable data storage.
My brother was at Strathclyde while these computers were available, so he plunked down the deposit and brought one home. It looked good — especially hooked up to a TV through its SCART port. But it didn’t have much software, outside the tools that were homebrewed for my brother’s course.
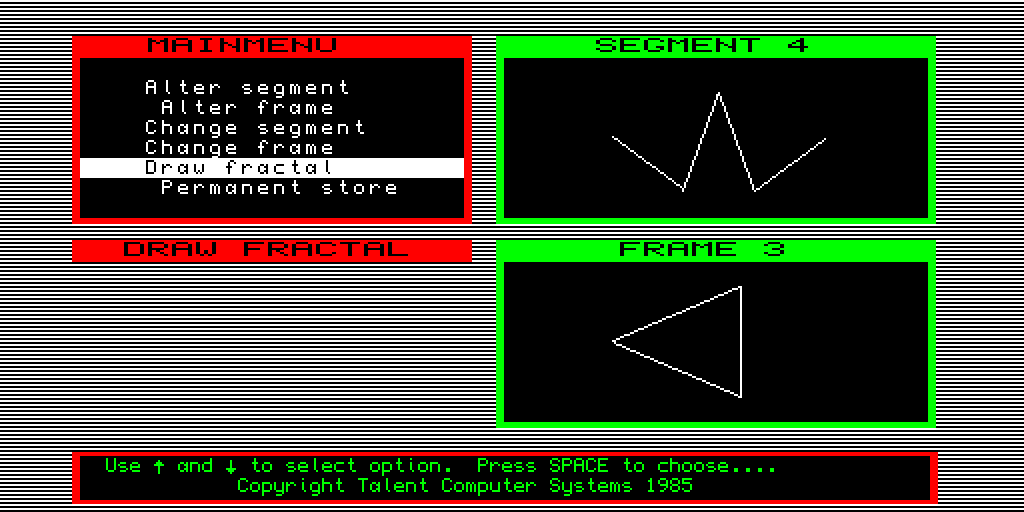
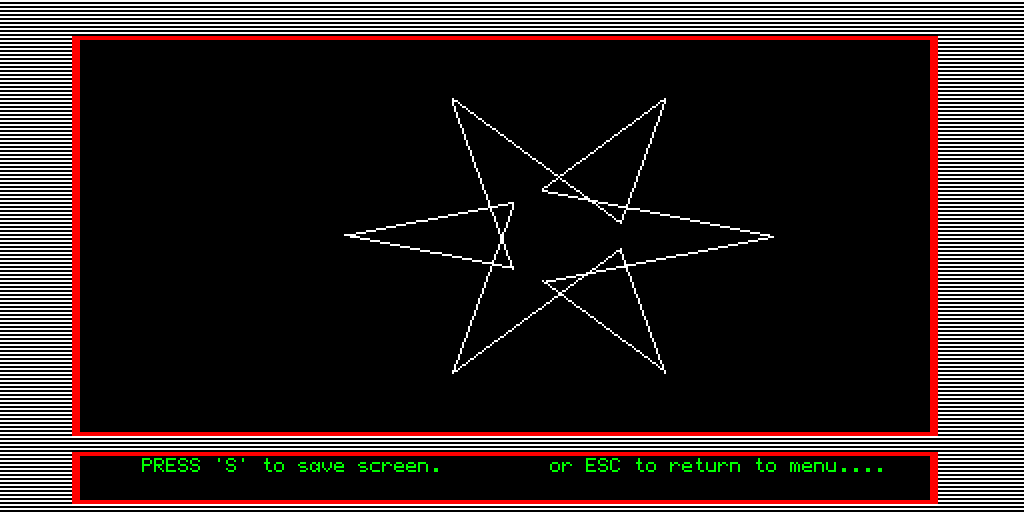
One piece of software that has stuck with me in the ~35 years since then was a fractal graphics creator. I remembered you could draw segments and overlay them on shapes to make geometric figures. I thought this was magic, especially with the QL’s (at the time) quite nippy 68008 processor.
I don’t know what prompted me to look for it today. I’d half-heartedly looked in the past, but found nothing. But today I remembered it was written by a software company based at Strathclyde, and that got me to the Talent Graphics Toolkit:
I remembered the “windowed†layout and even the pinstripes. Maybe the graphics were a bit plainer than I remember, but it still delighted me:
The emulator (uQLx) was not particularly easy to install, but I so wanted to run this again that I persevered.
By the time I got to Strathclyde a few years later, the QLs were history. It was rumoured that there was a storage room full of ’em, and there may even have been a thriving market in not-entirely-legit sales of liberated machines. But that wasn’t my jam back then: we had Atari STs with FaST BASIC cartridges in the engineering lab, and a couple even had connections to the VAX cluster …