Adding a Bluetooth serial terminal to Raspberry Pi

Hey! This article is really old. The advice given here will not work on a Raspberry Pi 3, and will need some care with recent versions of Raspbian.

Sometimes you find a computer component that’s so cheap, that works so well, that you’re amazed you managed to live without it for so long. The JY-MCU Arduino Bluetooth Wireless Serial Port Module is that component for me right now.

JY-MCU Arduino Bluetooth Wireless Serial Port Module from dx.com

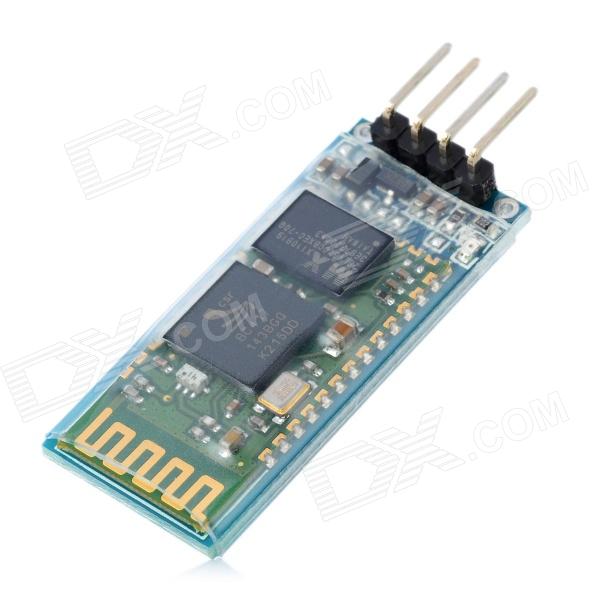
This little board is a cheap ($8.50!) Bluetooth serial port. It’s happy with the Raspberry Pi’s 3.3 V logic levels, and will communicate at standard rates between 1200 and 1,382,400 baud. It even comes with a nifty little cable which is just the right polarity for the Raspberry Pi’s GPIO pins. It’s really meant to do serial comms on an Arduino, but it’s not limited to that.

What this board allows you to do is connect to your Raspberry Pi’s serial console via Bluetooth. That way, you can have your Raspberry Pi hidden away somewhere, and yet still log in as if you were talking to it directly through a serial cable. Combine this with a USB wireless adaptor (like the Belkin N150 that I use) and you’ve got a wireless device you can always connect to, even if your network goes down.

In order to use this device with your Raspberry Pi, you’re going to have to do some reconfiguration. Exactly what reconfiguration you do depends on some additional hardware:

  1. If you have a USB-TTL Serial converter (like an FTDI Friend, FTDI Basic Breakout – 3.3V, or the one I use, the OSEPP FTDI), you can reconfigure the Bluetooth module to run at 115,200 baud, the default speed of the Raspberry Pi’s serial port.
  2. If you don’t have the serial converter, you’ll need to reconfigure the Raspberry Pi’s serial terminal to run at the JY-MCU Bluetooth adapter’s default 9600 baud.

To reconfigure the Bluetooth module to run at 115,200 baud

(I chose this option, as it allows me to use the Bluetooth module with Firmata on an Arduino, too.)

The JY-MCU board comes with no instructions, but all the reconfiguration commands you’ll need are explained here: hc06_linvor_1.5_at_command_set [[hc06_linvor_1.5_at_command_set]] (cached copy; original has gone) While you’re setting the communications speed, you’ll probably also want to change the device name (so you can more easily recognize your own board, as the default is something like “Linvor”) and PIN (for that warm feeling of security that only a four digit code can provide). The device is configured using AT commands (or as we eldsters call them, Hayes commands) by plugging it directly into a USB-TTL Serial device attached to your computer. Here’s how you wire it:

USB-TTL Serial    Bluetooth Serial
================= =================
GND               GND
VCC               VCC
TXD               RXD
RXD               TXD

Note that TXD and RXD are crossed. The Bluetooth unit runs on a 3.6-6V supply, but 3.3V logic. To enter the AT commands, start a serial terminal (Hyperterm, minicom, screen …) at 9600 baud talking to the USB-Serial adapter, and copy and paste these commands in:

AT+NAMEBluey
AT+PIN4321
AT+BAUD8

You’ll have to disconnect the terminal and reconnect at 115,200 baud, as that last command just reset the Bluetooth device’s speed. You might want to use other settings than Bluey for the name and 4321 for the PIN, too.

Update: check that your Raspberry Pi’s /boot/cmdline.txt contains:

console=ttyAMA0,115200

You will not get a login prompt otherwise.

Now go to Using the Device.

To reconfigure the Raspberry Pi’s serial terminal to run at 9600 baud

Serial terminals traditionally ran at 9600 baud, and that seems a bit slow these days. But, if you don’t have a way of setting up the Bluetooth device differently, 9600 is what you’re stuck with. You’ll need to edit your Raspberry Pi’s /boot/cmdline.txt so that the part that previously read:

console=ttyAMA0,115200 kgdboc=ttyAMA0,115200

to

console=ttyAMA0,9600 kgdboc=ttyAMA0,9600

Note that this file should only contain one line, so be careful you don’t add extra line breaks or your Raspberry Pi won’t boot. Save the file, reboot your Raspberry Pi, and go to the next section.

Using the Device

On your Raspberry Pi, connect the Bluetooth Wireless Serial Port Module as follows:

Raspberry Pi      Bluetooth Serial
================= =================
5V  (GPIO Pin  2) VCC
GND (GPIO Pin  6) GND
TXD (GPIO Pin  8) RXD
RXD (GPIO Pin 10) TXD

(Despite the minimum 3.6V rating, I’m happily running mine from the 3V3 power, GPIO Pin 1. YMMV.)

When the board gets power, but isn’t paired, the LEDs on the Bluetooth module flash quickly. Now you need to pair the device with your computer (use 0000 as the PIN, or whatever you chose if you changed it), and it will appear as a serial port on your machine. On my Mac, that’s a device called /dev/tty.Bluey-DevB. The LEDs stop flashing when the port goes into use. Open up a serial terminal, set the device and speed correctly, and if all goes well, you should see:

Debian GNU/Linux wheezy/sid raspberrypi ttyAMA0

raspberrypi login:

Success!

30 comments

  1. Have you tried this with an iOS or Android device? Could you use it as a “bluetooth terminal monitor” of some sort? I have plenty of old Android phones that need repurposing!

  2. Hi.
    Been trying to get this going on Windows using the second method… I don’t suppose you’ve had any luck on Windows, have you? It’s refusing to connect, despite correctly (I think) establishing the BT connection. The bluetooth led is continually flashing. Very frustrating!

  3. If it’s flashing, it hasn’t paired, Michael. I don’t have a windows machine to try it on, sorry.

  4. Thanks for posting this. I’m doing something slightly different, where I want to connect to the Pi via bluetooth from an Android tablet. I it connecting but for some reason I can’t read/write from the serial port on the Pi. I should be able to just write “cat /dev/ttyAMA0” on the pi and have it print the text I enter in Android. Any ideas on how this could be fixed? I can echo the text using an Arduino so the problem is with the Pi.

  5. Funny, you wrote that just about when I finally figured it out. Thanks so much for responding. It works great now. I am using this for a device that collects data for a piece of lab equipment. Sensors are read into an Arduino. The Arduino is connected to a raspberry pi. The pi collects the data and makes it available via a http api. The UI is an Android tablet. Since we’re not guaranteed network connectivity, the Android needed to connect to the Pi via Bluetooth, which it now does. The cool part is the tablet can connect using Bluetooth or wifi. It’s up to the customer. This combination of technology is so powerful, easy, and inexpensive. It’s a beautiful time to be in tech!

    Thanks for the help.

  6. Yes, Steve; I agree with Michael. That would be a great writeup. Still, if it’s for a client, sometimes the contract doesn’t allow you to publish …

  7. Guys, I was planning on a writeup once the project is done. Might have to clear a bit of red tape but no big deal. It’ll all happen soon after the dev is done.

    Thanks and have a great week!

  8. Hi there,

    Do you really need an FTDI serial adapter (or equivalent) to alter the BT module’s settings?

    Surely you can do this:
    1) Hook up BT module to RPi GPIO header serial pins. Do not establish a link with the module.
    2) Log in to RPi (via local keyboard and screen or ssh)
    3) Send configuration commands to ttyAMA0

    If not, why not?

    My module just arrived from DealExtreme…

  9. Yes you can!

    You can only send AT commands to the module when bluetooth is not connected, but if you hook it up as you describe then you can send AT commands from the console:

    echo -n “AT+NAMEfoobar” > /dev/ttyAMA0

    You need to know what the serial port speed is when you do this. I set the console speed to 9600 first (as you describe), then sent the module NAME command. I didn’t set the module speed, but if I did I’d have to set the console speed back again.

  10. I seem to have a problem, probably related to a recent update. My /boot/cmdline.txt contains the following dwc_otg.lpm_enable=0 console=ttyAMA0,9600 kgdboc=ttyAMA0,9600 console=tty1 root=/dev/mmcblk0p2 rootfstype=ext4 elevator=deadline rootwait

    The connection is successful (Bluetooth module light stopped blinking), but nothing appears in the serial terminal.

  11. I found the solution to my problem: one must be connected with the BT module BEFORE the RPi starts, otherwise nothing appears on the screen. That is you must connect to the BT module (on my Mac it’s “screen /dev/tty.Raspberry 9600”), and then issue a “sudo reboot” signal (via ssh or whatnot).

  12. Do you know how to reset the JY-MCU to factory defaults? I am using it with an Arduino with great success, but tried to increase it’s speed to the maximum setting (1382400bps). The JY-MCU accepted the AT command, but then I realized that my arduino doesn’t support that speed. Now I have the problem of not being able to connect at that speed to send any more AT commands (as I was connecting through the arduino). Is there something I can do to reset the device and bring it back to the default speed?

  13. I found that changing this line also helped me out, in fact, it wasn’t working for me until i did :D. The second configuration file is /etc/inittab. Inside this file you have to locate the following line:

    T0:23:respawn:/sbin/getty -L ttyAMA0 115200 vt100
    and change it to
    T0:23:respawn:/sbin/getty -L ttyAMA0 9600 vt100

    Solved my problem! The link to the article i got it from is http://blog.miguelgrinberg.com/post/a-cheap-bluetooth-serial-port-for-your-raspberry-pi
    Its practically the same as this one, with that one line different.

  14. Great tutorial but I’ve fallen at the first hurdle. I cannot connect to reprogram it to run at 115200

    I’m using a USB – Serial that I know works as I have used it with an Arduino and to directly connect to the Raspberry Pi serial.

    I’ve wired up as per above.
    5V – 5V
    GND – GND
    RXD – TXD
    TXD – RXD

    Using a Windows XP PC
    Serial port comes up as COM5 (verified in Device Manager)
    Set the terminal to 9600,N,1

    When I use Hyperterm or Putty and create a serial connect it will not let me enter any AT commands.
    The console is not accepting keyboard input.

    Any advice would be greatly appreciated.

    NOTE: I can connect to the Bluetooth side but not the serial side.
    Yes – I have disconnected from the Bluetooth side before trying to connect to the Serial Side.

  15. Figured it out.
    Using Hypterterm I still could not type but if pasted and pressed enter I received back the confirmation.
    Using this I set the baud rate to 115200 and changed the name of by Bluetooth.

    All working now.

    Great for Raspberry Pi model A as I can use serial to control the Pi and have Wifi on the USB… – Yeah.

    Thank you for the information.

  16. I followed this tutorial, but it isn’t quite working. I can connect to the BT serial terminal, and all kinds of messages fly across the screen as the Pi boots/reboots, but I can’t seem to actually log in. The last line that shows up is:

    Raspbian GNU/Linux 8 exp ttyAMA0

    There is no login line.

  17. I think they’ve changed some of the console settings recently. Also, this will likely not work on a Raspberry Pi 3, as ttyAMA0 is the built-in BT.

    This article is really old, so may not be too helpful.

  18. Wayne – check that your Raspberry Pi’s /boot/cmdline.txt contains:

    console=ttyAMA0,115200

    You will not get a login prompt otherwise.

  19. i would like to convert my serial printer to bluetooth using this serial to BT module , it’ is possible ?

  20. Hi Joe – yes, I had some success with a BT module, but the one I used would occasionally drop characters and corrupt the output. Maybe you’ll have better luck.

Leave a comment

Your email address will not be published. Required fields are marked *