Instagram filter used: Normal
Photo taken at: Newton Mearns
TPUG Toronto PET Users Group still publishes its software library for Commodore computers. You can buy it for $20.00 (Cdn) plus shipping and handling. Yes, it still makes TPUG money to sell it this way. Or you can download it from the Internet Archive: TPUG Users Group CD : Free Download, Borrow, and Streaming : Internet Archive.
The scanned library catalogues are available as PDF: About the TPUG Library. They’re searchable via web search engines:
Google: site:tpug.ca amiga “puzzle maker”. The search is only as good as the OCR in the scan, but is better than nothing.
What you can’t do is search inside the disk images themselves. The files I made below might help with that, especially once search engines get hold of them:
Each line has the disk name and then the name of the file in that disk image, something like:
TPUG C64/A-Monthly Disks/(c)aaa.d64 : 0 "tpug may86(c)aaa" ac 2a
TPUG C64/A-Monthly Disks/(c)aaa.d64 : 23 "autoload" prg
TPUG C64/A-Monthly Disks/(c)aaa.d64 : 119 "infusr/2.0.txt" seq
TPUG C64/A-Monthly Disks/(c)aaa.d64 : 13 "infbot/2.1" prg
 …
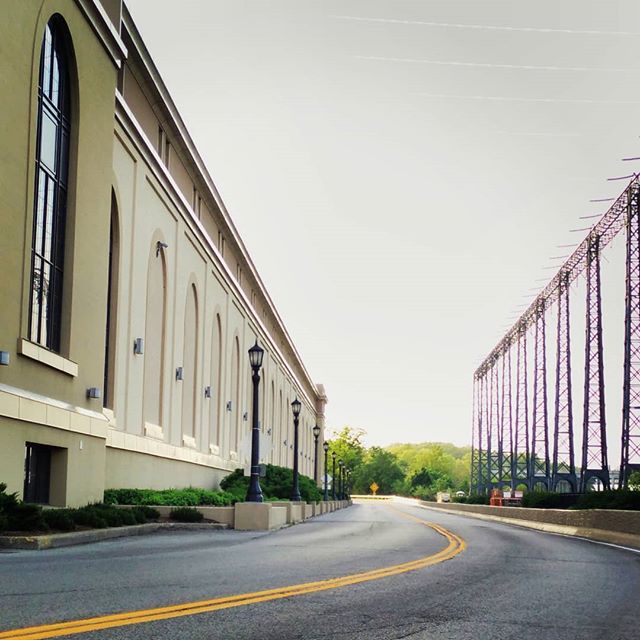

Instagram filter used: Lo-fi
Photo taken at: Sir Adam Beck Hydroelectric Generating Stations
Printing from computers goes through waves of being difficult to being easy, then back to difficult again. This is likely due to the cycles of technology, complexity and user demand flow in and out of sync. I think we’re at peak annoyance right now.
It’s even harder with Raspberry Pis, as when printer drivers support Linux, 90% of them are for x86 or x86_64 computers only (Canon: ಠ_ಠ). ARM doesn’t get a look in. But one technology does actually seem to help: network printers that support IPP — Internet Printing Protocol.
We had an old Brother laser printer that just got slower and crankier and less useful as a printer, so yesterday I got a new Brother DCP-L2550DW to replace it. It says it supports Linux in the spec, but I knew not to be too optimistic with my Raspberry Pis. And indeed, it was seen on the network but no driver was found. I had a sad.
What turned my frown upside down was finding out about Raspbian’s cups-ipp-utils package. For desktop use, install it this way:
sudo apt install cups cups-ipp-utils system-config-printer
(leave off system-config-printer if you’re running from the terminal.)
Update: while you’re here, you might also want to install the print-to-PDF driver too. This allows you to print without wasting paper. Install it (and the IPP driver) with:
sudo apt install cups cups-ipp-utils system-config-printer printer-driver-cups-pdf
In many cases, this might be all you need to do: the network printers should be automatically found and added as devices.
On the desktop, open up Preferences → Print Settings and add a new printer. Yes, it prompts for your user password which you may have forgotten. I’ll wait while you try to remember it …
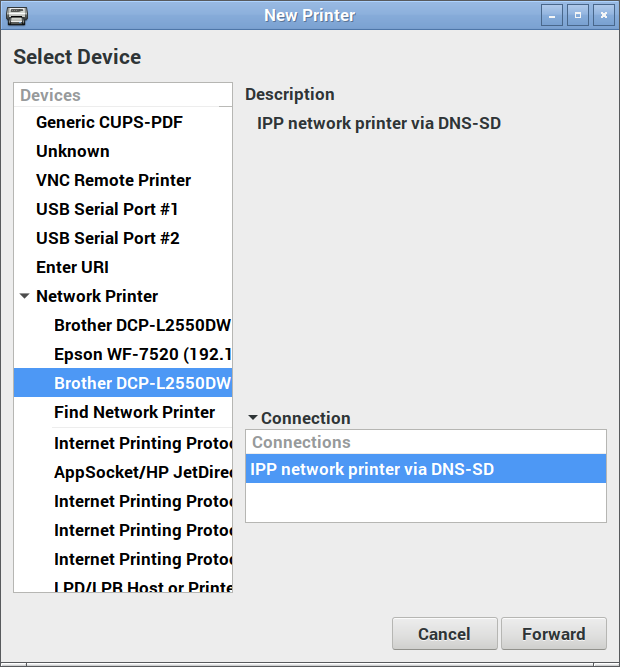
Now under Network Printers, you should see a device you recognize. Pick the one that says IPP network printer somewhere:
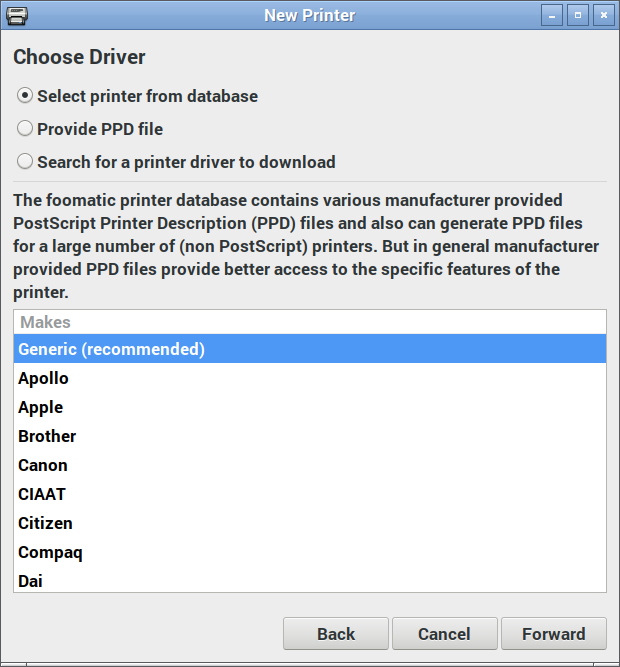
Here’s where the magic happens: you actually want to pick the generic driver for once:
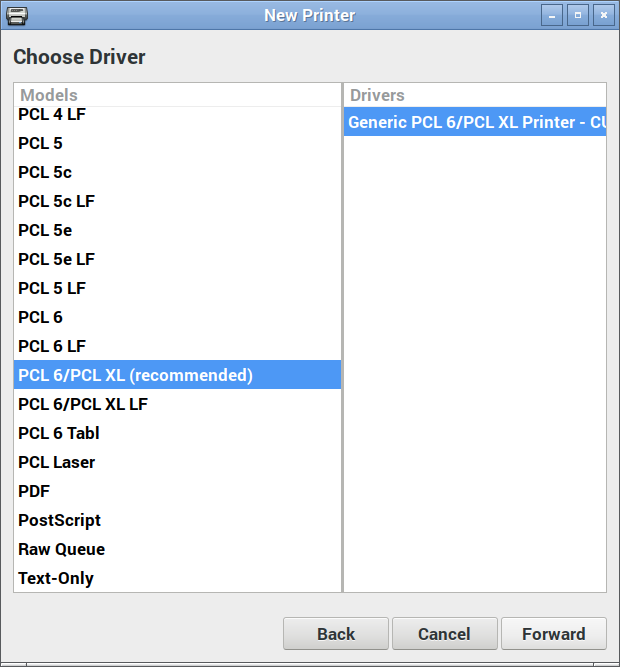
And again, the IPP utilities package will have picked the right driver for you:
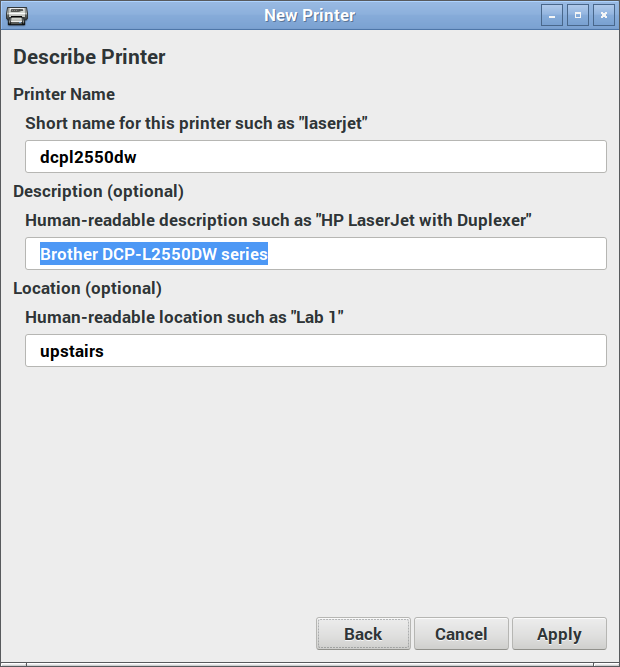
Changing the name and location is optional:
Hit Apply, and you should be printing!
(Hey, printer manufacturers have been known to be evil and make good, working stuff suddenly not work. IPP is supposed to make everything sparkly again, but I can’t guarantee that something wicked won’t come this way.)
Update: After a few months of using the Brother DCP-L2550DW, I don’t recommend you buy it. It’s a perfectly capable printer, but it takes ‘chipped’ toner cartridges that:
To get around (1), select Continue instead of Stop in the Toner Out configuration menu.
Update, January 2020: with sales and all needing a printer for work, the DCP-L2550DW will go with me to the office. I now have a MFC-L2750DW at home that scans to network, amongst other things. IPP proved it was magic yet again by the new printer being found and just worked with all my machines as soon as I added it to the network.
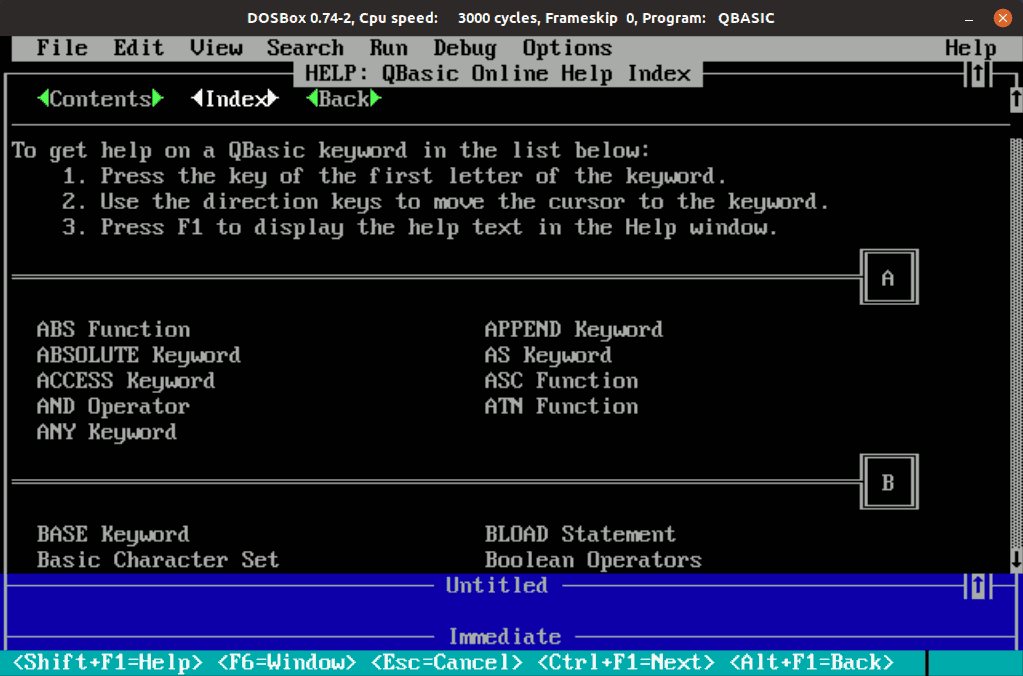
Only umpteen years late, I bring you the
QBasic Online Help Index — https://scruss.com/qbasic_hlp/
It’s the QuickHelp file from Microsoft’s ancient-but-still-useful QBasic interpreter for MS-DOS. I converted it to HTML, and made some minor cleanups so it would work better on the web.
So if you’ve got a hankering to understand the parameters for MKSMBF$ or know the syntax of PRINT USING, I’ve got your back.
The greatest common divisor (gcd) of two natural numbers is the largest number that evenly divides both. For instance gcd(8, 12) is 4. There are many clever and efficient ways to calculate the gcd of two numbers on a Linux machine. The method presented here is not among them.
#!/bin/bash
gcd(){ comm -12 --nocheck-order <(factor $1|sed 's/^[^ ]*/1/;s/ /\n/g') <(factor $2|sed 's/^[^ ]*/1/;s/ /\n/g')|tr '\n' \*|sed 's/.$/\n/'|bc;}
gcd $1 $2
(Contrived) example:
gcd.sh 24691357802469135780246913578 61728394506172839450617283945
12345678901234567890123456789
Which breaks down as:
| prime factors of 24691357802469135780246913578 |
prime factors of 61728394506172839450617283945 |
| 2 | |
| 3 | 3 |
| 3 | 3 |
| 3 | 3 |
| 5 | |
| 7 | 7 |
| 13 | 13 |
| 31 | 31 |
| 37 | 37 |
| 211 | 211 |
| 241 | 241 |
| 2161 | 2161 |
| 3607 | 3607 |
| 3803 | 3803 |
| 2906161 | 2906161 |
Multiply the factors common to both:
3 × 3 × 3 × 7 × 13 × 31 × 37 × 211 × 241 × 2161 × 3607 × 3803 × 2906161 = 12345678901234567890123456789
I’m sure someone else has used the output of factor and comm in this way before. The hard part was getting coprime numbers to output 1.
So I picked up this large boy from the MSU Surplus Store:
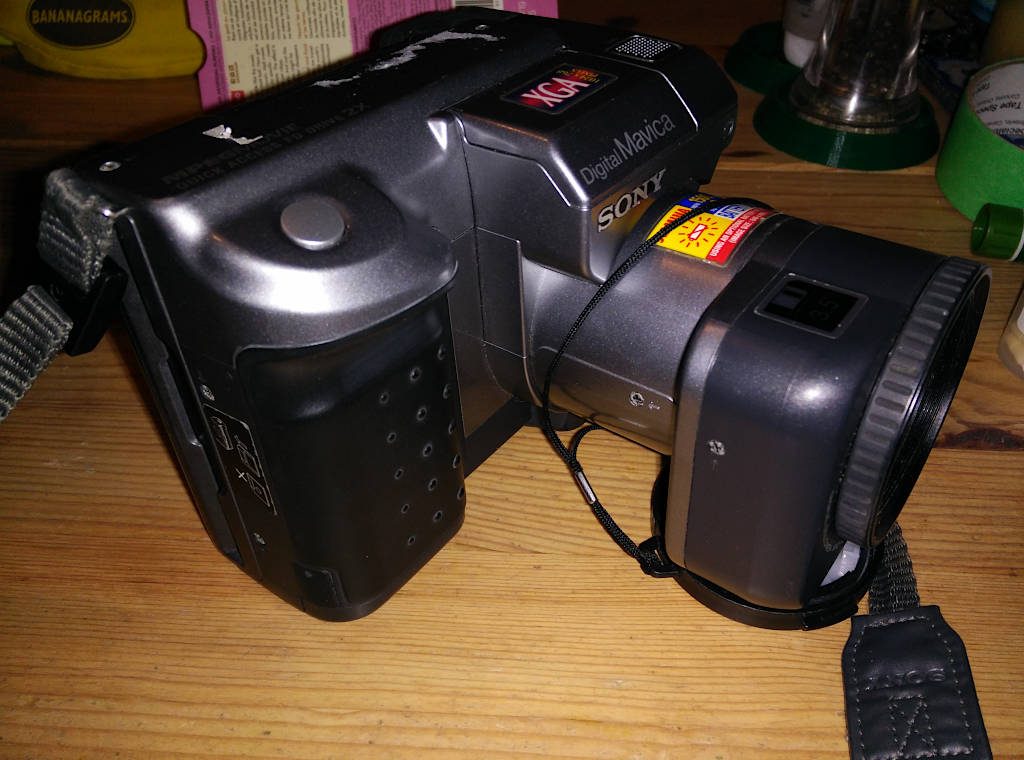
You get about 7 high-resolution pictures on a disk. And high resolution by 1998 standards means this:
1024×768 whole pixels: that’s huge! The camera is autofocus with image stabilization, so it was quite a nifty unit at the time.
Pre-dating EXIF, its image metadata is limited. There’s an external ‘411’ thumbnail file that looks a bit like this:

If you care to dig about in such an ancient file, I’ve got a matching image and its 411 file here: MVC-005X.zip. And manuals? Here: Sony_Mavica-FDC91-W0007229M.pdf
Most annoyingly, the camera really only likes real Sony batteries, or it shuts down with an “InfoLithium” battery error (swearies in link). As this battery format is now used in generate photo lighting systems and Sony don’t make it any more, this may be a camera that dies from DRM before anything else.