Around 1988–1991 there was a weekly computer magazine in the UK called New Computer Express. This period coincided roughly with the time I was a freelance writer in the same field.
For childish reasons now lost to time, a group of us freelancers had a major hate-on for NCE’s advice columnist. Writing under the name Uncle TechTip, this columnist seemed to answer most questions with something like “Hmm, I don’t know anything about _____. Maybe a reader can help?†Almost without fail, he’d have readers write in answers for next week’s issue.
Not realizing that Uncle TT’s economy of response was a sly precursor to crowdsourcing websites, the neophyte journo brigade were incensed by his lack of knowledge. One of us wrote an Uncle TechTip Simulator in BASIC, which I recreate from memory for your enjoyment:
10 CLS
15 PRINT " *** Uncle TechTip Simulator ***"
20 PRINT
25 INPUT "What is your question for Uncle TechTip";a$
30 PRINT
35 PRINT "Uncle TechTip's Answer: "
40 PRINT
45 PRINT "Hmm, I don't know anything about"
50 PRINT " ";a$;" ..."
55 PRINT "Maybe a reader can help?"
Note: I’ve lightly tested this with Microsoft Excel (Windows 10), Excel Online, Google Sheets and LibreOffice Calc. It seems to work. Like all spreadsheet data conversions, please verify before trusting your PhD thesis tables to it …
Asked on the GTALUG mailing list the other week:
Does anybody know how to display and work with SI numbers like 10k or 20M or 40G within LibreOffice?
I came up with the following formula, in this example for data in cell D3:
The right column is displayed in LibreOffice Calc’s newly(ish)-supported engineering notation.
This function works through creative (mis-)use of the CONVERT() function:
if the argument is a numeric value, pass it through;
if the argument is a string, return CONVERT(«numeric part», "«prefix»m", "m"). This is lightly misusing overloading the unit conversion function by going via metres, but it saves having a lookup table.
This function doesn’t work with IEC 60027-2 binary prefixes, but they’re silly and I wouldn’t be caught dead using ’em.
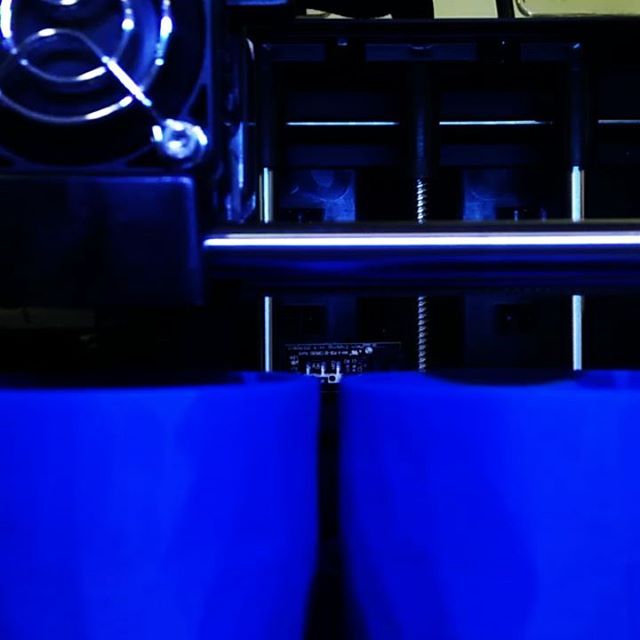
I’m still a sucker for vase mode/spiral contour prints … this one made in OpenSCAD:
Thanks to Andrew at ProtoLab for the loan of the PrintrBot. I’ve got a demo at UofT on Wednesday, and my Reach 3D isn’t exactly portable. Yeah, I should probably get a cheap Monoprice printer to lug around to occasional demos, but I’d need to find a donor …
Thingiverse‘s Customizer allows users to customize suitable OpenSCAD models without knowing any OpenSCAD code. While it does have some documentation to help developers along, there’s still a lot of guesswork.
I released my first (working!) Customizer design the other week: Parametric Finger Pen Holder (Vertical). While the docs are the primary source of developer information, you might want to know the following:
Customizer assumes that every variable defined before the first module definition in the script is a user parameter. To give it a hint that it should stop displaying variables, add an empty module (such as module naff() { }) after the last variable definition you want Customizer to display.
(There’s supposed to be a CUSTOMIZER VARIABLES/CUSTOMIZER VARIABLES END comment pair that will do this too, but it didn’t work for me)
Customizer will fail if there’s any character other than strict ASCII in the script, and won’t give useful diagnostics about the problem. Check your comments for accents and fancy punctuation
Customizer displays a real-time preview of your model. This means the rendering will be a little rough, especially if you use set operations such as union(), difference() and intersection(). If you have to hit F6 to render your model in OpenSCAD properly, it’s going to look a bit off in Customizer
If you must use resource-intensive functions such as hull() and minkowski(), try to limit them to 2D paths that are subsequently extruded. Everyone else in the Customizer job queue will thank you
Similarly, keep the circle smoothness variables ($fa, $fn, $fs) in sensible ranges
Customizer creates a new Thing under your name rather than just letting you download your customized model. You likely want to delete that once you’re finished with it.
(This also means that Customizer only works for registered Thingiverse users. I can’t see any way around this, unfortunately)
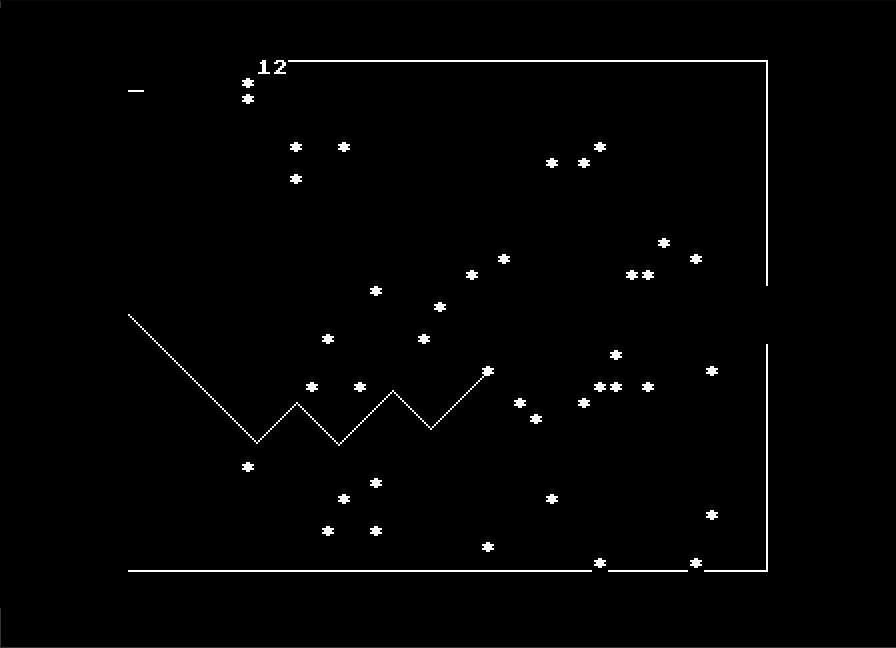
Thanks to users sbadger and lurkio on the stardot forum, I’ve been reunited the original BBC BASIC one-liner that begat 2d Star Dodge/Stardodger: Asterisk Tracker!
Asterisk Tracker
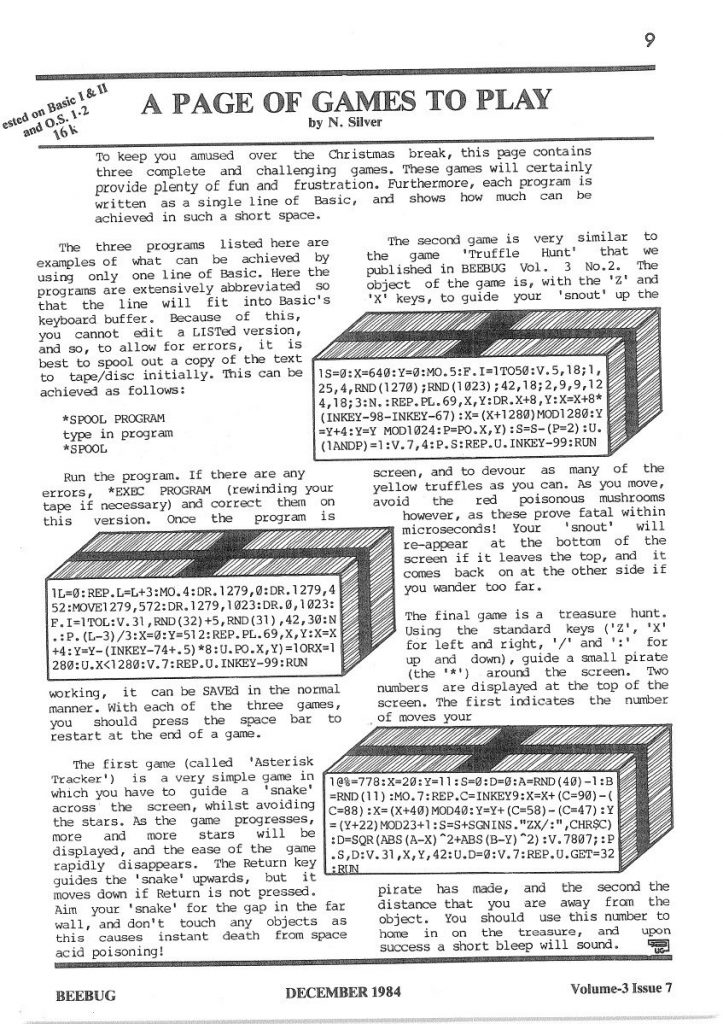
It was published in the December 1984 edition of BEEBUG Magazine (vol. 3, issue 7; page 9) and is credited to N. Silver.
It makes extensive use of BBC BASIC’s abbreviations, and the writeup even warns
… Here the programs are extensively abbreviated so that the line will fit into Basic’s keyboard buffer. Because of this, you cannot edit a LISTed version, and so, to allow for errors, it is best to spool out a copy of the text to tape/disc initially. This can be achieved as follows:
*SPOOL PROGRAM type in program *SPOOL
The program unwinds to something much more understandable:
   10 L=0
   20 REPEAT
   30   L=L+3
   40   MODE 4
   50   DRAW 1279,0
   60   DRAW 1279,452
   70   MOVE 1279,572
   80   DRAW 1279,1023
   90   DRAW 0,1023
  100   FOR I=1 TO L
  110     VDU 31,RND(32)+5,RND(31),42,30
  120   NEXT
  130   PRINT (L-3)/3
  140   X=0
  150   Y=512
  160   REPEAT
  170     PLOT 69,X,Y
  180     X=X+4
  190     Y=Y-(INKEY(-74)+.5)*8
  200   UNTIL POINT(X,Y)=1 OR X=1280
  210 UNTIL X<1280
  220 VDU 7
  230 REPEAT UNTIL INKEY(-99)
  240 RUN
The instructions are typical of the day:
The first game (called “Asterisk Tracker”) is a very simple game in which you have to guide a “snake” across the screen, whilst avoiding the stars. As the game progresses, more and more stars will be displayed, and the ease of the game rapidly disappears. The Return key guides the “snake” upwards, but it moves down if Return is not pressed. Aim your “snake” for the gap in the wall, and don’t touch any objects as this causes instant death from space acid poisoning!
Um, yeah, N. Silver, whatevs …
It’s pretty amazing that three type-ins could fit on a page: especially when you consider that the BEEBUG magazine was A5!
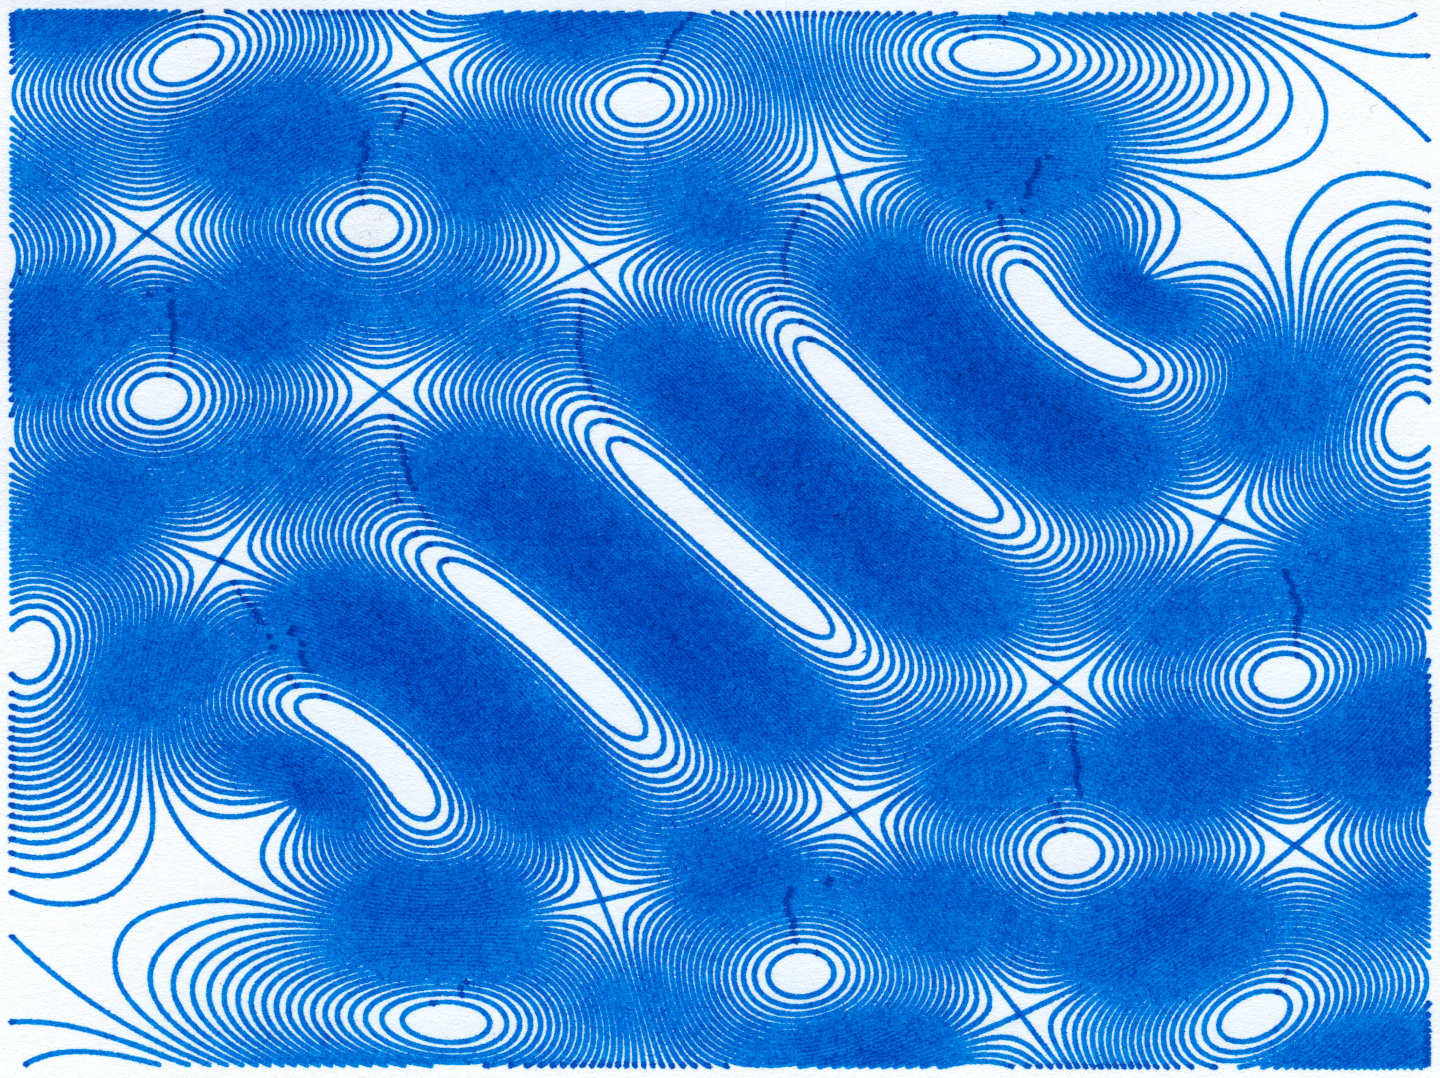
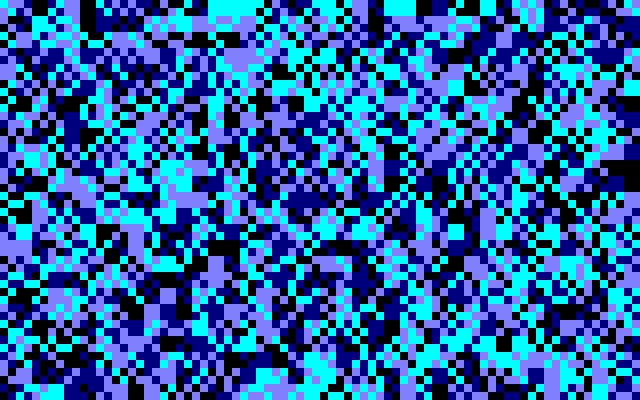
No, really: this *was* the seat pattern on Western SMT buses circa 1979
Because I care (and don’t if you don’t), here’s the Locomotive BASIC source, lovingly typed into the Caprice32 emulator then extracted as text using iDsk:
10 ' British Council Tile / Bus Fabric Sim

20 ' by Rob Manuel 2018

30 '

40 ' z/x - change char up/down (ascii)

50 ' space - random palette

60 ' c - show ascii val, inks & pause

70 ' v - random character (128+ ascii)

80 ' b - random char and cols

90 ' n - fill with same line & pause

100 'i - input ascii value

110 '

120 ON BREAK GOSUB 260:MODE 1:LOCATE 1,26

130 DEF FNs=INT(RND*255)

140 SYMBOL 255,FNs,FNs,FNs,FNs,FNs,FNs,FNs,FNs

150 DEF FNp=INT(RND*4)

160 DEF FNi=INT(RND*26)

170 GOSUB 470

180 GOSUB 270

190 o$="":i$=INKEY$

200 IF i$<>"" THEN GOSUB 380

210 FOR i=1 TO 40

220 w$=CHR$(14)+CHR$(FNp)+CHR$(15)+CHR$(FNp)

230 w$=w$+CHR$(c):o$=o$+w$:NEXT i

240 store$=o$

250 PRINT o$;:GOTO 190

260 CALL &BC02:PAPER 0:PEN 1:END

270 aa=FNi:bb=FNi:cc=FNi:dd=FNi

280 INK 0,aa:INK 1,bb:INK 2,cc:INK 3,dd

290 BORDER aa

300 GOSUB 320:RETURN

310 IF c>255 THEN c=32:IF c<32 THEN c=255

320 LOCATE 1,1:PAPER 0:PEN 1

330 PRINT "C:"c;

340 PRINT CHR$(c);

350 PRINT " ";

360 PRINT "I:"aa;bb;cc;dd;

370 LOCATE 1,26:RETURN

380 IF i$=" " THEN GOSUB 270:RETURN

390 IF i$="z" THEN c=c-1:GOSUB 310:RETURN

400 IF i$="x" THEN c=c+1:GOSUB 310:RETURN

410 IF i$="c" THEN GOSUB 310:CALL &BB18:RETURN

420 IF i$="i" THEN LOCATE 1,1:INPUT "ASCII?",c:GOSUB 310:RETURN

430 IF i$="v" THEN GOSUB 470:GOSUB 310:RETURN

440 IF i$="b" THEN GOSUB 270:GOSUB 470:GOSUB 310:RETURN

450 IF i$="n" THEN FOR i=1 TO 25:PRINT store$;:NEXT:CALL &BB18:RETURN

460 RETURN

470 c=INT(RND*128)+127:RETURN
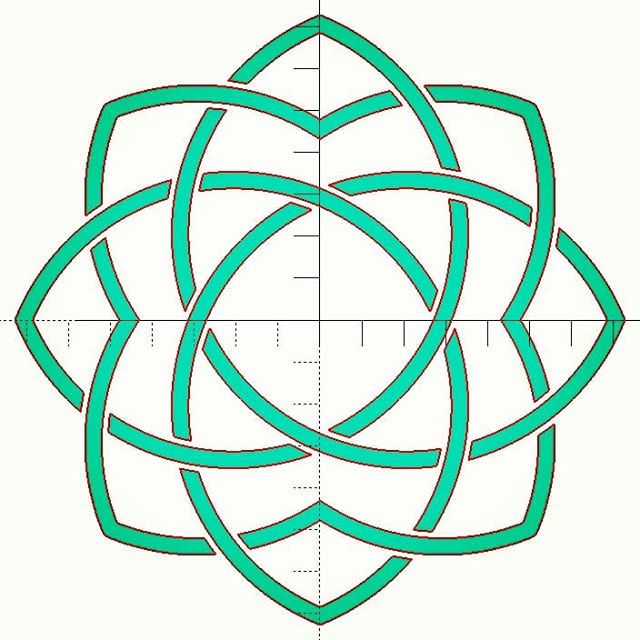
Yup, lots of circles, intersections, differences and offsets went into this attempt at the logo of my favourite museum.
For the determined/demented, here’s the source. It’s probably not that useful for learning OpenSCAD, as it’s written in my typical “carve away all the bits that don’t look like an elephant†style:
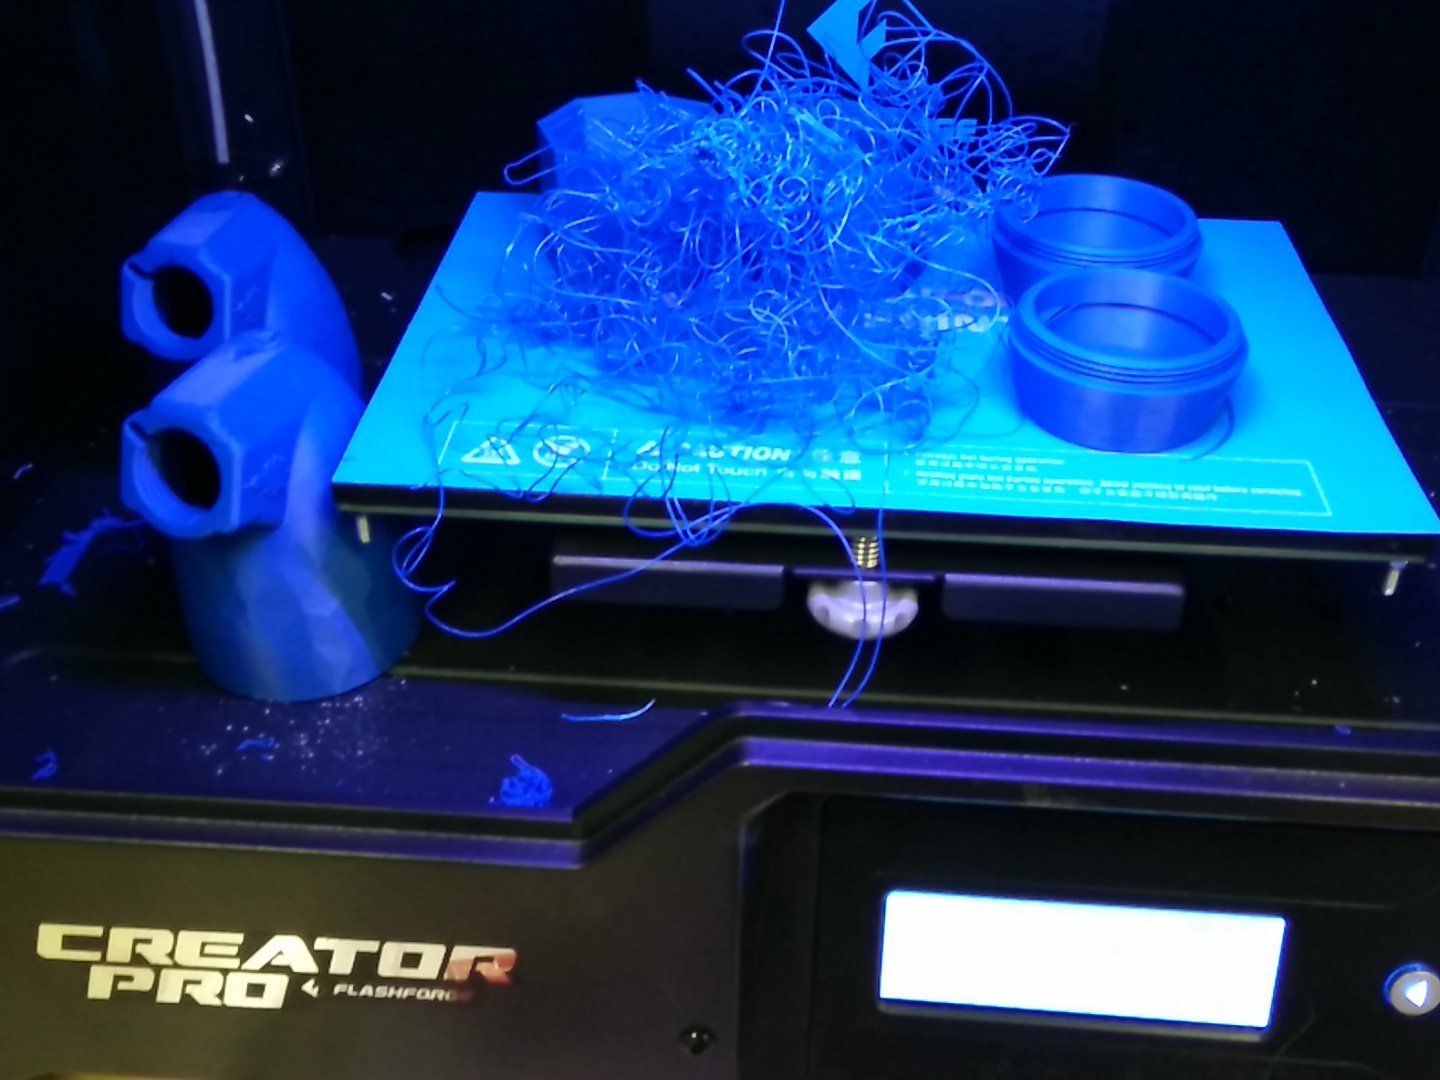
I use a FlashForge Creator Pro 3D printer for work. It’s okay, but I wouldn’t recommend it: you have to manually level the print bed (ಠ_ಠ), you can’t print via USB, it pretends to be a knock-off MakerBot (same USB ID: naughty naughty) and its slicing software is a mishmash of GPL and other code all bundled up in one proprietary lump. It also doesn’t used g-code, which is a bit poo.
As Vik said: “The Flying Spaghetti Monster has cast forth His noodly appendage and made output in His own image.â€
[brim]
enable = true                  # valid range {true, false}, default is false # CHANGED
extruderId = 0                  # valid range {0, 1}, default is 0
margin = 10.0                    # valid range [1.0, 10.0], default is 5.0   # CHANGED
layerCnt = 2                    # valid range [1, 5], default is 1           # CHANGED
speed = 60                      # valid range [10, 200], default is 60
excludeInterior = true         # valid range {true, false}, default is false # CHANGED
This makes a colossal double-width, double thickness brim around the prints so that they will not topple. I’m very happy with the results so far.
Rather than mucking about with config files, if you enable “Expert Mode” in Flashprint’s preferences:
Then you can make a brim that stops prints coming off the print bed.
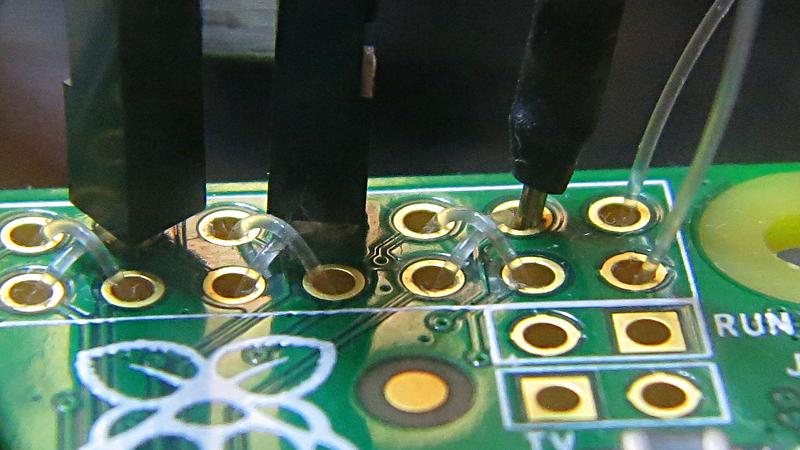
0.38 mm / 5.4 kg test Trilene threaded through Raspberry Pi Zero header holes holds jumper wires snugly without soldering
Eugene “thirtytwoteeth” Andruszczenko (of Game Boy Zero – Handheld Edition fame) posted a neat idea to help your Raspberry Pi Zero take jumper wires without soldering. He threaded fishing line through the 40 hole header, making an interference fit for header pins. I tried it with 0.38 mm Trilene, which worked rather well.
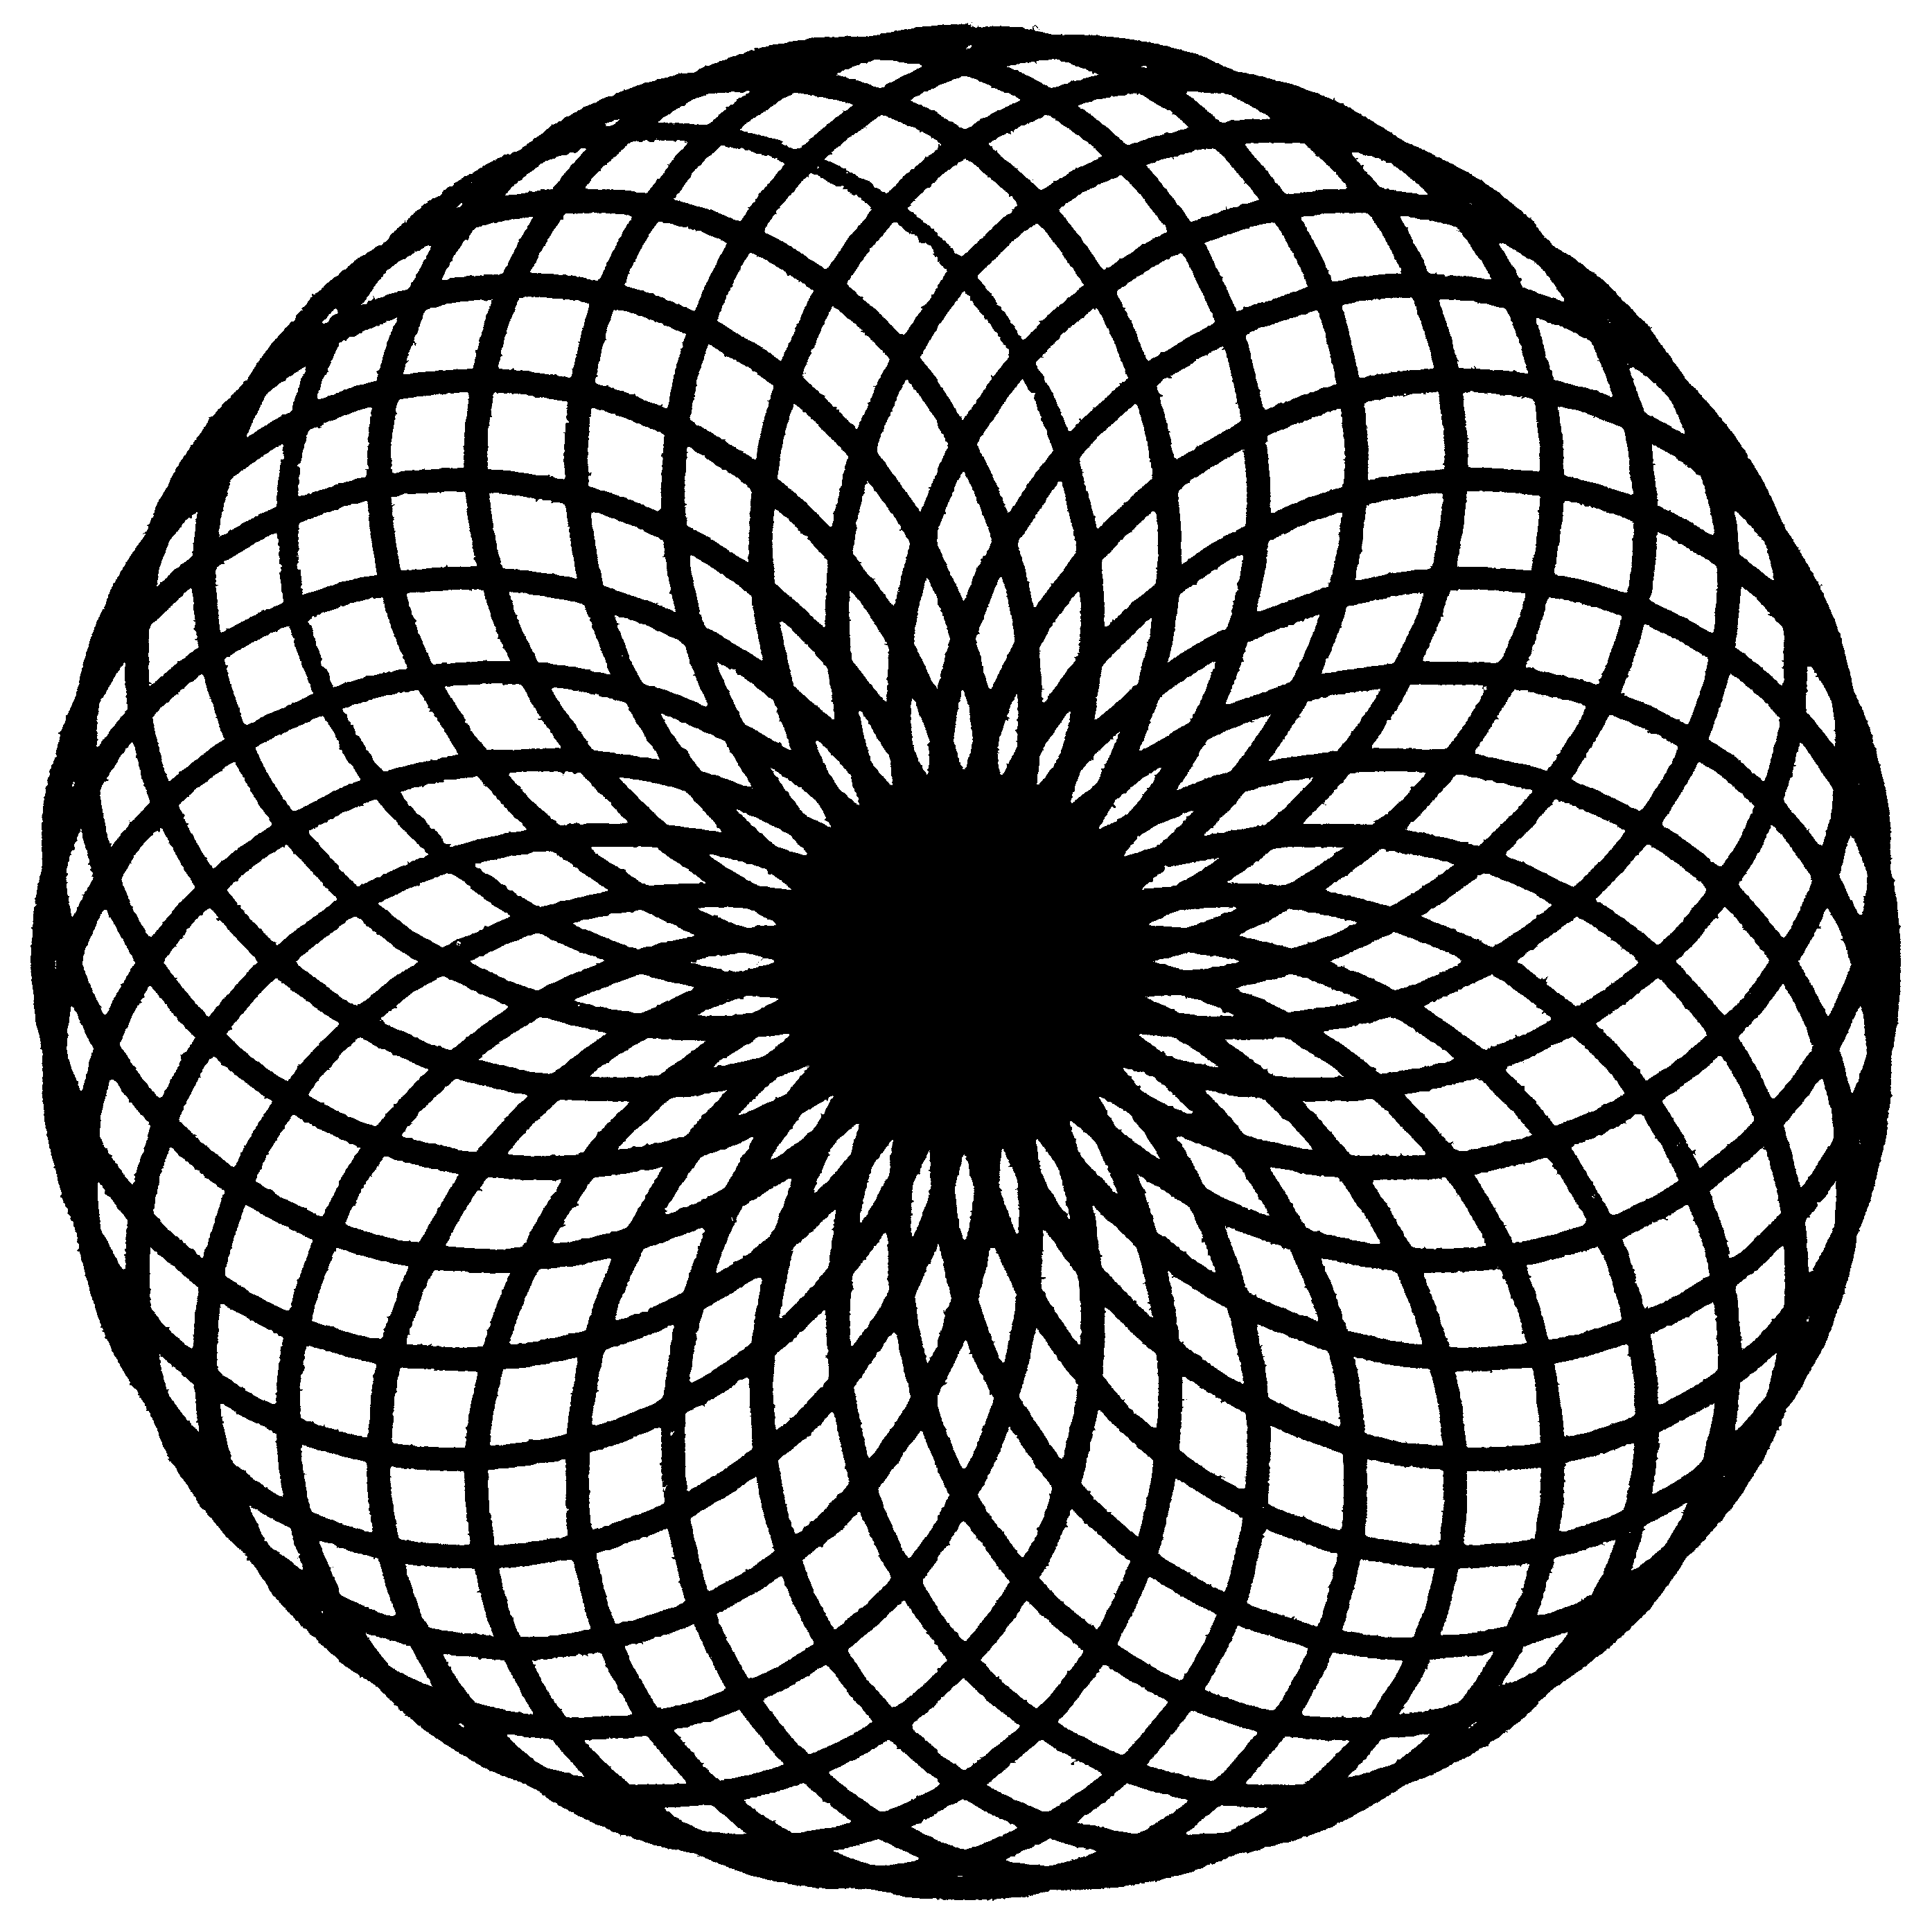
select this to see the full resolution scan. Original is just under 6 cm wide
Unfortunately, an earlier attempt to print this figure using a fresh-out-the-box 20+-year-old HP SurePlot ¼ mm pen on glossy drafting paper resulted in holes in the paper and an irreparably gummed-up pen. If anyone knows how to unblock these pens, I’m all ears …
This is one of those toys that you whirl around on a piece of string and it makes a chirping sound like a flock of sparrows. I have no idea what they’re called, so I called it birb_chirper.
Print Settings
Printer: Reach 3D Rafts: Doesn’t Matter Supports: Doesn’t Matter Resolution: 0.3 mm Infill: 0%
Notes: This is a thin-walled model, so use at least two shells and no infill for smooth walls.
Post-Printing
Take a piece of thin string about 1 metre long (I used micro-cord, very fine paracord), pass it through the hole in the tip, then tie off a jam knot that’s big enough to stop in the hole in the top but still pass back through the slot in the side. Now whirl the thing around fast by the string, and it should start to chirp.
This is intended for the amusement of small children and the annoyance of adults.
How I Designed This
The tip of this thing is an ogee curve. I’ve included my library for creating simple ogee and ogive profiles in OpenSCAD.
// ogive-ogee example
// scruss, 2018
use <ogive_and_ogee.scad>;
ogive(20, 35);
translate([0, -5])text("ogive(20,35)", size=3);
translate([30, 0])ogee(20, 35);
translate([30, -5])text("ogee(20,35)", size=3);
I made this two-colour plotted card for the MeFi “holiday card exchange – v.e.†thing. Pen plotter is a Roland DG DXY-1300 (1990s) using Roland 0.3 mm fibre-tip pens. Plot size is 123 × 91 mm, and is driven entirely from Inkscape 0.92.
I might not have Amiberry — an optimized Amiga emulator for Raspberry Pi — running quite yet, but the build instructions at midwan/amiberry are a bit lacking. If you want to compile it under Raspbian Stretch, you’ll need the following packages: sudo apt install libsdl2-dev libxml2-dev libxml2-utils libsdl2-ttf-dev libsdl2-image-dev
This will at least allow you to get it to build correctly with: make -j2 PLATFORM=rpi3-sdl2-dispmanx
More later when/if I get it working.
The Unofficial CP/M Web site uses some very old file formats. As almost no-one can easily run Amà 3 to read the manuals these days, here are the CP/M 3.1 manuals from that site converted to PDF:
Update, 2019-01: raspblocks.com appears to be dead, with an “Account Suspended” error from the host
Raspblocks is a new Blocks-based web programming environment for Raspberry Pi. You don’t even need to write the code on a Raspberry Pi, but the Python 3 code it produces will need to be transferred to a Raspberry Pi to run.
For maximum authenticity (and slowness), I fired up http://www.raspblocks.com/ on a Raspberry Pi Zero over VNC. It took a minute or more to load up the site in Chromium, but creating a simple program was all easy dragging and dropping:
The code it produced was pretty much exactly what you’d write by hand:
import RPi.GPIO as GPIO
import time
GPIO.setmode(GPIO.BCM)
GPIO.setup(26, GPIO.OUT)

while True:
    GPIO.output(26,True)
    time.sleep(1)
    GPIO.output(26,False)
    time.sleep(1)

And, as you might expect, the code make an LED connected to GPIO 26 turn on and off. Science!
Raspblocks isn’t as polished as its more established rival  EduBlocks, but Raspblocks doesn’t need any software installed. Edublocks installs its own Node.js-based web service, which would be painfully slow on a Raspberry Pi Zero. Raspblocks’ code needs to be run manually from a terminal, but I’d put up with that any day over having yet another Node server distribution installed under /opt.
SoX can do almost anything with audio files — including synthesize audio from scratch. Unfortunately, SoX’s syntax is more than a bit hard to follow, and the manual page isn’t the most clear. But there is one example in the manual that gives a glimpse of what SoX can do:
While it plays a nice chord, it’s not obvious how to make audio files from this process. I have a project coming up that needs a few simple guitar chords, and with much trial and error I got SoX to spit out audio files. Here’s what I keyed into the shell:
G   :  G2  B2  D3
C   :  C3  E3  G4
D   :  D3  F#4 A3
F   :  F3  A3  C4
A   :  A3  C#4 E4
E   :  E2  G#3 B3
Em  :  E2  G3  B3
How the SoX command line breaks down:
-n —use no input file: SoX is going to generate the audio itself
-r 16000 -b 16 “chord-${chord}.wav” — with a sample rate of 16 kHz and 16-bits per sample, write to the output file “chord-….wavâ€
synth pl “$first” pl “$third” pl “$fifth” —synthesize three plucked tones read from the file
delay 0 .05 .1 —delay the second tone 0.05 s after the first and likewise the third after the second. This simulates the striking of guitar strings very slightly apart.
remix – —mix the tones in an internal pipe to the output
fade 0 1 .095 —fade the audio smoothly down to nothing in 1 s
norm -1 —normalize the volume to -1 dB.
The chords don’t sound great: they’re played on only three strings, so they sound very sparse. As my application will be playing these through a tiny MEMS speaker, I don’t think anyone will notice.
Update: well, now I know how to do it, why not do all 36 autoharp strings and make the “magic ensues†sound of just about every TV show of my childhood?