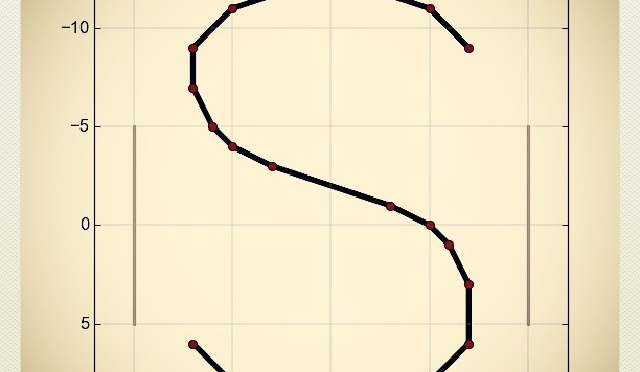
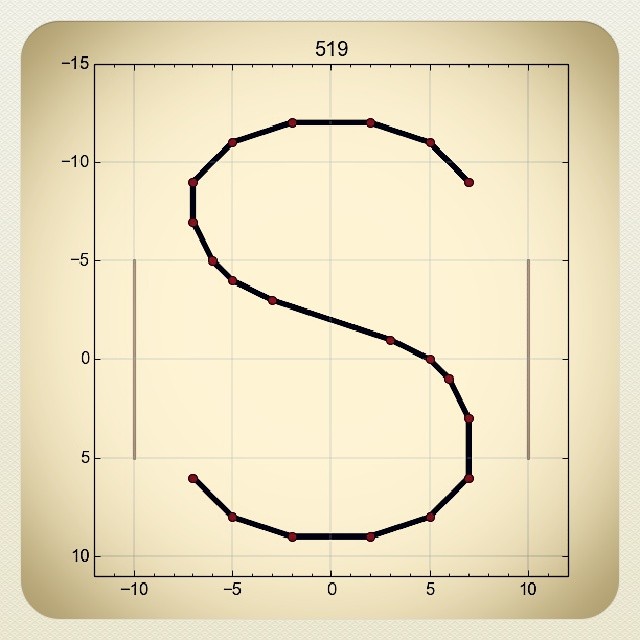
A minimally-useful tracing of the standard numerals embossed
on credit cards. The geometry should be checked against ISO/IEC 7811—1:2002 should these data be used for official purposes. No claims of compliance are made here.
As there are only 10 digits in this font, encoding it as a digital
form (TTF, OTF, or otherwise) is left as an exercise for the reader.
Files
f7b-colour.svg – an A4 sheet with all 10 digits presented as a
poster. Each digit is approximately 1284% standard size.
eps folder – PostScript source files. Each outline is approximately 5695% standard size, which is appropriate for a glyph in FontForge.
Workflow
The rough character outlines were created as short scripts in Python,
using the Shapely library to handle geometry. A confusing array of support tools (including, but not limited to: QCAD, wellknown
and OGR added the arcs and fillets. The more complex arc intersections were calculated using GeoGebra. Finally, the
outlines — at this point, mostly in the form of PostScript Level 2 arct commands — were hand-keyed into the EPS files included here.
Notes on the data
There are some typos in the published coordinates, particularly in
the “1” glyph. Whether these are genuine errors or
‘trap streets‘, is hard to tell. The glyphs presented here are intended to be visually accurate
The published coordinates of the “8” glyph indicate that it is
only 97.6% as tall as the other digits. This has been carried
through here.
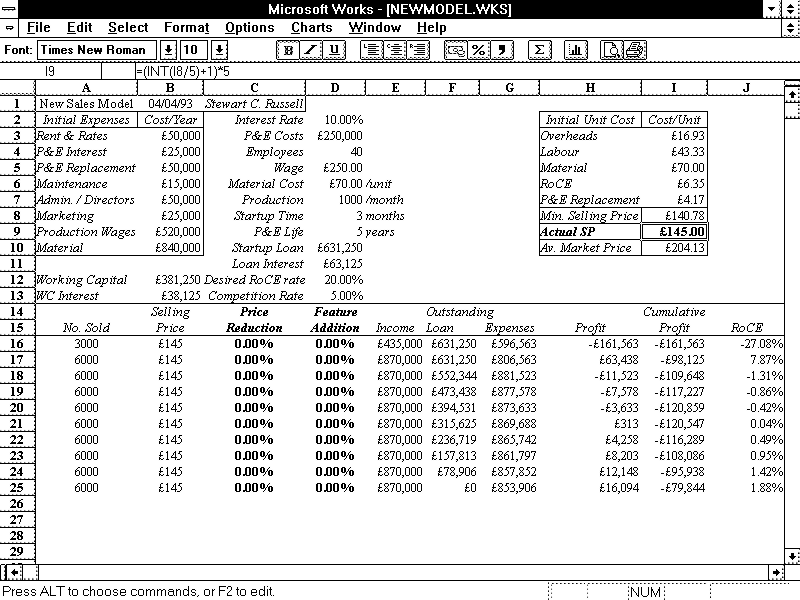
Twenty-two years ago, I wrote a thesis. It wasn’t a very good thesis, but it did what it needed to do. For years, its model files have been unreadable, because the spreadsheets were written in a ~1992 version of Microsoft Works. These are old files:
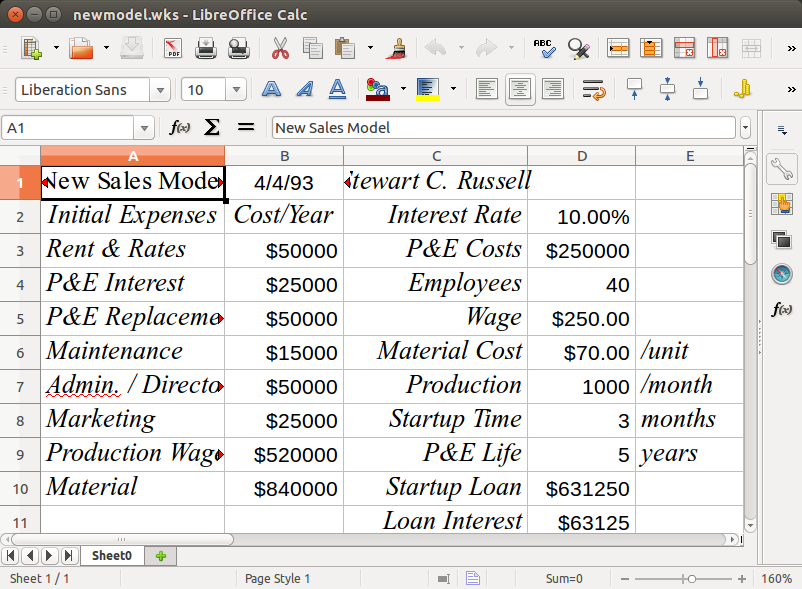
Quite recently, LibreOffice realized that there are old files out there that (unlike my thesis models) could still be useful. As they have no commercial requirement to only support the latest and greatest, LibreOffice added the ability to read these ancient works. So my old stuff lives again:
I found a screen dump that I used back in ’93 to illustrate the layout. The display was colour, but here it is brought back to life with a little bit of antialiasing:
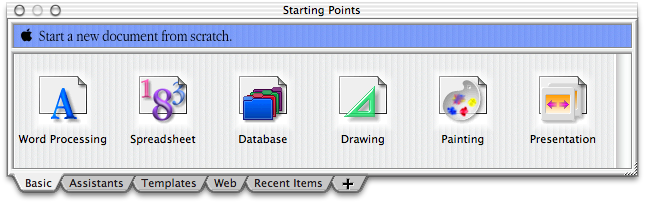
LibreOffice can also read old AppleWorks files. Although Works 6 still runs on Catherine‘s Mac, it looks a bit … dated:
Thanks, LibreOffice! It’s sometimes easy to forget (like right after updated to Ubuntu 15.04, which decided that BlueTooth support was kindaoptional unless you jumped through hoops …) that people do write software just to be more useful.
Hey! This is yet another of my ancient posts about Raspberry Pis that probably contains out-of-date information. In order to run FreeBASIC on a Raspberry Pi, all you need do is:
FreeBASIC is a pretty nifty cross-platform BASIC compiler. It uses a Microsoft-like syntax, has an active user and developer base, and is quite fast. Building the latest version on a Raspberry Pi is a bit of a challenge, though.
FreeBASIC 1.01 demo running on a Raspberry Pi from Geany
Part of the problem is that FreeBASIC is mostly written in FreeBASIC, so you need a working compiler to bootstrap the latest version.
Update: you’re probably best just downloading the binary install packages from the FreeBASIC site. I’m having difficulty getting recent (late 2016) source packages to build for reasons that would take too long for most people to care about.
unzip fbc_linux_armv6_rpi_version.zip
cd fbc_linux_armv6_rpi/
chmod +x install.sh
sudo ./install.sh -i
Don’t delete the installation folder just yet.
Grab the latest version of the source from github:
cd
git clone https://github.com/freebasic/fbc.git
Change directory to the new FreeBASIC source folder (cd fbc), and type make. (or, on a Raspberry Pi 2 or 3, make -j4 to use all the cores …). After a while (in my tests, about 52 minutes on a 512 MB Raspberry Pi, or around 6½ minutes [!] on a Raspberry Pi 2), it should finish. If there’s a bin/fbc file, the compilation worked!
Before you install the new compiler, uninstall the old one: change directory to the fbc_linux_armv6_rpi folder, and type:
sudo ./install.sh -u
Once that’s done, go back to the new fbc folder, and type:
sudo make install
And you’re done! You can delete the fbc_linux_armv6_rpi folder now. If you don’t mind it taking up space, keep the fbc folder to allow you a quick rebuild of the latest version of the compiler with:
cd fbc
git pull
make
sudo make install
Note that this will build a native armv7l compiler on a Raspberry Pi 2, and an armv6l one on a Raspberry Pi. This means you can’t run binaries you built on a Raspberry Pi 2 on a Raspberry Pi (you’ll get an Illegal Instruction error), but you should be able to run ones built on a Raspberry Pi on a Raspberry Pi 2. Binary compatibility is overrated, anyway …
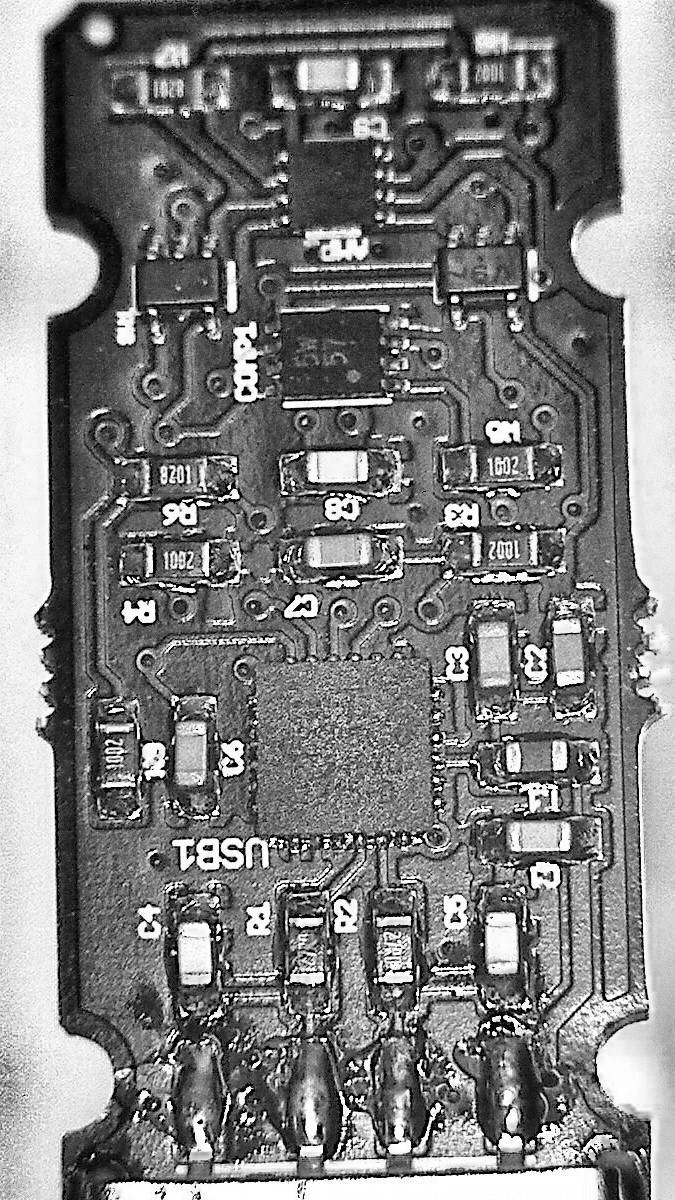
Just got Bill “WaywardGeek” Cox’s Infinite Noise USB Random Number Generator. It uses very few components, and doesn’t even have a microcontroller on board. It relies on the controlled amplification of thermal noise as its entropy source.
Not great enhanced image of the Infinite Noise board. Yes, that’s all there is to it
As it’s so very simple, it uses a driver to read from the device, and then hashes the data to reduce the data stream to very close to pure noise. Building the driver is easy, once you work it that the code lives in the infnoise/software folder on the author’s github repo.
Normal operation would look like this:
sudo ./infnoise | entropy_consuming_program …
as in
sudo ./infnoise | rngtest -t 10
which I left running for a work day to get
…
rngtest: bits received from input: 10327720032
rngtest: FIPS 140-2 successes: 515955
rngtest: FIPS 140-2 failures: 431
rngtest: FIPS 140-2(2001-10-10) Monobit: 63
rngtest: FIPS 140-2(2001-10-10) Poker: 61
rngtest: FIPS 140-2(2001-10-10) Runs: 162
rngtest: FIPS 140-2(2001-10-10) Long run: 151
rngtest: FIPS 140-2(2001-10-10) Continuous run: 0
rngtest: input channel speed: (min=29.022; avg=178.828; max=19531250.000)Kibits/s
rngtest: FIPS tests speed: (min=17.403; avg=30.153; max=85.917)Mibits/s
rngtest: Program run time: 56727702860 microseconds
So from its success to failure rate, it produces pretty decent (for my casual use) results. These bytes chug out at around 22¾ Kbytes/second; not screamingly fast, but decent, considering the very simple hardware.
You can run the hardware without hashing/whitening, and the results (from a much shorter run) are less solid:
sudo ./infnoise --raw | rngtest -t 10
…
rngtest: bits received from input: 15499264
rngtest: FIPS 140-2 successes: 0
rngtest: FIPS 140-2 failures: 774
rngtest: FIPS 140-2(2001-10-10) Monobit: 0
rngtest: FIPS 140-2(2001-10-10) Poker: 774
rngtest: FIPS 140-2(2001-10-10) Runs: 774
rngtest: FIPS 140-2(2001-10-10) Long run: 0
rngtest: FIPS 140-2(2001-10-10) Continuous run: 0
rngtest: input channel speed: (min=27.201; avg=355.760; max=9765625.000)Kibits/s
rngtest: FIPS tests speed: (min=24.868; avg=30.488; max=41.554)Mibits/s
rngtest: Program run time: 49831593 microseconds
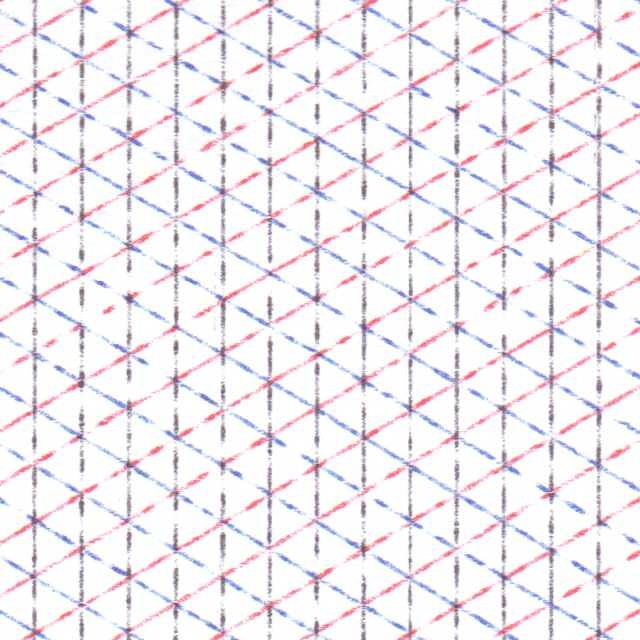
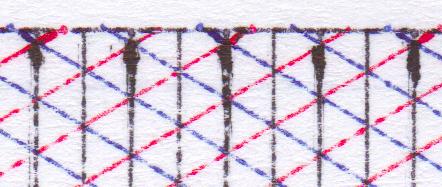
Another naïve test is seeing how images made from the data stream look:
Each of these 128 pixel squares should be no less than 49152 (= 128 × 128 × 3) bytes — plus the size of any PNG header/metadata — in size. The fact that the raw output is smaller shows that PNG’s compressor found some patterns it could work with.
It’s a fun little device, and Bill is adding new code and features to the driver at waywardgeek/infnoise regularly.
After a relative lack of success in making cheap plotter pens, I managed to score a trove of old pens on eBay. Some of these were dry, and I tried to resuscitate them. A few came back to life, but I ended up with a handful of very dead pen shells.
A dry plotter pen, possibly Alvin
I think the pens were made or sold by Alvin, as there were several empty Alvin trays in the batch I got on eBay. In taking one apart, I thought that a pen refill might just slide inside. Lo and behold, but didn’t the pen nerd’s fave gel pen du jour refill just slide in with enough of an interference fit that it wouldn’t easily slide back out.
Taking the dry pens apart isn’t too easy:
Pull the black tip straight out with pliers; it has a long fibre plug which goes into the ink reservoir. Discard the tip.
While it’s really hard to see, the other end of the pen body has a push-on plug. Gently working around it with a sharp knife can open it up a bit.
Once you’re inside the pen, pull the dry fibre ink reservoir out with tweezers and discard it.
Converting the pen body to use a Jetstream refill needs some tools:
Drill a hole in the plug at the end of the pen body just large enough to allow the end of the refill to pass through. It helps if this is mostly centred to keep the pen point centred; this is important for accurate plots.
Cut a piece of tubing just wide enough to slip over the pen refill, but not quite narrow enough to fit through the hole you just drilled. I used some unshrunk heatshrink tubing for this. It needs to be just long enough to push against the plug when the pen tip is at the right length. This should help stop the refill getting hammered back into the body by your plotter.
Before you assemble the pen, I find it useful to cut a couple of flats in the sides of the plug so you can more easily change the refill. You don’t have to do this, though.
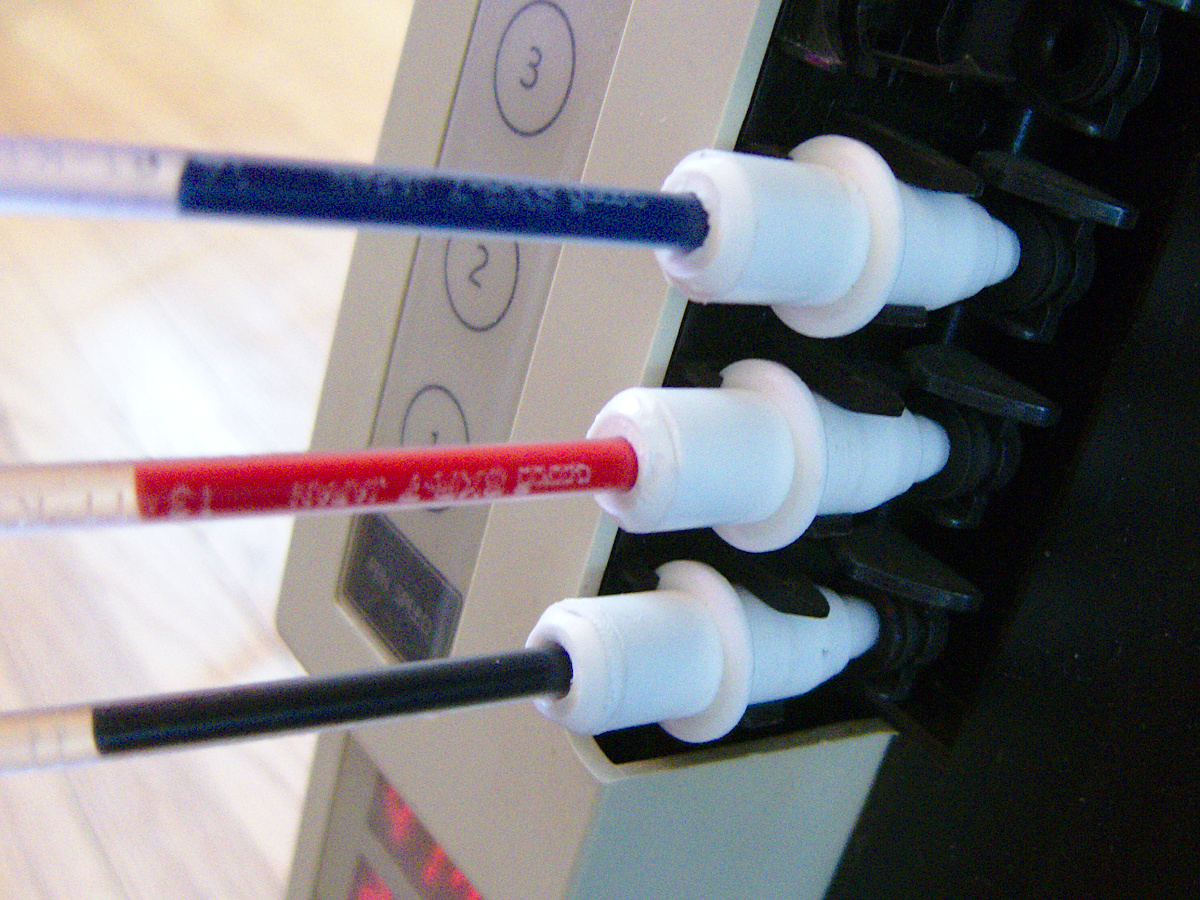
Assemble the pen:
Push the Jetstream refill into the pen body, and adjust it so it sticks out about 6 mm clear of the plastic collar near the nib.
Put the tubing over the other end of the refill, and push the plug over the top, clicking it into place.
Three pens in place on my DXY-1300
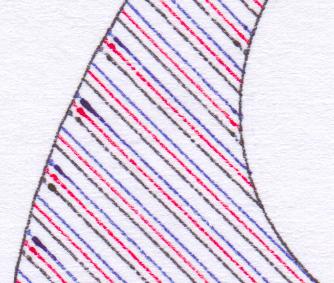
To get best results, you’ll have to slow your plot speed down quite a bit. At standard speeds, you get a ¼ mm interrupted line which looks like this:
Jetstream at full speed
Close up, the lines are really faint
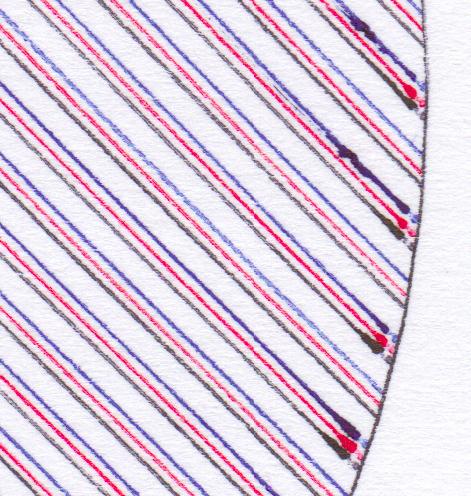
A hint that I should run them slower was at the start of each line, where the line would start very thick, then taper off as the ink supply ran low:
acceleration blobs
Run at 120 mm/s, the results where a bit darker, but still blobby at the start of lines:
120 mm/s
Slowing down to 60 mm/s produced slightly better results:
60 mm/s
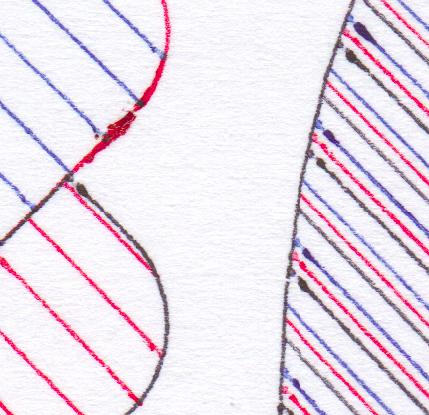
But sharpest of all was at the crawling speed 30 mm/s:
30 mm/s
Some pronounced blobs at the starts of lines still. Here’s the full page at 600 dpi, squished into a very lossy PDF: jetstream_plotter-slow
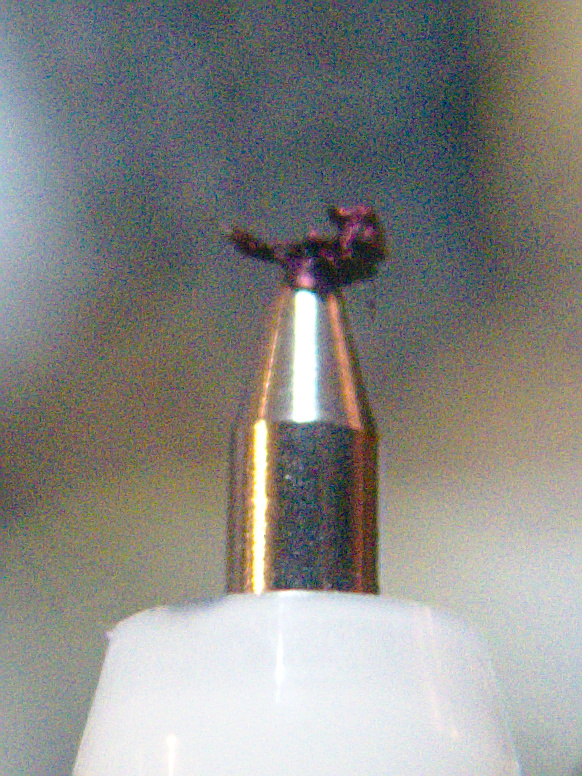
The blobs could be due to this, though:
grode on pen tip
It seems that a mix of paper fibres and coagulated ink builds up on the tip. Occasional cleaning seems to be a good idea. It also seems to help to draw a quick scratch line before anything important so the ink will be flowing properly.
Just to sign off, here’s one of the pens in action:
So, the DVD drive on my laptop’s on the fritz. It reads data fine, but ripping CDs with CDDA checks makes it go over the transport error rainbow bridge. So, partly through necessity and partly for lulz, I wondered how well a Raspberry Pi B+ would do on ripping CDs. I’ve got an old IDE DVD-R drive in an external 5¼” USB enclosure (huge!). I set about installing abcde, which is about the leanest way of ripping CDs in a terminal that I know. The standard sudo apt-get install abcde didn’t quite come up with all of the options I’d want to use, so I made the mistake of trying this:
sudo apt-get install --install-suggests abcde
Nooooooooooooooooooooooooooo! This horror suggested I install the following:
Eep! That looks like the full TeXLive system, most of QT4, almost every TrueType font ever (plus a font editor), printer drivers, the full Apache webserver setup, MySQL, a couple of web browsers, scanner drivers and OCR programs, a mail server … 2.4 GB of downloads, or over 6 GB installed. And all this for a command line script for ripping CDs.
Much better. Installed in a couple of minutes. Worked quite well, if not fast — ripped and encoded a 45 minute CD in just under 26 minutes (using lame -V2, which is good enough for me). For setup hints for abcde, abcde: Command Line Music CD Ripping for Linux is a good resource. On a Raspberry Pi, with its single core processor, you probably want to set MAXPROCS=1 in the abcde.conf file, or the encoders will fight for resources and get really slow.
NB: this is in the early stages of development, but does work. It’s by no means a plug-and-play solution. You’re going to have to do some coding, and perhaps some soldering. Undaunted? Read on …
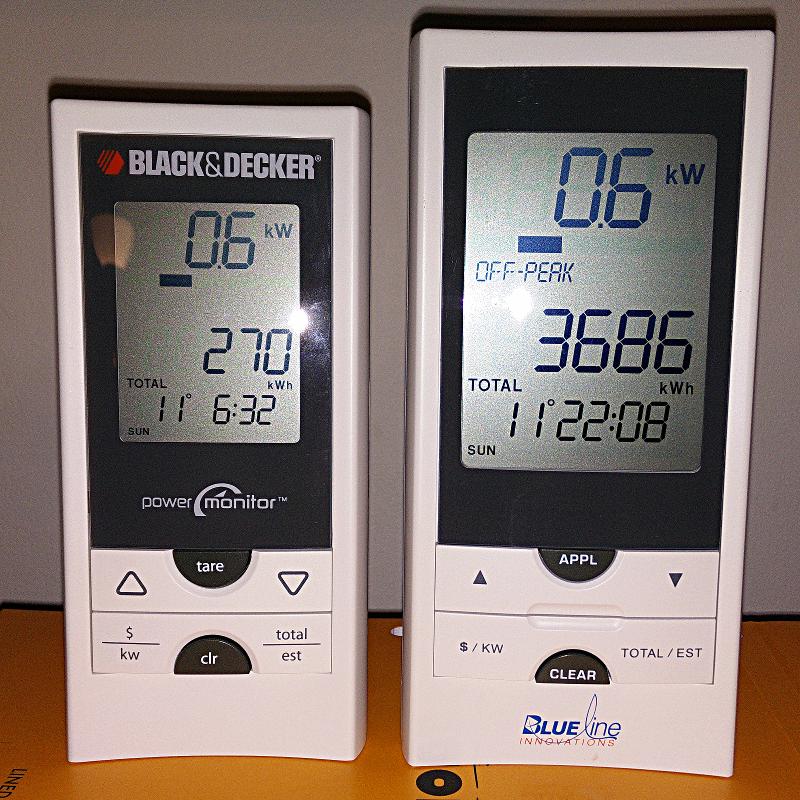
I really like the Blue Line Innovations PowerCost Monitorâ„¢ (aka the Black & Decker Power Monitor EM100B). I bought one long before the OPA started to give them away free to Ontario households as part of their peaksaver PLUS program. It’s a little device that clamps to your hydro meter and sends instantaneous power readings to a display.
Power Monitor displays — Black & Decker on the left, Blueline on the right
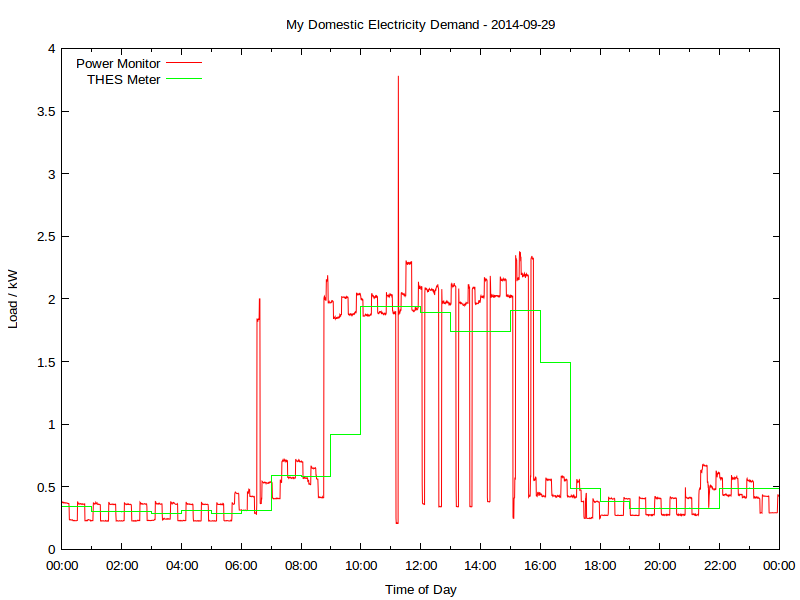
Wouldn’t it be so much better if you could log and analyze these data? So a day’s power consumption might graph to something like this:
Yup, this is my real electricity consumption, as logged from the PowerCost Monitor. You can see the fridge cycling on and off, and I think the big mid-day spike was either the AC or the dryer; someone was home on that Monday. The rather blocky green line is Toronto Hydro’s hourly smart meter data. It really hasn’t got the resolution to show really detailed power use.
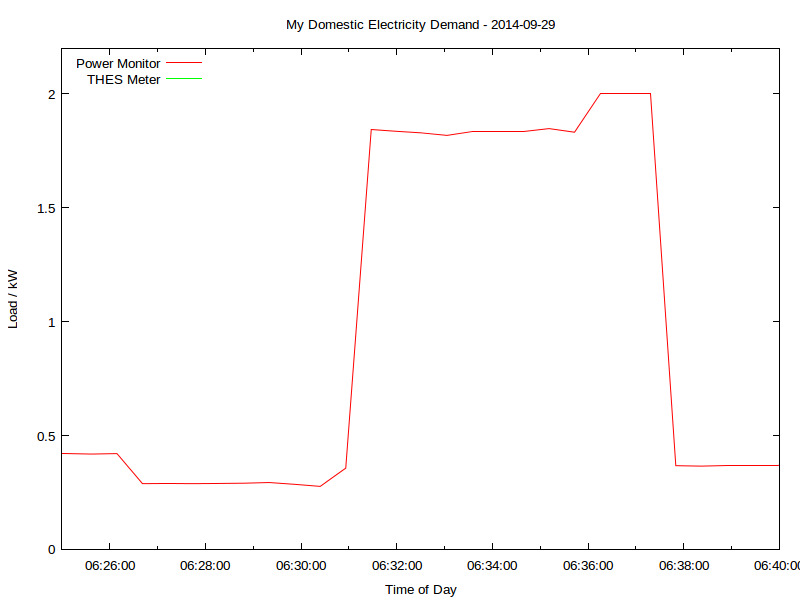
That spike at 06:30; what’s that? Let’s take a look:
That’s me boiling the kettle. You can see that the time resolution is better than a minute, and the power is to the watt. Mmm, coffee …
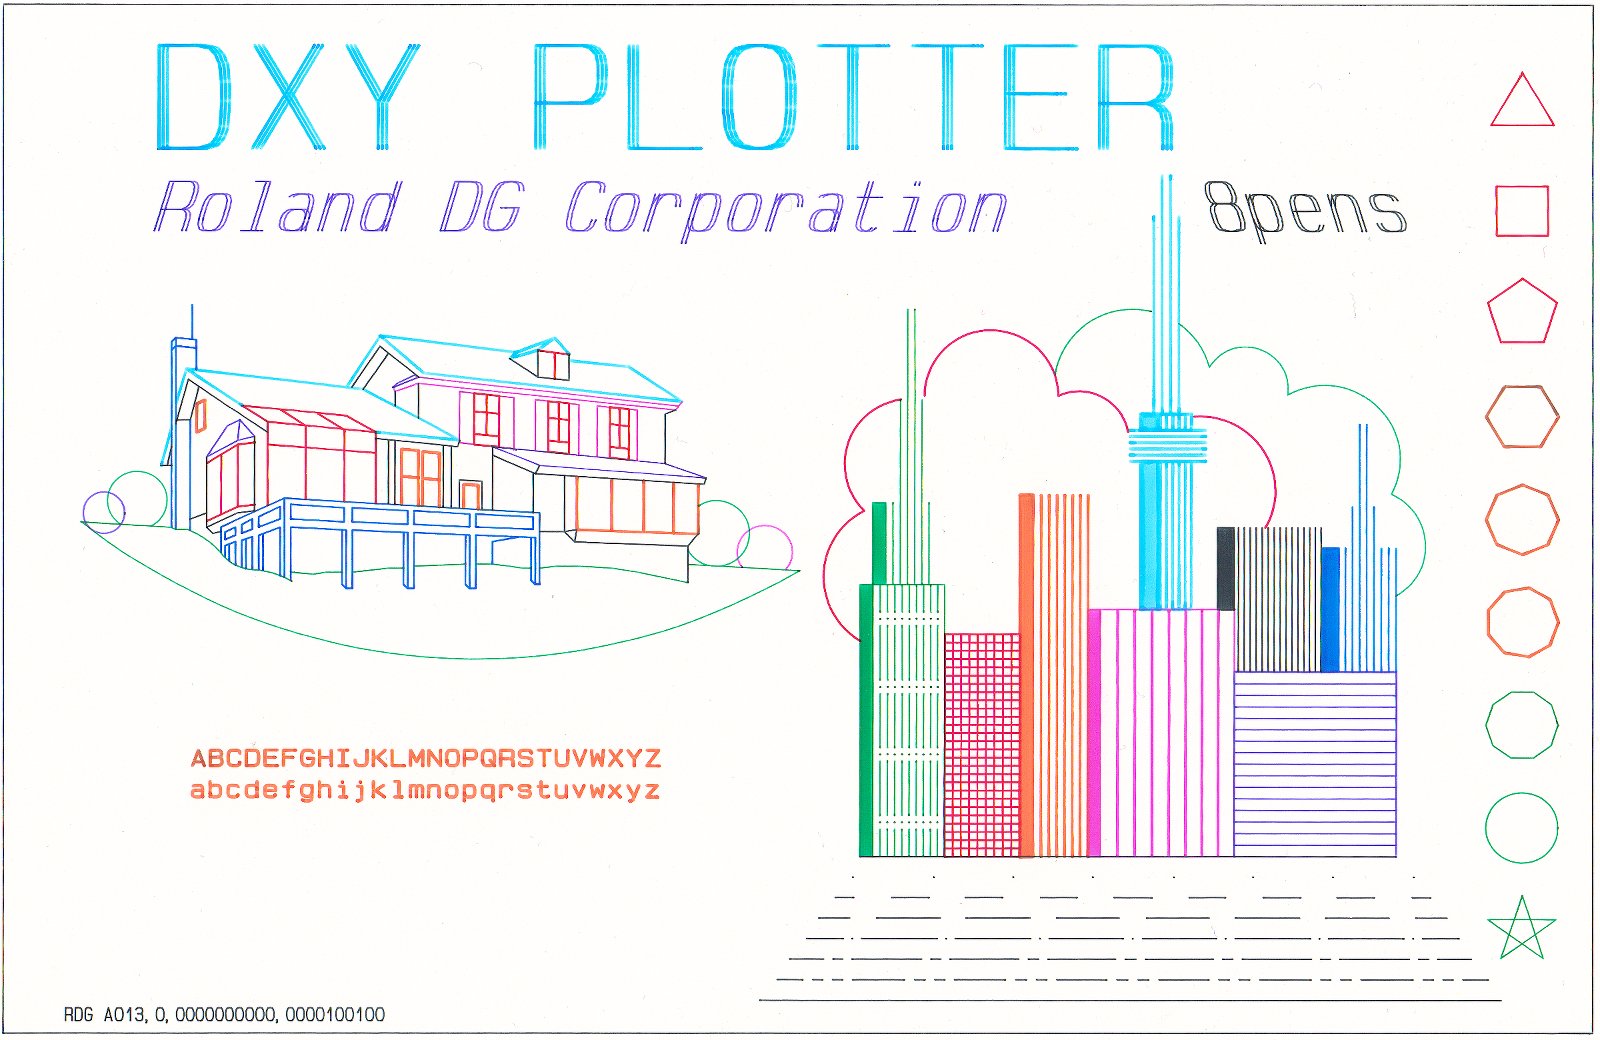
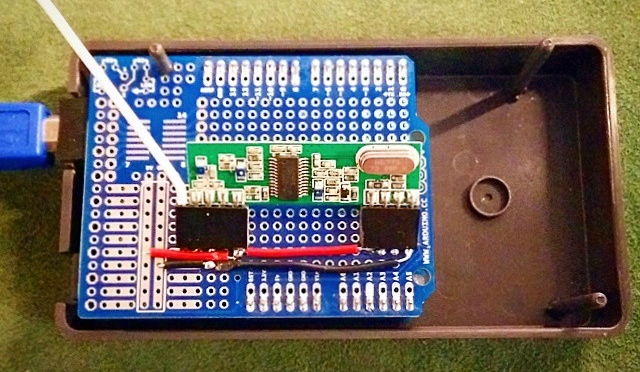
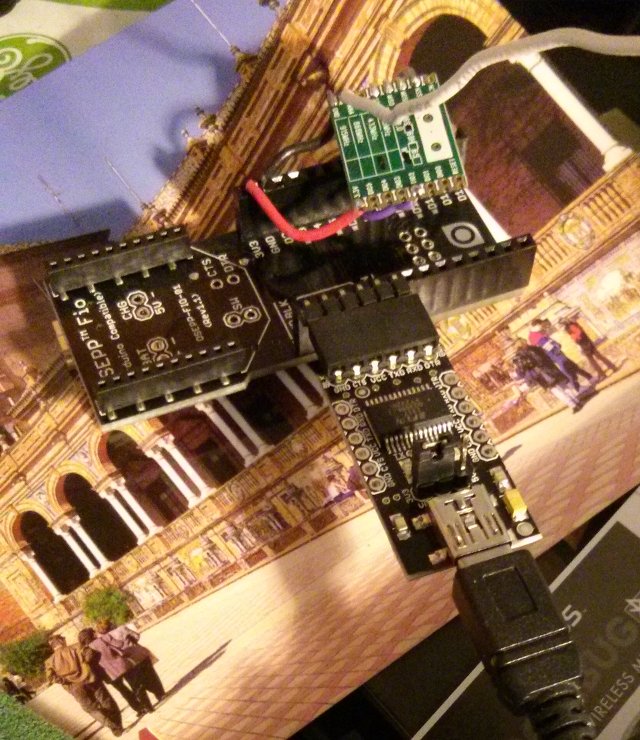
All of this is recorded using a simple Arduino-based solution, originally cooked up by Bryan Mayland. I’ve forked his code and added some instructions: scruss/Powermon433. Here’s the rig I’ve been using to log data over a USB serial link:
Arduino FIO compatible + RFM69W board + FTDI serial
That’s a particularly ugly rig, due to the limitations of the 3.3 V receiver board I was using. There are other options that work with more normal Arduino boards up on github.
Here’s a sample of the data I’m logging, including the kettle incident:
Datetime
Elapsed_s
Energy_Wh
Power_W
Temp_C
2014-09-29T06:27:44
23241.7
25876
289
15
2014-09-29T06:28:16
23273.6
25876
290
15
2014-09-29T06:28:48
23305.5
25876
291
15
2014-09-29T06:29:20
23337.4
25892
294
15
2014-09-29T06:29:52
23369.2
25892
286
15
2014-09-29T06:30:24
23401.1
25892
277
15
2014-09-29T06:30:56
23433.0
25892
357
15
2014-09-29T06:31:28
23464.9
25892
1844
15
2014-09-29T06:32:00
23496.8
25892
1836
15
2014-09-29T06:32:31
23528.5
25952
1829
15
2014-09-29T06:33:03
23560.2
25952
1818
15
2014-09-29T06:33:35
23592.1
25952
1836
15
2014-09-29T06:34:07
23624.0
25952
1836
15
2014-09-29T06:34:39
23655.8
25952
1836
15
2014-09-29T06:35:11
23687.7
25952
1848
15
2014-09-29T06:35:43
23719.6
26048
1832
15
2014-09-29T06:36:15
23751.5
26048
2000
15
2014-09-29T06:36:46
23783.4
26048
2000
15
2014-09-29T06:37:18
23815.2
26048
2000
15
2014-09-29T06:37:50
23846.9
26048
368
15
You’ll see that I’m recording:
a system timestamp
the elapsed logging time, from the Arduino’s clock
instantaneous meter readings in watt-hours. Note that not every row has an update
the average power since the last record. The product of this and the time between records adds up to the energy consumption
the outside temperature in °C. This is not very accurate (in full sun it over-reads vastly) but better than nothing.
Compare that to the smart meter data:
DateTime
Hour
KwhUsage
Cost
Rate
2014-09-29 05:00:00
5
0.29
$0.02
$0.075
2014-09-29 06:00:00
6
0.31
$0.02
$0.075
2014-09-29 07:00:00
7
0.59
$0.04
$0.075
Not much data there, is there? Certainly not enough resolution to tell if a kettle has been running.
Even though this interface is homebrew and cheap, it is accurate. Here’s how four days of continuous readings stack up against Toronto Hydro’s meter:
Â
Power Monitor
ndToronto Hydro Smart Meter
Day
First Reading / Wh
Last Reading / Wh
Total Consumption / kWh
No of readings
Daily Total / kWh
No of readings
2014-09-29
23896
43668
19.772
2711
19.77
24
2014-09-30
43668
52500
8.832
2710
8.82
24
2014-10-01
52500
68004
15.504
2711
15.51
24
2014-10-02
68004
81996
13.992
2712
13.99
24
The difference looks to me like aliasing; THES’s reporting is much more granular.
I’m going to develop this further to turn it into an easy (or at least, easier) to use logging platform. It’s taken us a few years to get here, but there’s nothing quite like a project finally working!
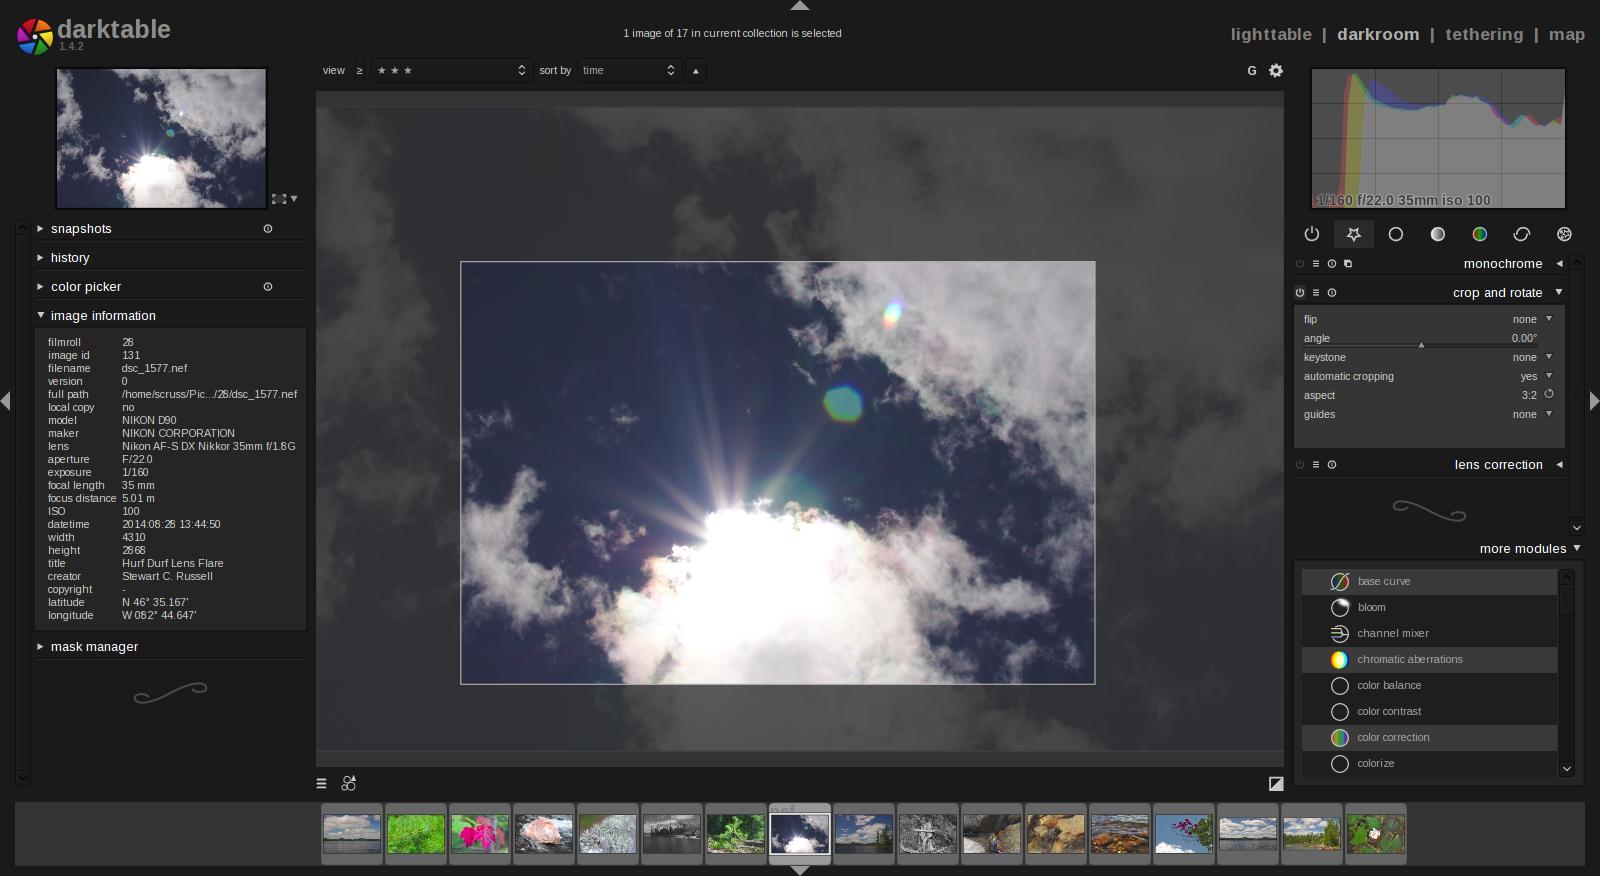
I’m really impressed with darktable, a raw photo workflow for Linux. Unlike Gimp, it uses floating point for all image processes, so it doesn’t get caught up in quantization error. It’s a non-destructive editor, too: it assumes your source images are like negatives, and any changes you make are only applied to the exported images. Darktable also has a very intuitive black and white filtering mode (where you apply a virtual colour filter to the front of the lens, and see the results in real time) and some very powerful geotagging features. I’m sold.
It’s not immediately obvious how some of the features work, and it took me a few hours (and some reading of the manual — eek!) to get files to export as I wanted them. It’s not quite perfect yet — the map feature can become unresponsive if you click too much on image icons — but it’s definitely solid enough for my purposes.
Over the last few weeks, I’ve been playing with a few small thermal printers. Meant as POS or information booth printers, they make a diverting project for the lo-fi printing enthusiast. While they all have common features — 58 mm/2¼” paper width, 8 pixel/mm resolution, 48 mm print width, serial connection — they all have their quirks. You may have seen these sold as the Adafruit Mini Thermal Receipt Printer or Sparkfun’s Thermal Printer, but there are many others. I’m going to write more on interfacing these directly to Raspberry Pi, Arduino, and (if I can navigate the documentation) a CUPS driver.
For now, I’m just leaving you a list of things I’ve found helpful for the DP-EH600 and 701 printers. Note that the similar-looking BTHT-v6 printer uses a completely different command set.
Replacement paper is sold as 2¼” — 30′. Staples have a box of 30 rolls for under $25 (item 279096, not on their website). Longer rolls don’t fit.
You’ll need a USB→TTL Serial adapter, preferably one with DTR control. I use one from JY-MCU. In a pinch, you can use a simpler Debug / Console Cable for Raspberry Pi, but you risk serial overruns and dodgy results. Remember that RX on the adapter goes to TX on the printer, and vice versa.
A good solid power supply is needed; these printers draw ~8 W when printing. Some printers only support 5 V (for which a 3 amp adapter would be ideal), others 5-9 V. The higher voltage makes text printing faster. You can’t drive these directly from your Raspberry Pi/Arduino power supply.
Linux serial ports are set to some defaults which may have been historically useful, but now corrupt 8-bit data. A trick I picked up here is to first issue the command stty -F /dev/ttyUSB1 0:0:0:0:0:0:0:0:0:0:0:0:0:0:0:0:0:0:0:0:0:0:0:0:0:0:0:0:0:0:0:0:0:0:0:0
which clears all settings, then set the device up as you need it: stty -F /dev/ttyUSB1 speed 9600 raw cs8
(Most of these printers default to 9600 baud. Your device may be called something different to ttyUSB1.)
I’ve written a couple of Python driver stubs which take an image and produce the relevant binary output:
scruss / esc-pos-image.py – prints an image as a single command. May not work on the SparkFun printer. Does not work on the BTHT-v6.
scruss / esc-pos-image-star.py – prints the image in 24 pixel deep bands. Can sometimes cause visible gaps in the printout, but will work on almost all printers, except the BTHT-v6.
These Python libraries also work, as long as you address the printer properly (right device, right speed):
python-escpos – image support limited to 255 pixels high, for some reason.
Reed Zhao (of Tangram Software) lent me a couple of different printers for testing after I bought a different one from him. He’s put a lot of work into sourcing these printers direct from the manufacturers. Thanks, Reed! NB: Reed doesn’t sell printers any more. Try eBay.
BTHT-V6 manual (Chinese) — probably just enough info to follow the wiring and some of the basic control codes. Looks like the one I had was 5V only, so needs a 5V 3A power supply.
Aargh! Ubuntu 16.10 has decided that ImageMagick doesn’t need JPEG 2000 support, and will quietly (and very very wrongly) write JP2s as JPEG.
(NB: JPEG 2000 images still maybe crash Ubuntu’s file browser in 14.10. My old installation didn’t like them, but my reinstall seems quite happy. Go figure.)
JPEG 2000 is a great image file format: well-defined, and able to store high quality photographic data in a very small space. It truly is the JPEG of the 2000s — except for its dismal support under Ubuntu.
The problem is the patents. An open library has been a long time coming, and lots of Linux software is built without JP2 support. This helped keep it away from my desktop.
Under Ubuntu 14.04, here’s what does and doesn’t support JP2 files:
Gimp — not supported. It appears to have a non-functioning plugin that tries to read the file, then gives up. This is annoying, as Gimp is defined as the system default viewer for JPEG 2000.
Image Viewer — does support JP2, but occasionally mis-renders pages. To make this the default, right-click on a JP2 file, and select Open with → Other Application …, then choose Image Viewer. It should work from then onwards.
Document Viewer — a bit rough when looking at JPEG 2000-encoded PDFs. Very slow, too.
GraphicsMagick — seems to be the most painless way of converting graphics files to JPEG 2000. My preferred method of invoking it is: gm convert -define 'jp2:rate=0.008' in.png out.jp2
The rate option should be a small number; the smaller, the greater the compression, and the worse the image quality.
OpenJPEG — provides the image_to_j2k and j2k_to_image tools. Far more picky about input formats than it should be, and often fails on seemingly perfect input.
img2pdf — (built from source) is a tiny gem of a package. All it does is wrap various image formats into a PDF file. It doesn’t modify the image data in any way, so with a bit of ingenuity (and pdftk) you can use PDF as a true metafile archive. You can view the content on any platform, but get the source images out bit-for-bit perfect. We used to call files which could contain files metafiles, but that stopped being popular when TIFF started to be a baroque travesty of an image container back in the mid-1990s.
poppler — (for full features, build from source) has a tool, pdfimages, which can extract embedded image files from PDFs. Some of the metadata might get lost, but all of the image bits come through.
Since JPEG 2000 isn’t included in web browsers (grar), I’ve embedded a sample scanned JPEG into a PDF, and added a series of progressively more compressed JPEG 2000 versions: JPEG-2000Booklet [PDF]. The booklet has notes showing the byte size of each page. The image still looks pretty good at 8% of the original file size!
It’s been so long since I’ve programmed in Perl. Twelve years ago, it was my life, but what with the Raspberry Pi intervening, I hadn’t used it in a while. It’s been so long, in fact, that I wasn’t aware of the new language structures available since version 5.14. Perl’s Unicode support has got a lot more robust, and I’m sick of Python’s whining about codecs when processing anything other than ASCII anyway. So I thought I’d combine re-learning some modern Perl with some childish amusement.
What I came up with was a routine to convert ASCII alphanumerics ([0-9A-Za-z]) to Unicode Enclosed Alphanumerics ([⓪-⑨Ⓐ-Ⓩⓐ-ⓩ]) for advanced lulz purposes. Ⓘ ⓣⓗⓘⓝⓚ ⓘⓣ ⓦⓞⓡⓚⓢ ⓡⓐⓣⓗⓔⓡ ⓦⓔⓛⓛ:
#!/usr/bin/perl
# annoying.pl - ⓑⓔ ⓐⓝⓝⓞⓨⓘⓝⓖ ⓦⓘⓣⓗ ⓤⓝⓘⓒⓞⓓⓔ
# created by scruss on 2014-05-18

use v5.14;
# fun UTF8 tricks from http://stackoverflow.com/questions/6162484/
use strict;
use utf8;
use warnings;
use charnames qw( :full :short );
sub annoyify;

die "usage: $0 ", annoyify('string to print like this'), "\n" if ( $#ARGV < 0 );
say annoyify( join( ' ', @ARGV ) );
exit;

# 💩💩💩💩💩💩💩💩💩💩💩💩💩💩💩💩💩💩💩💩💩💩💩💩💩💩💩💩💩💩💩💩💩

sub annoyify() {
    # convert ascii to chars in circles
    my $str = shift;
    my @out;
    foreach ( split( '', $str ) ) {
        my $c = ord($_);             # remember, can be > 127 for UTF8
        if ( $c == charnames::vianame("DIGIT ZERO") )
    {
            # 💩💩💩 sigh; this one's real special ... 💩💩💩
            $c = charnames::vianame("CIRCLED DIGIT ZERO");
        }
        elsif ($c >= charnames::vianame("DIGIT ONE")
            && $c <= charnames::vianame("DIGIT NINE") )
        {
            # numerals, 1-9 only (grr)
            $c =
              charnames::vianame("CIRCLED DIGIT ONE") +
              $c -
              charnames::vianame("DIGIT ONE");
        }
        elsif ($c >= charnames::vianame("LATIN CAPITAL LETTER A")
            && $c <= charnames::vianame("LATIN CAPITAL LETTER Z") )
        {
            # upper case
            $c =
              charnames::vianame("CIRCLED LATIN CAPITAL LETTER A") +
              $c -
              charnames::vianame("LATIN CAPITAL LETTER A");
        }
        elsif ($c >= charnames::vianame("LATIN SMALL LETTER A")
            && $c <= charnames::vianame("LATIN SMALL LETTER Z") )
        {
            # lower case
            $c =
              charnames::vianame("CIRCLED LATIN SMALL LETTER A") +
              $c -
              charnames::vianame("LATIN SMALL LETTER A");
        }
        else {
            # pass thru non-ascii chars
        }
        push @out, chr($c);
    }
    return join( '', @out );
}
Yes, I really did have to do that special case for ⓪; ⓪…⑨ are not contiguous like ASCII 0…9. ⓑⓞⓞ!
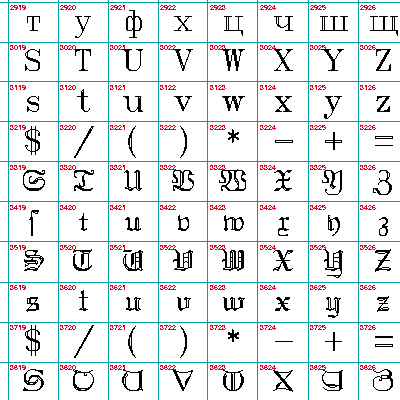
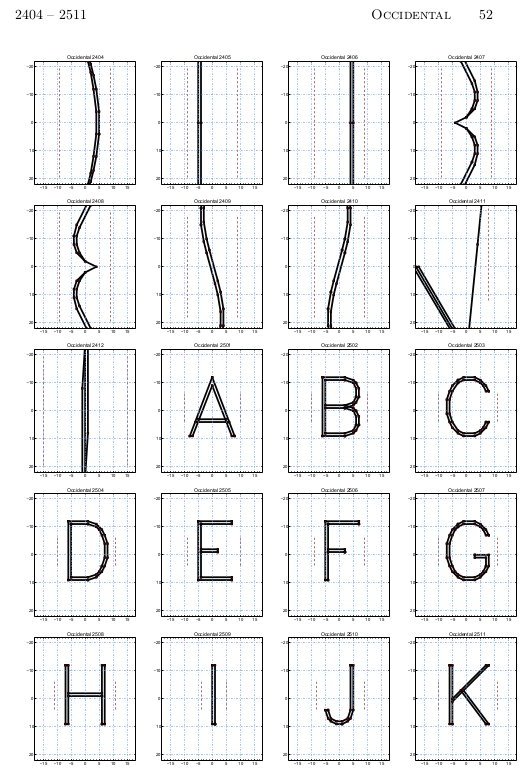
It’s impractically huge, but under the image link lives a table of all of the Hershey fonts (well, the Western ones, at least). It’s interesting to note Dr Hershey’s preferences in this pre-ASCII table: almost every variant has degree, minute and second symbols, but none of them have ‘\’. Many of them don’t have ‘@’, either, so no e-mail addresses in Hershey Fraktur for you …


