Update, 2017-06: I’ve updated the plans so you shouldn’t need to spend time sanding things to fit.
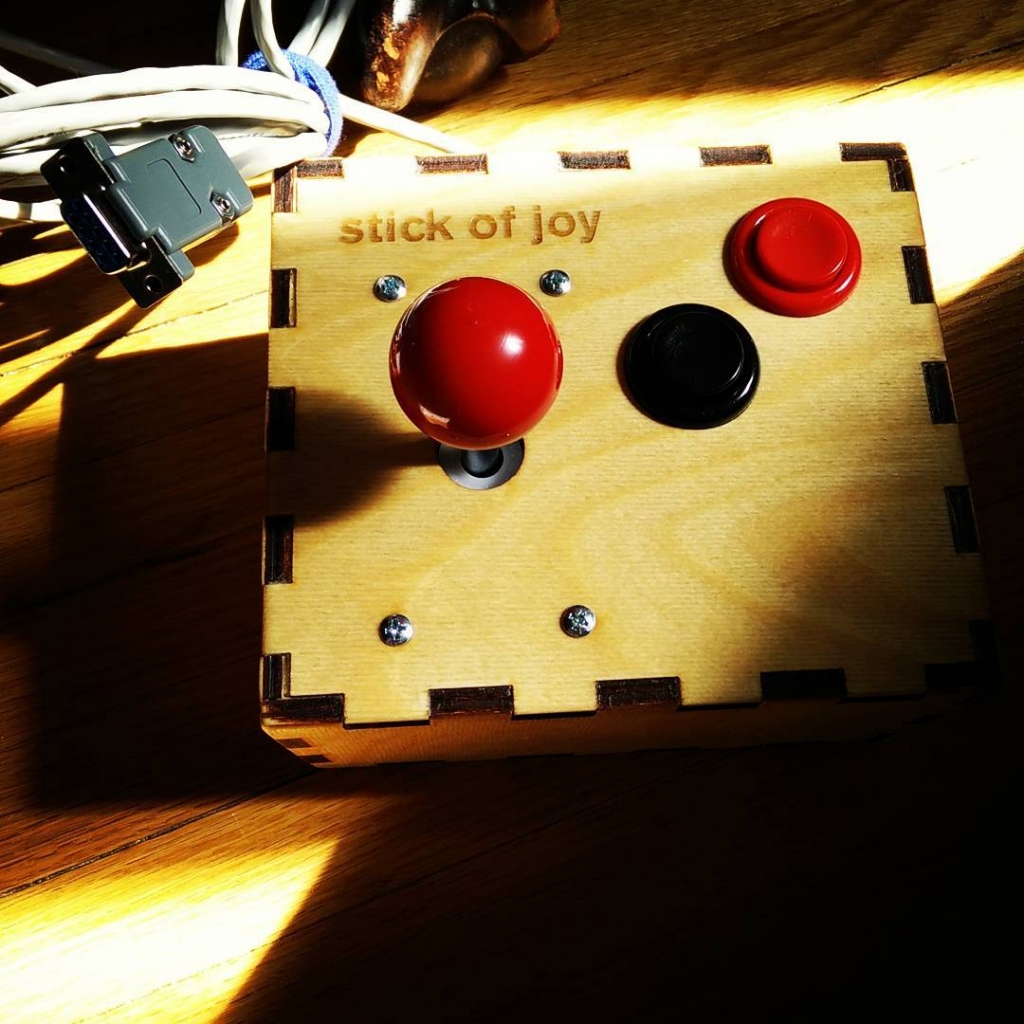 Tracking down old Atari-style joysticks for retrogaming can expensive, and it’s hard to tell if you’ll get something reliable. So I made one for less than the cost of a used stick on eBay.
To build this, you will need:
- 8-way joystick , or any stick compatible with the industry standard Sanwa JLF-P1 mounting plate. This has M4 holes at 84 × 40 mm.
- Two concave momentary arcade push buttons. In my built, I used an older design that’s much taller. You could make the joystick box shorter if you used these snap-in buttons.
- DE-9 (DB-9) Female Socket Connector
- Terminal block, with at least seven connectors. You’ll likely want more, so this 12 position screw terminal block should work.
- 4× M4 countersunk (oval head) machine screws with nuts and lots of washers. You’ll need washers to act as spacers between the box and the joystick mounting plate. This allows the joystick’s dust washer to move freely.
- a couple of metres of 8-core stranded signal cable
- hookup wire and spade connectors for building the button harness.
The case is made from 6.4 mm high quality plywood, using a template generated by BoxMaker. The external dimensions of the box are 163 mm x 143 mm x 83 mm. I haven’t included any kerf width in the design, so the edges should fit together easily for gluing.

Joystick box plan for download: joystick-box-201706.svg (SVG: best in Inkscape); joystick-box-201706.pdf (PDF).
If you want to make your own design, here’s the top plate plan: joystick-box-top-201706.svg (SVG); joystick-box-top-201706.pdf (PDF).
The basic DE-9 pin wiring for Atari-style joysticks goes like this:
1 — Up
2 — Down
3 — Left
4 — Right
6 — Button
8 — Ground
There are many variants that add features to this scheme, however. If you’re building for a specific computer, Tomi Engdahl’s Joystick information page has the details.
Many thanks to Andrew Horsburgh for the use of Protolab‘s laser cutter.
1 comment