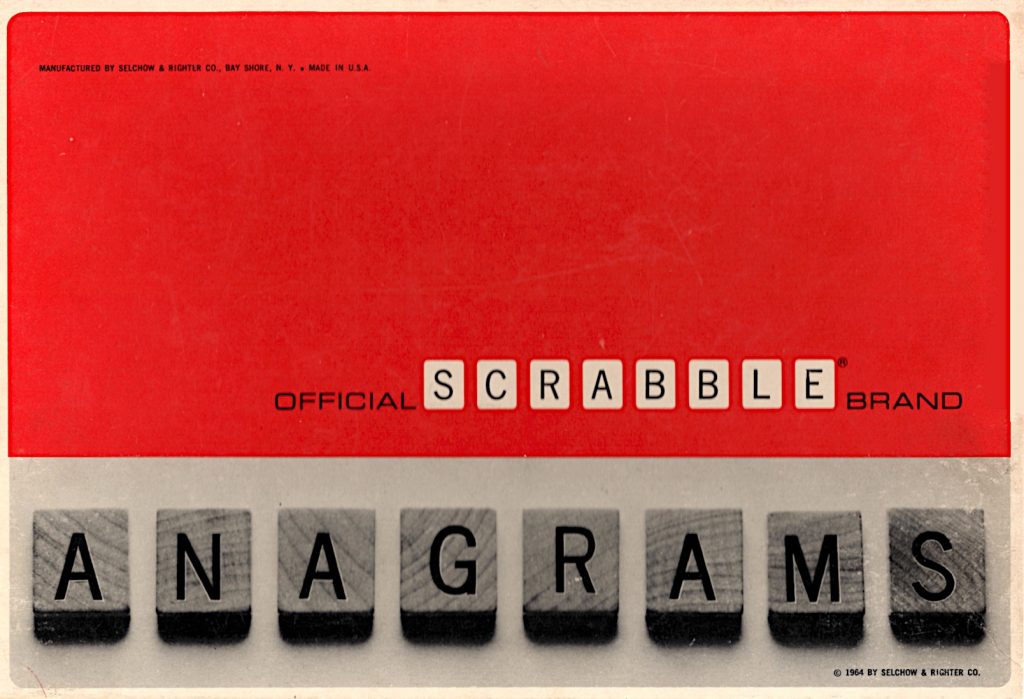
Found in a thrift store, the 1960s Selchow & Righter SCRABBLE® variant that nobody loved. It has no board, but 180 tiles, slightly different from the SCRABBLE® ones (dang, I love that I can type ®, can’t you tell?)
The stencilling/printing isn’t perfectly even in position, but I do have to remember these are at least 60 years old:

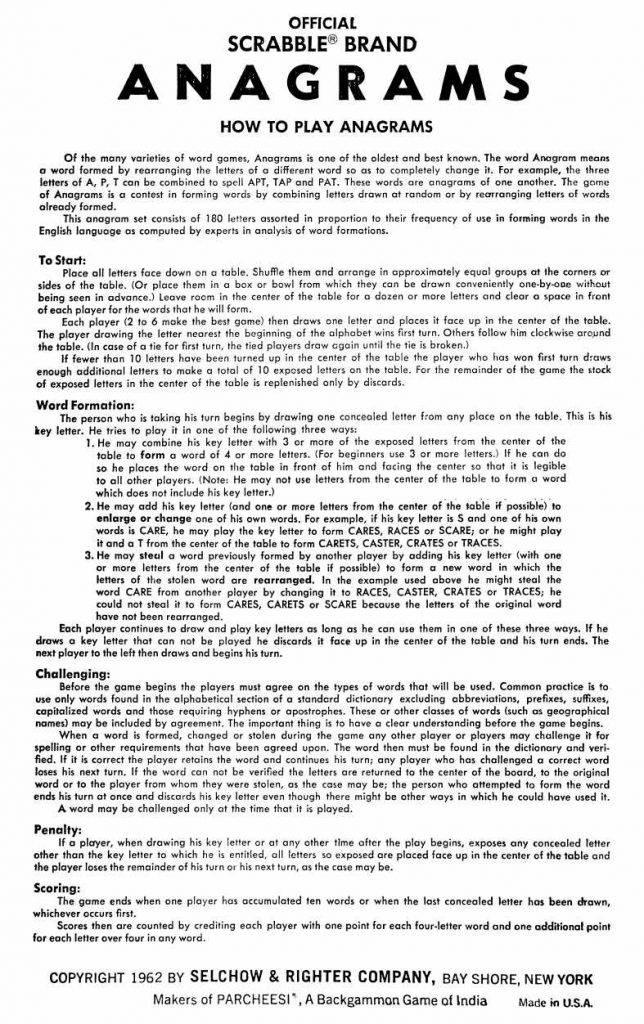
The instructions from inside the box (which were murder to scan btw: appreciate me!) are dated 1962, unlike the box. There’s a PDF linked under this image for those who enjoy legibility:
Included in the box, possibly original, is an instruction sheet typed in the naffest font known to man:
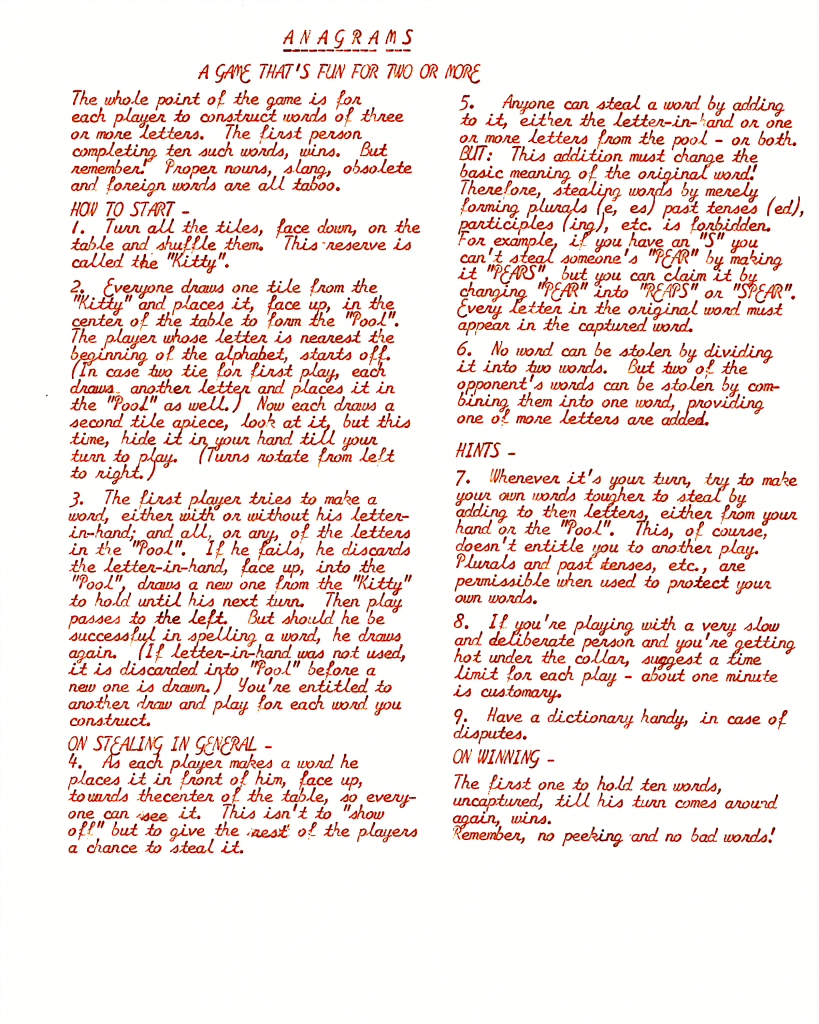
Should you have no taste at all and want this excuse for type in your own documents, go here: zai Smith-Corona Galaxie Typewriter Font. May your documents smell of stale cigarette smoke forever. At least no-one will be able to OCR them.
The typed rules seem to disagree with the box rules a little. Pick the one you dislike less.
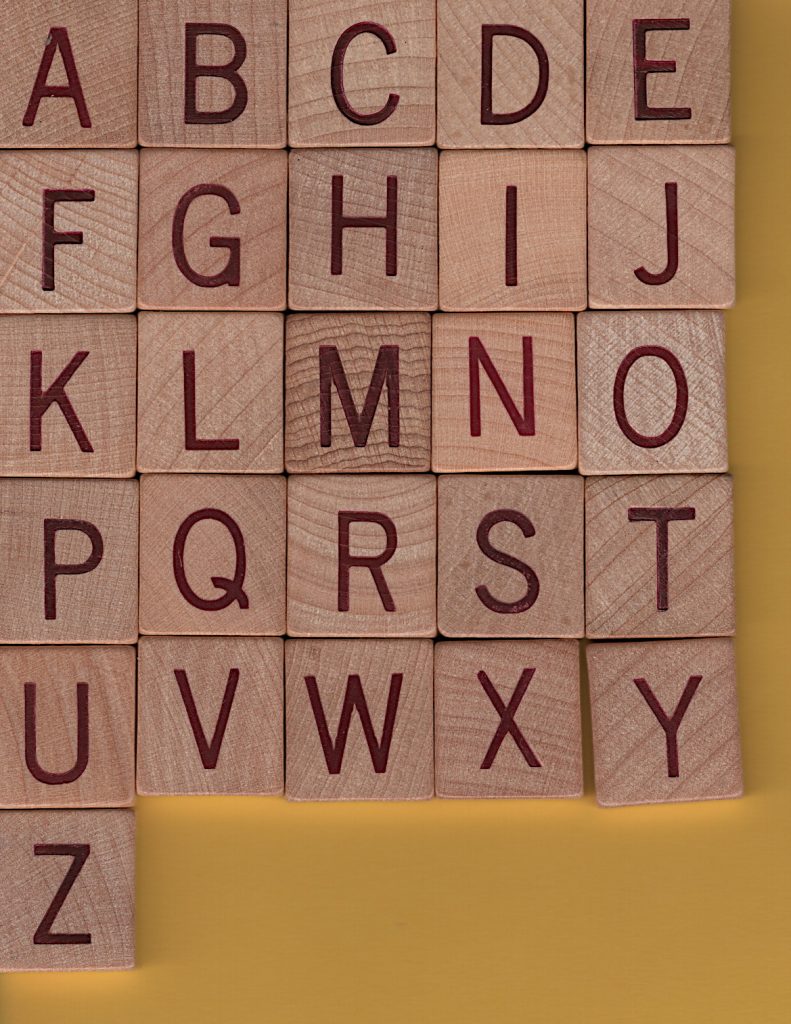
The 180 tiles have a slightly odd distribution for English: A×14, B×4, C×4, D×8, E×22, F×4, G×6, H×4, I×18, J×2, K×2, L×8, M×4, N×10, O×14, P×4, Q×2, R×12, S×8, T×10, U×8, V×2, W×2, X×2, Y×4, Z×2. You’re not going to make this up with any number of SCRABBLE® tile sets.
You can’t even make up a full 144 tile Bananagrams set with these. Even if you remove the excess tiles (A, B, C, D×2, E×4, F, G×2, H, I×6, L×3, M, N×2, O×3, P, R×3, S×2, T, U×2, Y), you’d still be short by a V and a W. A bug, perhaps?
Here are the rules from the box lid in full:
OFFICIAL SCRABBLE® BRAND ANAGRAMS
HOW TO PLAY ANAGRAMS
Of the many varieties of word games, Anagrams is one of the oldest and best known. The word Anagram means a word formed by rearranging the letters of a different word so as to completely change it. For example, the three letters of A, P, T can be combined to spell APT, TAP and PAT. These words are anagrams of one another. The game of Anagrams is a contest in forming words by combining letters drawn at random or by rearranging letters of words already formed.
This anagram set consists of 180 letters assorted in proportion to their frequency of use in forming words in the English language as computed by experts in analysis of word formations.
To Start:
Place all letters face down on a table. Shuffle them and arrange in approximately equal groups at the corners or sides of the table. (Or place them in a box or bowl from which they can be drawn conveniently one-by-one without being seen in advance.) Leave room in the center of the table for a dozen or more letters and clear a space in front of each player for the words that he will form.
Each player (2 to 6 make the best game) then draws one letter and places it face up in the center of the table. The player drawing the letter nearest the beginning of the alphabet wins first turn. Others follow him clockwise around the table. (In case of a tie for first turn, the tied players draw again until the tie is broken.)
If fewer than 10 letters have been turned up in the center of the table the player who has won first turn draws enough additional letters to make a total of 10 exposed letters on the table. For the remainder of the game the stock of exposed letters in the center of the table is replenished only by discards.
Word Formation:
The person who is taking his turn begins by drawing one concealed letter from any place on the table. This is his key letter. He tries to play it in one of the following three ways:
- He may combine his key letter with 3 or more of the exposed letters from the center of the table to form a word of 4 or more letters. (For beginners use 3 or more letters.) If he can do so he places the word on the table in front of him and facing the center so that it is legible to all other players. (Note: He may not use letters from the center of the table to form a word which does not include his key letter.)
- He may add his key letter (and one or more letters from the center of the table if possible) to enlarge or change one of his own words. For example, if his key letter is S and one of his own words is CARE, he may play the key letter to form CARES, RACES or SCARE; or he might play it and a T from the center of the table to form CARETS, CASTER, CRATES or TRACES.
- He may steal a word previously formed by another player by adding his key letter (with one or more letters from the center of the table if possible) to form a new word in which the letters of the stolen word are rearranged. In the example used above he might steal the word CARE from another player by changing it to RACES, CASTER, CRATES or TRACES; he could not steal it to form CARES, CARETS or SCARE because the letters of the original word have not been rearranged.
Each player continues to draw and play key letters as long as he can use them in one of these three ways. If he draws a key letter that can not be played he discards it face up in the center of the table and his turn ends. The next player to the left then draws and begins his turn.
Challenging:
Before the game begins the players must agree on the types of words that will be used. Common practice is to use only words found in the alphabetical section of a standard dictionary excluding abbreviations, prefixes, suffixes, capitalized words and those requiring hyphens or apostrophes. These or other classes of words (such as geographical names) may be included by agreement. The important thing is to have a clear understanding before the game begins.
When a word is formed, changed or stolen during the game any other player or players may challenge it for spelling or other requirements that have been agreed upon. The word then must be found in the dictionary and verified. If it is correct the player retains the word and continues his turn; any player who has challenged a correct word loses his next turn. If the word can not be verified the letters are returned to the center of the board, to the original word or to the player from whom they were stolen, as the case may be; the person who attempted to form the word ends his turn at once and discards his key letter even though there might be other ways in which he could have used it.
A word may be challenged only at the time that it is played.
Penalty:
If a player, when drawing his key letter or at any other time after the play begins, exposes any concealed letter other than the key letter to which he is entitled, all letters so exposed are placed face up in the center of the table and the player loses the remainder of his turn or his next turn, as the case may be.
Scoring:
The game ends when one player has accumulated ten words or when the last concealed letter has been drawn, whichever occurs first. Scores then are counted by crediting each player with one point for each four-letter word and one additional point for each letter over four in any word.
COPYRIGHT 1962 BY SELCHOW & RIGHTER COMPANY, BAY SHORE, NEW YORK
Makers of PARCHEESI®, A Backgammon Game of India
Made in U.S.A.
The game is listed as Scrabble Scoring Anagrams on Board Game Geek and given a much later date (1972) than this one.


![[decorative] a spiralling figure made of scaled and rotated equilateral triangles](https://scruss.com/wordpress/wp-content/uploads/2025/04/hpgl-rotatey.png)
![[decorative] a spiralling figure made of scaled and rotated equilateral triangles](https://scruss.com/wordpress/wp-content/uploads/2025/04/20250408_214147_BRWD89C6730425A_000572a-787x1024.jpg)