
Instagram filter used: X-Pro II
Whee! This entry was the basis of the cover article of The MagPi issue 7. Read it on Issuu, or download the PDF.

Okay, so maybe I can stop answering the StackExchange question “How to attach an Arduino?” now. While I got the Arduino working with pyFirmata on the Raspberry Pi before, it wasn’t that pretty. With a TkInter front end, it actually looks like some effort was involved. You can happily brighten and dim the LED attached to the Arduino all you want, while the temperature quietly updates on the screen independent of your LED frobbing.
I’d never used TkInter before. For tiny simple things like this, it’s not that hard. Every widget needs a callback; either a subroutine it calls every time it is activated, or a variable that the widget’s value is tied to. In this case, the Scale widget merely calls a function set_brightness() that sets a PWM value on the Arduino.
Updating the temperature was more difficult, though. After TkInter has set up its GUI, it runs in a loop, waiting for user events to trigger callback events. It doesn’t really allow you to run another loop alongside its main event loop. What you have to do then is set up a routine which is called periodically using TkInter’s after() function, which calls a subroutine after a set amount of time. If this subroutine ends with another call to after() to call itself again, it will maintain its own event loop separate from TkInter’s GUI loop. This is what I do in the get_temp() subroutine, which schedules itself after a ½ second.
#!/usr/bin/python
# -*- coding: utf-8 -*-

# graphical test of pyfirmata and Arduino; read from an LM35 on A0,
#                                          brighten an LED on D3 using PWM
# Connections:
# - small LED connected from D3, through a 1kΩ resistor to GND;
# - LM35: +Vs -> +5V, Vout -> A0, and GND -> GND.
# scruss, 2012-08-16 - tested on Raspberry Pi and Arduino Uno

import pyfirmata
import sys                              # just for script name and window
from Tkinter import *

# Create a new board, specifying serial port
board = pyfirmata.Arduino('/dev/ttyACM0')

# start an iterator thread so that serial buffer doesn't overflow
it = pyfirmata.util.Iterator(board)
it.start()

# set up pins
pin0=board.get_pin('a:0:i')             # A0 Input      (LM35)
pin3=board.get_pin('d:3:p')             # D3 PWM Output (LED)

# IMPORTANT! discard first reads until A0 gets something valid
while pin0.read() is None:
    pass

def get_temp():                         # LM35 reading in °C to label
    selection = "Temperature: %6.1f °C" % (pin0.read() * 5 * 100)
    label.config(text = selection)
    root.after(500, get_temp)           # reschedule after half second

def set_brightness(x):  # set LED; range 0 .. 100 called by Scale widget
    y=float(x)
    pin3.write(y / 100.0)               # pyfirmata expects 0 .. 1.0

def cleanup():                          # on exit
    print("Shutting down ...")
    pin3.write(0)                       # turn LED back off
    board.exit()

# now set up GUI
root = Tk()
root.wm_title(sys.argv[0])              # set window title to program name
root.wm_protocol("WM_DELETE_WINDOW", cleanup) # cleanup called on exit
scale = Scale( root, command=set_brightness, orient=HORIZONTAL, length=400,
               label='Brightness')      # a nice big slider for LED brightness
scale.pack(anchor=CENTER)

label = Label(root)
label.pack(anchor='nw')                 # place label up against scale widget

root.after(500, get_temp)               # start temperature read loop
root.mainloop()
The program takes a few seconds to start on the Raspberry Pi, mainly because initializing pyFirmata over a serial line and waiting for the duff values to subside takes time. I tried to exit the program gracefully in the cleanup() subroutine, but sometimes one of the loops (I suspect pyFirmata’s iterator) doesn’t want to quit, so it takes a few clicks to exit.
The program also seems to chew up a fair bit of CPU on the Raspberry Pi; I had it at around 40% usage just sitting idle. I guess those serial ports don’t read themselves, and you have to remember that this computer is basically no more powerful than a phone.
So there you are; a simple demo of how to control an output and read an input on an Arduino, from a Raspberry Pi, written in Python (the Raspberry Pi’s official language) with a simple GUI. Considering I’d never written a line of Python before the beginning of this month, I think I’m doing not too badly.
Hey! This article is really old! So old, in fact, that it really only exists to track down content farms that like to knock off my articles (oh hai, CircuitDigest!). Information here may be misleading and possibly wrong. You probably want to be using a newer client library and you definitely want to use an Arduino IDE ≥ 1.6 and not the ancient one that comes with Raspbian.
After the other night’s wonderfully slow detour into Processing, I thought I’d try the Raspberry Pi’s “native” language of Python to control an Arduino. This worked rather well, though I don’t have a slick GUI for it yet.
pyFirmata is the magic that allows an Arduino running Firmata to talk to Python. It’s fairly easy to install under Raspbian:
sudo apt-get install python-serial mercurialhg clone https://bitbucket.org/tino/pyfirmata
cd pyfirmata
sudo python setup.py installUsing pyFirmata is a bit different from other Arduino applications:
Here’s some code that uses the same hardware as before, but simply reports the temperature and ramps the brightness of the LED up in 10% steps.
#!/usr/bin/python
# -*- coding: utf-8 -*-
# simple test of pyfirmata and Arduino; read from an LM35 on A0,
#Â Â Â Â Â Â Â Â Â Â Â Â Â Â Â Â Â Â Â Â Â Â Â Â Â Â Â Â Â Â Â Â Â Â Â Â Â Â brighten an LED on D3 using PWM
# scruss, 2012-08-14 - tested on Arduino Uno & Raspberry Pi (Raspbian)
import pyfirmata
# Create a new board, specifying serial port
board = pyfirmata.Arduino('/dev/ttyACM0')
# start an iterator thread so that serial buffer doesn't overflow
it = pyfirmata.util.Iterator(board)
it.start()
# set up pins
pin0=board.get_pin('a:0:i')            # A0 Input     (LM35)
pin3=board.get_pin('d:3:p')Â Â Â Â Â Â Â Â Â Â Â Â # D3 PWM Output (LED)
# IMPORTANT! discard first reads until A0 gets something valid
while pin0.read() is None:
pass
for i in range(10):
pin3.write(i/10.0)Â Â Â Â Â Â Â Â Â Â Â Â Â Â Â Â Â # set D3 to 0, 10%, 20%, ... brightness
print "PWM: %d %% Temperature %.1f °C" % (i * 10, pin0.read() * 5 * 100)
board.pass_time(1)Â Â Â Â Â Â Â Â Â Â Â Â Â Â Â Â Â # pause 1 second
pin3.write(0)Â Â Â Â Â Â Â Â Â Â Â Â Â Â Â Â Â Â Â Â Â Â Â Â Â Â # turn LED back off
board.exit()
The output from this might look like:
PWM: 0 % Temperature 24.9 °C
PWM: 10 % Temperature 24.9 °C
PWM: 20 % Temperature 24.9 °C
PWM: 30 % Temperature 25.9 °C  <-
PWM: 40 % Temperature 26.9 °C    |
PWM: 50 % Temperature 28.3 °C    | I was holding the LM35 here
PWM: 60 % Temperature 28.8 °C    | to make the temperature rise
PWM: 70 % Temperature 29.8 °C    |
PWM: 80 % Temperature 29.8 °C    |
PWM: 90 % Temperature 29.8 °C  <-
If this doesn’t work, check the output of dmesg to see if you’re using the right port. You could try this little test script
#!/usr/bin/python
# -*- coding: utf-8 -*-
import pyfirmata
PORT = '/dev/ttyACM0'Â Â Â Â Â Â Â Â Â Â # change this to suit
board = pyfirmata.Arduino(PORT)
print 'pyFirmata version:\t%s' % pyfirmata.__version__
print 'Hardware:\t\t%s' % board.__str__()
print 'Firmata firmware:\t%i.%i' % (board.get_firmata_version()[0],
board.get_firmata_version()[1])
board.exit()
which should generate something like
pyFirmata version:Â Â Â 0.9.4 Hardware:Â Â Â Â Â Â Arduino /dev/ttyACM0 on /dev/ttyACM0 Firmata firmware:Â Â Â 2.3
Next time, I’ll try to wrap this in a tkinter GUI. But for now, pyFirmata is a much quicker way than Processing to talk to an Arduino. But there is hope of a faster Java for the Raspberry Pi …
Hey! This article is really old! The code might still work, but I’ve updated the installation instructions for Processing 2.1 and Sun Oracle Java here: Processing 2.1 + Oracle Java + Raspberry Pi + Serial + Arduino = ☺.

This might not look like much, but it was a lot of work to get here. It’s the display from a small Processing sketch, running on a Raspberry Pi, talking to an Arduino controlling the brightness of an LED with the slider, and reading from an LM35 temperature sensor.
I wanted to see if I could get graphical control of an Arduino on the Raspberry Pi. I wrote about the simplest sketch in Processing that combined output (to control a small green LED through a resistor) and input (from an LM35, that simplest of sensors). This is how it looks running on a slightly faster machine than the Raspberry Pi:

LED at half brightness, LM35 showing 25°C

LED off, sensor at 26°C
 LED full on, LM35 warmed up
I had the same results on the Raspberry Pi; just much, much slower. The sketch is below the fold.
Processing is both written in and generates Java, so there’s some hope that it can run on most platforms. Up-to-date installation instructions. These instructions are modified from Processing sur Raspberry Pi, for which thanks are given to the original author:
sudo apt-get install librxtx-java openjdk-6-jdkprocessing-1.5.1/javaln -s /usr/lib/jvm/java-6-openjdk-armhf javamodes/java/libraries/serial/library/linux32/librxtxSerial.so; it’s an x86 binary, and will failmodes/java/libraries/serial/library/RXTXcomm.jar, and replace it with a copy of /usr/share/java/RXTXcomm.jarNow fire up Processing. It will used to take a while to start up, and will throw the following warning:

Despite this, it should eventually should start up fine:

Now, this is slow. It takes tens of seconds to start up. It might not be the most practical development tool, but Processing sketches are very portable, so you can develop on one machine, and then run on the Raspberry Pi.
The code at the end of this article expects:
If you run this, after about half a minute, the blank sketch window appears, and about half a minute later, the slider and temperature reading appears. If it doesn’t, there’s a good chance that the serial libraries are wrong. Try this sketch:
import processing.serial.*;
import cc.arduino.*;

Arduino arduino;
println(Arduino.list());
This should return a number and a serial port where the Arduino was found; something like ‘[0] /dev/ttyACM0’.
What I really want to do now is get this same hardware running with Python and tkinter. It’s not that Python’s my favourite language; it’s just that the Raspberry Pi Foundation chose Python as the official language for the board. I’d rather work to further the aims of this educational foundation rather than work against it. Processing’s pretty much unworkably slow on the Raspberry Pi — but it does work!

In a moment of boredom, I tried to bring up an X session on my Raspberry Pi from my laptop in the hotel, via the machine in the DMZ on my home network. It worked! It’s not very fast, but proves it can be done. The command I used was:
ssh -X home_dmz_machine 'ssh -X raspberrypi "exec startlxde"'
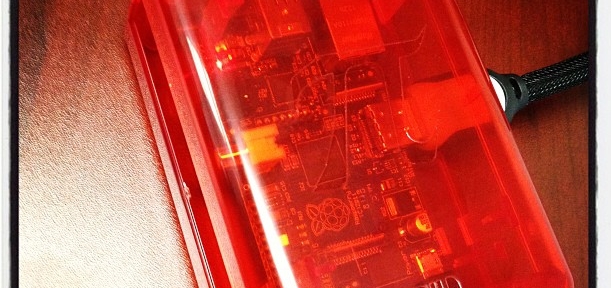
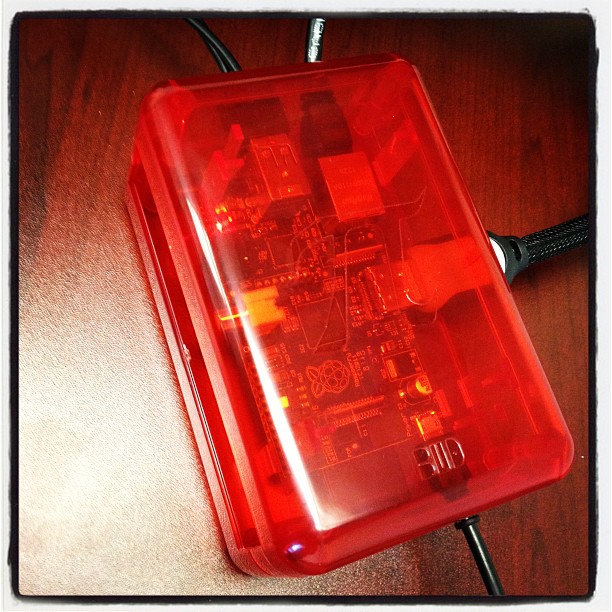
I retired the cardboard case this morning, as I got some proper enclosures:

Looks a bit like a little red Orac, no?
This case is a Bud Industries Pi Sandwich. They’re cheap ($5) but very basic. Comprised of two identical halves, you could (if you weren’t fussy about having the top off) house two Raspberry Pis in a single case.
The downsides are:
It’s a case. It stops the Raspberry Pi shorting out or getting too dusty/things spilled on it. It’s cheap. It works. I’m happy with it.
Python is okay, I guess, but there’s not a hint of music to it. I’m a dyed-in-the-wool Perl programmer since 4.036 days. When I think of how I’ll solve a programming problem, I think in Perl (or, more rarely, in PostScript, but I really have to be pretty off-balance to be thinking in stacks). I’m learning Python because all of the seemingly nifty open source geospatial software uses it, and if I’m to write anything for or about the Raspberry Pi, it seems that Python is the language they officially support on it.
So I’m learning Python by porting some of the simple Perl tools I use around here. It’s painful, not just dealing with the language Fortranesque space-significance, but also physically; I think I put my shoulder out picking up Mark Lutz‘s giant books on Python. The first program I chose to port matches input lines against known words in the system dictionary file. Here’s the Perl version:
#!/usr/bin/perl -w

use strict;
use constant WORDLIST => '/usr/share/dict/words';

my %words;
open(WORDS, WORDLIST);
while () {
    chomp;
    my $word  = lc($_);
    $words{$word}++;
}
close(WORDS);

# now read candidate words from stdin
while (<>) {
  chomp;
  $_=lc($_);
  print $_,"\n" if defined($words{$_});
}

exit;
I most recently used this to look for available call signs that — minus the number — were real words. The input lines from the available call sign list look like this:
VA3PHZ
VA3PIA
VA3PID
VA3PIF
VA3PIH
...
so if I strip out the 3s and run it through the program:
sed 's/3//;' va3_avail.txt | ./callsigncheck.pl
I get one hit: vapid. Which is now my call sign, VA3PID. Moohah.
The Python version is much shorter, and I’m semi-impressed with the nifty little trick in line 5 (aka ‘dictionary comprehension’) which offers some hope for the future of terse, idiomatic code. The fileinput module gives Perlish stdin-or-ARGV[] file input, without which I’m sunk.
#!/usr/bin/python
import fileinput                        # Perl-like file input

# get our wordlist
words={w.lower(): 1 for w in open('/usr/share/dict/words', 'r').read().split()}

# read through input looking for matching words
for l in fileinput.input():
    ll=l.lower().rstrip()
    if words.get(ll, 0):
        print(ll)
(So far, I’ve found the PLEAC – Programming Language Examples Alike Cookbook useful in comparing the languages.)
 I’ve had my MacBook for just over three years (just past AppleCare, alas), but recently the trackpad had been acting up. I couldn’t get it to click and drag at all. Opening up the case showed me that the battery was getting a bit, well, tubby — something that apparently happens as Lithium Ion batteries age.
I finally ordered a new one, and it came today. It’s nearly 50% slimmer, and sits flat on the table, unlike the old battery. My trackpad works perfectly again.
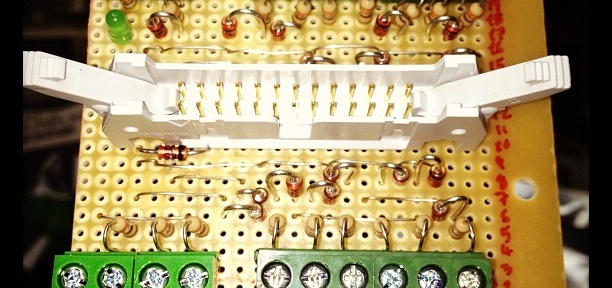
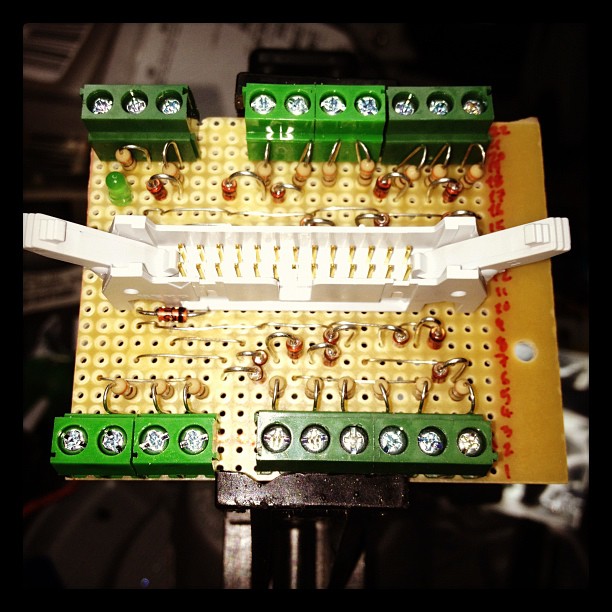
 Mike Cook’s Raspberry Pi Breakout Board. My first stripboard build. No, I’m not showing you the solder side …