Instagram filter used: Lo-fi
Author: scruss
-
Times New ROT13 (and Times New Caesar)
If you’re wondering why the lower line has a load of squigglies when it appears identical to the one above, open the linked PDF and copy some of the text. Looks a bit squiffy, no?
I’m messing with your head here by splitting the encoding of the characters from the appearance of the glyphs, and using the old rot13 cypher to do it. This will really mess up the new MS Office “Edit PDF as text” schtick. Please note I’m doing this for lulz, not to break accessibility; that would be as the kids today say, a dick move.
Here’s the font: TimesNewROT13.
Since Times is both New and Roman, I thought I’d add some old roman by making a Caesar Cypher version. I don’t think I’ve done this quite right, but it works if you use the following shell command as an encoder:
tr '[A-C][D-Z][a-c][d-z]' '[D-Z][A-C][d-z][a-c]'
Here it is: TimesNewCaesar. I’ll fix it soon enough.
(Note that ROT13 fonts have been done before …)
-
Pibow
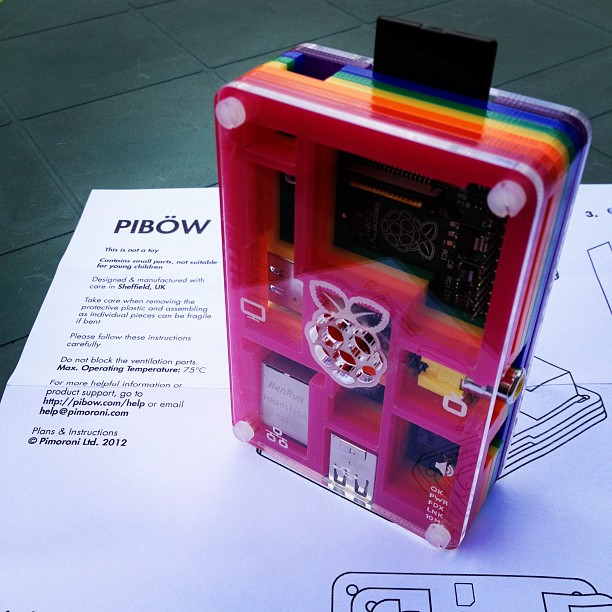
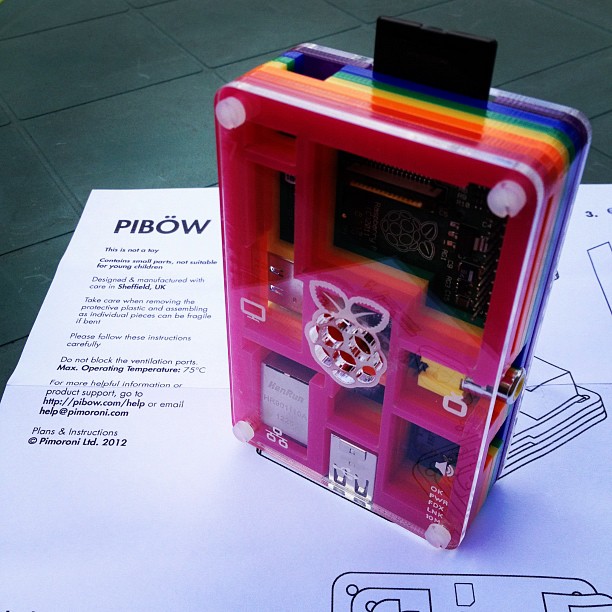
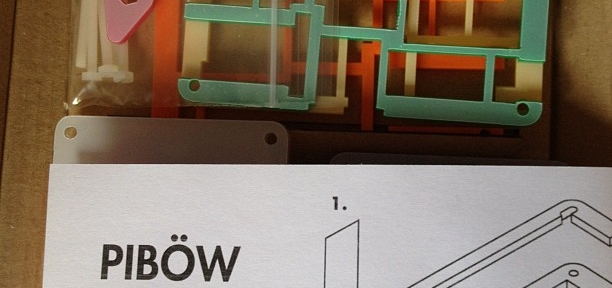
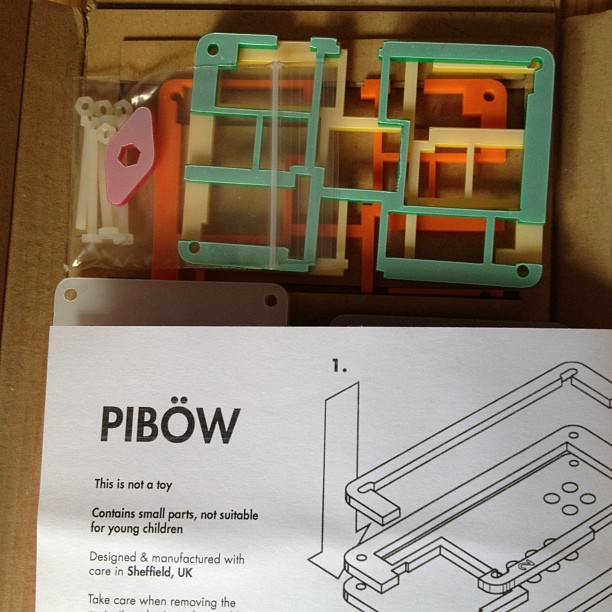
… arrived today from the UK. Quick and easy build, though you have to be careful to get the case screws all tightened up just right or the thing will be wobbly. IKEA are totally going to hand Pimoroni their arse over the lookalike instructions, though.
Though there is just one problem: a standard USB micro-b power plug doesn’t fit …
-
Nice crane
Looks like one of the Ferndale turbines was under maintenance when the USGS flew its orthophotos …
-
Raspberry Pi, Python & Arduino *and* a GUI …
Whee! This entry was the basis of the cover article of The MagPi issue 7. Read it on Issuu, or download the PDF.
Okay, so maybe I can stop answering the StackExchange question “How to attach an Arduino?” now. While I got the Arduino working with pyFirmata on the Raspberry Pi before, it wasn’t that pretty. With a TkInter front end, it actually looks like some effort was involved. You can happily brighten and dim the LED attached to the Arduino all you want, while the temperature quietly updates on the screen independent of your LED frobbing.
I’d never used TkInter before. For tiny simple things like this, it’s not that hard. Every widget needs a callback; either a subroutine it calls every time it is activated, or a variable that the widget’s value is tied to. In this case, the Scale widget merely calls a function
set_brightness()
that sets a PWM value on the Arduino.Updating the temperature was more difficult, though. After TkInter has set up its GUI, it runs in a loop, waiting for user events to trigger callback events. It doesn’t really allow you to run another loop alongside its main event loop. What you have to do then is set up a routine which is called periodically using TkInter’s
after()
function, which calls a subroutine after a set amount of time. If this subroutine ends with another call toafter()
to call itself again, it will maintain its own event loop separate from TkInter’s GUI loop. This is what I do in theget_temp()
subroutine, which schedules itself after a ½ second.#!/usr/bin/python # -*- coding: utf-8 -*- # graphical test of pyfirmata and Arduino; read from an LM35 on A0, # brighten an LED on D3 using PWM # Connections: # - small LED connected from D3, through a 1kΩ resistor to GND; # - LM35: +Vs -> +5V, Vout -> A0, and GND -> GND. # scruss, 2012-08-16 - tested on Raspberry Pi and Arduino Uno import pyfirmata import sys # just for script name and window from Tkinter import * # Create a new board, specifying serial port board = pyfirmata.Arduino('/dev/ttyACM0') # start an iterator thread so that serial buffer doesn't overflow it = pyfirmata.util.Iterator(board) it.start() # set up pins pin0=board.get_pin('a:0:i') # A0 Input (LM35) pin3=board.get_pin('d:3:p') # D3 PWM Output (LED) # IMPORTANT! discard first reads until A0 gets something valid while pin0.read() is None: pass def get_temp(): # LM35 reading in °C to label selection = "Temperature: %6.1f °C" % (pin0.read() * 5 * 100) label.config(text = selection) root.after(500, get_temp) # reschedule after half second def set_brightness(x): # set LED; range 0 .. 100 called by Scale widget y=float(x) pin3.write(y / 100.0) # pyfirmata expects 0 .. 1.0 def cleanup(): # on exit print("Shutting down ...") pin3.write(0) # turn LED back off board.exit() # now set up GUI root = Tk() root.wm_title(sys.argv[0]) # set window title to program name root.wm_protocol("WM_DELETE_WINDOW", cleanup) # cleanup called on exit scale = Scale( root, command=set_brightness, orient=HORIZONTAL, length=400, label='Brightness') # a nice big slider for LED brightness scale.pack(anchor=CENTER) label = Label(root) label.pack(anchor='nw') # place label up against scale widget root.after(500, get_temp) # start temperature read loop root.mainloop()
The program takes a few seconds to start on the Raspberry Pi, mainly because initializing pyFirmata over a serial line and waiting for the duff values to subside takes time. I tried to exit the program gracefully in the
cleanup()
subroutine, but sometimes one of the loops (I suspect pyFirmata’s iterator) doesn’t want to quit, so it takes a few clicks to exit.The program also seems to chew up a fair bit of CPU on the Raspberry Pi; I had it at around 40% usage just sitting idle. I guess those serial ports don’t read themselves, and you have to remember that this computer is basically no more powerful than a phone.
So there you are; a simple demo of how to control an output and read an input on an Arduino, from a Raspberry Pi, written in Python (the Raspberry Pi’s official language) with a simple GUI. Considering I’d never written a line of Python before the beginning of this month, I think I’m doing not too badly.
-
Raspberry Pi, Python & Arduino
Hey! This article is really old! So old, in fact, that it really only exists to track down content farms that like to knock off my articles (oh hai, CircuitDigest!). Information here may be misleading and possibly wrong. You probably want to be using a newer client library and you definitely want to use an Arduino IDE ≥ 1.6 and not the ancient one that comes with Raspbian.
After the other night’s wonderfully slow detour into Processing, I thought I’d try the Raspberry Pi’s “native” language of Python to control an Arduino. This worked rather well, though I don’t have a slick GUI for it yet.
pyFirmata is the magic that allows an Arduino running Firmata to talk to Python. It’s fairly easy to install under Raspbian:
- Get the required packages:
sudo apt-get install python-serial mercurial
- Download the pyFirmata code:
hg clone https://bitbucket.org/tino/pyfirmata
cd pyfirmata
sudo python setup.py install
(If this succeeds, you can delete the pyfirmata folder.)
Using pyFirmata is a bit different from other Arduino applications:
- Analogue reads and PWM writes are normalized to a 0 .. 1 range, and not the standard Arduino 0 .. 255 and 0 .. 1023.
- You really need to start a separate iterator thread to stop old readings overflowing the serial buffer
- Since the Arduino is read asynchronously, make sure that the pyFirmata connection is fully initialized before reading from ports. Otherwise, None values ensue.
Here’s some code that uses the same hardware as before, but simply reports the temperature and ramps the brightness of the LED up in 10% steps.
#!/usr/bin/python # -*- coding: utf-8 -*- # simple test of pyfirmata and Arduino; read from an LM35 on A0, #                                      brighten an LED on D3 using PWM # scruss, 2012-08-14 - tested on Arduino Uno & Raspberry Pi (Raspbian) import pyfirmata # Create a new board, specifying serial port board = pyfirmata.Arduino('/dev/ttyACM0') # start an iterator thread so that serial buffer doesn't overflow it = pyfirmata.util.Iterator(board) it.start() # set up pins pin0=board.get_pin('a:0:i')            # A0 Input     (LM35) pin3=board.get_pin('d:3:p')            # D3 PWM Output (LED) # IMPORTANT! discard first reads until A0 gets something valid while pin0.read() is None: pass for i in range(10): pin3.write(i/10.0)                 # set D3 to 0, 10%, 20%, ... brightness print "PWM: %d %% Temperature %.1f °C" % (i * 10, pin0.read() * 5 * 100) board.pass_time(1)                 # pause 1 second pin3.write(0)                          # turn LED back off board.exit()
The output from this might look like:
PWM: 0 % Temperature 24.9 °C PWM: 10 % Temperature 24.9 °C PWM: 20 % Temperature 24.9 °C PWM: 30 % Temperature 25.9 °C <- PWM: 40 % Temperature 26.9 °C | PWM: 50 % Temperature 28.3 °C | I was holding the LM35 here PWM: 60 % Temperature 28.8 °C | to make the temperature rise PWM: 70 % Temperature 29.8 °C | PWM: 80 % Temperature 29.8 °C | PWM: 90 % Temperature 29.8 °C <-
If this doesn’t work, check the output of
dmesg
to see if you’re using the right port. You could try this little test script#!/usr/bin/python # -*- coding: utf-8 -*- import pyfirmata PORT = '/dev/ttyACM0'Â Â Â Â Â Â Â Â Â Â # change this to suit board = pyfirmata.Arduino(PORT) print 'pyFirmata version:\t%s' % pyfirmata.__version__ print 'Hardware:\t\t%s' % board.__str__() print 'Firmata firmware:\t%i.%i' % (board.get_firmata_version()[0], board.get_firmata_version()[1]) board.exit()
which should generate something like
pyFirmata version:Â Â Â 0.9.4 Hardware:Â Â Â Â Â Â Arduino /dev/ttyACM0 on /dev/ttyACM0 Firmata firmware:Â Â Â 2.3
Next time, I’ll try to wrap this in a tkinter GUI. But for now, pyFirmata is a much quicker way than Processing to talk to an Arduino. But there is hope of a faster Java for the Raspberry Pi …
- Get the required packages:
-
Controlling an Arduino from Raspberry Pi using Processing
Hey! This article is really old! The code might still work, but I’ve updated the installation instructions for Processing 2.1 and
SunOracle Java here: Processing 2.1 + Oracle Java + Raspberry Pi + Serial + Arduino = ☺.
This might not look like much, but it was a lot of work to get here. It’s the display from a small Processing sketch, running on a Raspberry Pi, talking to an Arduino controlling the brightness of an LED with the slider, and reading from an LM35 temperature sensor.
I wanted to see if I could get graphical control of an Arduino on the Raspberry Pi. I wrote about the simplest sketch in Processing that combined output (to control a small green LED through a resistor) and input (from an LM35, that simplest of sensors). This is how it looks running on a slightly faster machine than the Raspberry Pi:
LED at half brightness, LM35 showing 25°C
LED off, sensor at 26°C
I had the same results on the Raspberry Pi; just much, much slower. The sketch is below the fold.
Running Processing on Raspberry Pi
Processing is both written in and generates Java, so there’s some hope that it can run on most platforms. Up-to-date installation instructions.
These instructions are modified from Processing sur Raspberry Pi, for which thanks are given to the original author:Install the JDK and Java serial library:sudo apt-get install librxtx-java openjdk-6-jdk
Download the Linux version of Processing, and unpack it to somewhere permanent in your home directoryDelete the java folder in the Processing directory; for me, that wasprocessing-1.5.1/java
Replace that java folder with a link to your system’s installation:ln -s /usr/lib/jvm/java-6-openjdk-armhf java
In the Processing folder, remove or renamemodes/java/libraries/serial/library/linux32/librxtxSerial.so
; it’s an x86 binary, and will failIn the Processing folder, also removemodes/java/libraries/serial/library/RXTXcomm.jar
, and replace it with a copy of/usr/share/java/RXTXcomm.jar
(If you don’t do this, you’ll get a warning: “WARNING:Â RXTX Version mismatch”, and any serial comms will fail.)- Download and install the controlP5 library for Processing
- Download and install the Arduino library for Processing
- Program your Arduino with Firmata; the version that comes with the Arduino software is
finea bit old. - Connect your Arduino to the Raspberry Pi with a USB cable; it may require external power.
Now fire up Processing. It
willused to take a while to start up, and will throw the following warning:Despite this, it should eventually should start up fine:
Now, this is slow. It takes tens of seconds to start up. It might not be the most practical development tool, butProcessing sketches are very portable, so you can develop on one machine, and then run on the Raspberry Pi.The code at the end of this article expects:
- an Arduino running the Firmata DAQ sketch attached to a USB port;
- a small LED connected from digital pin 3, through a 1kΩ resistor to ground;
- an LM35 with the following connections: +Vs → +5V, Vout → analogue pin 0, and GND → GND.
If you run this,
after about half a minute, the blank sketch window appears,and about half a minute later,the slider and temperature reading appears. If it doesn’t, there’s a good chance that the serial libraries are wrong. Try this sketch:import processing.serial.*; import cc.arduino.*; Arduino arduino; println(Arduino.list());
This should return a number and a serial port where the Arduino was found; something like ‘[0] /dev/ttyACM0’.
What I really want to do now is get this same hardware running with Python and tkinter. It’s not that Python’s my favourite language; it’s just that the Raspberry Pi Foundation chose Python as the official language for the board. I’d rather work to further the aims of this educational foundation rather than work against it.
Processing’s pretty much unworkably slow on the Raspberry Pi — but it does work! -
ssh … you know who
In a moment of boredom, I tried to bring up an X session on my Raspberry Pi from my laptop in the hotel, via the machine in the DMZ on my home network. It worked! It’s not very fast, but proves it can be done. The command I used was:
ssh -X home_dmz_machine 'ssh -X raspberrypi "exec startlxde"'