cbmbasic for BASIC Computer Games

Immersive it ain’t, but you have to remember it was 1978 …

cbmbasic is pretty cool. It’s a portable C rendition of the Commodore 64’s ROM BASIC interpreter. While not the spiffiest version of the language, it does allow some very old code to run — such as the games from David H. Ahl’s book BASIC Computer Games.

Here are all the programs automatically converted to cbmbasic’s tokenized format: cbmbasic-Ahl-BASIC_Games. They seem to run, but some might fail. Notes on sources of the text files and conversion methods are in the archive. Have fun!

ESP8266 BASIC is seriously neat!

screenshot-from-2016-09-19-22-27-57That picture might not look much, but it’s doing something rather wonderful. It’s a tiny ESP8266 BASIC script running on a super-cheap ESP8266 wifi module. The code draws a clock that’s synced to an NTP server. ESP8266 BASIC graphic commands are built from SVG, so anything you can draw on the screen can also be saved as a vector graphic:

The runtime includes a simple textarea editor that saves code to the board’s flash:

screenshot-from-2016-09-19-22-28-53(and yes, that first line is all you need to set up NTP sync)

Among other features, ESP8266 BASIC has a simple but useful variable display:

screenshot-from-2016-09-19-22-30-17I’d picked up a (possible knock-off of a) WeMos D1 ESP8266 board in Arduino form factor a few months ago. The Arduino.cc Software now supports ESP8266 directly, so it’s much easier to program. Flashing the BASIC code to the board was very simple, as I’d noticed that the Arduino IDE printed all of its commands to the console. All I needed to do was download an ESP8266 BASIC Binary, and then run a modified Arduino upload line from the terminal:

~/.arduino15/packages/esp8266/tools/esptool/0.4.9/esptool -vv -cd nodemcu -cb 921600 -cp /dev/ttyUSB2 -ca 0x00000 -cf ESP8266Basic.cpp.bin

ESP8266 BASIC starts in wireless access point mode, so you’ll have to connect to the network it provides initially. Under Settings you can enter your normal network details, and it will join your wifi network on next reboot. I just hope it doesn’t wander around my network looking for things to steal …

Running FreeBASIC on Raspberry Pi

Hey! This is yet another of my ancient posts about Raspberry Pis that probably contains out-of-date information. In order to run FreeBASIC on a Raspberry Pi, all you need do is:

  1. Download a nightly build
  2. Unpack it and run the installer.

That’s it! You can access GPIO with FreeBASIC, too: GPIO LED Blink using FreeBASIC and WiringPi

FreeBASIC is a pretty nifty cross-platform BASIC compiler. It uses a Microsoft-like syntax, has an active user and developer base, and is quite fast. Building the latest version on a Raspberry Pi is a bit of a challenge, though.

FreeBASIC 1.01 demo running on a Raspberry Pi
FreeBASIC 1.01 demo running on a Raspberry Pi from Geany

Part of the problem is that FreeBASIC is mostly written in FreeBASIC, so you need a working compiler to bootstrap the latest version.

Update: you’re probably best just downloading the binary install packages from the FreeBASIC site. I’m having difficulty getting recent (late 2016) source packages to build for reasons that would take too long for most people to care about.

The following steps worked for me:

  1. Install some necessary packages:
    sudo apt-get install build-essential libncurses5-dev libffi-dev libgl1-mesa-dev libx11-dev libxext-dev libxrender-dev libxrandr-dev libxpm-dev ncurses-doc libxcb-doc libxext-doc libgpm-dev git libcunit1 libcunit1-dev libcunit1-doc

    (You don’t really have to include the cunit packages; they’re only needed if you run tests before installation.)

  2. Download a nightly binary from Sebastian’s server: http://users.freebasic-portal.de/stw/builds/linux-armv6-rpi/  and install it:
    unzip fbc_linux_armv6_rpi_version.zip
    cd fbc_linux_armv6_rpi/
    chmod +x install.sh
    sudo ./install.sh -i

    Don’t delete the installation folder just yet.

  3. Grab the latest version of the source from github:
    cd
    git clone https://github.com/freebasic/fbc.git

    Change directory to the new FreeBASIC source folder (cd fbc), and type make. (or, on a Raspberry Pi 2 or 3, make -j4 to use all the cores …). After a while (in my tests, about 52 minutes on a 512 MB Raspberry Pi, or around 6½ minutes [!] on a Raspberry Pi 2), it should finish. If there’s a bin/fbc file, the compilation worked!

  4. Before you install the new compiler, uninstall the old one: change directory to the fbc_linux_armv6_rpi folder, and type:
    sudo ./install.sh -u
  5. Once that’s done, go back to the new fbc folder, and type:
    sudo make install

And you’re done! You can delete the fbc_linux_armv6_rpi folder now. If you don’t mind it taking up space, keep the fbc folder to allow you a quick rebuild of the latest version of the compiler with:

cd fbc
git pull
make
sudo make install

Note that this will build a native armv7l compiler on a Raspberry Pi 2, and an armv6l one on a Raspberry Pi. This means you can’t run binaries you built on a Raspberry Pi 2 on a Raspberry Pi (you’ll get an Illegal Instruction error), but you should be able to run ones built on a Raspberry Pi on a Raspberry Pi 2. Binary compatibility is overrated, anyway …

Running X11-Basic (almost perfectly) on Raspberry Pi

Update: Markus Hoffmann uploaded a new version of X11Basic-1.20.tar.gz to SourceForge that addresses most of these problems. I’ve edited the article to remove the obsolete bits.


More than 20 years ago, I really liked GFA-Basic. It ran blindingly fast on the Atari ST, and when it didn’t crash on the Amiga, it ran blindingly fast there too. I even wrote a review of it for comp.sys.amiga.programmer, which you can read to this day in all its textual glory. One of the e-mail addresses in that article still works, too.

I still sometimes think in BASIC, and there is much wringing of hands (not by me, really) that there isn’t a good interpreter for Raspbian on the Raspberry Pi. So when I found X11-Basic — a cross-platform GFA-Basic-like system — I had to take a look.

While I have managed to get X11-Basic demos to run, I have to say it’s not running super well. I’ll show you how to install X11-Basic 1.20 and get it (mostly) running, but it’s a bit rough on the ARM. Incidentally, these instructions also work on Ubuntu 12.mumble LTS on x86.

First, you need to install some (okay, a lot of) packages:

sudo apt-get install libreadline-dev tcsh libncurses5-dev xutils-dev libc6-dev libsdl1.2-dev libtool

Now download and extract the package:

tar xvzf X11Basic-1.20.tar.gz
cd X11Basic-1.20

For X11Basic-1.20, you have to issue an extra command before the standard ‘./configure ; make ; make install‘ sequence:

sudo mkdir -p /usr/local/share/man/man1
./configure
make
sudo make install

This is enough to make a working xbasic interpreter. I made some screenshots of some of the graphics demos —

Screen Shot 2013-03-08 at 16.34.51 Screen Shot 2013-03-08 at 14.59.37 Screen Shot 2013-03-08 at 14.57.21 Screen Shot 2013-03-08 at 14.54.08 Screen Shot 2013-03-08 at 14.49.48As you can see, there’s some screen corruption, but most demos just worked. Incidentally, the Mandelbrot one took almost 1¼ hours to run. Took me right back, that did (or it would have, if I hadn’t been outside bombing about in the slush on my bicycle while it churned away).

In order to see just how fast the interpreter is, I ran the formerly fearsome Personal Computer World Benchmark #8 under X11-Basic. PCW#8 used to bring 8-bit home computers to their knees, typically taking more than a minute to run. Here’s the code, indented a bit and with a timing wrapper added:

	LET start=TIMER
	LET K=0
L30:
	LET K=K+1
	LET A=K^2
	LET B=LN(K)
	LET C=SIN(K)
	IF K<1000
		GOTO L30
	ENDIF
	PRINT TIMER-start
	QUIT

(yeah, GFA-style BASIC isn’t too pretty …)

It takes about ¼s to run. The old BBC B was supposed to take about 50s. By comparison, X11-Basic on a manky old dual-core Atom took 0.04s.

The native compiler xbc seems to work. To make a standalone binary of the above code, you do:

xbc -o PCWBenchmark PCWBenchmark.xbas

The compiled binary runs roughly twice as fast as the interpreted code. Not blazing fast, but a useful increase.

Unfortunately, the bytecode compiler xbbc doesn’t actually do anything on the Raspberry Pi yet. So here I leave it up to you to play with X11-Basic, and see what it can and can’t do.

2D Star Dodge flies again!

There’s rather more nostalgia in this post than I’d want to deal with. If you want to just play the game, go here here and skip this blurb.

Update: the Java emulator doesn’t work in the browser any more, so here’s Arnold playing the BASIC version: http://scruss.com/cpc/6128s.html?stardoj.dsk/run%22stardoj2

About 25 years ago, I was a smallish computer nerd obsessed with programming his Amstrad CPC464. I had got a BCPL rom-based compiler for cheap and was looking for things to do with it. “Why not write a game?” I asked myself.

There were two minor hurdles. I had no imagination, and I certainly wasn’t focused enough to write anything big. Fortunately, it was still the 80s, so we knew how to rip stuff off without being called out for it. I merrily copied a game my friend Alan Cook had written for the Dragon 32, and called it 2D Star Dodge.

2D Star Dodge was the perfect rip off. Not merely had I ripped off the idea from Alan, but he had ripped off the idea in turn from a BBC Basic one-liner game called (as verified by Graeme Smith) “One Line” Asterisk Tracker. The name 2D Star Dodge was an, um, homage to Realtime Games’ 3D Starstrike, which itself was “strongly influenced” by the Star Wars arcade game. Originality? Pfft.

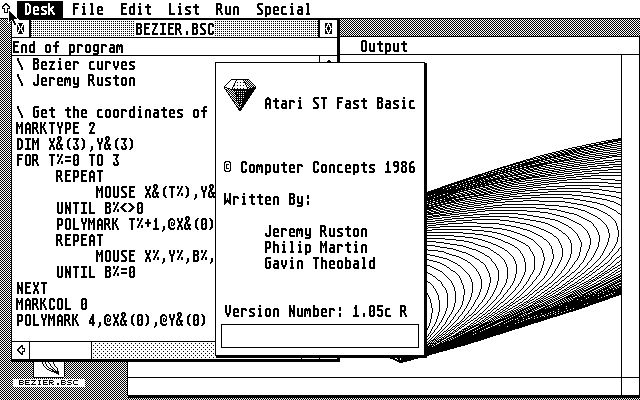
So I wrote the game. Well, okay, I wrote a mockup in Locomotive BASIC, which ran a bit slowly, but gave me something to work from. Here it is, if you want to play it in you (Java-enabled) browser: 2D Star Dodge – BASIC. I then meticulously translated it into BCPL, and ended up with something that looked liked this:

(if you click on that image, you can play the BCPL version in your browser.)

this is actuall screen three, hope no-one notices ...


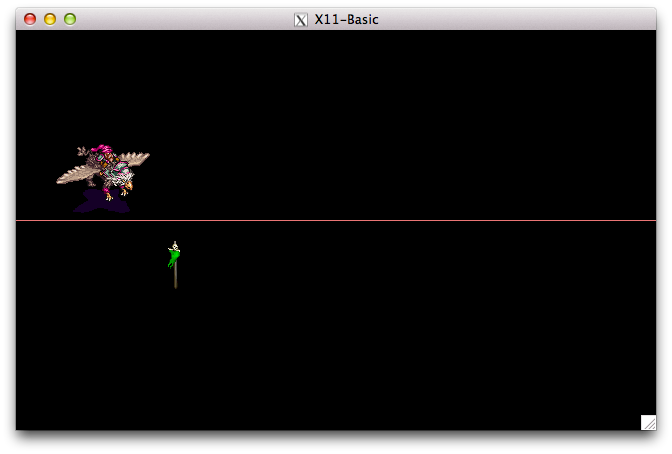
The gameplay — press a key to go up, stop pressing a key to go down — is a bit like SFCave (obligatory Java version: Lab6 SFCave) or even my current favourite Tiny Wings.

Once I’d finished the BCPL version, I had bought the MAXAM assembler ROM, and got learning the Z80 opcodes. Soon, a third port was complete, now needing hardcoded delays to be playable as it would kill you off in about one screen refresh without them.

So, now I had three versions of the same game. There was only a limited number of local folks I could give it to, so I decided to send all three versions to Amstrad Computer User magazine to print as a type-in. Thankfully, it arrived on the desk of the freshly minted (yet still beardy) assistant editor Jeff Walker, who had founded the jam econo CPC magazine/club WACCI. Jeff had the idea for me to turn the simple game into a comparison of programming in three languages.

Thanks to the CPCWiki forum, you can now read the articles I wrote in Amstrad Computer User in 1988 that went with the code. Writing style best described as “typing”:

To play the game in an astonishing JavaScript emulator:

  1. Download this disc image file: stardoj
  2. Unzip it
  3. Go to CPCBox
  4. “Choose configuration …” of Boot CPC464 (or 664, or 6128)
  5. Select your downloaded stardoj.dsk as Drive A:
  6. Annoyingly, it seems to be stuck with an AZERTY keymap, so to catalogue the disc (cat) you have to type cqt
  7. To run the BASIC version, type run"stardoj2 (on my American keyboard, that becomes run@stqrdoj2; quotes are Shift+2). Hitting Escape twice will quit back to the prompt.
  8. To run the BCPL version, type run"2dstardo. The only way to quit is to reset the emulator.

The BASIC version is based on the published type-in. The BCPL version I found as a disk image (2dstardo.dsk) on a download site — it’s exactly as I submitted it to the magazine, dubious copyright message and all. I’m not sure how it got out there; I suspect either my network of, ahem, software protection experts I knew through Colin Harris of Nemesis, or it went via my CPC-owning French penpal (Hi Benoit Hébert, formerly of Le Havre).

I had to modify the BCPL binary to run on modern emulators, as the real Amstrad CPC did a thing with its keymapping that is really hard to get right on modern systems. Originally, the game used the Shift key, but I modified it to use Space, which is easier to emulate as it’s a printing character. Can I just say that I remembered how to read and modify Z80 binaries after a quarter century? Old school, literally. I used iDsk‘s disassembler/hex dumper and emacs’s hexl mode to do the deed.

I recently discovered that someone created a Flash game based on my type-in: Star Dodger. Mind = Blown.

Update, 2018: Lawks! Someone wrote a PureScript version! It doesn’t exactly work for me on Firefox, but it does on Chromium.

my juvenalia: 2D Star Dodge / Stardodger

Oh dear:

And here’s the Locomotive BASIC version, as published in Amstrad Computer User:

10 ' ** Initialise **
20 MODE 1
30 INK 0,0
40 BORDER 0
50 INK 1,26
60 INK 3,0
70 q=5
90 LOCATE 16,1
100 PRINT"Stardodger"
110 LOCATE 1,5
120 PRINT"Avoid the killer Asterisqs, and seek the"
130 LOCATE 9,6
140 PRINT"wondrous Nextscreen Gap."
150 LOCATE 12,13
160 PRINT"Use SHIFT to climb"
170 GOSUB 700
190 MODE 1
200 DRAWR 629,0
210 DRAWR 0,170
220 MOVER 0,60
230 DRAWR 0,169
240 DRAWR -629,0
250 DRAWR 0,-399
260 DRAWR 0,2
270 DRAWR 627,0
280 DRAWR 0,168
290 MOVER 0,60
300 DRAWR 0,167
310 DRAWR -625,0
320 DRAWR 0,-399
330 MOVE 636,0
340 DRAW 636,399,3
350 MOVE 638,0
360 DRAW 638,399
370 PLOT -1,-1,1
380 TAG
390 FOR s=1 TO q
400 MOVE 50+RND*561,20+RND*361
410 PRINT"*";
420 NEXT
430 TAGOFF
440 MOVE 0,200
450 dy=4
470 DRAWR 4,dy
480 IF INKEY(21)<>-1 THEN dy=4 ELSE dy=-4
490 t=TESTR(2,dy/2)
500 IF t=1 GOTO 550  
510 IF t=3 GOTO 620
520 MOVER -2,-dy/2
530 GOTO 470
550 MODE 1
560 PRINT TAB(16);"YOU GOOFED"
570 LOCATE 5,13
580 PRINT"Number of Screens completed = "+STR$((q/5)-1)
590 GOSUB 700
600 RUN
620 MODE 1 
630 PRINT TAB(16);"WELL DONE"
640 LOCATE 10,13
650 PRINT"Stand by for Screen "+STR$((q/5)+1)
660 GOSUB 700
670 q=q+5
680 GOTO 190
700 LOCATE 8,25
710 PRINT"Press any key to continue"
720 WHILE INKEY$<>""
730 WEND
740 WHILE INKEY$=""
750 WEND
760 RETURN

Here’s Asterisk Tracker, the original inspiration from 1984