It appears that my musical choice has this effect on people, as this just happened on a collaborative jukebox I’m aware of:
Oh well.
It appears that my musical choice has this effect on people, as this just happened on a collaborative jukebox I’m aware of:
Oh well.
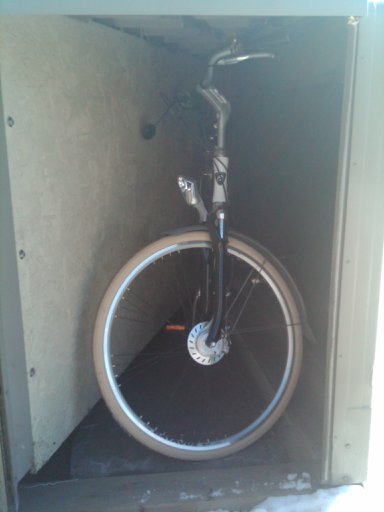
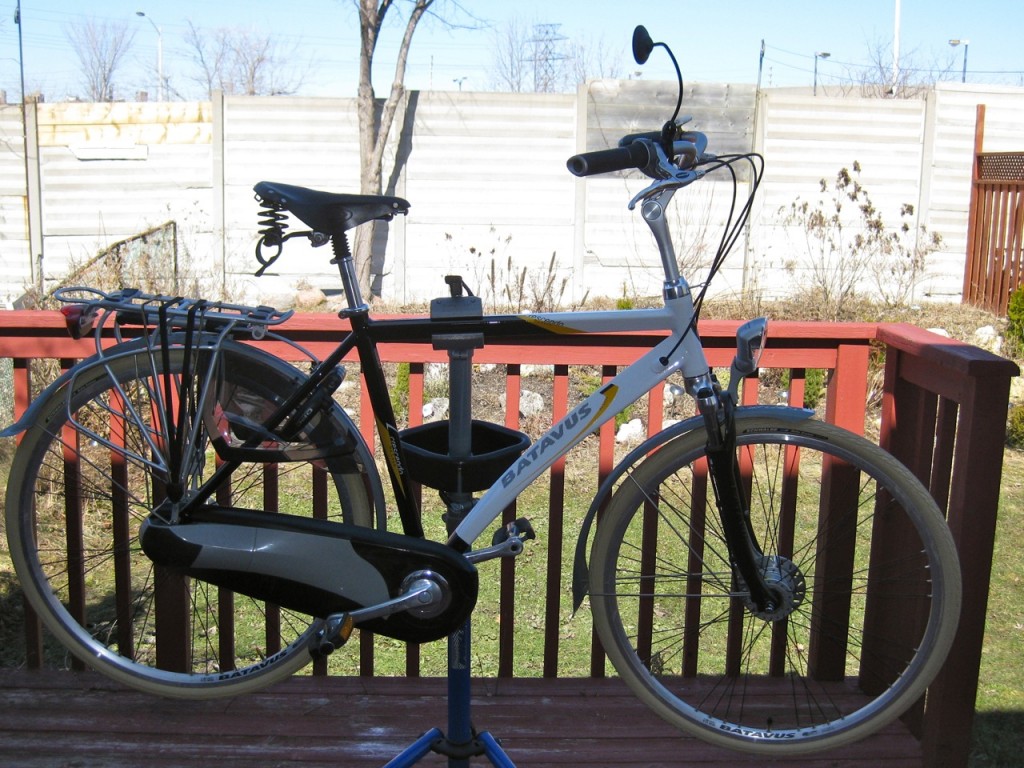
Creme Delta Cruisers? Check. Conti tubes with presta valves and adaptors? Check. B&M CycleStar mirror? Check. Frankly unnecessary but very very pretty Sögreni brass bell? Check (ding!). The Batavus is ready for riding (and more importantly 30 Days of Biking).
While the ingenious Batavus chain-guard comes off quickly once you know the trick (it’s all held together by the section over the hub; pop that open, and everything else comes apart in a simple manner), removing and replacing the rear wheel was one of the fiddliest things I’ve ever done. The Shimano Nexus 8-speed hub with roller brake (model SG-8R31, if you care) makes things difficult enough by having a brake reaction arm and a gear cable to remove, but Batavus’s own dropout adjuster/wheel keepers are a pain.
I suspect these little stainless steel clasps (not pictured, as to see them would have me swearing at them again) are in fact impossible to reinstall with the bike in a stand. With the bike upside down, the weight of the wheel seems to spring them open a bit, placing the axle into the dropout smooth like buttah.
(I blame Lovely Bicycle! for the cream-coloured tyres obsession.)
After several months closed, the Jamaican restaurant at 224 Adelaide St W has reopened as Caribbean Taste. It’s the same folks (Robert & Wendy, from Tropical Desires on Old Weston Rd) cooking as before, and it’s still able to provide a life-changing roti experience.
We’d been to Schwartz’s before, and the line and the crush and the noise just wasn’t worth it. Across the road is the Main Steak House Deli, which was supposed to be as good, and way less crowded. So we went in …
Whoa! Tender peppery meat, killer poutine, crispy pickles and cold beer. We ordered in hesitating French, then the server yelled the order in English to the kitchen.
Looks like not everyone’s billing workflow understands accents:
Outside, we saw meat resting in the window, bejewelled with peppercorns:
Canada Computers are entirely awesome. In the last week, they:
So I got my vehicle tax refund cheque yesterday. In a city that’s gridlocked, if anything is a blatant attempt to buy votes, this $60 “refund” is the worst possible way to reward voters. I think that the Toronto Coalition for Active Transportation could use the money better than me.
Catherine probably thought I was acting no more strangely than usual last night, when I was holding the Power Cost display unit in one hand, frobbing the electric stove control with the other, all the while watching a digital clock and cackling gently to myself.
All this makes me think I’m a bit further on with getting something from the Power Cost Monitor. Previous attempts using cheap wireless units (and cluelessness on my part — never forget that) got nothing, so I caved and bought the rather expensive but nice Parallax 433 MHz RF Transceiver from Solarbotics.
The Parallax unit adds an analogue output that’s proportional to the instantaneous signal strength. I hooked up the output to the trusty sdfatlib analogue logger, set the logger to sample every 50ms (figuring that, every now and again, it’s going to see part of a transmission) and this is what I saw:
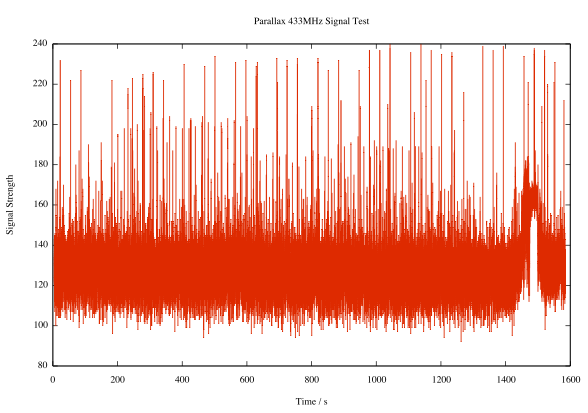
Pretty noisy, I know. But look, there are regular peaks:
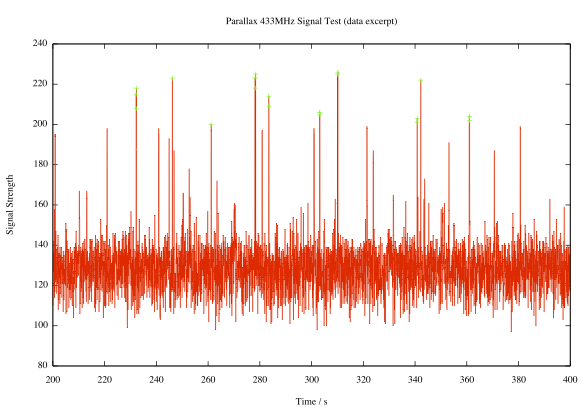
Here I’ve highlighted all the peaks with signal strength ≥ 200 (in arbitrary units, where 1024 would be full scale). It’s pretty regular; the largest peaks come in a shade under every 32 seconds, or a multiple thereof. If you need additional decimal places to validate your worldview, I’m thinking the period’s around 31.86s.
Observations made during last night’s frobbing and cackling episode seem to confirm that the display updates about every 32s. If you adjust the load mid-cycle, nothing changes until the update. If the display misses an update, it’ll refresh in 64 or 96 seconds.
I don’t yet know what bitrate the data comes through at, or the protocol. I’ve logged some data recorded at various rates: 433mhz_powercost_data. The file names give a hint at the data rate; L1200V04 was recorded at 1200bps, for example. I’m guessing that there’s some kind of sync header, then the total value and the current temperature (which was around/below freezing at the time). I need to work on that.
Update: I rewrote the logger to use the Arduino’s internal UART, since — lovely though NewSoftSerial may be — it causes millis() to report wildly inaccurate times at low bit rates. I recorded a bunch more data (powercost-arduino2.zip) in a slightly more useful text format. It has three columns:
I’ve also included the Arduino sketch, which could be better documented.
(Arduino + LoL Shield + hand drawn 14×9 GIFs [,
, and
] + this)
I’m pretty new to Arduino, and electronics in general. Sure, I used to wire up sensors to a bunch of dataloggers, but there wasn’t much variation or application of theory. I made up a bunch of Ardweenies, mostly to practice soldering skills, but now I’ve made them, I might as well use them.
The Ardweeny is a tiny broadboard-only Arduino-compatible microcontroller board. It needs both a power supply and a means of programming it. Solarbotics’ own Breadboard Voltage Regulator Kit provides the juice, while a SparkFun’s FTDI Basic Breakout handles the USB serial programming. The FTDI breakout board can supply power, so I turn the power off to the board at the regulator when programming it. You can’t use shields with the Ardweeny, but it’s small enough that you can have a simple project on a small breadboard. It communicates with the Arduino IDE as if it were a Duemilanove.
The Ardweeny has pins clearly (if tinily) marked by function. To power it, you need to feed GND and +. The familiar A0-A5 and D0-D13 are present, if not quite where you’d expect them. There isn’t room to mark the digital pins capable of PWM.
For no particular reason (perhaps that spring finally looks like it might be warming things up around here) I wanted to make a a temperature sensor that would sample the temperature at start up, then warn if the temperature got more than 2°C hotter or colder.
I used an LM35 as the sensor. These are a bit noisy, so I added some smoothing (nicked, with little grace, from the Arduino – Smoothing tutorial). The temperature is indicated by three LEDs: red for ≥2°C over, amber for within ±2°C of the starting temperature, and green for ≥2°C under. I also wanted all the LEDs lit while the system was working out starting temperature. Here’s how it runs:
I put the LM35 on A0, and the red, amber and green LEDs on D5, D6 & D8. The only reason I didn’t use D7 was that I didn’t have the right length jumper wire. 680Ω resistors are used to limit current through the LEDs.
Here’s the code:
/*  lm35_plusminus - read temperature at startup then light  leds if over or under   lm35 - analogue 0   red led - digital 5  amber led - digital 6  green led - digital 8   scruss - 2011-02-17  */ #define REDPIN 5 #define AMBERPIN 6 #define GREENPIN 8 #define TEMPPIN 0 // analogue #define DELTA 2.0 // amount +/- from start to warn #define READINGS 15 //declare variables float tempC, start_temp, array[READINGS], total; int val, i; void setup() {   pinMode(REDPIN, OUTPUT);   pinMode(AMBERPIN, OUTPUT);   pinMode(GREENPIN, OUTPUT);   // signal start of test by lighting all LEDs   digitalWrite(REDPIN, HIGH);   digitalWrite(AMBERPIN, HIGH);   digitalWrite(GREENPIN, HIGH);   // read initial values   for (i=0; i< READINGS; i++) {     delay(500/READINGS); // just so initialization is visible     val = analogRead(TEMPPIN);     array[i] =  (5.0 * (float) val * 100.0)/1024.0;     total += array[i];   }   start_temp = total / READINGS;   // test off, lights off   digitalWrite(REDPIN, LOW);   digitalWrite(AMBERPIN, LOW);   digitalWrite(GREENPIN, LOW);   i=0; // just to initialize } void loop() {   // some cheapo smoothing copied from the Smoothing example   // in the playground   total -= array[i];   val = analogRead(TEMPPIN);   tempC = (5.0 * (float) val * 100.0)/1024.0;   array[i] = tempC;   total += tempC;   i++;   if (i>=READINGS) {     i=0;   }   tempC = total/READINGS;   if (tempC - start_temp >= DELTA) {     // we're hot !     digitalWrite(REDPIN, HIGH);     digitalWrite(AMBERPIN, LOW);     digitalWrite(GREENPIN, LOW);   }   else if (tempC - start_temp <= -DELTA) {     // we're cold !     digitalWrite(REDPIN, LOW);     digitalWrite(AMBERPIN, LOW);     digitalWrite(GREENPIN, HIGH);   }   else {     // we're just right !     digitalWrite(REDPIN, LOW);     digitalWrite(AMBERPIN, HIGH);     digitalWrite(GREENPIN, LOW);   } }
Despite the smoothing, the LEDs flicker briefly as they turn on. I kind of like the effect, so I made no attempt to change it.
What I like about Arduino is that — within the limits of my sensor knowledge — the programming language does what I expect. The above program worked first time; worked, that is, save for me putting one LED in the wrong way round, so it didn’t light. I know I could probably replicate the same function with a few linear devices and other components, but it would take much more time and effort. It may not be the most elegant, but it does work, and gives me the satisfaction of the desired result quickly.
A house down the road does these very intricate snow sculptures:
My sister-in-law makes very nice cakes.
… several Solarbotics Ardweenys. They are extremely tiny Arduino clones designed for the breadboard.
After bumping along at about 600Kbps for the last few weeks, Bell (through TekSavvy) finally kicked my connection over to 3 megabit. I don’t think we’ve ever managed this speed before, as I think I’ve been routed to a different exchange. Whee!
Update: Yowza! Looks like I’ve been upped to as close to the 5M that I can get …
It was a bit of a fight to get the SparkFun microSD Shield working. At first, I thought it was my choice of cards. Then, on reading the manual (ahem), I discovered the section “I downloaded a FAT library for Arduino on my own from the Web but it’s not working! Why not?“. It seems that the SparkFun shield uses non-standard pins for signalling, which they consider a feature, but some consider a bug.
After fixing the code in the awesome sdfatlib library, I’ve now got it logging the temperature of a cooling container of hot water:
You might just be able to make out the LM35 pressed up against the measuring cup.
I remember making a right mess of this experiment in my school final Physics practical exam. I also used to do this in my first job when bored testing Campbell CR10 dataloggers, making a nice 1-d cooling curve with a thermocouple and a cup of hot water.
I think the heating came on a couple of times, as there shouldn’t be bumps in the curve. Here’s the data.
Can you tell the difference?
(awesome sleuthing by fegmaniax)