Simple — like, really simple — Arduino periodic timer with Brett’s MillisTimer library

I don’t know how many times I’ve written bad Arduino code to call a function every few milliseconds. Sometimes this bad code works well enough for my sketch to actually work. Often, it either doesn’t work at all or does something I really didn’t expect.

So on Arduino Day 2017, I’m glad I found out about bhagman/MillisTimer: A Wiring and Arduino library for working with millis(). It couldn’t be simpler to use: include the library, write the function you want to call every N milliseconds, set up the timer to run every N millis, and put timer.run() in a loop that’s called frequently. The library handles the timing and resetting all by itself.

As an example, here’s the eternal “Hello, World!” of the embedded world, Blink, rewritten to use MillisTimer:

// MillisTimerBlink - blink LED every second
//  using Brett Hagman's MillisTimer library
//  https://github.com/bhagman/MillisTimer
//  (or use Sketch → Include Library → Manage Libraries … to install)
// scruss - 2017-04-01

#include <MillisTimer.h>
MillisTimer timer1;               // new empty timer object
const int led_pin = LED_BUILTIN;  // use the built-in LED

void flash() {                    // function called by timer
  static boolean output = HIGH;
  digitalWrite(led_pin, output);  // set LED on or off
  output = !output;               // toggle variable state High/Low
}

void setup() {
  pinMode(led_pin, OUTPUT);       // use built-in LED for output
  timer1.setInterval(1000);       // set timer to trigger every 1000 millis
  timer1.expiredHandler(flash);   // call flash() function when timer runs out
  timer1.setRepeats(0);           // repeat forever if set to 0
  timer1.start();                 // start the timer when the sketch starts
}

void loop() {
  timer1.run();                   // trigger the timer only if it has run out
  // note that run() has to be called more frequently than the timer interval
  //  or timings will not be accurate
}

Note that MillisTimer only triggers when timer.run() is called. Sticking a delay(2000) in the main loop will cause it to fire far less frequently than the interval you set. So it’s not technically a true periodic timer, but is good enough for most of my purposes. If you want a true interrupt-driven timer, use the MsTimer2 library. It relies on the timer interrupts built into the Arduino hardware, and isn’t quite as easy to use as MillisTimer.
LaunchPad MSP430 pomodoro timer using Energia

I know a lot of people who bought the Texas Instruments MSP430 LaunchPad development kit but never really got into it. I’m one of them; the $4.30 purchase price was compelling, but the requirement to install a huge proprietary IDE (with its own embedded C dialect) was just too much.

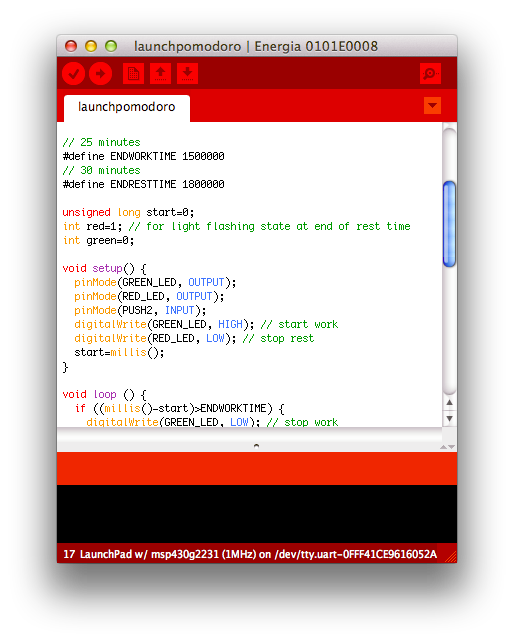
For this reason, Energia is great. It’s a fork of the Wiring/Arduino development environment for the MSP430. Looks just like Arduino, but quite red:

The basics of the language are the same, although the pin names and functions are different from the Arduino. The basic board also has a red and a green LED, a user button, and the obligatory reset button.

Just to try out Energia, I wanted a useful project that only used the onboard hardware. I came up with a version of a pomodoro timer, similar to the one used in The Pomodoro Technique® time management method. The one I made has the following features:

  • 25 minute “green light” work period
  • 5 minute “red light” rest period
  • At the end of the rest period, the green and red lights flash. You can choose to restart the timer (with the reset button), or turn the lights off with the user button.
  • You can turn the timer off at any time with the user button, and restart it from zero with the reset button.

For me, this electronic version has several advantages over the wind-up official timer:

  • it doesn’t tick or ring distractingly
  • it’s cheaper than the real thing
  • it always resets to the same time.

It does have a couple of possible disadvantages, though:

  • it doesn’t give an indication of time left
  • it’s not very accurate, since it uses the MSP430’s internal oscillator. Mine seems to give an approximately 26 minute work period, with a rest time that’s proportionally longer.

Here’s the code (tested on a MSP-EXP430G2 board, version 1.4):

/*

 launchpomodoro - simple task/rest timer for TMS430/Energia

 On reset: Green LED on for 25 minutes
 After 25 minutes: Red LED
 After 30 minutes: Flashing Red/Green LED (until reset)
 On button press: all lights off.

 scruss - 2012-10-15

 */

// 25 minutes
#define ENDWORKTIME 1500000
// 30 minutes
#define ENDRESTTIME 1800000

unsigned long start=0;
int red=1; // for light flashing state at end of rest time
int green=0;

void setup() {
  pinMode(GREEN_LED, OUTPUT);
  pinMode(RED_LED, OUTPUT);
  pinMode(PUSH2, INPUT);
  digitalWrite(GREEN_LED, HIGH); // start work
  digitalWrite(RED_LED, LOW); // stop rest
  start=millis();
}

void loop () {
  if ((millis()-start)>ENDWORKTIME) {
    digitalWrite(GREEN_LED, LOW); // stop work
    digitalWrite(RED_LED, HIGH); // start rest
  }

  if ((millis()-start)>ENDRESTTIME) {
    flicker(); // warn that we've overrun
  }

  if (digitalRead(PUSH2) == LOW) { // push quiet/off switch
    off();
  }
}

void flicker() { // toggle LEDs and wait a bit
  red=1-red;
  green=1-green;
  digitalWrite(GREEN_LED, green);
  digitalWrite(RED_LED, red);
  delay(333);
}

void off() { // appear to be off
  digitalWrite(GREEN_LED, LOW); // lights off
  digitalWrite(RED_LED, LOW);
  while (1) { // loop until reset
    delay(50);
  }
}

(or if you’d rather have the archived sketch: launchpomodoro-121015a.zip.)

It would be trivial to port this to Arduino, but you would need some external LEDs, resistors and a pushbutton.