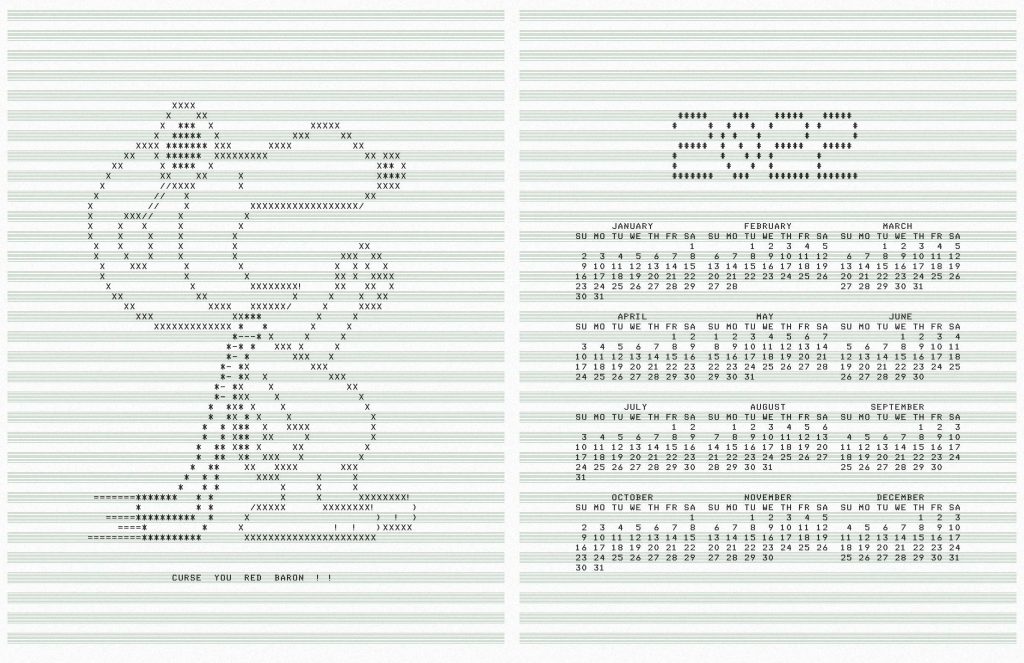
Original “WW1 Fighter Pilot” Snoopy ASCII art from “SNOOPY.BA” for the DEC PDP-8, written by Mr Kay R. Fisher of DEC some time before July 1973. It’s referred to in the first printing of the “101 Basic Computer Games” book, which was published in 1973.
ncal, banner: their respective authors
pstext an ascii to PS filter by Dan Judd, usenet comp.lang.postscript, December 1989. I had to really mess around with the output of this program to use a custom font and add the music ruling, but it produces cleaner PostScript than the giant messes that enscript and a2ps have become
Font: mnicmp, by me. Based on the DecWriter II font.
Hey, this post is super old!
That means that installation and run instructions may not work as well, or even at all. Most of the *Ports Apple software repositories have given way to Homebrew: you may have some success on Mac (untested by me) if you brew install netpbm fontforge potrace. There’s also some font cleanup I’d recommend, like resolving overlaps, adding extrema, and rounding points to integer. One day I may update this post, but for now, I’m leaving it as is.
This looks more than a bit like my handwriting
because it is my handwriting! Sure, the spacing of the punctuation needs major work, and I could have fiddled with the baseline alignment, but it’s legible, which is more than can usually be said of my own chicken-scratch.
This process is a little fiddly, but all the parts are free, and it uses free software. This all runs from the command line. I wrote and tested this on a Mac (with some packages installed from DarwinPorts), but it should run on Linux. It might need Cygwin under Windows; I don’t know.
FontForge, the amazing free font editor. (Yes, I said amazing. I didn’t say easy to use …)
autotrace or potrace so that FontForge can convert the scanned bitmaps to vectors
some kind of bitmap editor.
You will need to download
fonttrace.pl – splits up a (very particular) bitmap grid into character cells
chargrid.pdf – the font grid template for printing
Procedure:
Print at least the first page of chargrid.pdf. The second page is guidelines that you can place under the page. This doesn’t work very well if you use thick paper.
Draw your characters in the boxes. Keep well within the lines; there’s nothing clever about how fonttrace.pl splits the page up.
Scan the page, making sure the page is as straight as possible and the scanner glass is spotless. You want to scan in greyscale or black and white.
Crop/rotate/skew the page so the very corners of the character grid table are at the edges of the image, like this: I find it helpful at this stage to clean off any specks/macules. I also scale and threshold the image so I get a very dark image at 300-600dpi.
Save the image as a Portable Bitmap (PBM). It has to be 1-bit black and white. You might want to put a new font in a new folder, as the next stage creates lots of files, and might overwrite your old work.
Run fonttrace.pl like this: fonttrace.pl infile.pbm | sh
If you miss out the call to the shell, it will just print out the commands it would have run to create the character tiles.
This should result in a bunch of files called uniNNNN.png in the current folder, like these:
uni0057.png
uni0069.png
uni0073.png
uni0070.png
uni0079.png
Fire up FontForge. You’ll want to create a New font. Now File→Import…, and use Image Template as the format. Point it at the first of the image tiles (uni0020.png), and Import.
Select Edit→Select→All, then Element→Autotrace. You’ll see your characters appear in the main window.
And that’s – almost – it. You’ll need to fiddle with (auto)spacing, set up some kerning tables, set the font name (in Element→Font Info … – and you’ll probably want to set the em scale to 1024, as TrueType fonts like powers of two), then File→Generate Fonts. Fontforge will throw you a bunch of warnings and suggestions, and I’d recommend reading the help to find out what they mean.
There are a couple of limitations to the process:
Most of the above process could be written into a FontForge script to make things easier
Only ASCII characters are supported, to keep the number of scanned pages simple. Sorry. I’d really like to support more. You’re free to build on this.
Lastly, a couple of extra files:
CrapHand2.pbm – a sample array drawn by me, gzipped for your inconvenience (and no, I don’t know why WordPress is changing the file extension to ‘pbm_’ either).
chargrid.ods – the OpenOffice spreadsheet used to make chargrid.pdf
 iOS has it covered too:

 I find it helpful at this stage to clean off any specks/macules. I also scale and threshold the image so I get a very dark image at 300-600dpi.


